A stiff, disproportionate figure isn’t a talent problem. It’s a structure problem: you’re drawing what you think a body looks like instead of how it’s actually built.
Anatomy drawing practice fixes that by building a figure in stages, from basic shapes to skeleton to muscle, instead of copying an outline.
In this blog, you’ll learn how to build the figure from simple shapes, work through each part of it, and practice the routines that make full-body sketches hold together on the page.
Why Anatomy Knowledge Makes Body Drawing Look Real
Shapes get the proportions right, but they don’t explain why a body looks alive instead of stiff and flat. Under the skin, muscle has real thickness and shape, and that’s what gives a limb its gentle curve instead of looking like a plain tube.
Skin also folds at the elbow and knee when you bend them. That small fold is what makes a drawing feel like it has real weight, not just a flat shape.
A few bones show through the skin too, like the kneecap, ankle bone, and wrist bones. Getting these in the right place is often what makes a figure look correct even before you add any shading.
Step-by-Step Body Drawing Practice
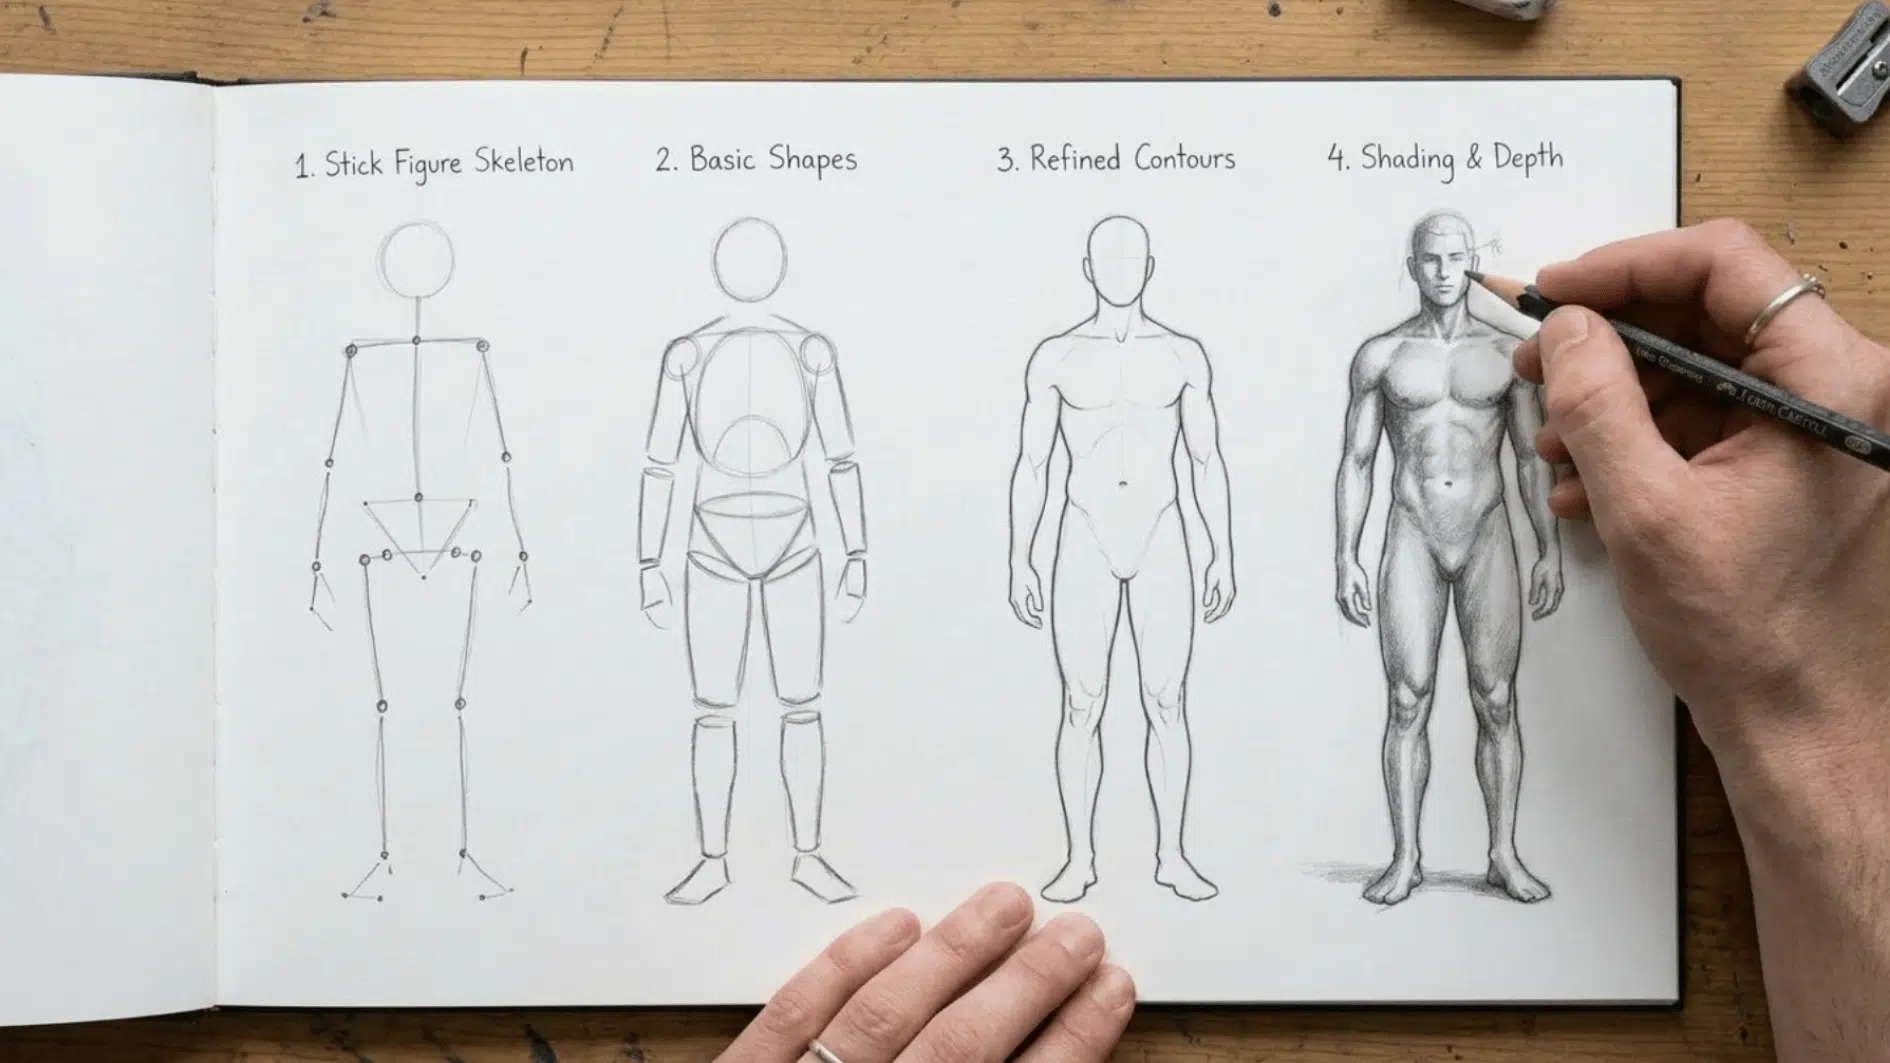
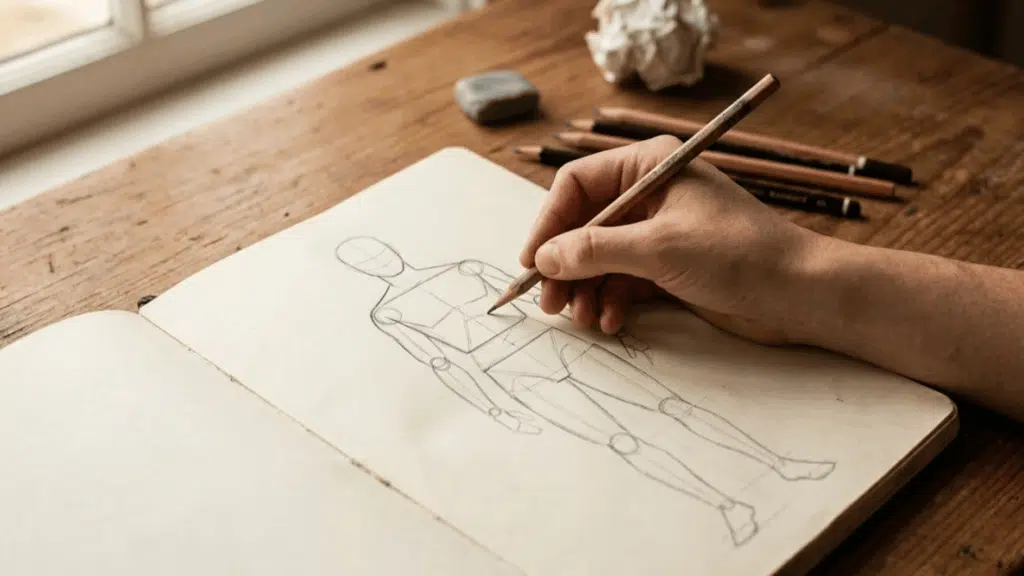
This breaks down into four repeatable steps: stick figure, basic shapes, refined contours, and shading. Each one builds directly on the last, so skipping a step shows up in the final drawing.
Step 1: Stick Figure Skeleton
Lightly sketch a stick figure to outline the head, spine, arms, and legs. Keep the lines light so the pose is easy to adjust.
Most artists rush this step, and they shouldn’t: ten seconds spent on the spine’s angle saves ten minutes of erasing later. This is also the easiest point to catch a pose that looks off-balance before any shape gets added.
Step 2: Add Basic Shapes
Overlay ovals for the torso and pelvis, and cylinders for the limbs, to establish proportion and volume. Adjust angle and length to match the pose, keeping the figure balanced.
If a shape looks too bulky or too thin next to its neighbor, resize it now, before contours lock it in.
Step 3: Refine Contours
Smooth the shapes into natural curves with contour drawing, adding slight bends at the elbows, knees, and torso for a realistic posture. Correct any alignment issues here, before the figure loses its flow.
Tip: Erase the construction lines gradually rather than all at once, so you can still check the underlying structure if something looks wrong.
Step 4: Shading and Depth
Add light shading to give the figure volume, thinking in terms of value in art rather than just outline. Follow a single light source, and let subtle shadows fall around muscle groups and joints to create depth.
Stepping back and looking at the drawing from a distance periodically helps you spot whether the shadows read as form or just sit flat on the surface.
Practice Routines to Improve Body and Hand Drawing
Structured exercises help beginners develop well-rounded skills in figure and skeleton hand drawing efficiently.
- Daily Short Sketches: Spend brief sessions each day alternating between full body and skeleton hand drawings to maintain consistency and reinforce hand-eye coordination.
- Explore Poses and Angles: Practice multiple poses from front, side, back, and foreshortened perspectives to understand body proportions and 3D structure.
- Incorporate Dynamic Movement: Focus on gestures, action lines, and natural motion to avoid a stiff or flat figure.
- Vary Body Types and Hand Studies: Draw tall, short, muscular, lean figures and skeleton hands from different angles to build versatility and accuracy.
- Repetition and Integration: Repeat exercises and mix in other drawing techniques with skeleton hand practice to strengthen muscle memory and improve observational skills.
Anatomy Made Simple: Head to Toe
Every body part follows its own logic: head, torso, arms, hands, hips, thighs, feet.
Brushing up on art fundamentals helps here, since learning how each part is built means your figures start holding together on their own, without you having to fight the proportions every time.
Head
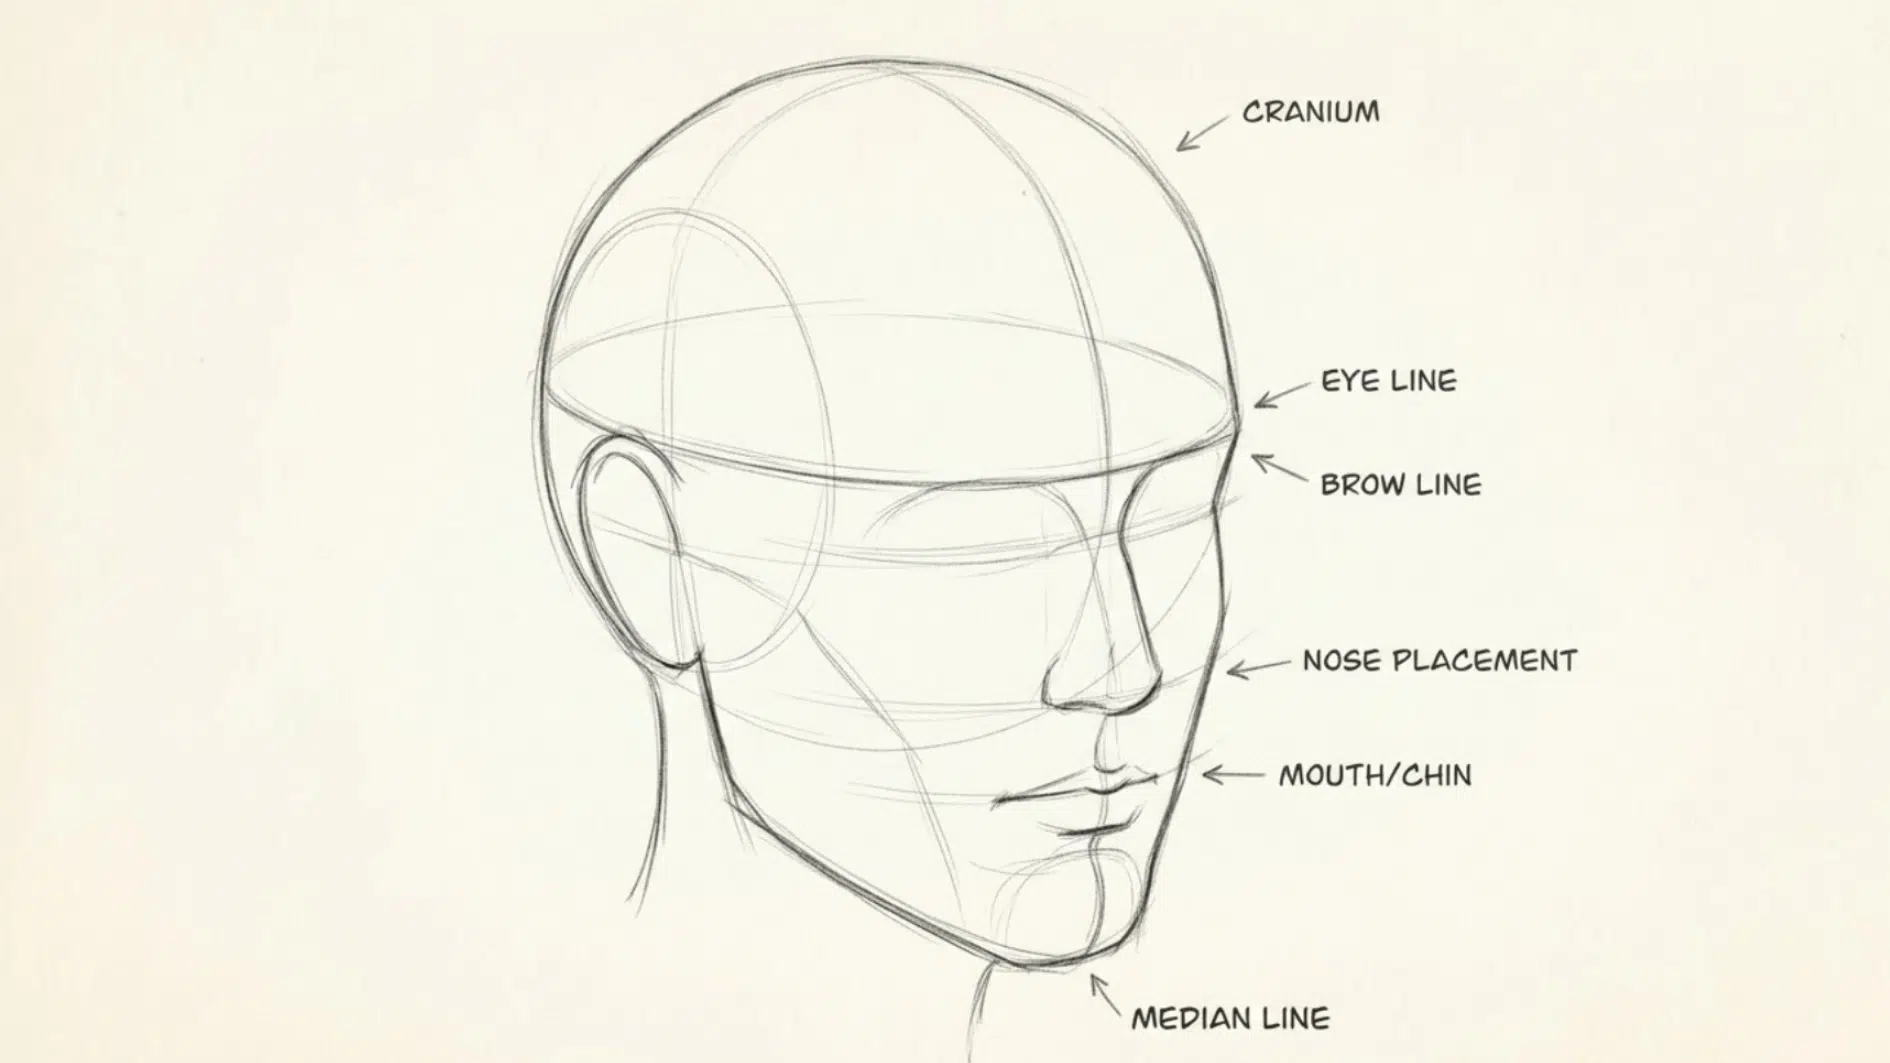
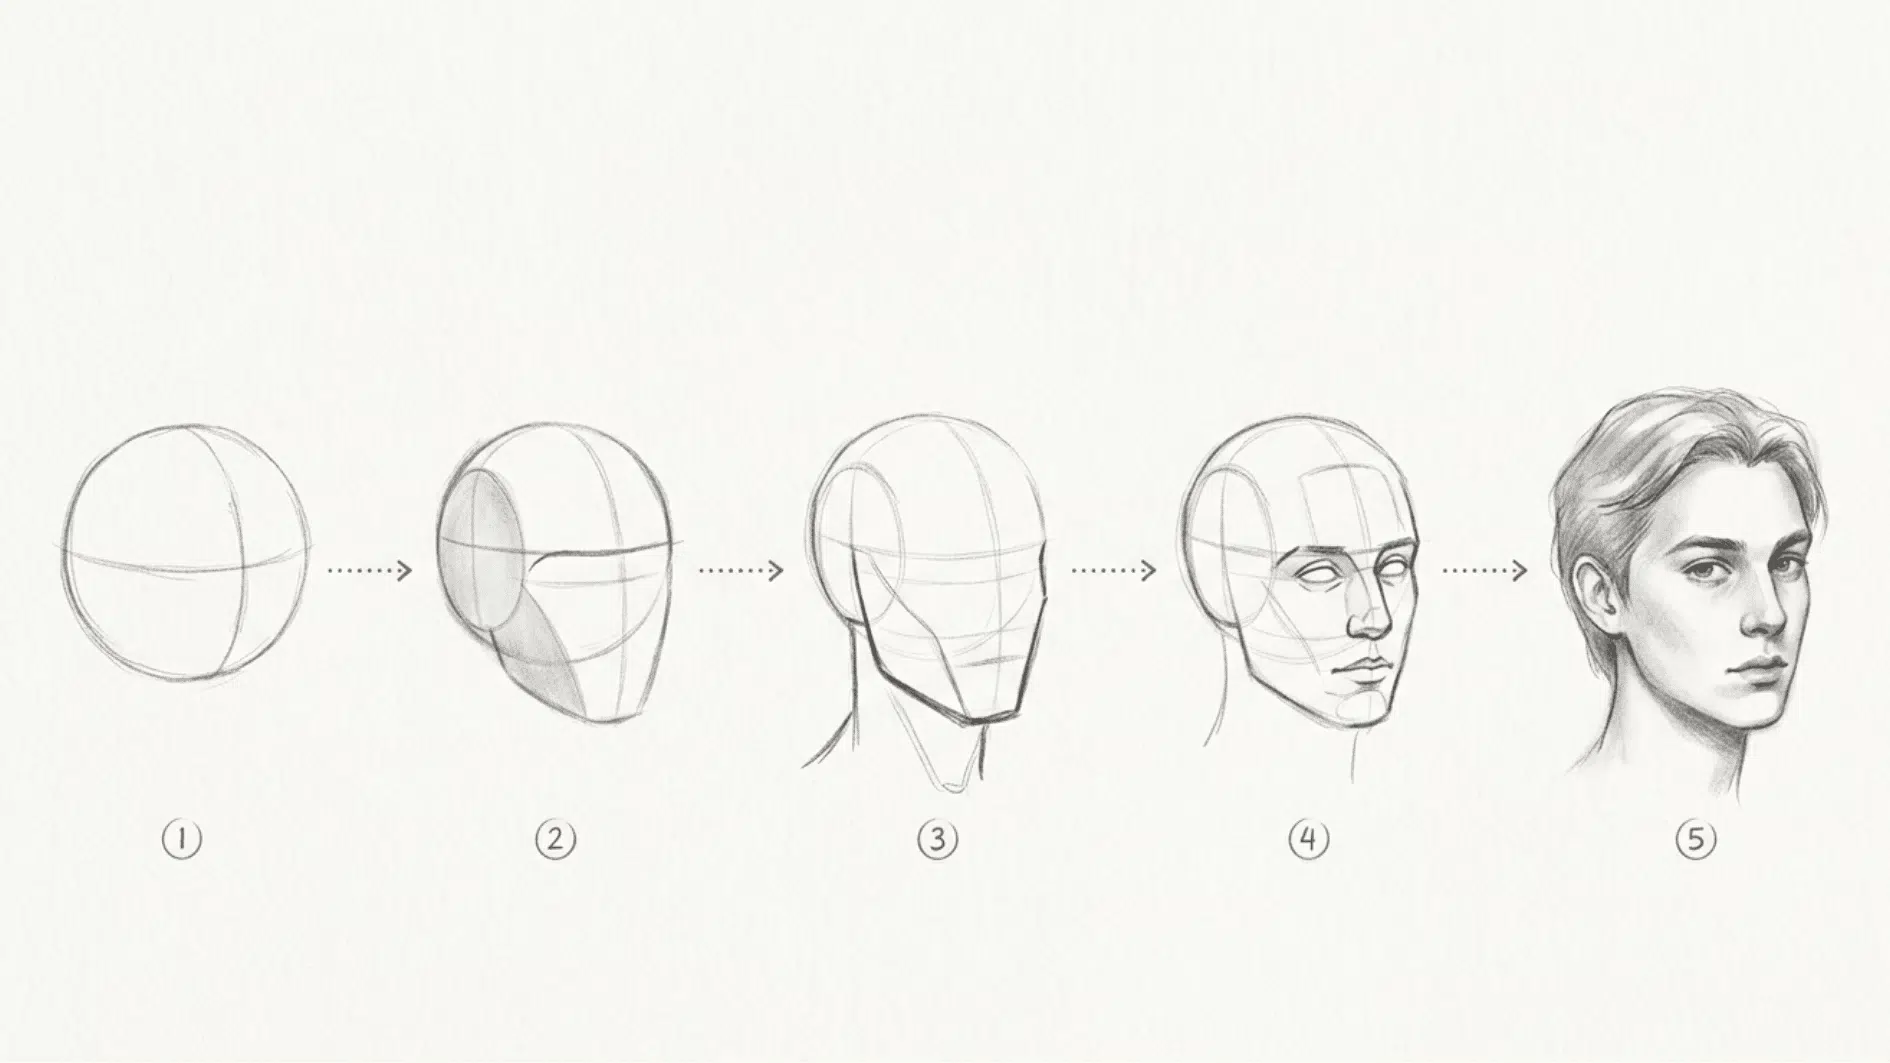
The head forms the anchor for the figure. It’s not just a circle; the jawline, chin, and planes guide facial features placement. Eyes are roughly halfway down the head, with the nose and mouth below, helping maintain proportion for the rest of the body.
Chest and Shoulders
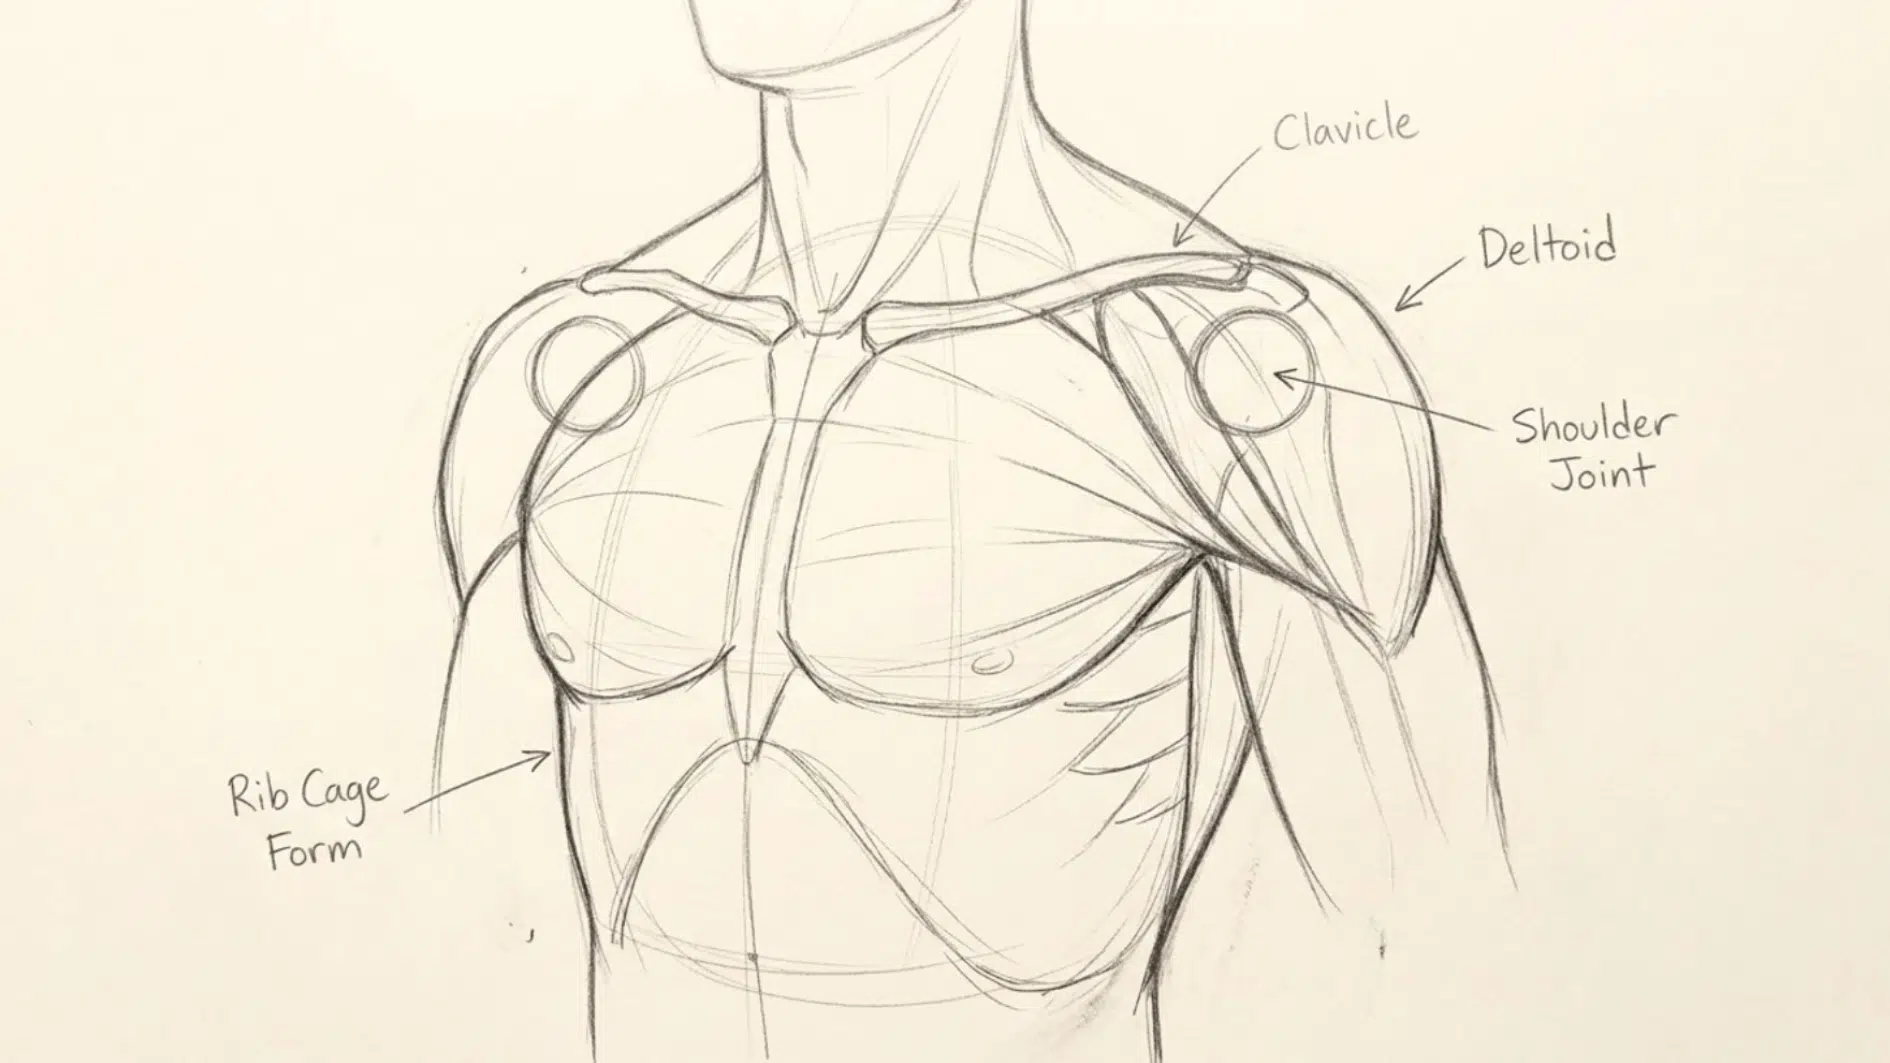
The chest contains the rib cage, which provides structure for the upper body. Shoulders are ball-and-socket joints that allow arm rotation.
Visualize the shoulders as rounded forms with muscle contours over the collarbones and deltoids to create a natural upper body posture.
Arms and Elbows
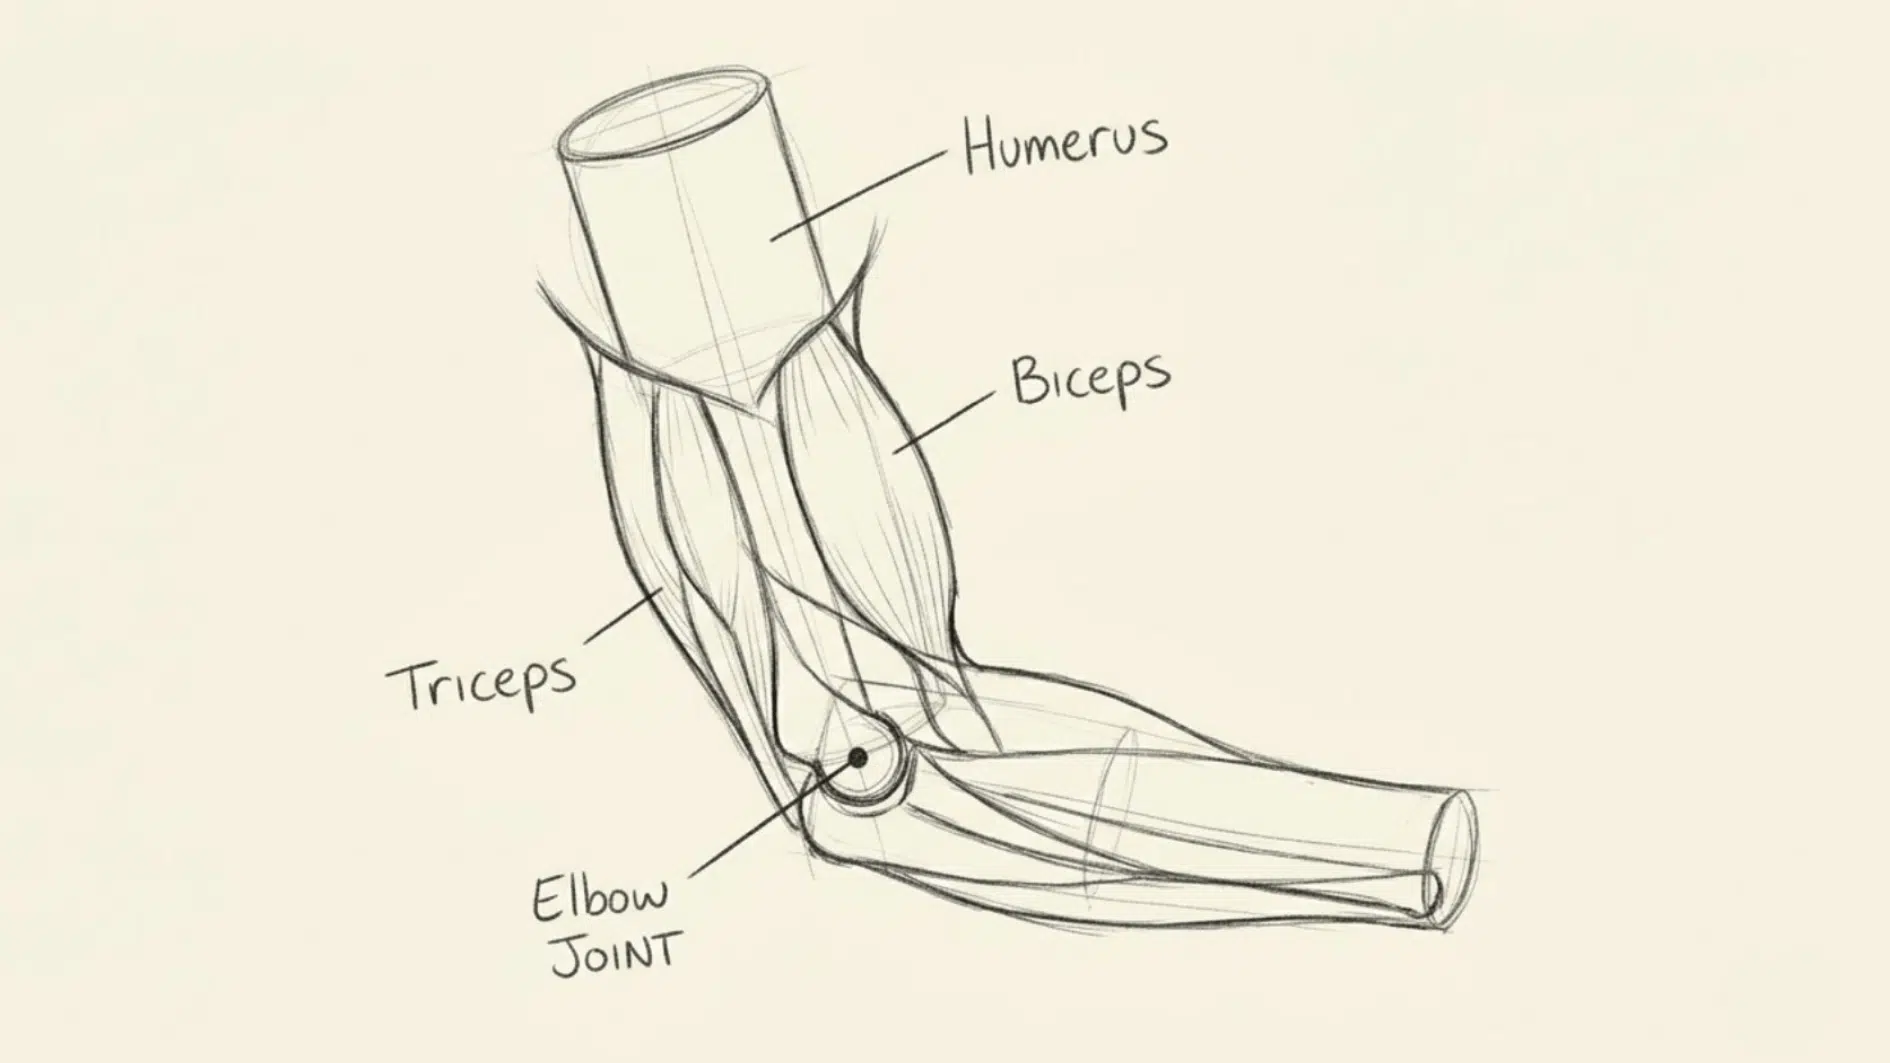
Arms consist of the upper arm (humerus) and forearm (radius and ulna).
Elbows are hinge joints connecting these sections. Represent arms as two cylinders for practice, then layer muscles like biceps and triceps over them for realism.
Hands
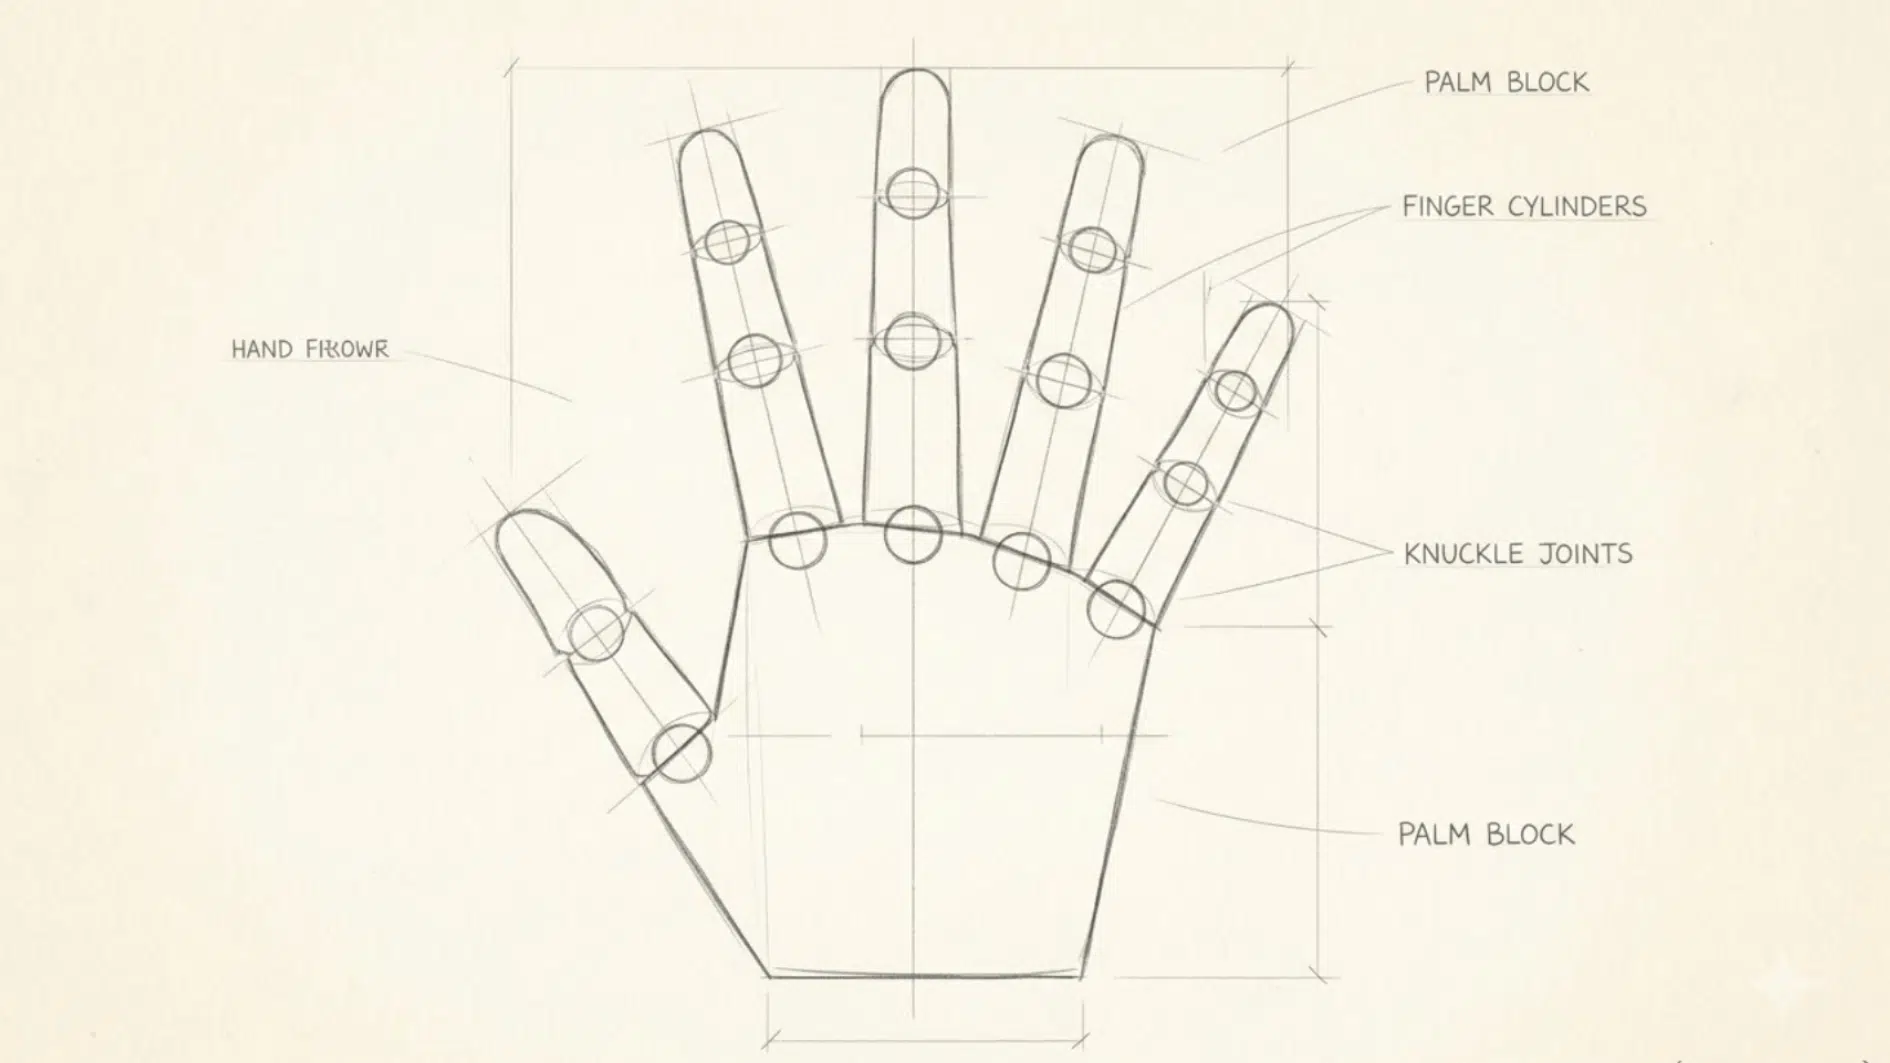
Hands are complex but manageable when broken into shapes. Start with a block for the palm and cylinders for fingers.
Use skeleton hand references to place knuckles, joints, and finger lengths accurately, then refine with muscle and skin layers.
Thighs and Hips
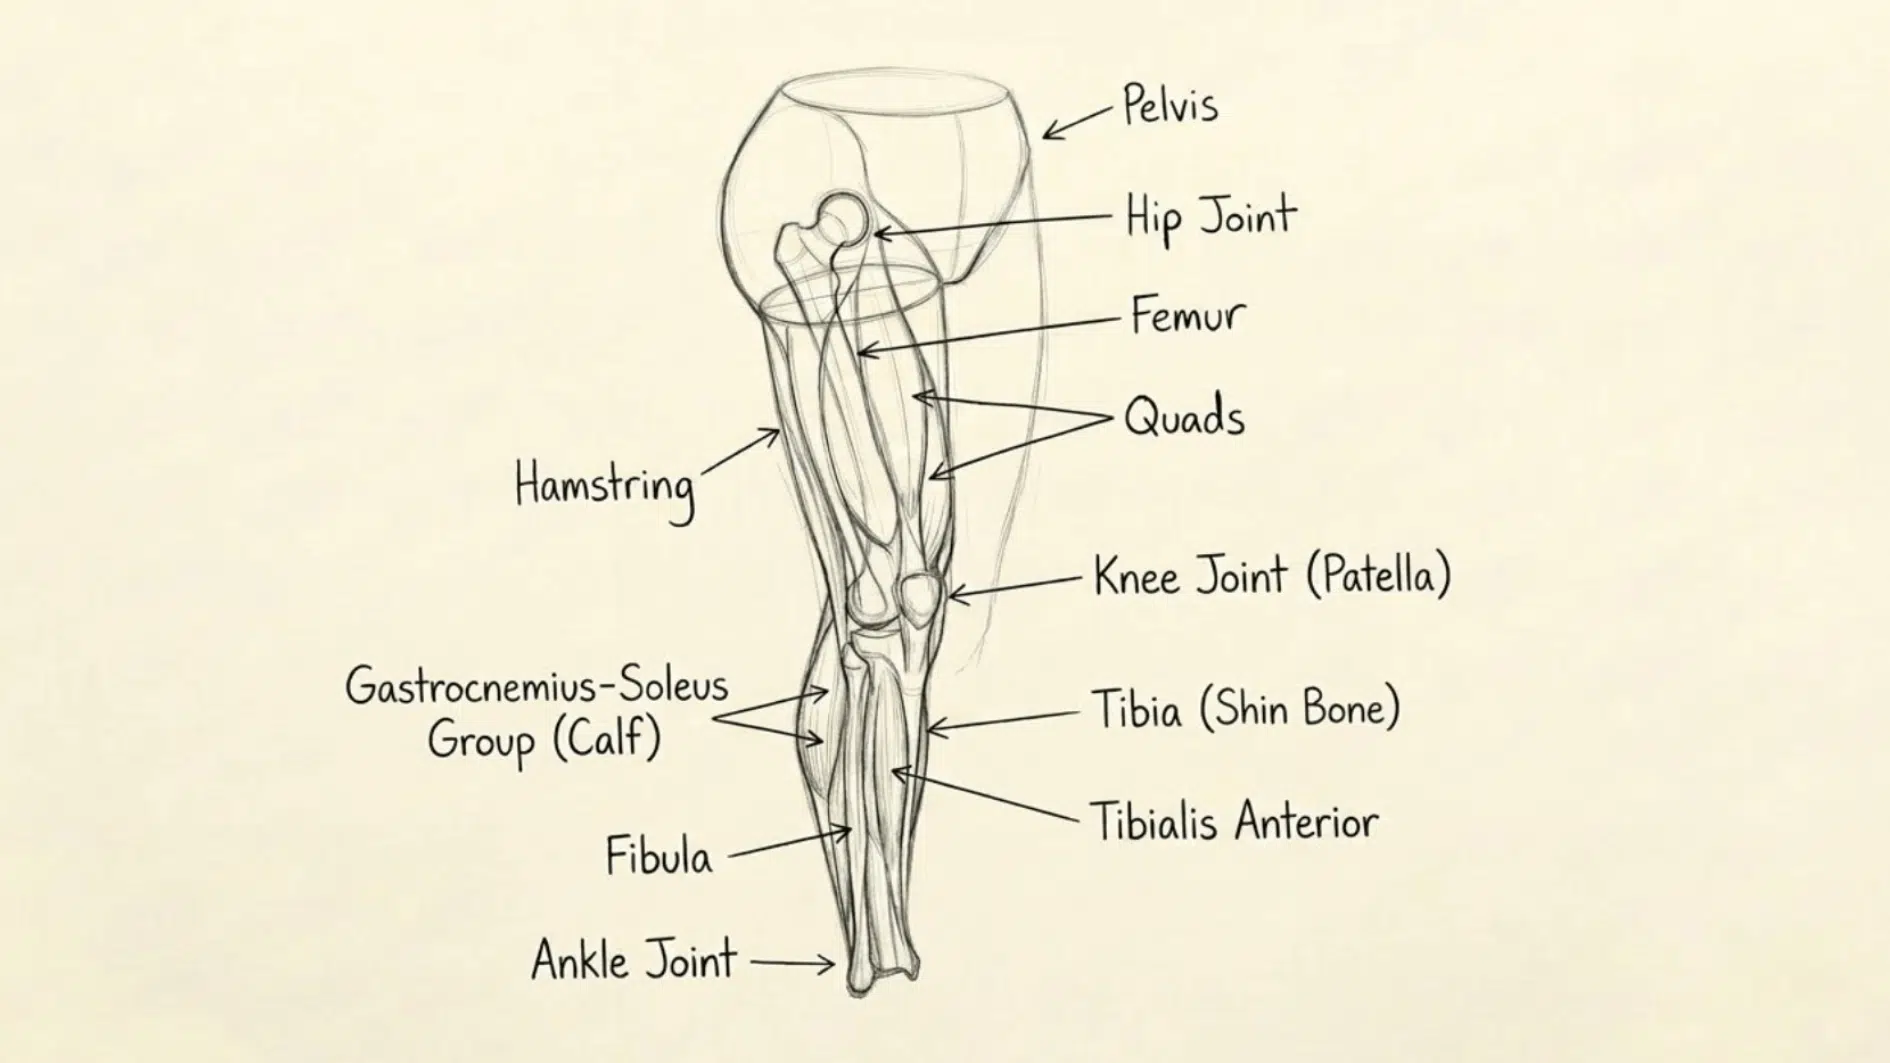
Thighs are the upper leg, thick and muscular, connecting to the pelvis at the hip joint. Observe how the quads and hamstrings wrap around the femur. Hips pivot the legs, influencing the figure’s balance and stance.
Feet
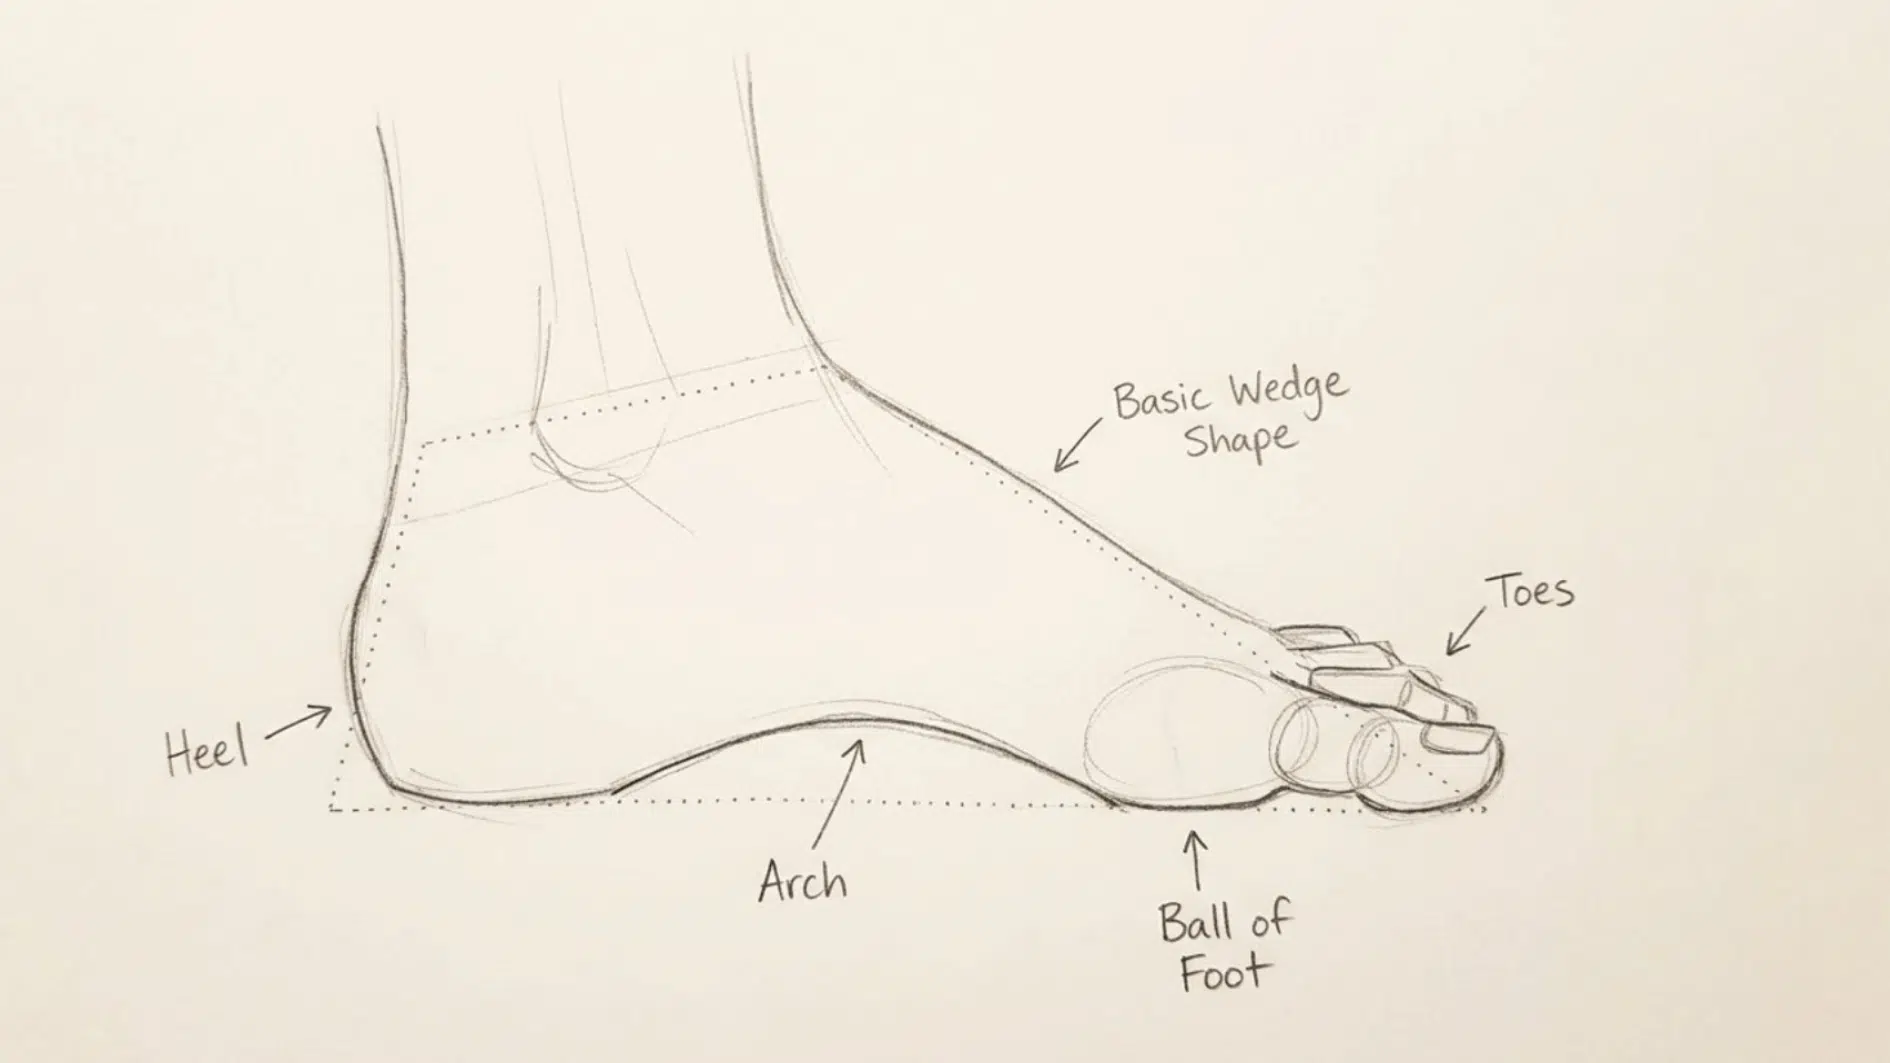
Feet carry the body’s weight and affect posture. Start with simple wedge or trapezoid shapes for the foot’s base, then add toes.
If you want a deeper walkthrough, a dedicated drawing feet breakdown covers the arch, heel, and ball of the foot for natural positioning, especially in standing or walking poses.
Common Mistakes Beginners Make when Drawing Anatomy
A few mistakes show up in almost every beginner sketchbook. Knowing them ahead of time saves you the guesswork later.
Skipping the construction stage
Jumping straight to contours without a stick figure or basic shapes underneath is the fastest way to end up with a lopsided figure you can’t fix without starting over.
Drawing the head too small
The average adult body is about 7 to 7.5 heads tall. Beginners often draw the head at 1/9 or 1/10 of the body height, which makes the figure look stretched.
Stiff, symmetrical poses
Real bodies shift weight onto one leg, tilt the shoulders, and curve the spine. A perfectly straight, evenly weighted figure is a dead giveaway of a beginner sketch.
Ignoring joints
Elbows, knees, and knuckles need a slight change in width or angle. Treating a limb as one straight cylinder from end to end flattens the whole drawing.
Conclusion
Anatomy drawing stops feeling overwhelming once you stop trying to draw a finished body in one pass.
Shapes set the proportions, steps build the pose, and anatomy knowledge is what makes the finished sketch look like it has real weight instead of sitting flat on the page.
None of it happens in one sitting. A few short sessions a week, borrowing from a running list of sketchbook ideas and working through one body part at a time, gets you further than an occasional long one.
Frequently Asked Questions
Do I Need to Learn Anatomy Before I Start Drawing Figures?
No. Start with basic shapes and proportions first. Anatomy knowledge helps refine a figure once the structure is already in place, not before.
How Often Should I Practice Body Drawing?
A few short sessions each week work better than one long session. Consistency builds proportion sense faster than time spent in a single sitting.
Can I Skip Basic Shapes and Draw Contours Directly?
You can, but proportions tend to drift without shapes to check against. Even experienced artists use light construction shapes to catch mistakes early.