Clothing can look simple to draw until you need to show how fabric sits on the body, and learning how fabric hangs, stretches, gathers, and bends makes a big difference.
In this blog, you will learn how to draw clothing folds with simple steps, from identifying fabric types to adding folds and basic shading.
You can use these techniques to draw T-shirts, dresses, jackets, pants, and loose drapery with greater control and accuracy.
Know the Types of Folds Before You Start Drawing
The main fold types appear in most clothing. Knowing what each one looks like will make your drawings much more accurate; several fabric fold and texture references touch on this when comparing realistic and hyperrealistic styles.
- Pipe folds: long, tube-like folds that hang down (like capes)
- Zigzag folds: sharp angles at bent joints like elbows and knees
- Spiral folds: wrap around arms and legs
- Half-lock folds appear on one side of a bend
- Diaper folds: fabric suspended between two points
- Drop folds: fabric falls from one point (like a shoulder)
- Inert folds: bunched-up fabric with no tension (like a pile of clothes)
Stiff, flat-looking fabric is a common challenge for beginner artists, especially when folds do not follow the movement or shape of the figure underneath, a gap that shows up often in this guide on how to draw person figures, where the clothing stage trips up so many beginners.
How to Draw Clothing Folds: Step-by-Step
Drawing clothing folds is not about copying every wrinkle. It is about understanding how fabric pulls, bends, hangs, and gathers around the body.
Step 1: Decide What Fabric You’re Drawing
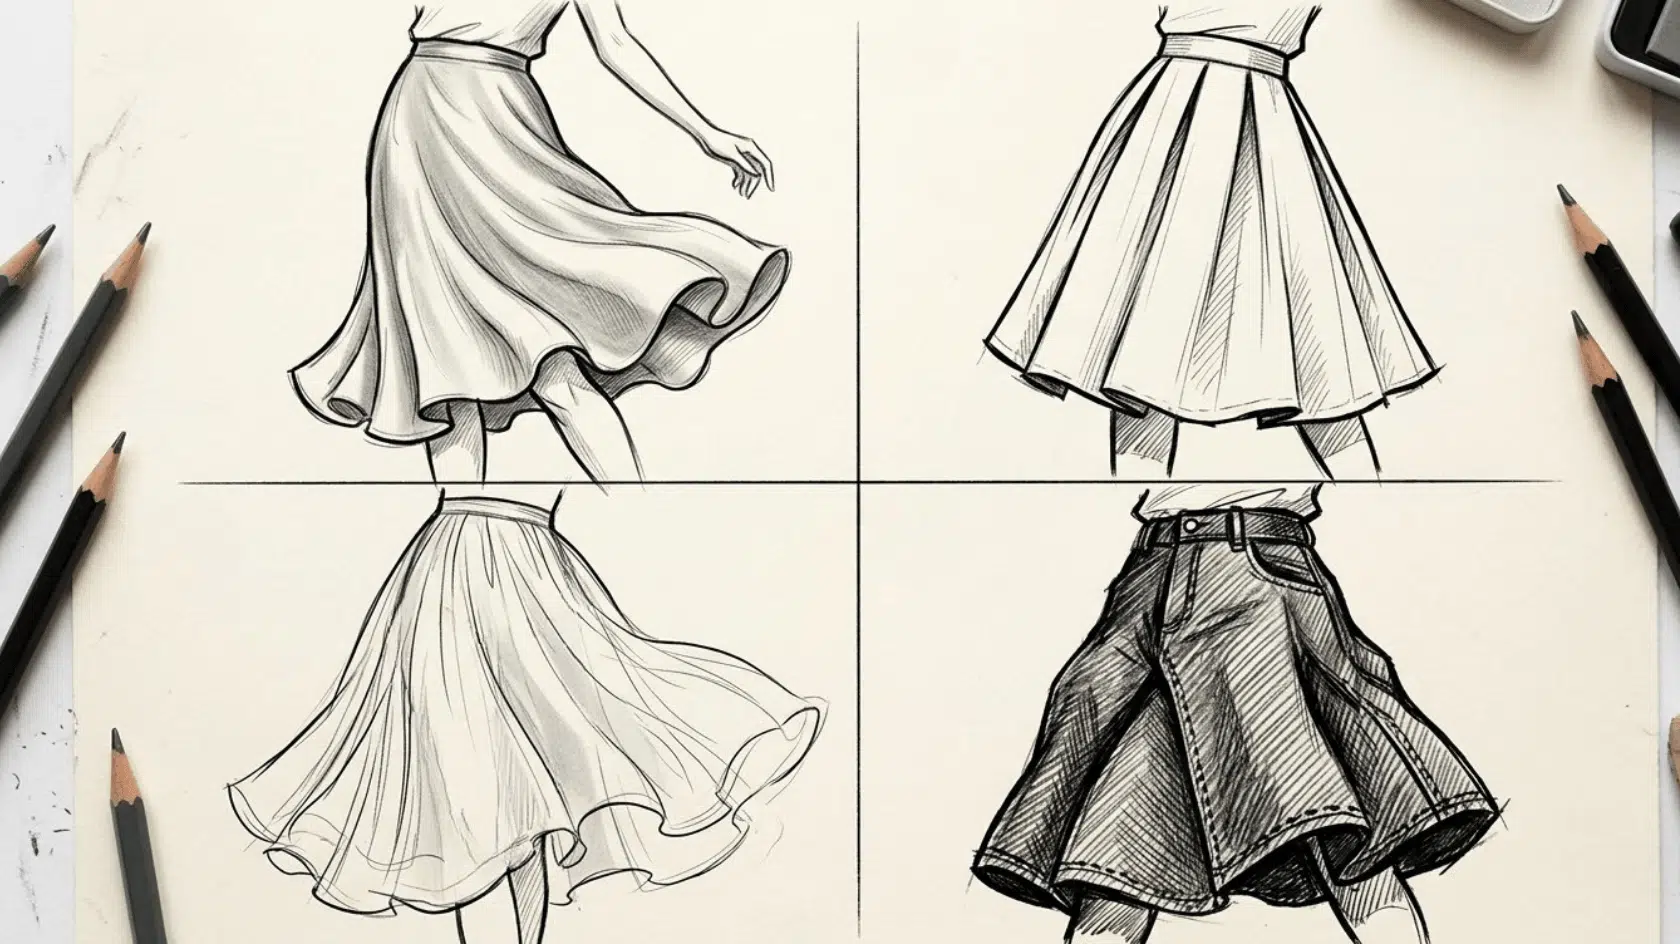
Start by deciding what material you are drawing. Cotton, silk, denim, and wool all create different fold patterns because they vary in weight, stiffness, and flexibility.
Think about the material before placing any folds so your lines and shading match its character.
Step 2: Start With the Body Underneath
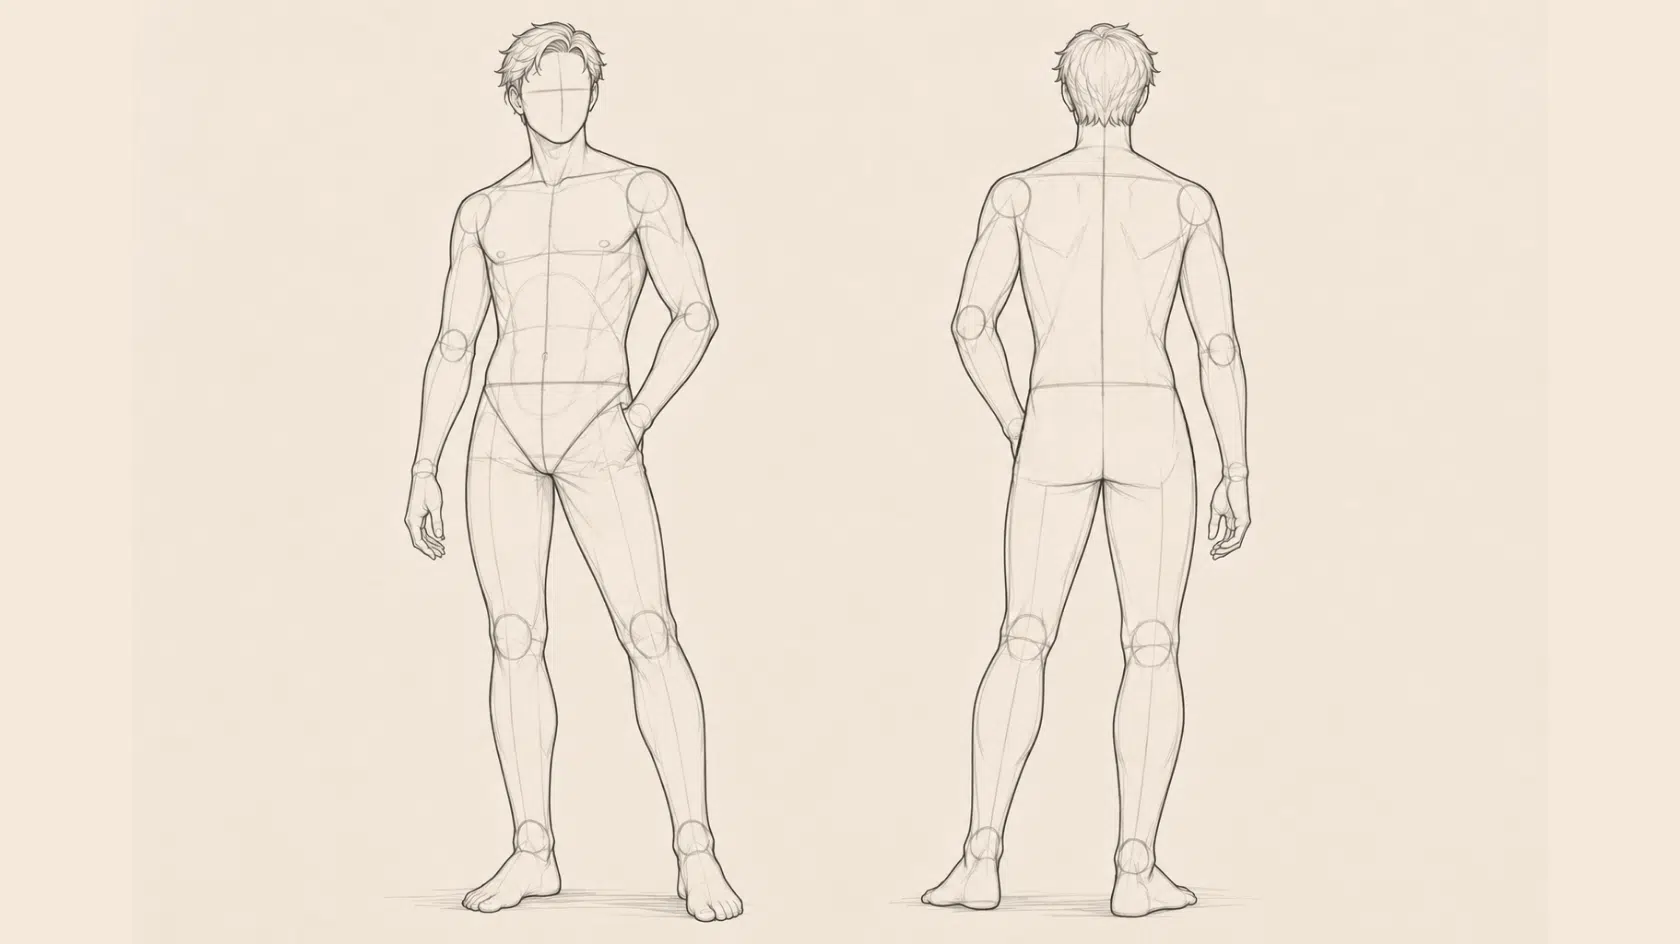
Lightly draw the figure beneath the clothing, even if you only use simple shapes.
Mark the torso, arms, legs, and major joints so you can see where the fabric will stretch, bunch, or hang- the same block-in approach covered in this anatomy drawing practice guide.
This prevents the clothing from looking disconnected from the body.
Step 3: Find the Tension Points
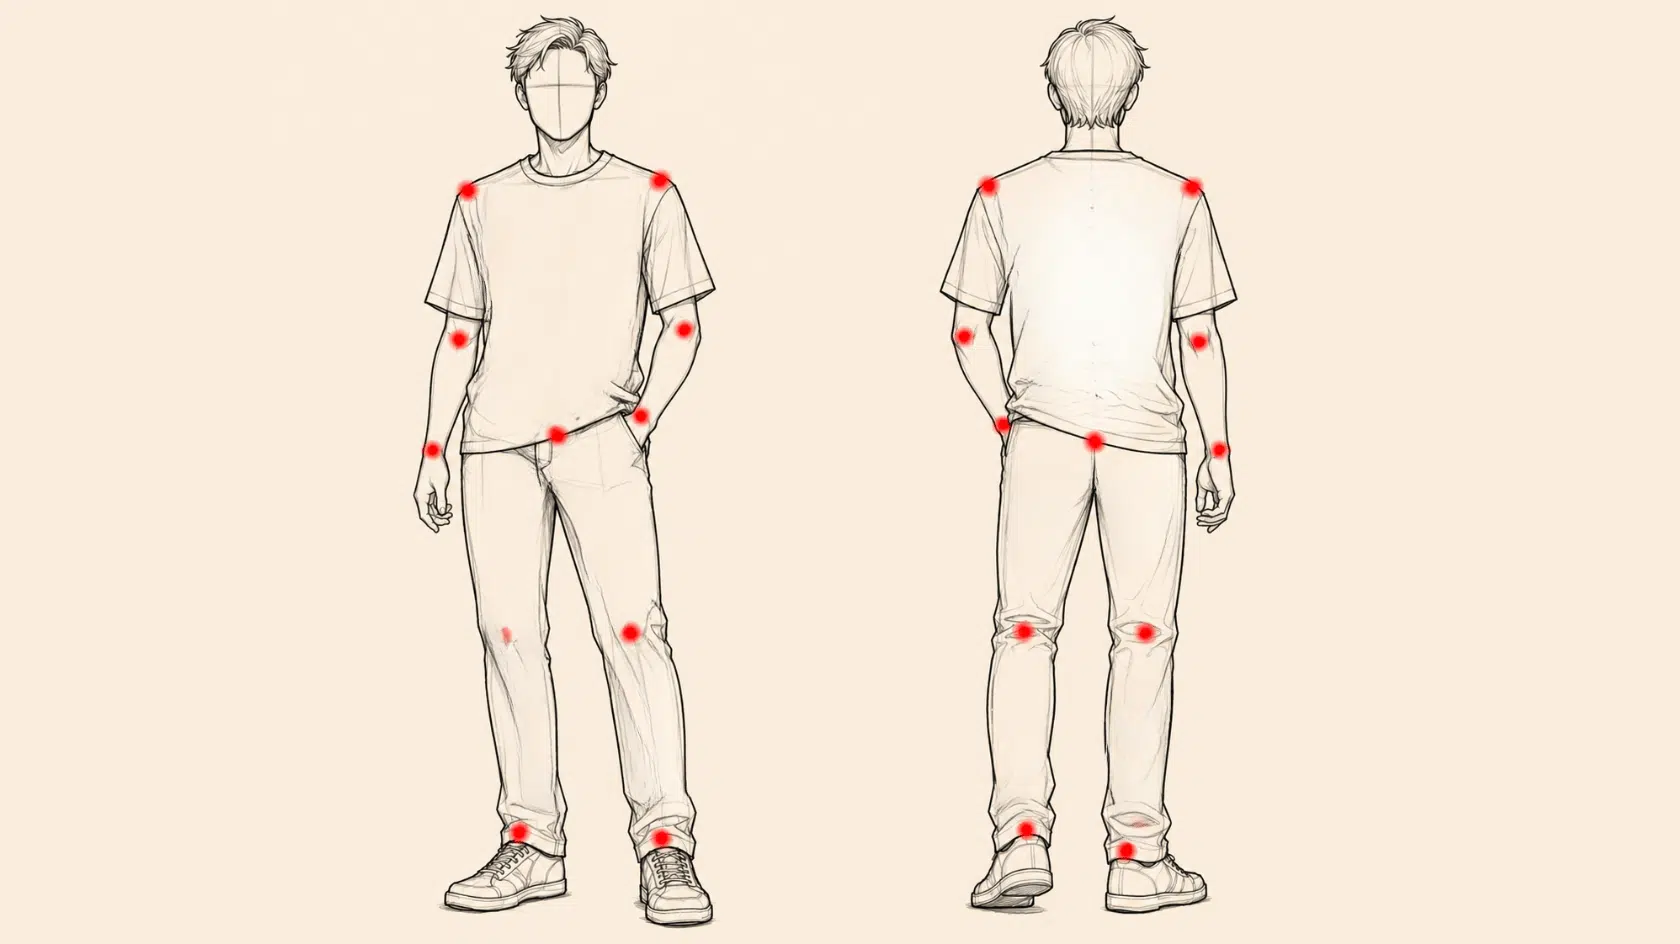
Look for places where the fabric is held or pulled, such as the shoulders, elbows, knees, waist, and cuffs.
Lightly mark these areas, then consider how the surrounding fabric responds. Folds often begin near these points and spread outward depending on the direction of the pull.
Step 4: Place the Main Folds
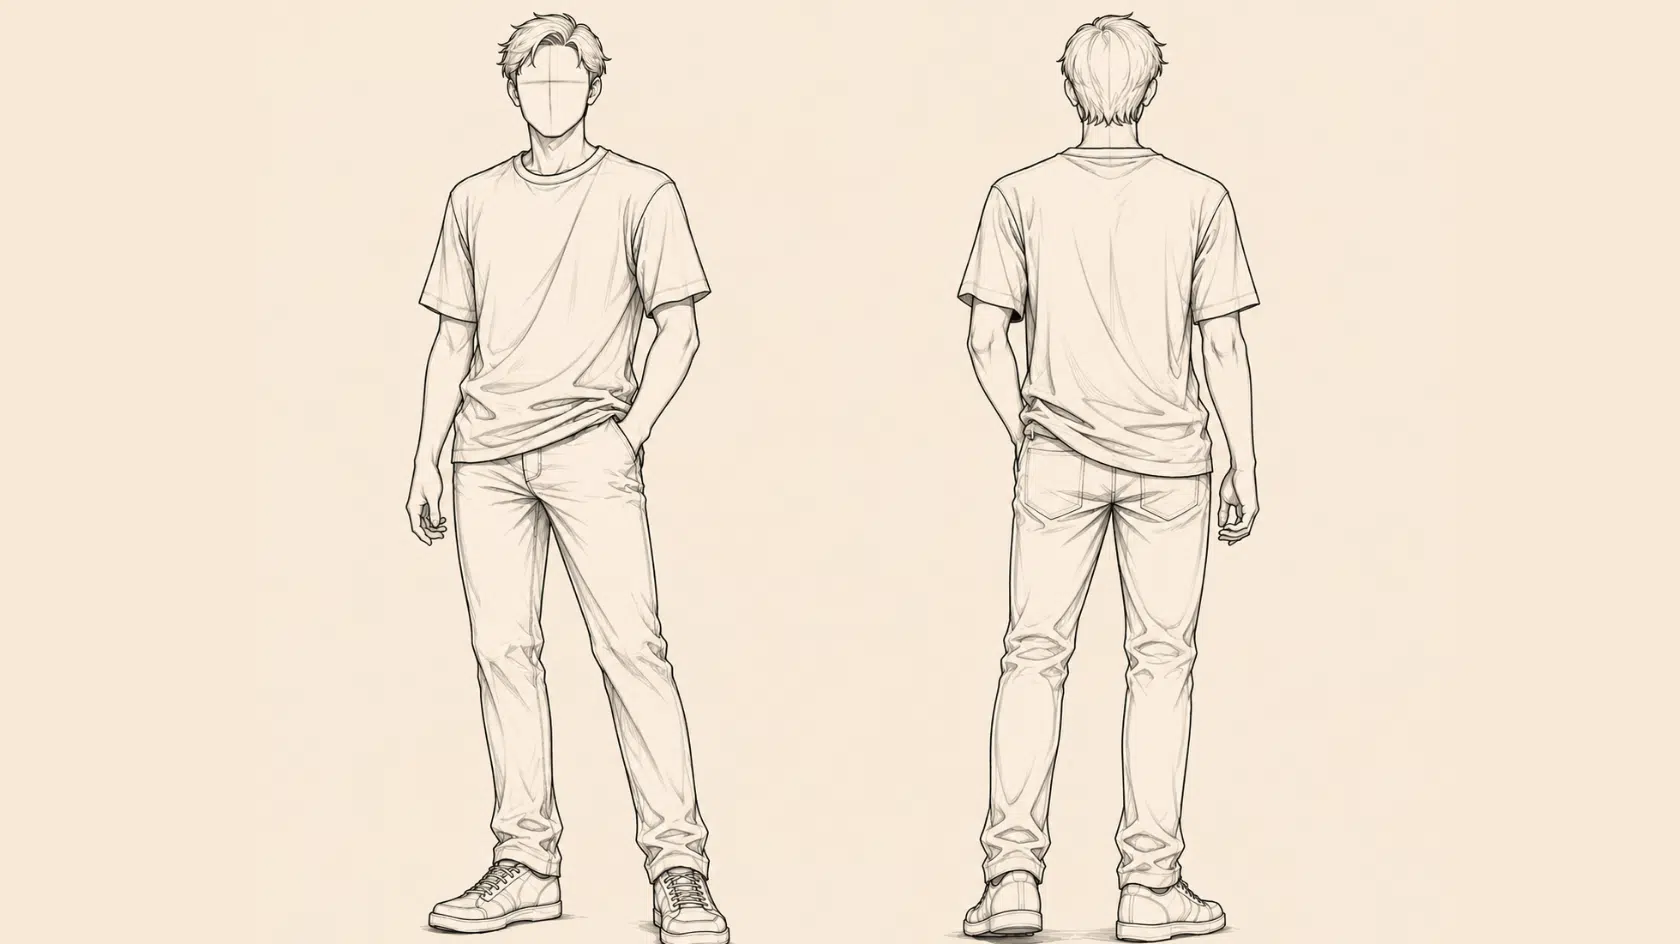
Start with the largest, most noticeable folds instead of drawing every crease at once. Use curves for fabric that hangs freely.
sharper angles where it is compressed around joints. Vary the length, width, and spacing so the folds do not look mechanically repeated.
Step 5: Add Secondary Creases
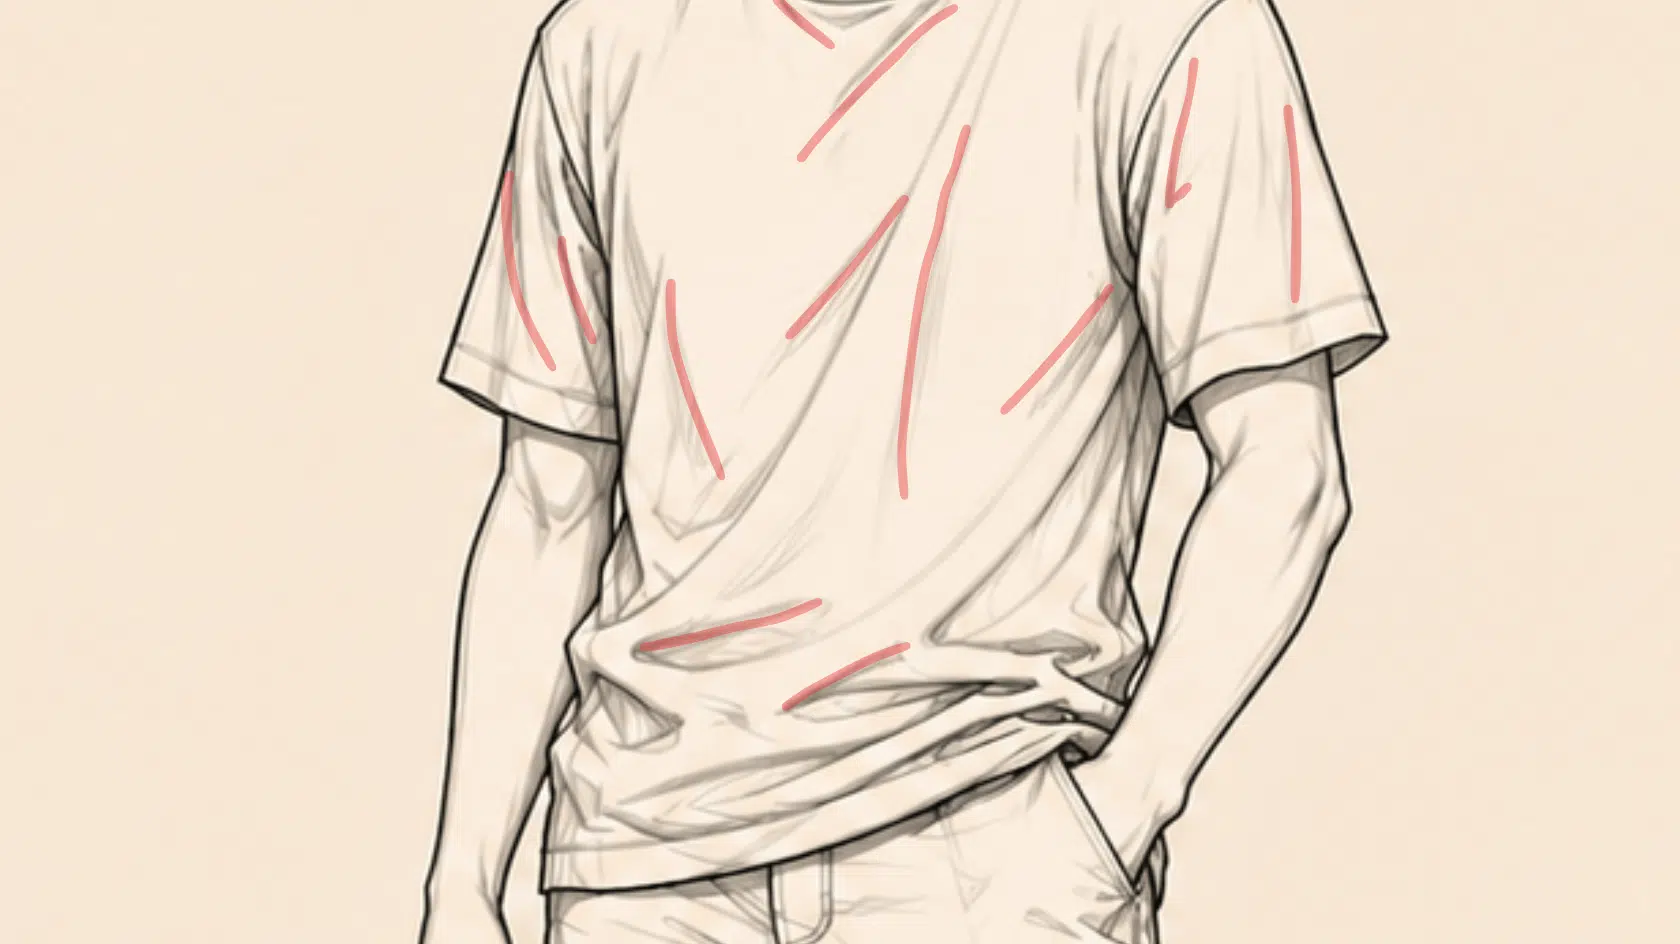
Once the main folds are in place, add a few smaller creases where the fabric gathers or changes direction. Keep these details selective.
Some areas can remain smooth, which helps the important folds stand out without making the clothing look crowded.
Step 6: Add Shading to Show Depth
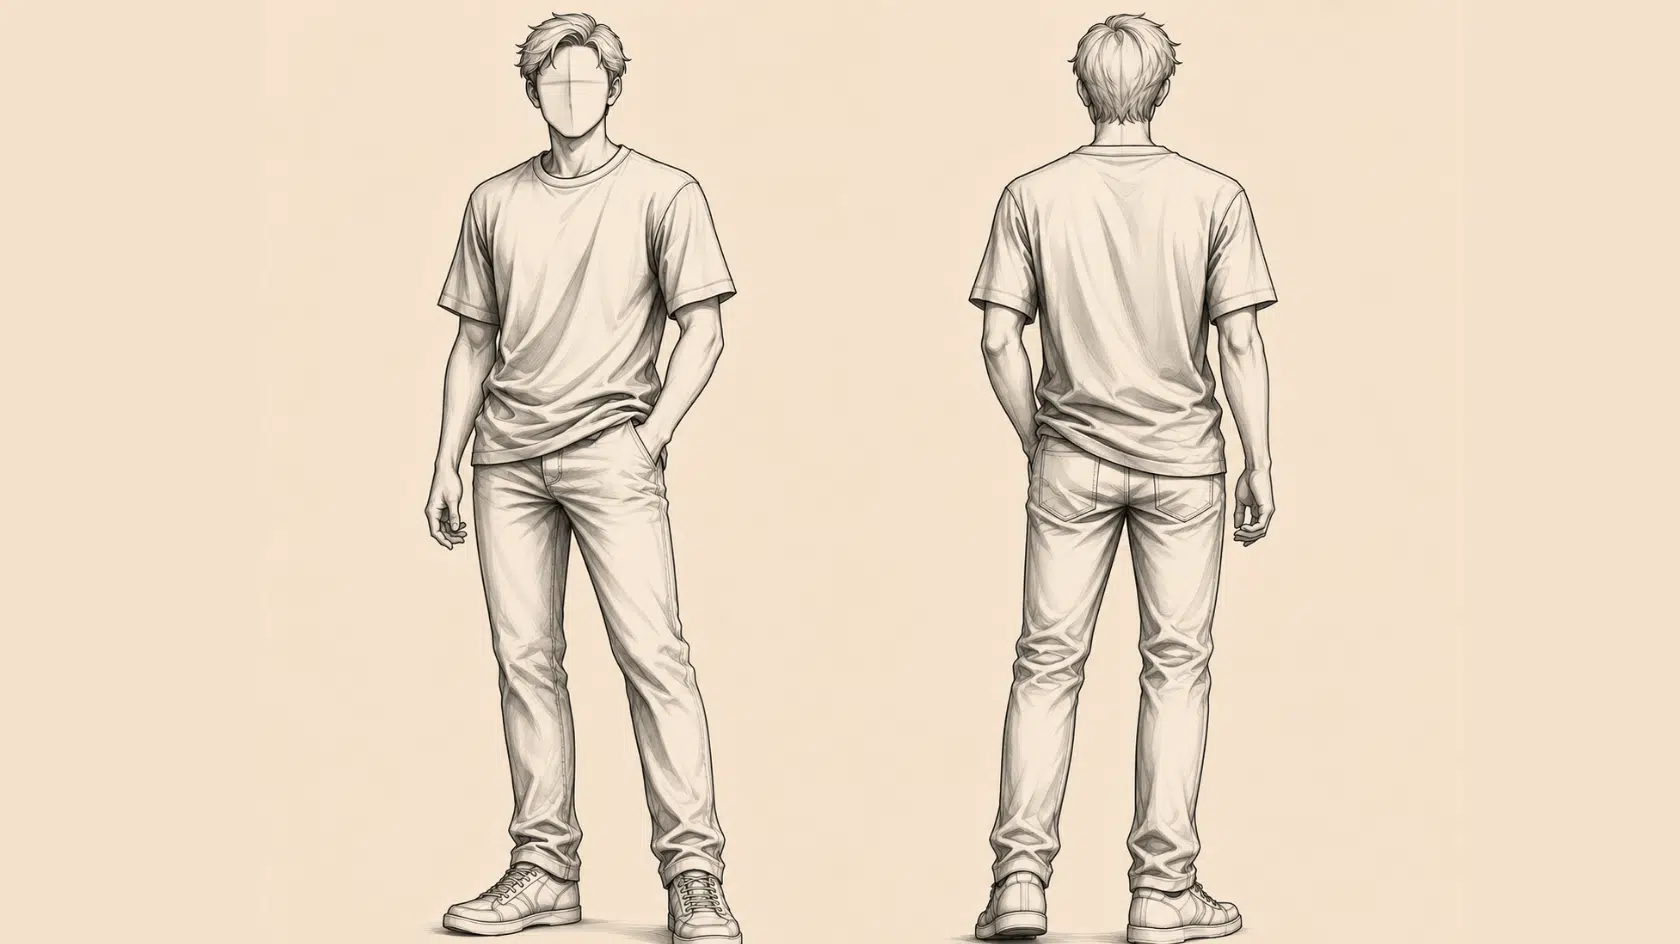
Choose a clear light direction before shading. Keep the raised sections lighter and place darker values inside deep folds, overlaps, and compressed areas, following the same light-and-shadow logic laid out in these shading techniques for art.
Use softer transitions for materials such as silk and cotton, while heavier fabrics can have firmer shadow edges.
Fabric, Fold, and Shading Tips
This table breaks down the key factors to consider when drawing clothing folds, along with simple ways to show each one in your sketches.
| What to consider | What to look for | Drawing approach |
|---|---|---|
| Fabric weight | Light fabric hangs easily; heavy fabric holds its shape more | Use longer, softer folds for light materials and broader, firmer folds for heavy ones |
| Tension | Notice where the fabric is pulled or held | Let folds travel from the tension point toward the looser areas |
| Body movement | Bends at the elbows, knees, waist, and shoulders affect the cloth | Compress folds around bends and stretch the fabric across extended areas |
| Gravity | Unsupported fabric tends to fall downward | Use vertical or gently curved folds where the material hangs freely |
| Fold depth | Not every crease has the same depth | Reserve darker shading for deeper overlaps and compressed folds |
| Material texture | Silk, cotton, denim, and wool respond differently | Match the line quality and shading to the fabric rather than using one approach for all clothing |
| Fold spacing | Natural folds are rarely evenly spaced | Vary their width, length, direction, and depth |
| Reference | Real clothing shows how fabric behaves in different positions | Study a shirt, jacket, or draped cloth before sketching when you need a clearer reference |
Wrapping It Up
Learning how to draw clothing folds starts with understanding the relationship between fabric, the body, tension, and gravity.
Once you identify these elements, you can build the main folds first and add smaller details only where they are needed.
Practice with real clothing, keep your fold patterns varied, and pay attention to how different materials behave.
With regular practice, your clothing sketches can look more natural without relying on excessive lines or shading.
Frequently Asked Questions
What Are the 7 Types of Drapery Folds?
The seven common types are pipe, zigzag, spiral, half-lock, diaper, drop, and inert folds.
Each forms differently based on how fabric is supported, pulled, bent, or allowed to hang.
What Are Dress Folds Called?
Dress folds are generally called fabric or drapery folds, with types such as pipe, zigzag, spiral, and drop folds.
The type depends on how the dress fabric hangs and interacts with the body.
What Are Common Folding Techniques?
Common techniques include gathering, pleating, tucking, draping, and creating folds around tension points.
Artists can use these methods to show how fabric bends, stretches, and hangs.