Ever stared at your sketchbook and thought Why do your eyes always look flat or off?
Learning how to draw an eye is one of the first real challenges most beginners face, and it is something even experienced artists keep practicing.
Breaking the eyeball drawing process down into simple shapes and steps makes it far more approachable than it seems. If you are working with pencil or digital tools, the basic approach stays the same across all of them.
In this blog, you will find a clear, step-by-step breakdown of drawing an eye, from accurately drawing the pupil to shading and highlights, with helpful sketches and visual references to direct you through every stage.
Basic Eye Anatomy You Should Know Before Drawing
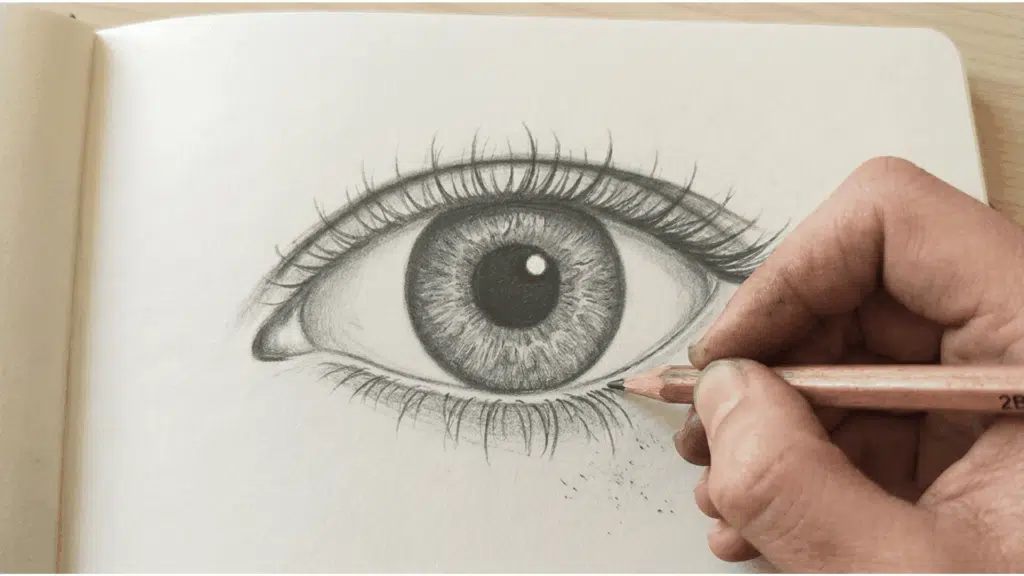
Before you start, you just need to know the basic parts of the eye drawing and where they sit. Knowing these parts helps you place everything in the right spot from the start.
- Eyeball: A rounded sphere that the eyelids wrap around. This shape affects how everything curves.
- Iris: The circular, colored part. The upper eyelid slightly covers it.
- Pupil: The dark circle in the center of the iris.
- Eyelids: The upper lid is more curved. The lower lid is flatter.
- Eyelashes: Grow from the eyelid edges. Upper lashes are longer and thicker.
- Tear Duct: The small shape at the inner corner that connects both lids.
How to Draw an Eye in Easy Steps
Follow each step in order and use the images alongside as a reference. Take your time with every part before moving on.
Step 1: Draw the Basic Eye Shape
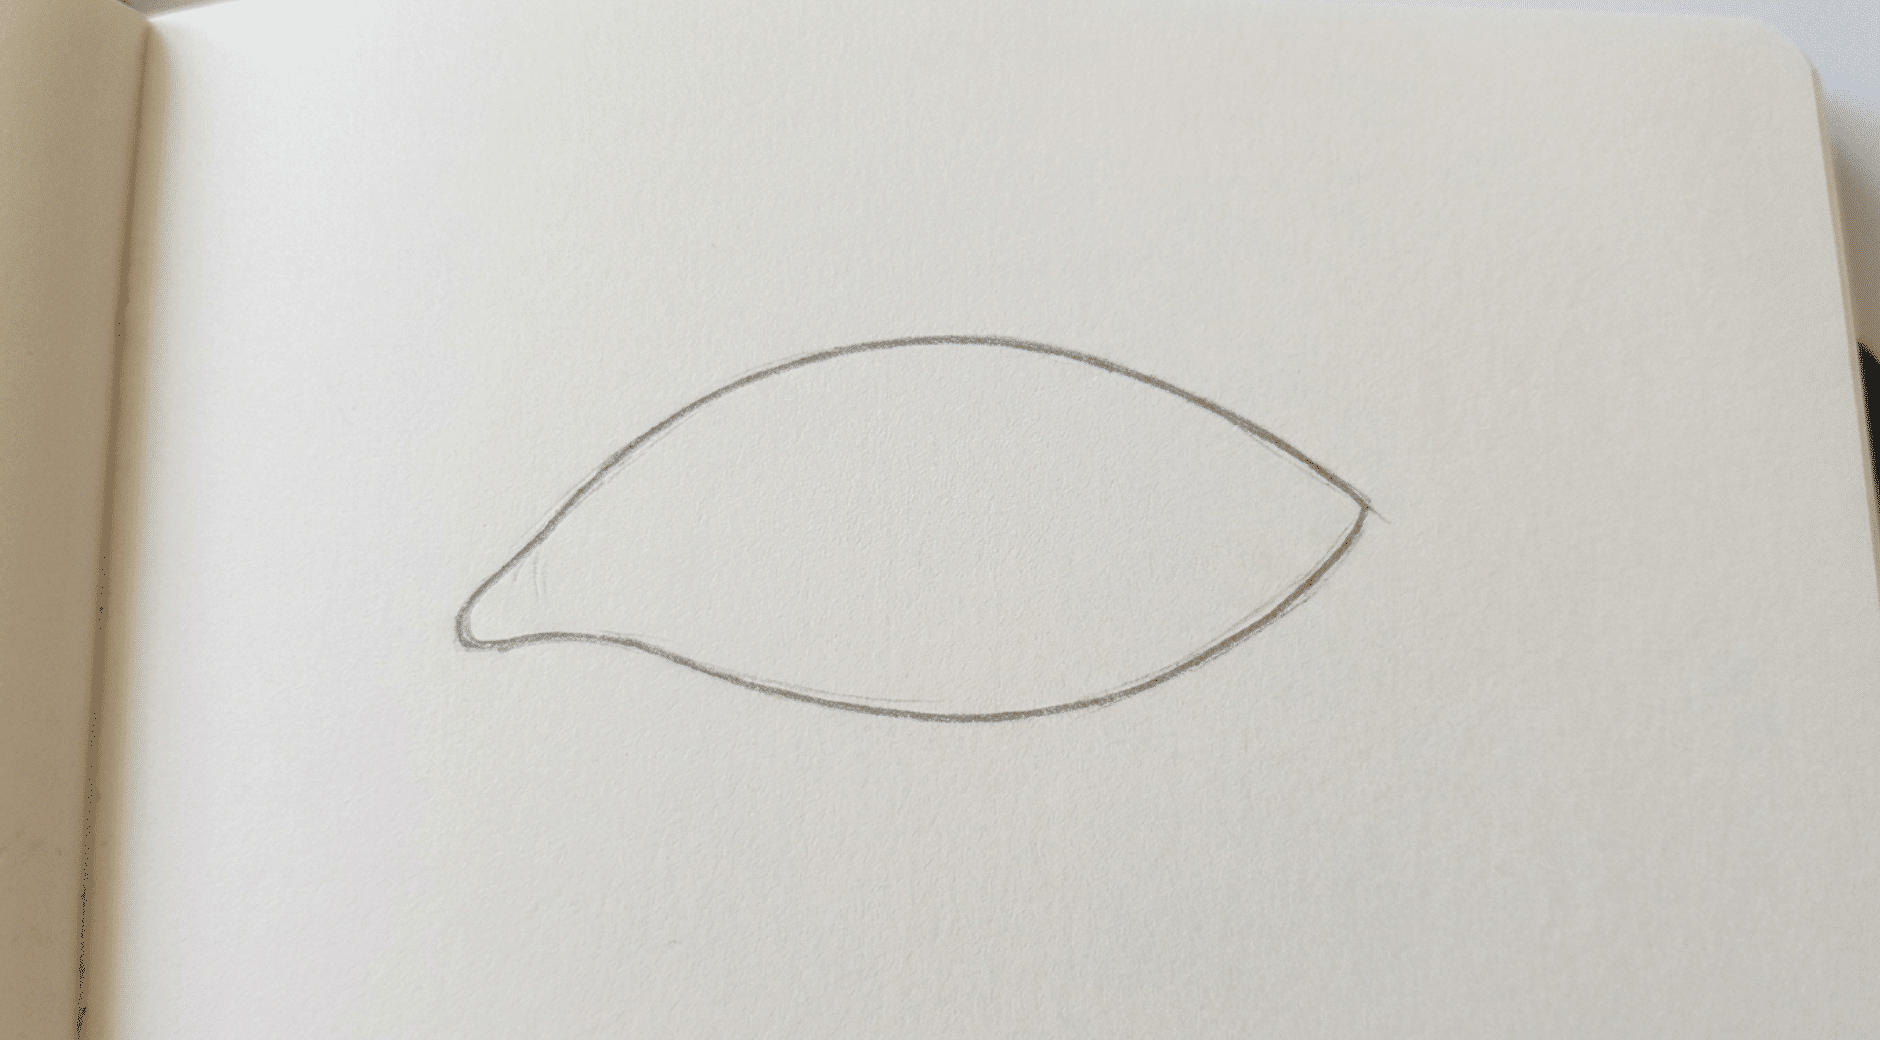
Sketch a simple almond shape. The inner corner should be slightly lower than the outer corner. This outline sets the foundation for your entire eye drawing.
Keep the curves smooth and avoid pressing too hard with the pencil. You can lightly erase and refine the outline until the overall shape looks balanced.
Step 2: Add the Iris and Pupil
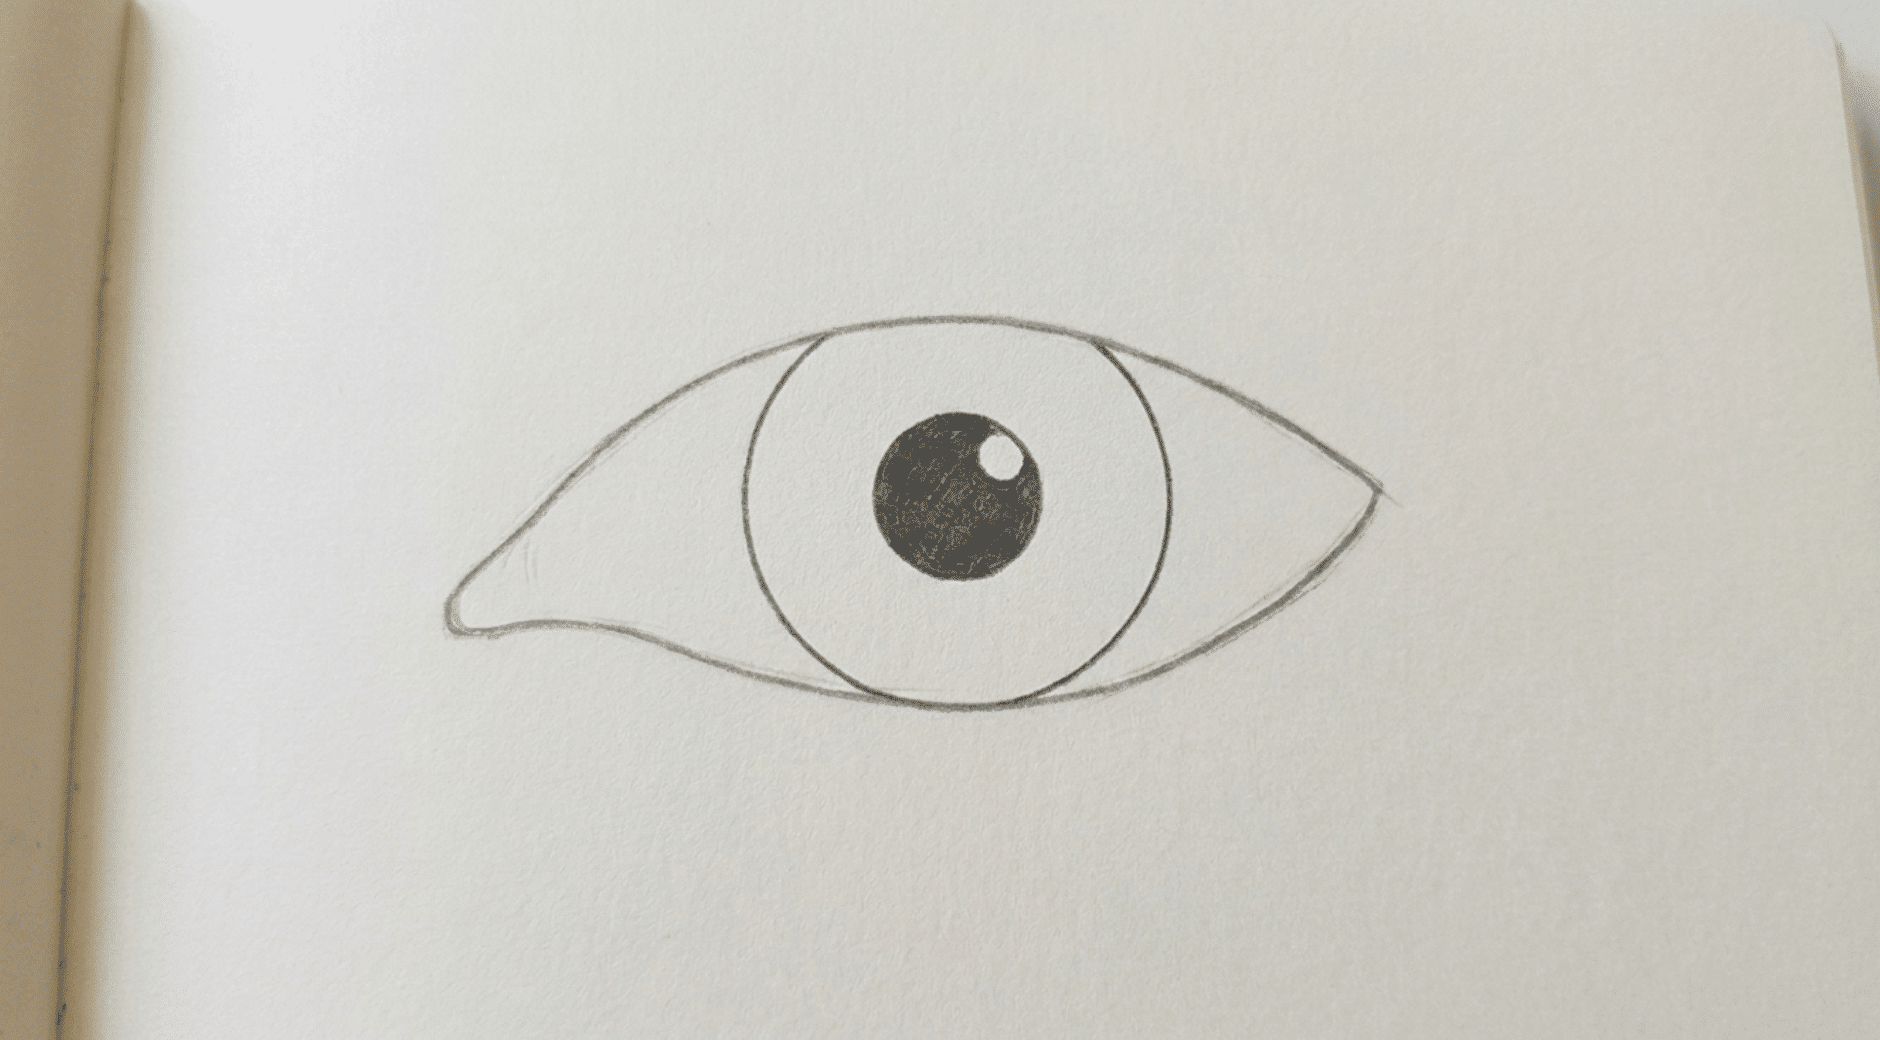
Draw a circle for the iris, slightly covered by the upper lid. Add a smaller circle inside for the pupil. Getting the pupil drawing centered within the iris is key to making the eye look natural.
Step 3: Draw the Eyelids
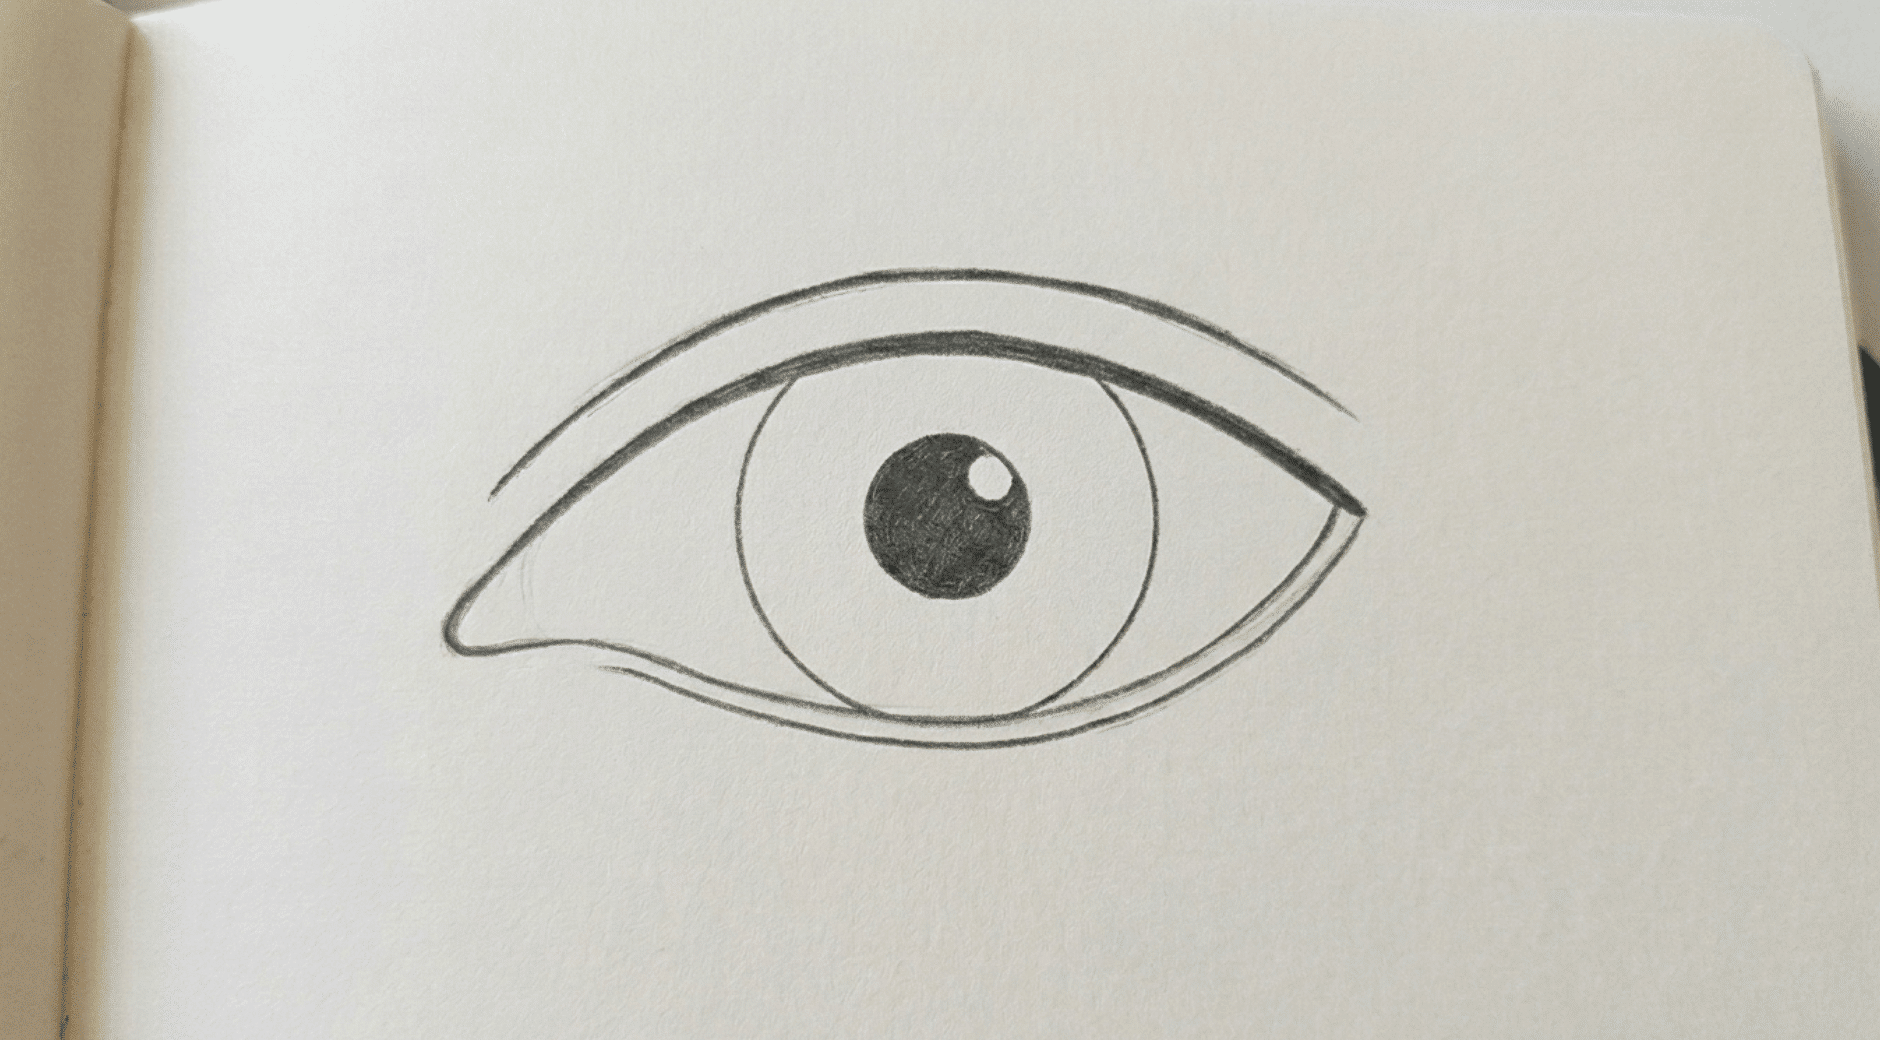
Thicken the upper lid line. Keep the lower lid flatter and thinner than the upper one. Both lids have different shapes, so avoid making them look identical.
Step 4: Add the Inner and Outer Corners
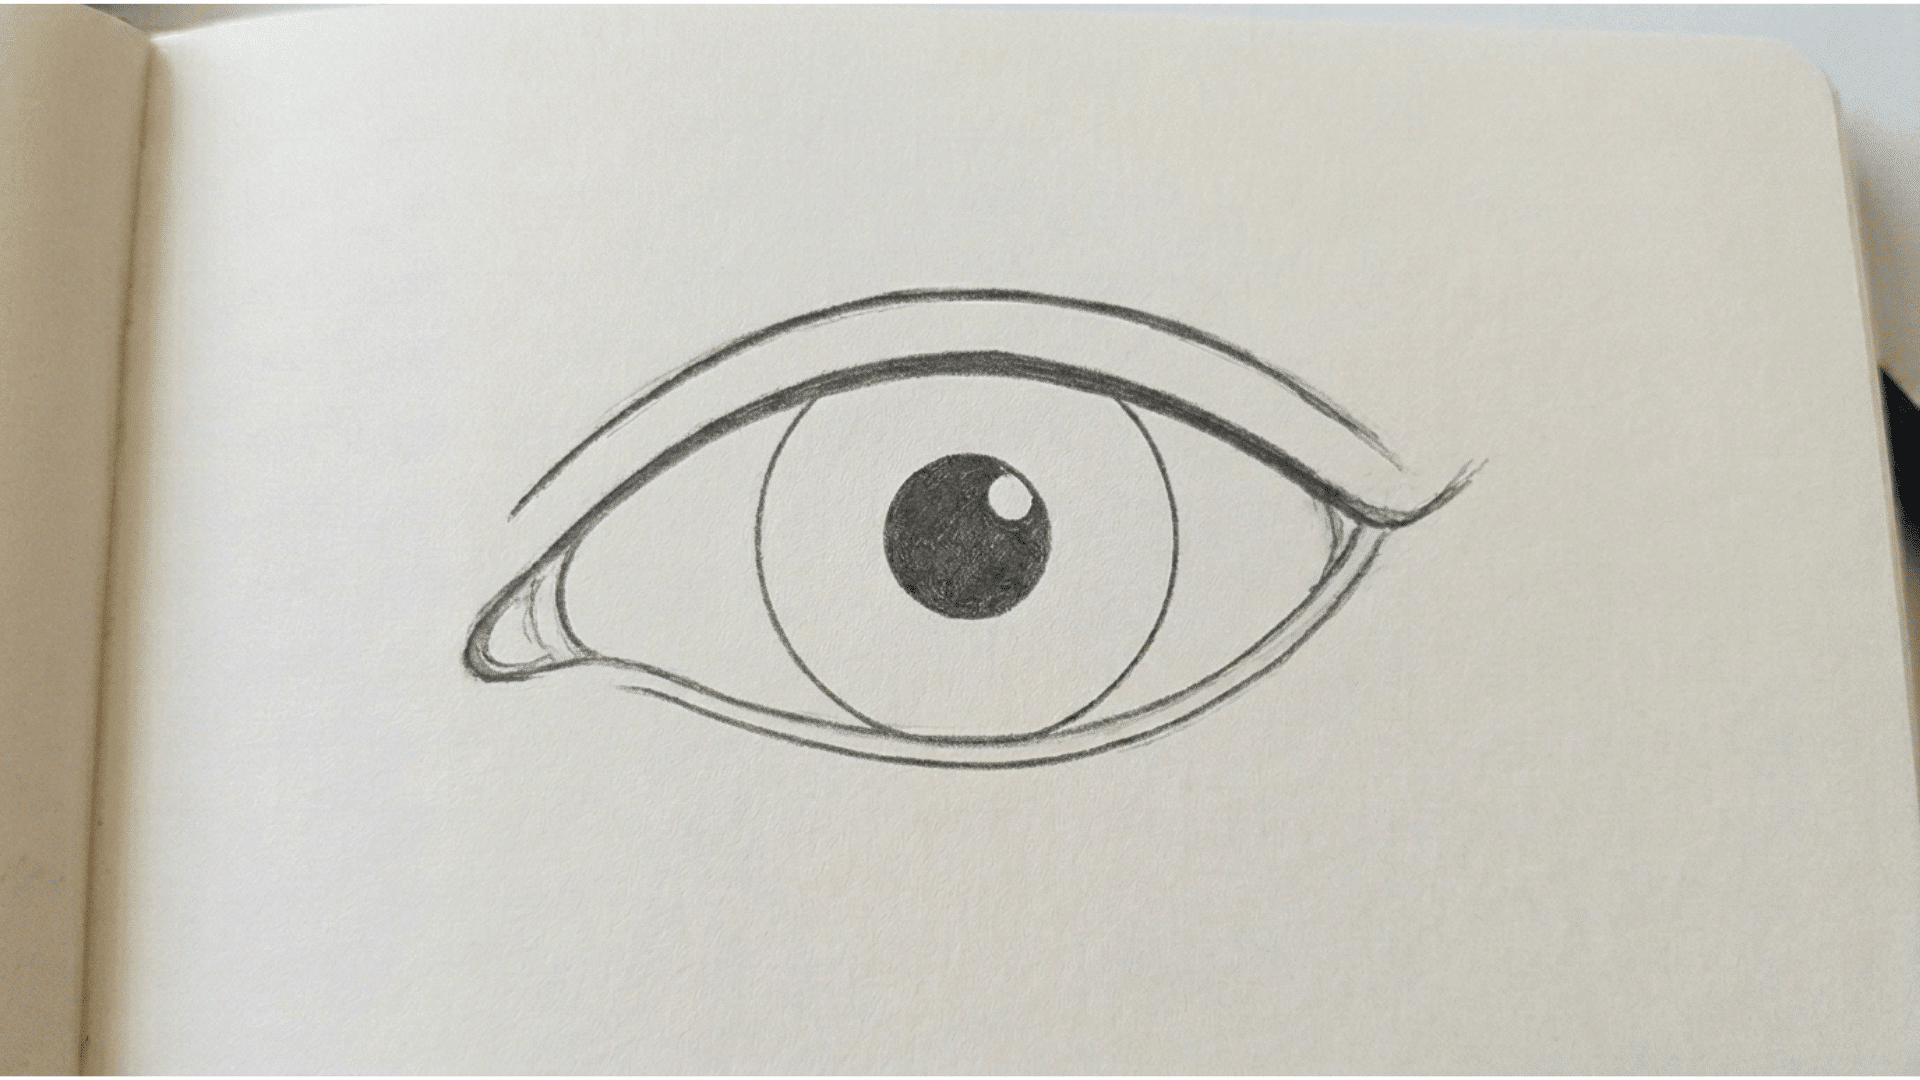
Draw a small C shape at the inner corner for the tear duct. Add a soft V shape at the outer corner. These two small details make a big difference in how finished and realistic the eye looks.
Keep the lines light at first so you can adjust the shape if needed. Slightly darken the outer corner to give the eye more depth and structure.
Step 5: Draw the Eyelashes
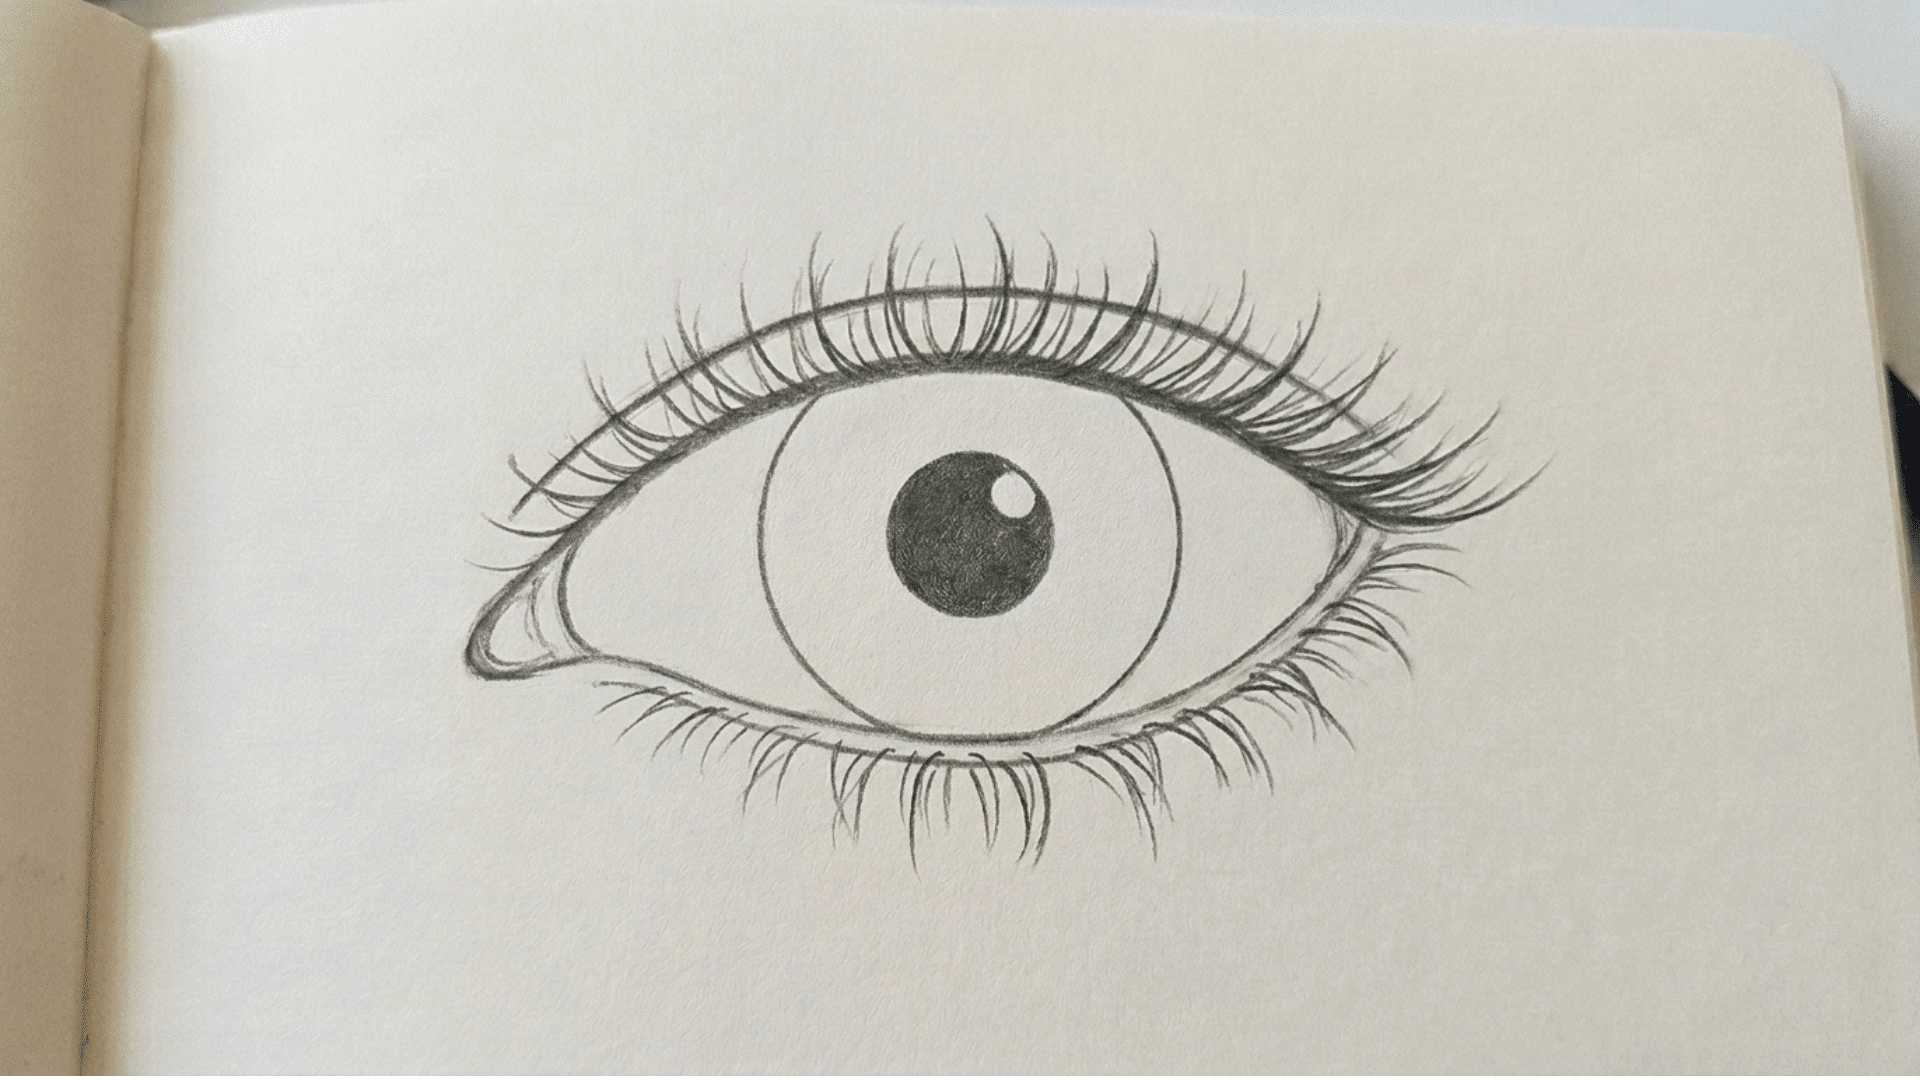
Add curved lines along the upper lid. Keep them thicker at the base and thinner at the tips. Lower lashes are shorter. Vary the direction slightly so they do not all look the same.
Step 6: Add Shading and Highlights
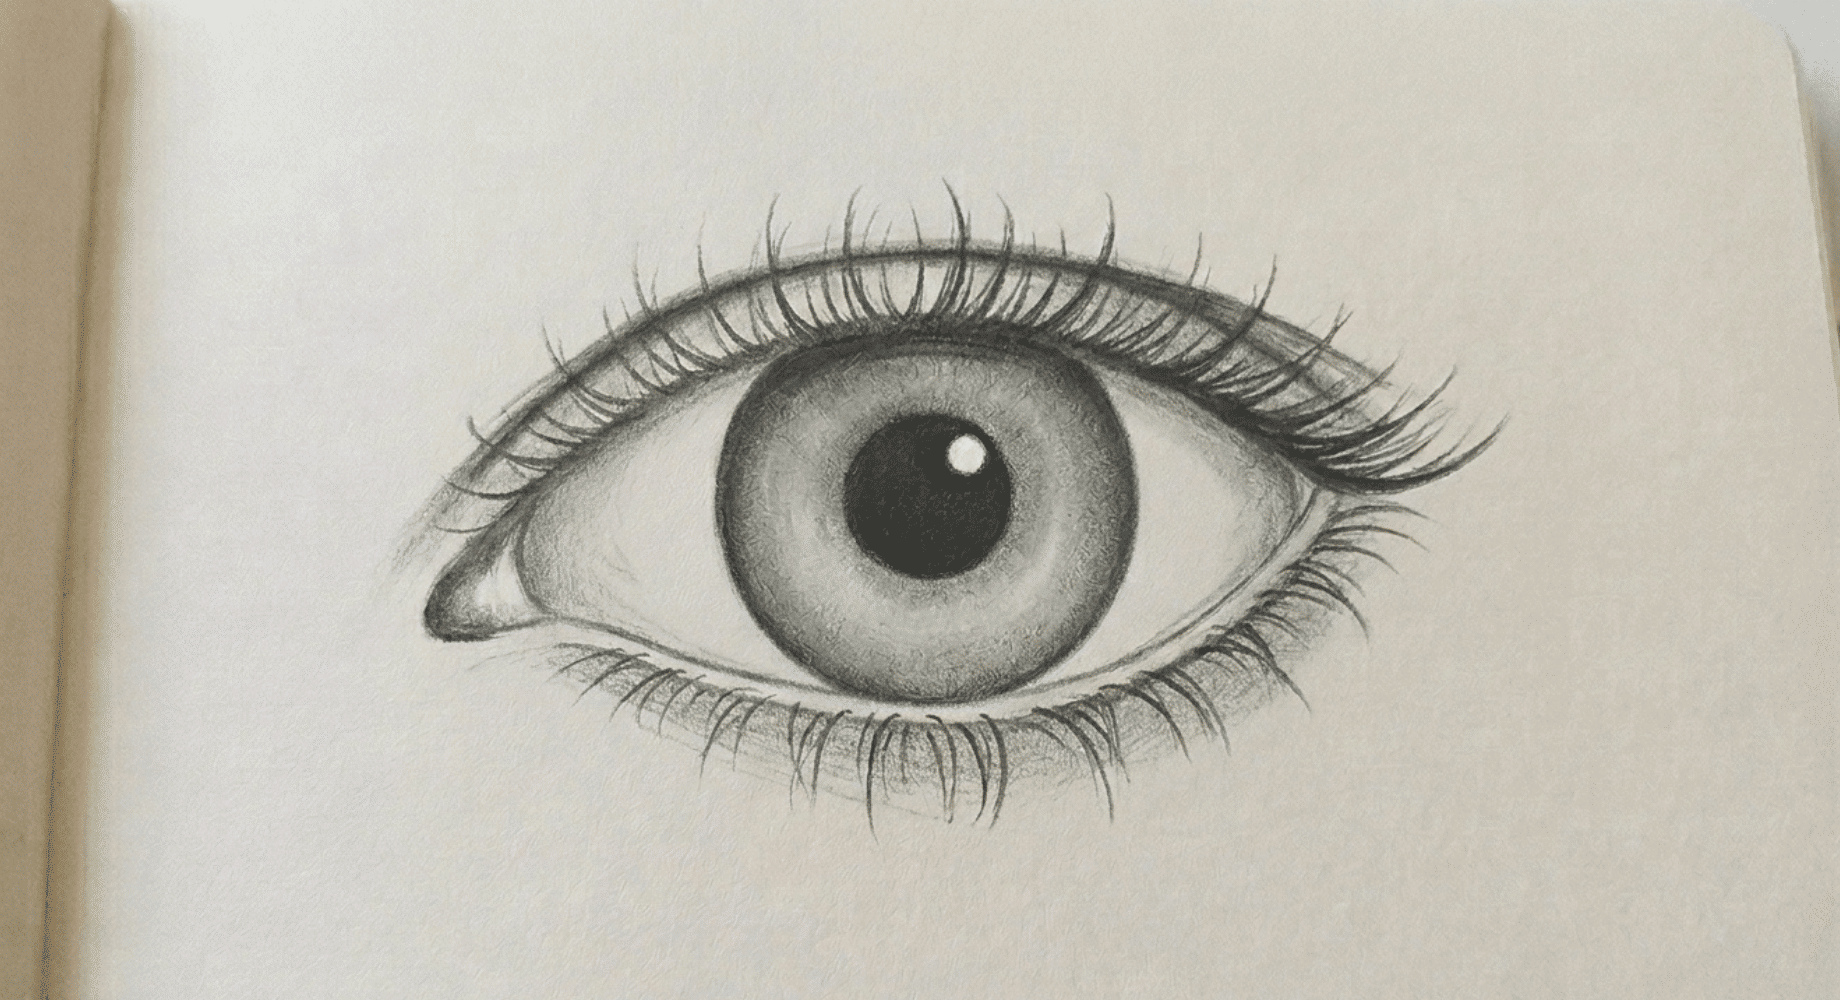
Fill in the pupil. Shade the iris from the outside in. Leave a small white spot for the highlight. Leave a small white spot for the highlight to make the eye look alive and three-dimensional.
Different Types of Eyes to Try
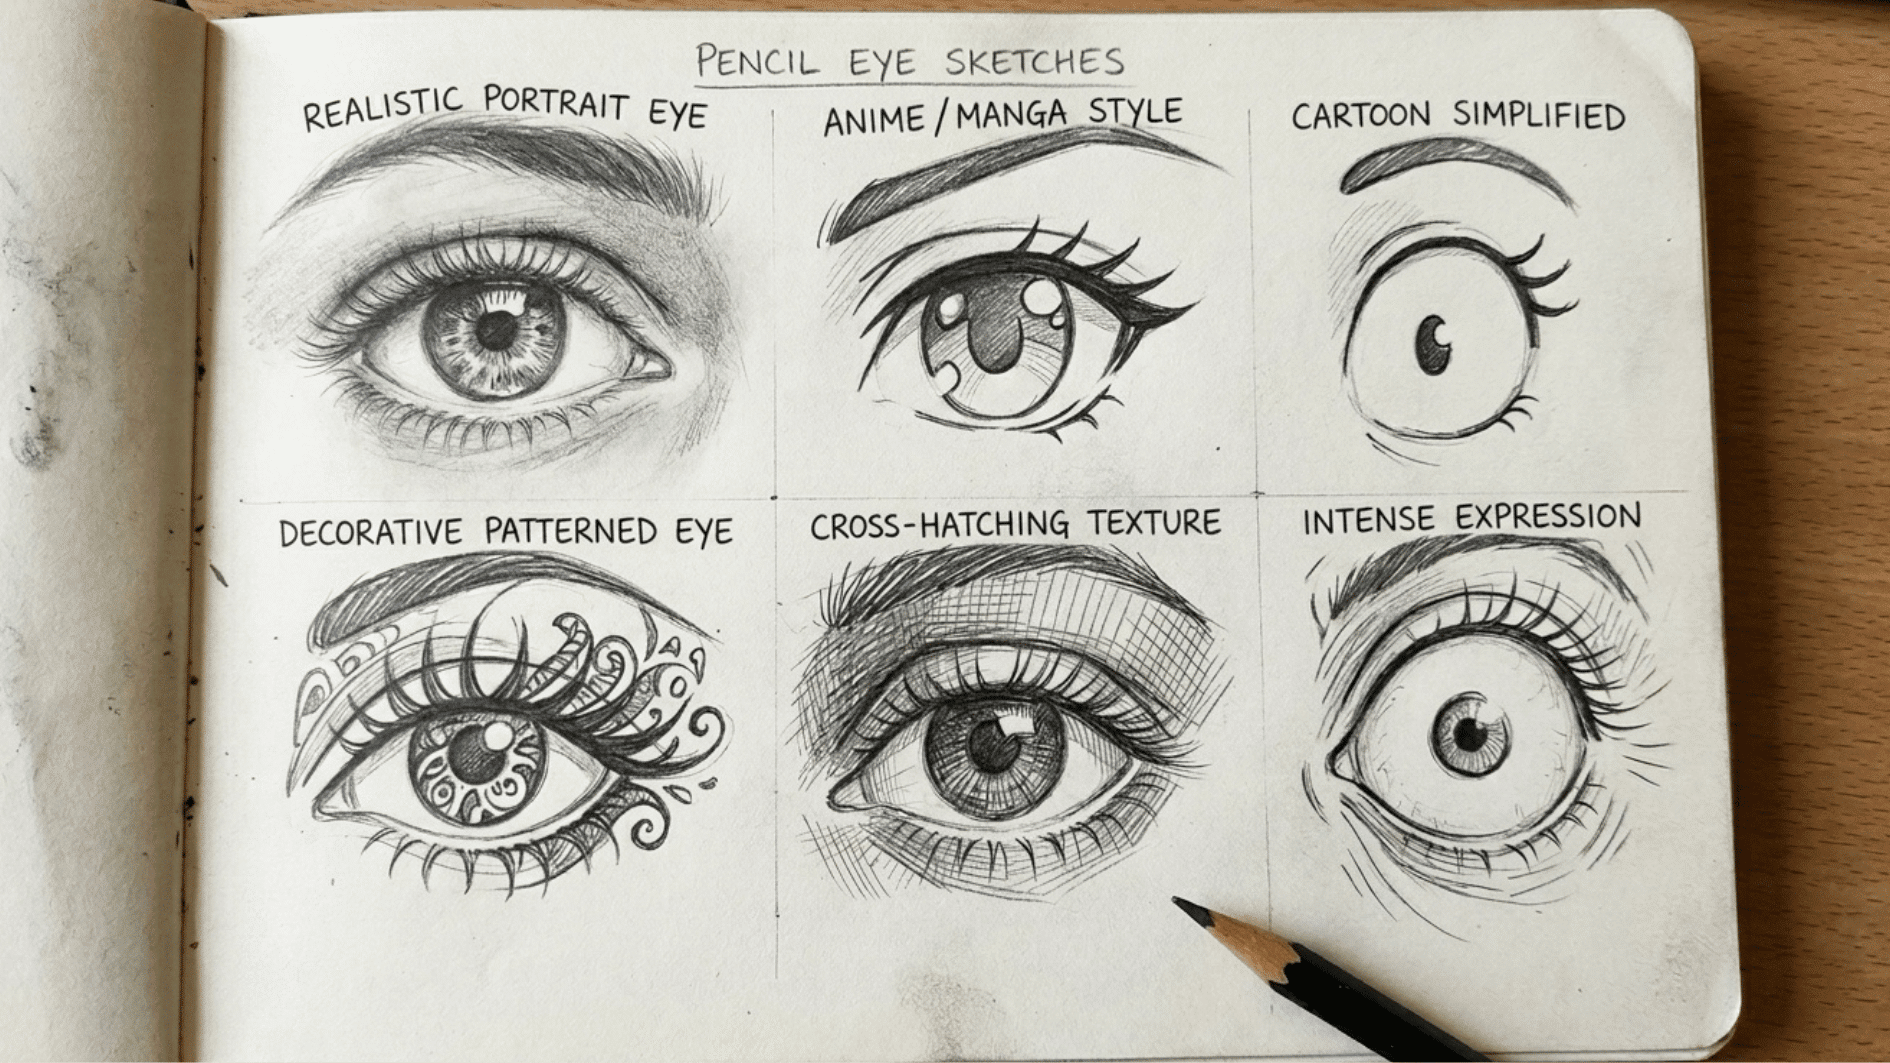
Trying different eye styles is one of the best ways to improve your drawing skills and develop your own artistic style. Each type teaches something unique, from realistic shading to expressive lines and creative design.
| Eye Style | Key Characteristics | Best For |
|---|---|---|
| Realistic Portrait Eye | Detailed iris, natural eyelashes, smooth shading, and lifelike proportions. | Portraits, realism, and figure drawing. |
| Anime/Manga Style Eye | Large expressive eye, bold outlines, oversized highlights, and simplified details. | Anime, manga, and stylized character art. |
| Cartoon Simplified Eye | Basic shapes with minimal detail and exaggerated expressions. | Cartoons, comics, and beginner illustrations. |
| Decorative Patterned Eye | Filled with ornamental lines, swirls, and creative patterns around the iris. | Zentangle art, doodles, and decorative illustrations. |
| Cross-Hatching Texture Eye | Built with layered cross-hatching instead of smooth blending to create depth. | Pencil sketching and pen-and-ink practice. |
| Intense Expression Eye | Wide-open eyes with raised brows, strong lines, and dramatic shading to convey emotion. | Expressive portraits, storytelling, and character design. |
Tips for Drawing More Realistic Eyes
Once you have the basics down, these tips will help take your eye drawing to the next level:
- Use light pressure first: Start every sketch lightly. It is much easier to darken lines later than to erase heavy ones.
- Shade the iris from the outside in: The outer edge of the iris is always darker. Gradually lighten toward the center for a natural look.
- Add shadow just below the upper lid: This is where the eyelid casts a shadow on the eyeball. It adds depth without overshadowing the entire eye.
- Vary your lash strokes: Real lashes are not uniform. Mix longer and shorter strokes, and slightly vary the direction of each.
- Step back and check proportions: Looking at your drawing from a distance helps you spot anything that looks off before you add more detail.
Conclusion
You now have a solid understanding of how to draw an eye, the right tools to get started, and a clear set of steps to follow every time you sit down to draw.
You also know what mistakes to watch out for and how to add shading that makes your eyes look real and three-dimensional. Drawing a convincing eye takes practice, but you are already closer than you think.
Grab your sketchbook, pick up your pencil, and try the steps from this blog today. Start with one eye, take it slow, and notice how much better it looks when you follow each stage carefully.
Frequently Asked Questions
Can I draw an eye without any prior drawing experience?
Yes, as long as you follow each step slowly and practice the basic shapes first.
How Long Does it take to Get Good at Drawing Eyes?
Most beginners see clear improvement within 2 to 4 weeks of daily practice.
Should I Draw Both Eyes at The Same Time When Practicing?
No, practice one eye at a time until you are comfortable, then move to pairs.
Can I Use The Same Steps to Draw Eyes in Different Styles, Like Cartoon or Anime?
Yes, the basic structure stays the same; only the proportions and details change per style.
What Is the Best Way to Practice Eyeball Drawing Consistently?
Fill a sketchbook page with eyes every day, focusing on one specific part each session.