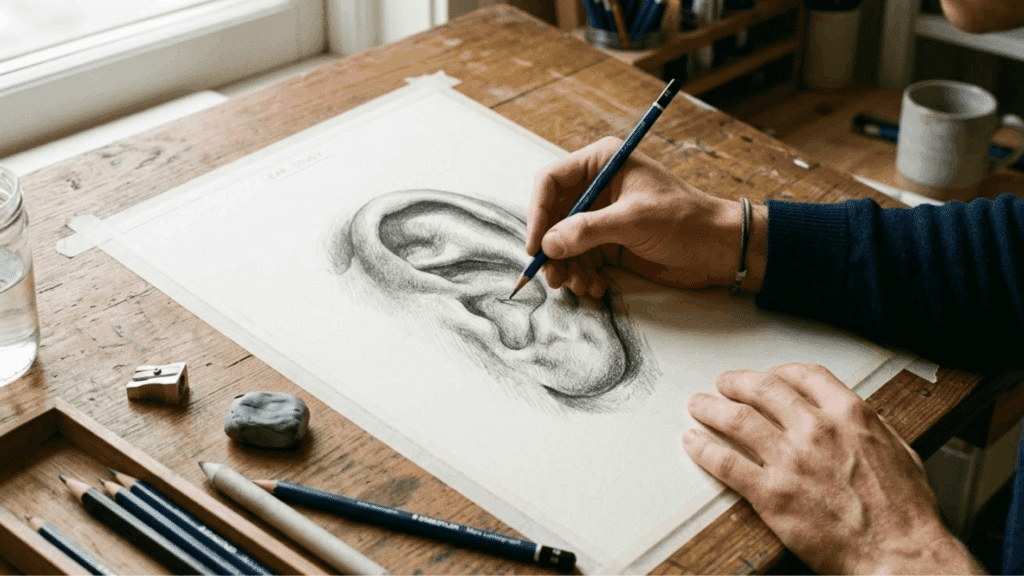
Ears are one of those things that look simple until you actually try to draw them. Most beginners either skip them entirely or end up with something that looks more like a potato than a body part.
The truth is, simple ear drawing comes down to knowing the structure. Once you break the ear down into basic shapes, it stops being intimidating.
The same logic applies to any core drawing fundamentals you’re building, if that’s an eye, a hand, or an ear.
In this blog, you will find step-by-step instructions, shape breakdowns, and visual references that show you exactly how to draw ears with more confidence.
Understanding the Basic Structure of an Ear
Before you learn how to draw ears, you need to know what you are actually looking at. The ear is made up of specific parts that each contribute to its appearance.
- The Helix: The outer rim that curves from the top and wraps down to the lobe. This is usually the first shape you map out.
- The Antihelix: Sits just inside the helix with a Y-shaped fork near the top. It gives the inner ear its rigid look.
- The Tragus and Antitragus: Small flaps on either side of the ear canal. Most beginners skip these, which is why ear drawings end up looking flat.
- The Concha: The bowl-shaped hollow in the center. It is the deepest part, adding depth to your drawing.
- The Earlobe: Sits at the bottom and can be attached or detached depending on the person.
- The Ear Canal: A small oval opening inside the concha. Including it makes the ear look more convincing.
If you want to see how these proportions hold up in context, sketching a full portrait is a good way to check that your ear placement lines up with the rest of the head.
Ear Drawing Simple: Step-by-Step
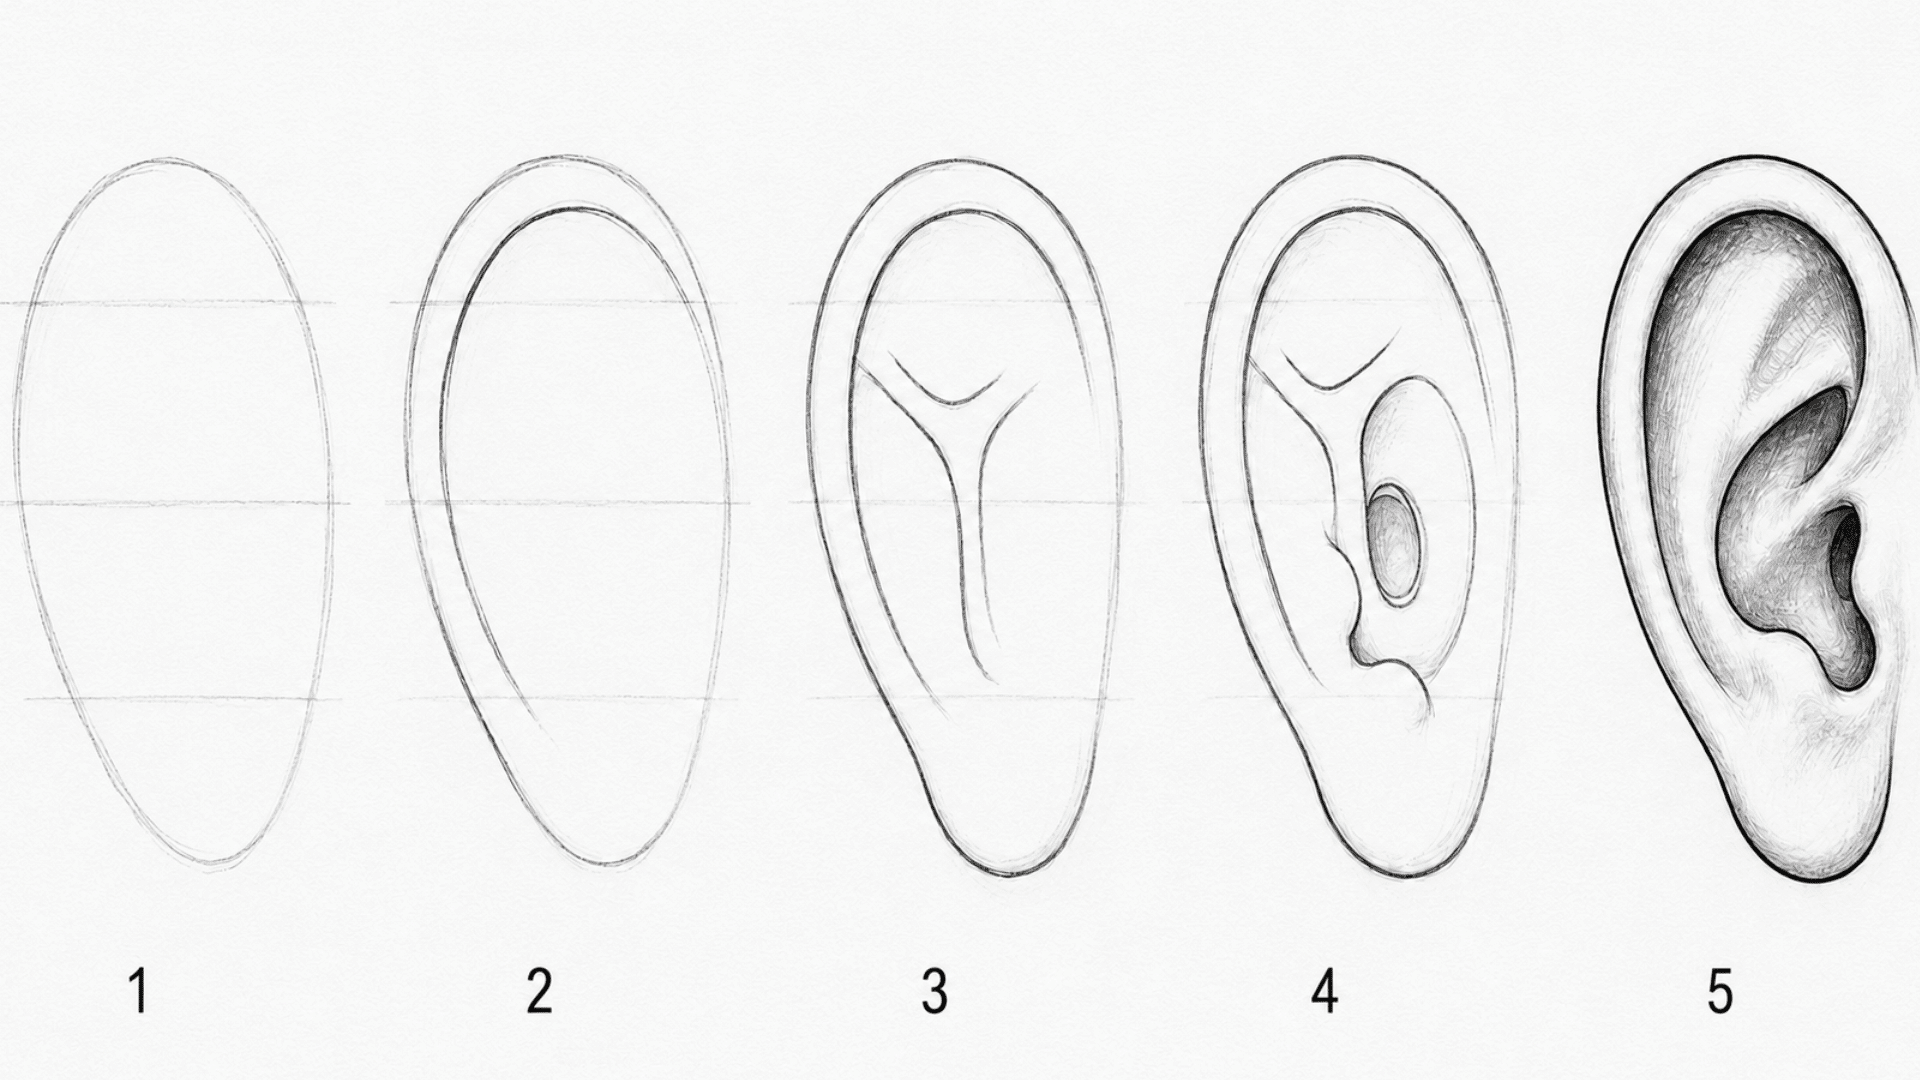
A simple four-step method for drawing an ear from scratch, from the basic C-shape outline to inking the final clean structure.
Step 1: Set Your Guides and Block a Rough Oval
Before any ear shape goes down, sketch light placement guides: a vertical line for where the ear sits, and two horizontal marks, one level with the eyebrow and one level with the base of the nose. Inside these guides, draw a loose, tilted oval.
Tip: Don’t aim for precision here; the oval is just a placeholder for size and angle, not part of the final ear. Skipping it is the main reason beginner ears end up too narrow or oddly stretched.
Step 2: Draw the Outer Shape (Helix)
Trace a C-shape along the outer edge of your oval. This curve becomes the helix, the rolled rim that runs from the top of the ear down to the lobe. Let the line follow the oval’s tilt instead of forcing it straight.
Keep the curve soft and slightly uneven; a perfectly smooth C often looks stiff. This single shape defines the ear’s whole silhouette, so take an extra pass before moving on.
Step 3: Add the Earlobe and Antihelix
At the base of your C-shape, curve the line inward and let it round out into the earlobe, soft and never pointed. This small curve makes a big difference in how natural the ear looks.
Next, inside the outer shape, sketch a smaller Y-shaped curve for the antihelix, running roughly parallel to the helix. This inner fork gives the ear its structure and stops it from looking hollow.
Step 4: Mark the Tragus, Antitragus, and Concha
Add a small flap on the inner left side for the tragus, then a small bump directly across from it for the antitragus. These tiny shapes are easy to skip, but they’re what stop an ear from looking flat.
Between them, draw an oval for the concha, the deepest hollow of the ear, and a smaller oval inside it for the ear canal. This adds real depth to the drawing.
Step 5: Refine and Ink the Outline
Go over your pencil sketch with a fine liner, carefully following every shape you’ve built: the helix, lobe, antihelix, tragus, and concha. Take your time on the curves; this is what turns a rough sketch into a clean drawing.
Tip: Once the ink is fully dry, erase all your guidelines and pencil marks. What’s left is a finished, confident ear drawing, ready for shading or color.
Different Techniques for Drawing Ears
Each technique focuses on a different part of the drawing process, from building the basic outline to adding realistic depth and detail.
| Technique | How It Works | Best For |
|---|---|---|
| Basic shape method | Builds the ear from a C-shape, oval, and inner Y-shaped curve | Beginners learning structure |
| Contour drawing | Follows the outer and inner edges with slow, controlled lines | Improving line accuracy |
| Grid method | Divides the reference and drawing area into matching sections | Accurate proportions |
| Negative space method | Focuses on the hollows and spaces between the ear folds | Understanding inner shapes |
| Light and shadow method | Uses highlights and shadows to form the ear without heavy outlines | Realistic drawings |
| Tracing study | Traces ear anatomy from a reference before redrawing it without help | Building muscle memory |
How to Draw Ears for Different Art Styles
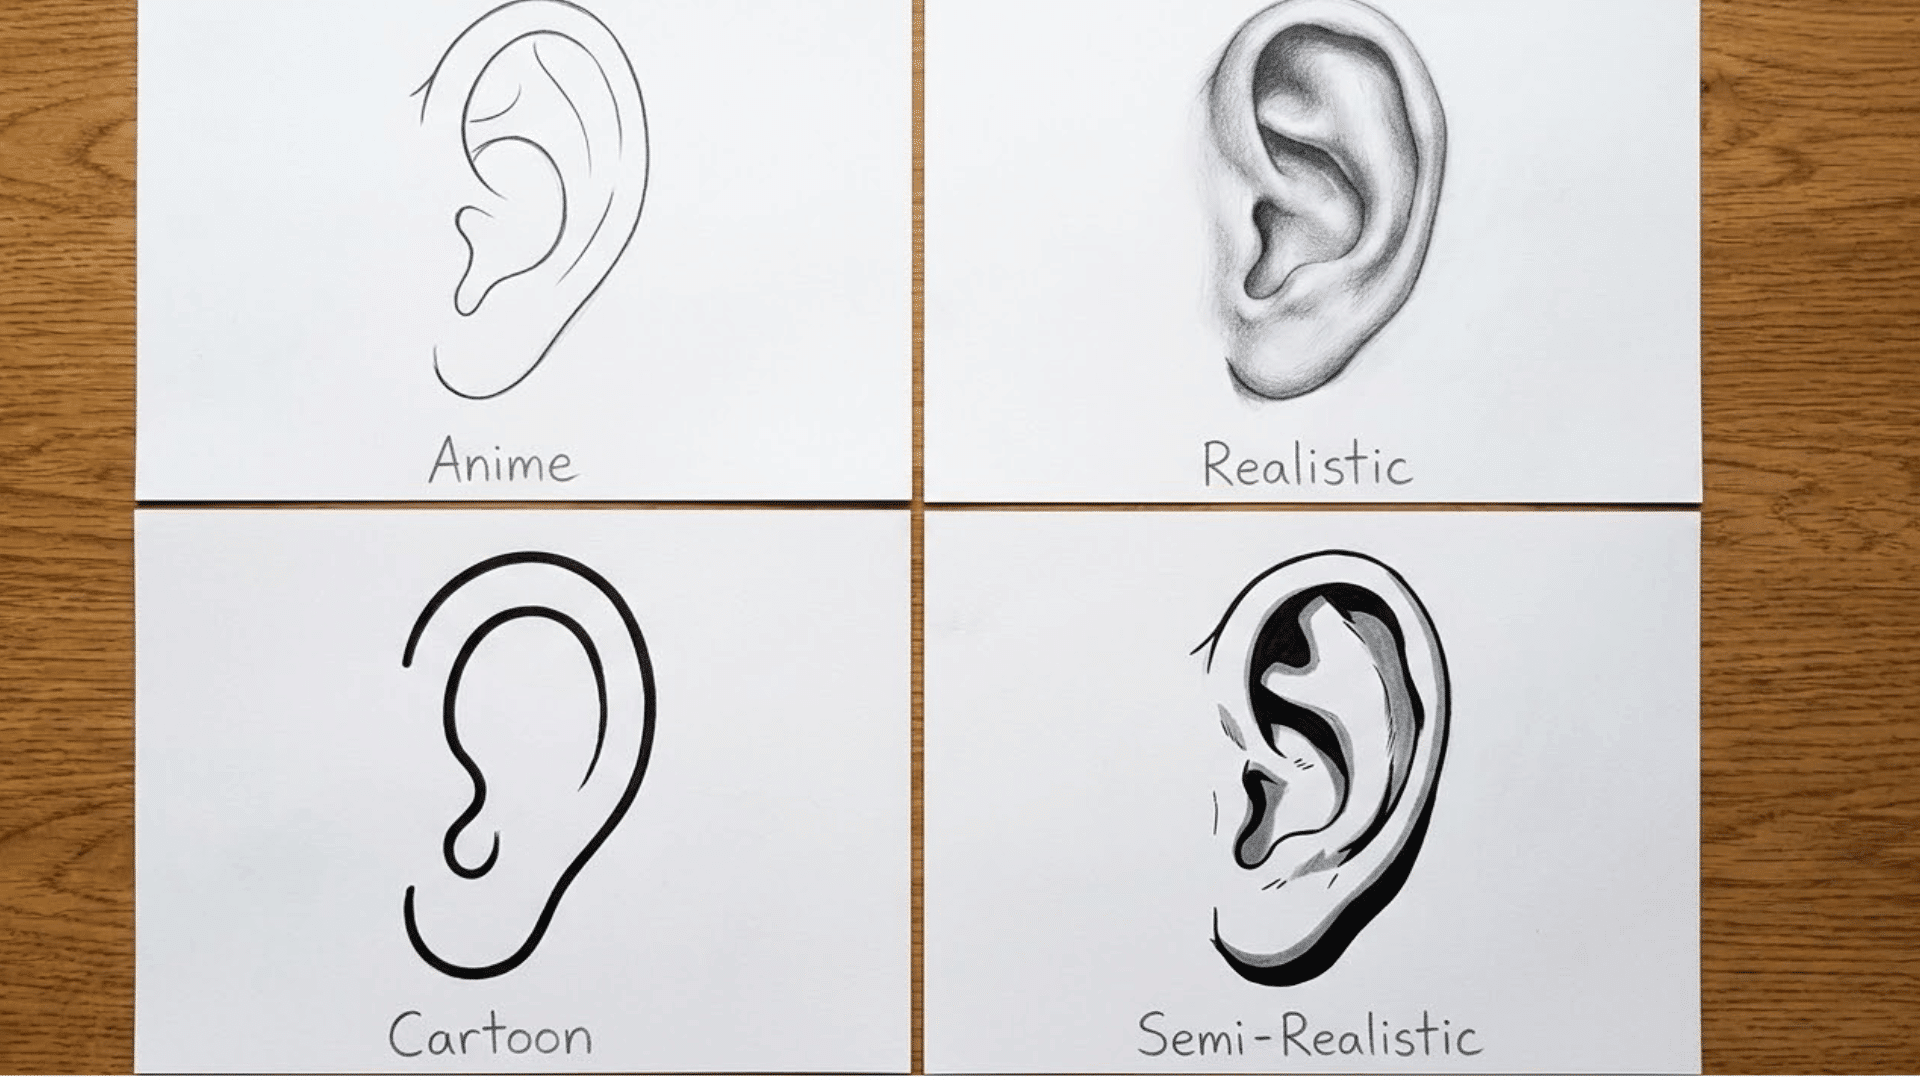
Ear shape changes a lot depending on the style you’re drawing in. Here’s how to adjust the same basic structure across four common styles.
Anime and Manga Style
Anime ears are simplified almost to the point of abstraction. Most artists skip the tragus, antitragus, and inner folds entirely, leaving just the outer helix and a simple curved line for the antihelix. The lobe is often exaggerated slightly larger or smaller depending on the character’s age or design.
Realistic Style
This is the full structure covered earlier: helix, antihelix, tragus, antitragus, concha, and ear canal, all rendered with accurate shading. The concha needs real depth here, since realistic art relies on shadow to sell the illusion of a 3D hollow.
Cartoon Style
Cartoon ears lean into simple, rounded shapes, often just a single curved line or a basic oval with a small notch for the lobe. Detail is sacrificed for readability. At a glance, the ear should register as “ear” without needing a second look.
Semi-Realistic or Comic Book Style
This style keeps the helix, antihelix, and lobe fairly accurate but drops the smaller details like the tragus and antitragus, or reduces them to a single line. Shading is bolder and more graphic than realistic style, using hard shadow shapes instead of gradients.
If you want to see how this same stylization logic plays out across a whole face, these stylized face drawings walk through similar proportion shifts.
Common Ear Drawing Mistakes and How to Avoid Them
Drawing ears gets much easier once you know what to stop doing. Here are the most common mistakes and how to fix them.
- Skipping the Basic Structure: Start with the C-shape outline before adding details.
- Making the Ear Too Symmetrical: Real ears aren’t perfectly even, so draw from reference.
- Ignoring the Tragus and Antitragus: Skipping these small shapes makes the ear look unfinished.
- Flat Shading Around the Concha: This deepest part needs strong shadow, or the ear looks flat.
- Drawing the Earlobe Too Sharp: The lobe should curve softly, not end in a point.
Conclusion
Drawing ears does not have to be the part you dread. You now understand ear structure, have the right materials, a clear step-by-step process, and know the mistakes to avoid before they slow you down.
With the practice ideas covered in this blog, you have a clear path from avoiding ears in your drawings to getting them right with consistency.
The best next step is simple. Pick one practice idea from this blog, grab your sketchbook, and draw one ear today. Progress starts with a single sketch.
If you want to keep the momentum going afterward, these sketchbook practice prompts and more pencil drawing ideas are a natural next stop.
Frequently Asked Questions
Where Exactly Does the Ear Sit on The Face?
The top of the ear lines up with the eyebrow, and the bottom of the ear lines up with the base of the nose.
Does Ear Shape Differ from Person to Person?
Yes, ear shapes vary widely across individuals, which is why using a specific reference gives you a more believable and natural result.
Should I Draw the Ear Before or After the Rest of The Face?
Most artists sketch the overall facial structure first and place the ear last to ensure the proportions and alignment stay accurate.
Can I Use the Same Simple Ear Drawing Steps for Both Left and Right Ears?
Yes, the structure is the same on both sides. You simply mirror the shapes when switching from one ear to the other.