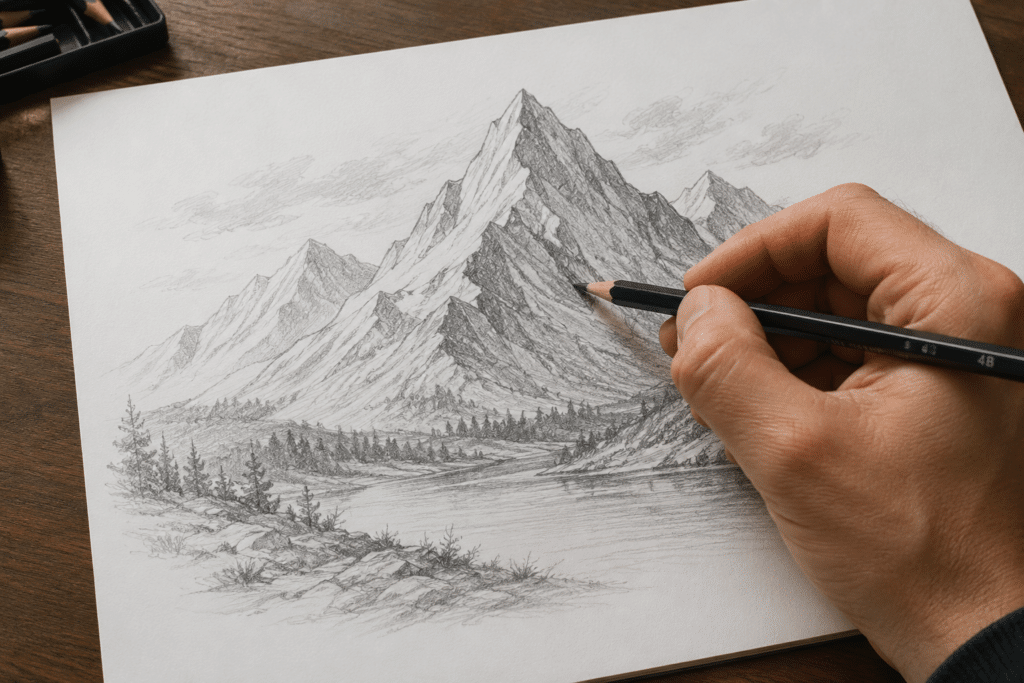
Drawing mountains might seem complicated because of the rugged shapes and textures; however, it all starts with a few simple lines.
If you’re a beginner, start with basic shapes and simple shading, and your sketch will quickly begin to take shape.
In this blog, you’ll learn how to draw mountains with an easy, step-by-step approach, learn about different mountain styles you can try, and find simple tips to make your drawings look more realistic.
Why Mountain Drawing Is Great for Beginners
Mountain drawing is a great place to start because it uses simple lines, triangles, and natural shapes instead of detailed features.
You don’t have to worry about perfect symmetry, making it easier to practice without feeling frustrated. As you draw, you’ll learn basic skills like perspective, shading, and texture that apply to many other landscapes.
Mountains also give you plenty of room to experiment with different styles, from simple sketches to realistic scenes.
With regular practice, you’ll become more confident while creating impressive drawings with just a few simple techniques.
How to Draw Mountains: Step-By-Step Process
This step-by-step process breaks a simple mountain drawing into easy stages, making it simple for beginners to follow. You can always add more detail later, but it’s much harder to fix a rushed sketch.
Step 1: Sketch the Main Mountain Shape
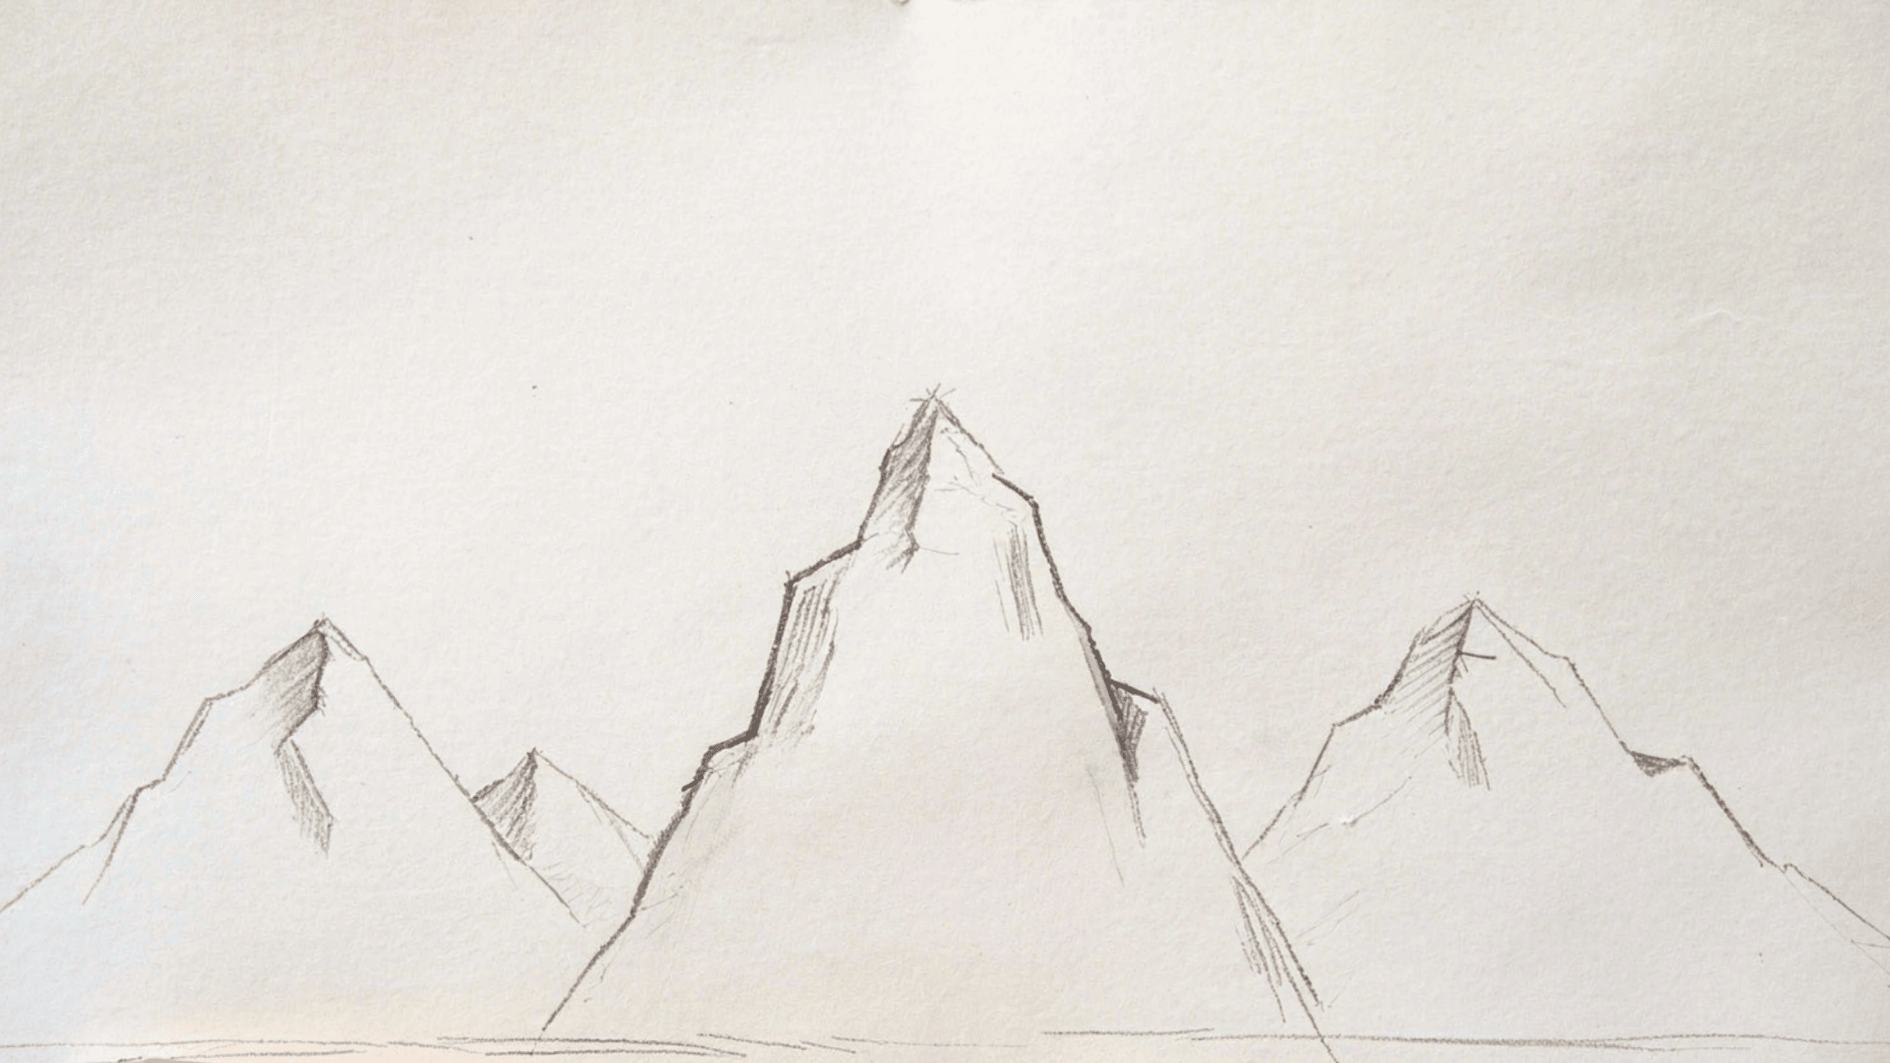
Start with light pencil strokes. Draw a large, uneven triangle for the main mountain, but don’t make the sides perfectly straight, and let the edges bend slightly to create a natural look.
Keep your lines light so they’re easy to erase if you need to adjust the shape.
Step 2: Add Smaller Peaks and Overlapping Ridges
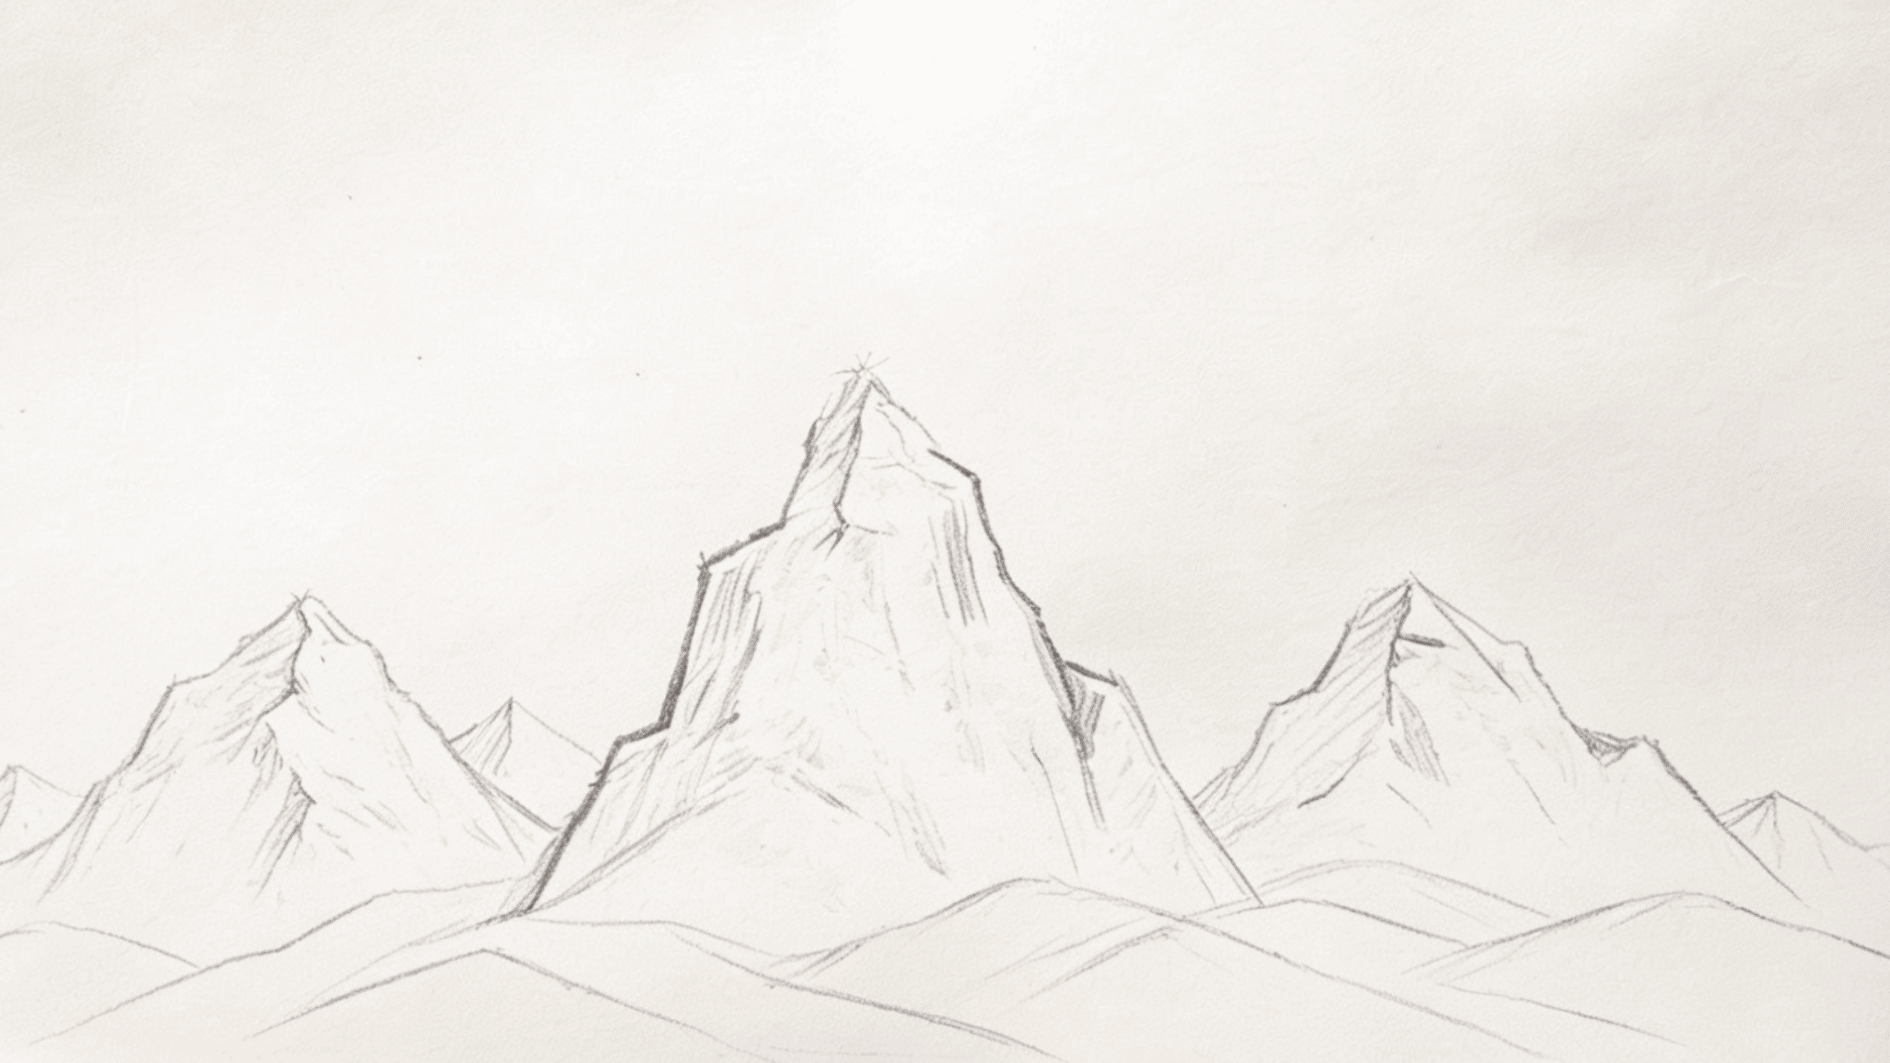
Mountains rarely stand alone! Draw smaller mountains behind and beside your main peak, and let some peaks overlap others.
This simple layering creates depth and makes your drawing feel larger; therefore, keep the mountains in the background slightly smaller than those in the front.
Step 3: Define the Slopes and Rock Edges
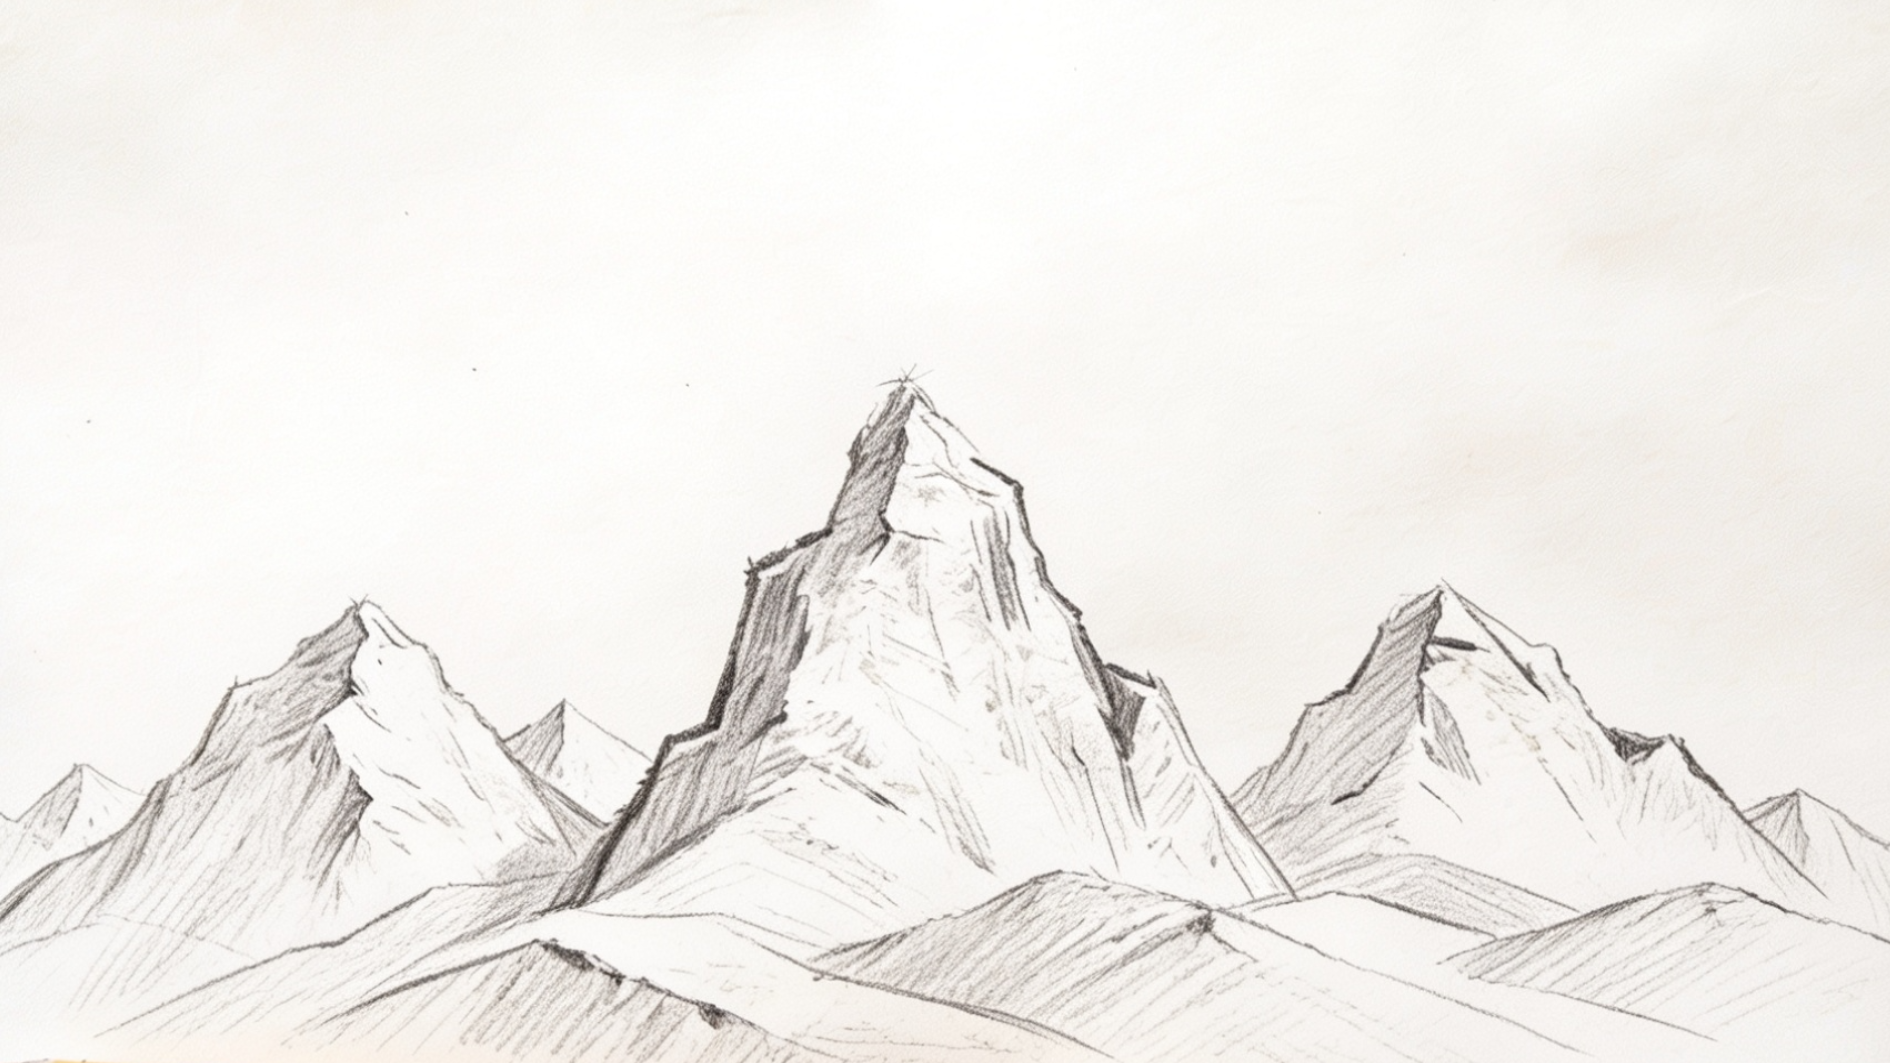
Choose where the highest point of your mountain will be, like from the peak, and draw a few uneven lines that flow down the sides of the mountain.
These lines represent ridges and help define the mountain’s structure. Add small breaks, angles, and rough edges instead of long straight lines, and avoid adding too many lines at once
Step 4: Draw Texture and Surface Details
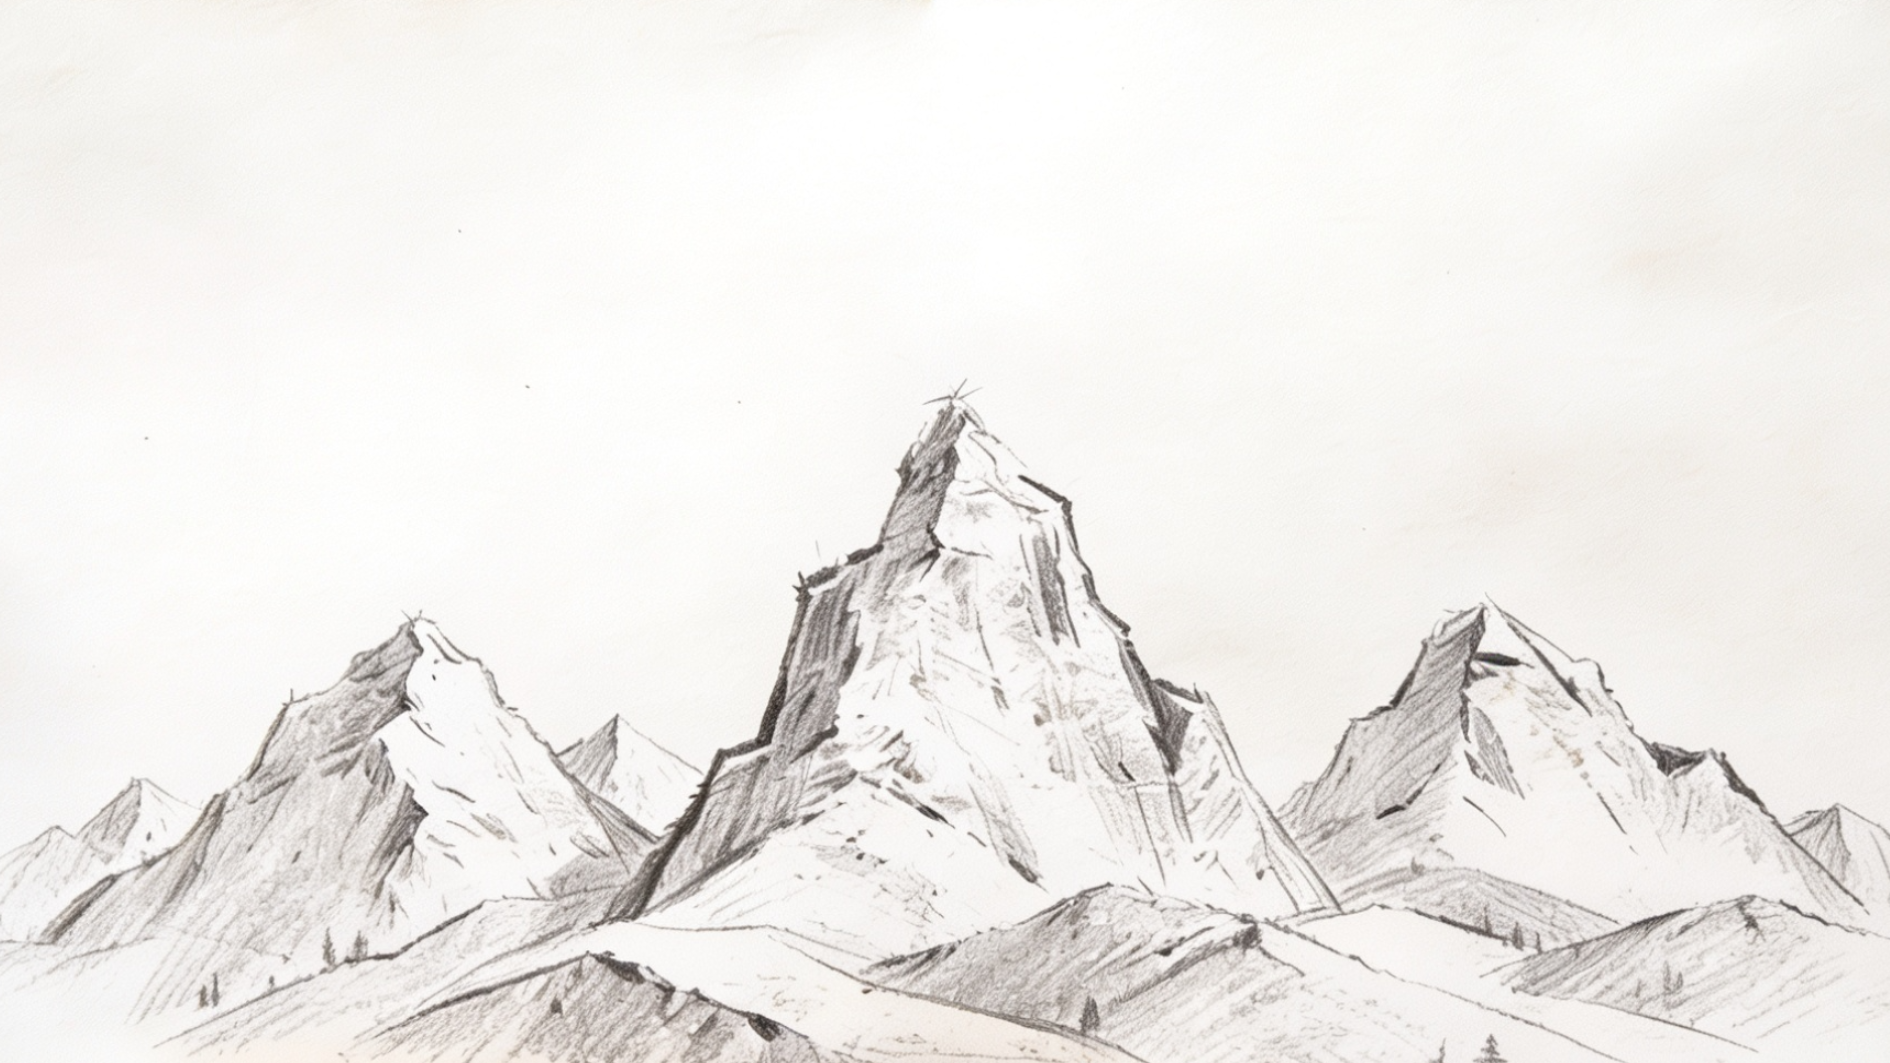
Now it’s time to make the mountain look rocky; for that, use short, broken pencil strokes to suggest cracks, rock faces, and rough surfaces.
Vary the length and direction of your marks instead of repeating the same pattern. Also, you can add a few scattered trees near the base to show the scale of the mountain.
Step 5: Add Light, Shadows, and Depth
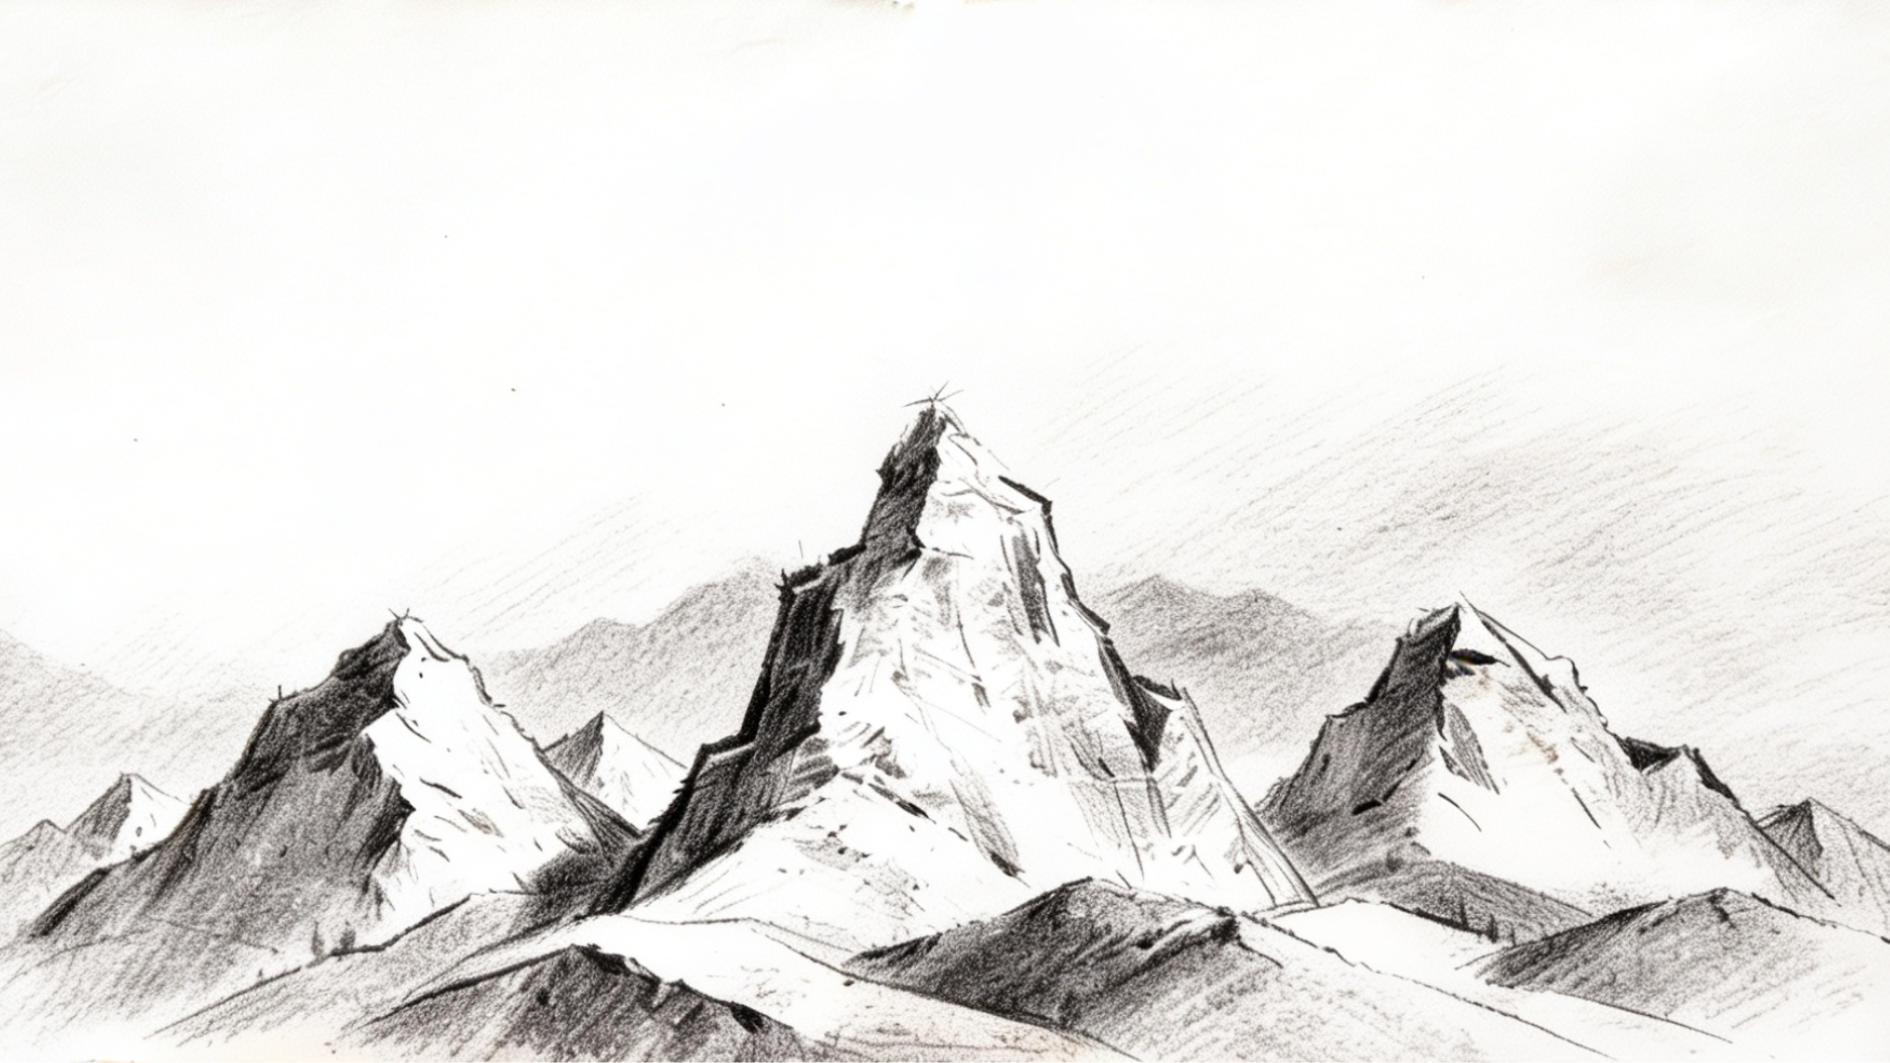
Decide where your light source is coming from before you begin shading. For example, if the light is coming from the left, the left side of the mountain will stay lighter while the right side becomes darker.
Shade gradually instead of pressing hard with your pencil, and build up darker tones in layers with a 2B or 4B pencil. Then blend lightly with a tissue or blending stump if you want a softer, more realistic finish.
Step 6: Finish with Trees, Snow, or A Background
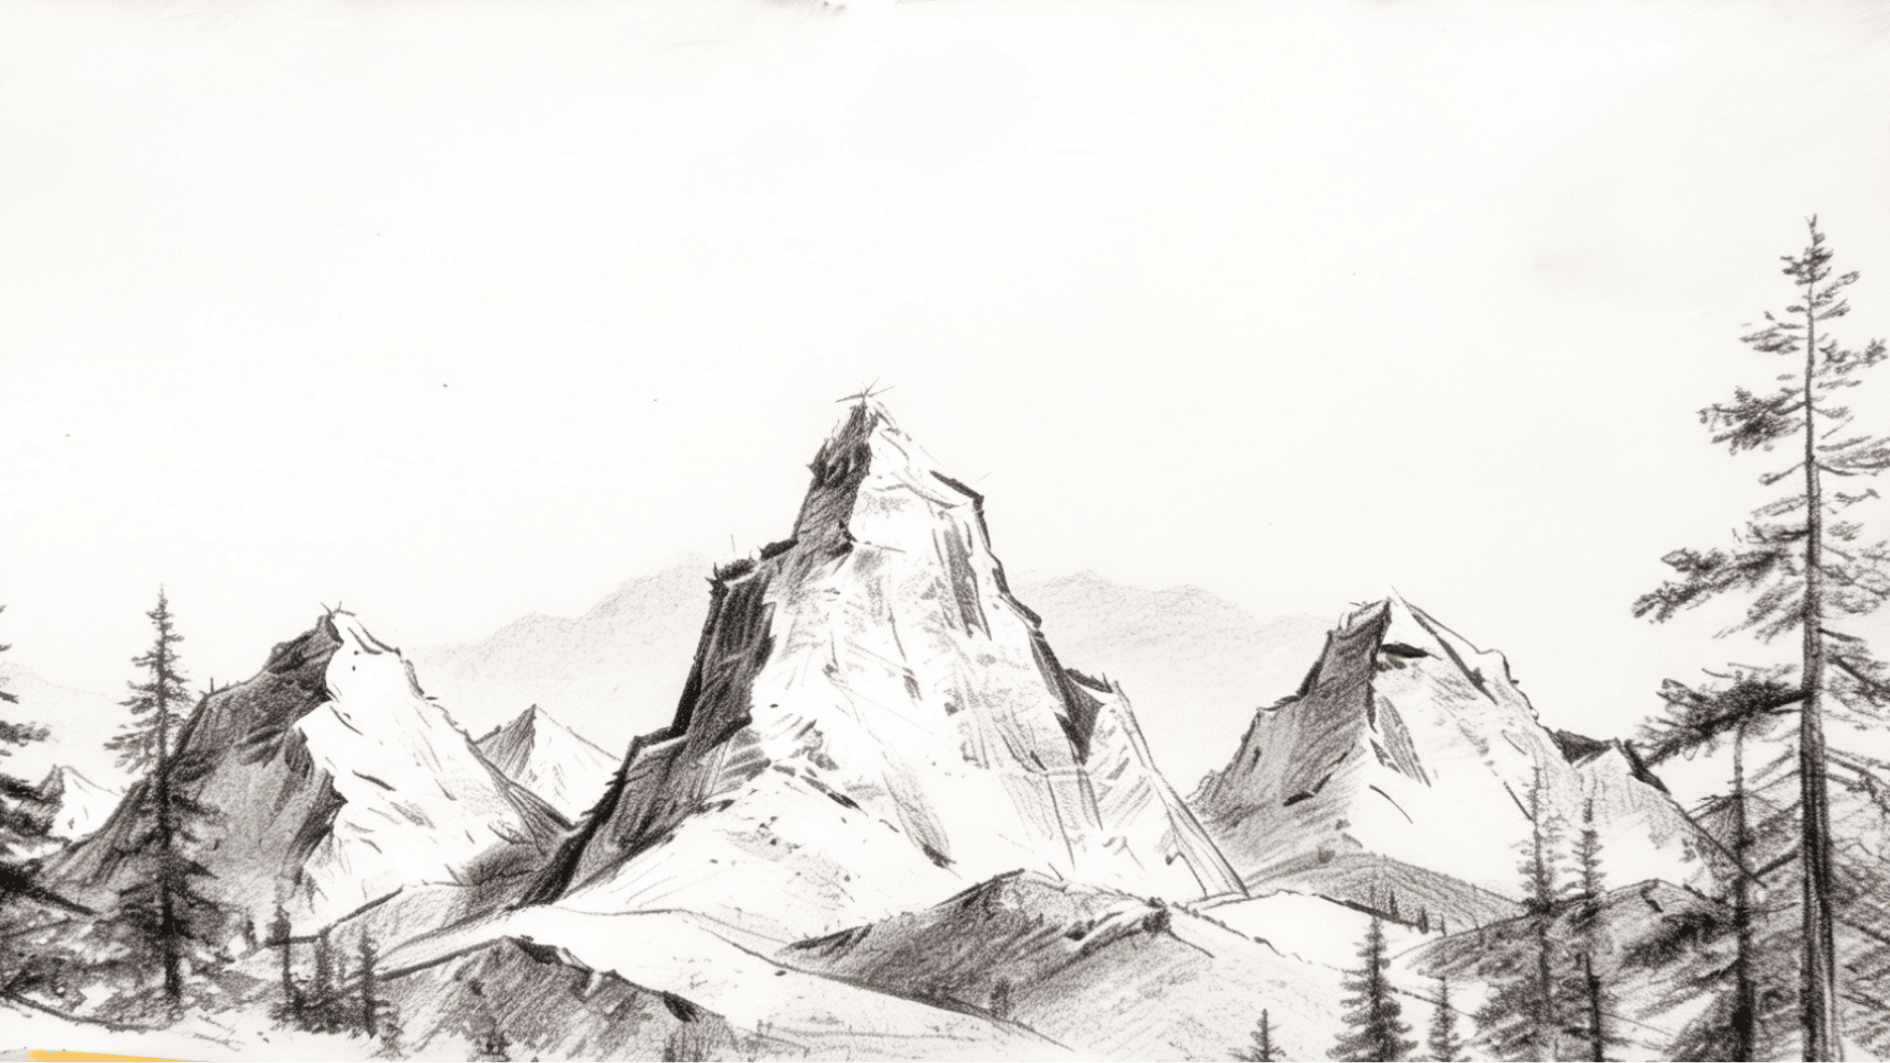
The final details bring the entire drawing together, adding pine trees, small bushes, or grassy hills around the base of the mountains.
Draw a few clouds, birds, or a rising sun if you’d like to create a complete landscape, and finally, erase any unnecessary construction lines and darken the outlines you want to stand out.
Essential Techniques for Drawing Lifelike Mountains
Once you’ve mastered the basic steps, refer to these techniques to help you refine your simple mountain drawing for greater depth, texture, shading, and overall realism.
| Technique | How to Do It | Benefit |
|---|---|---|
| Layer Mountains | Draw larger peaks in front and smaller ones behind. | Creates depth and perspective. |
| Leave Paper Untouched for Highlights | Skip shading on the lit edges of ridges instead of erasing after the fact. | Keeps highlights crisp and avoids muddy, over-blended peaks. |
| Build Texture with Short Strokes | Add small, uneven pencil strokes for rocks. | Gives mountains a natural rocky appearance. |
| Fade Distant Mountains | Use lighter shading and fewer details in the background. | Creates a realistic sense of distance. |
Different Mountain Styles You Can Draw
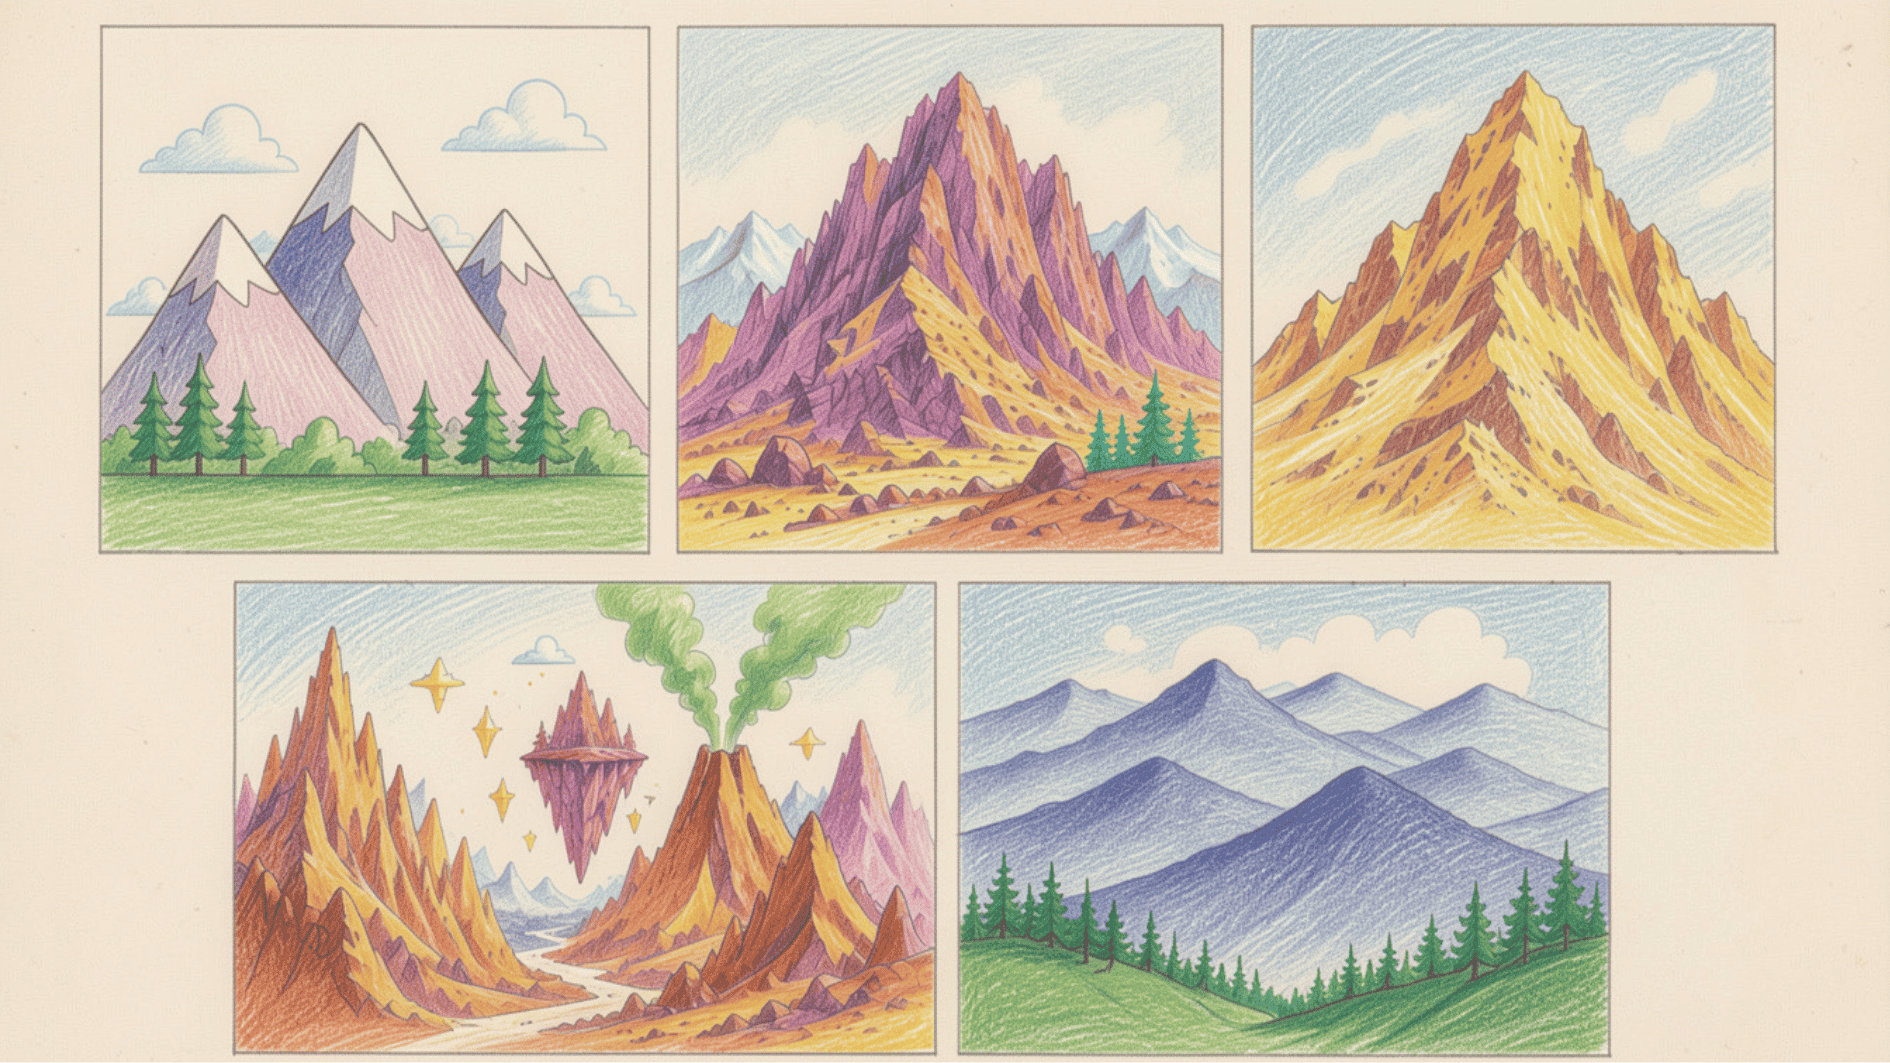
There’s always space for more creativity, so once you’ve learned the basics, try different styles to improve your skills and find the one you enjoy most.
1. Simple Cartoon Mountains
Cartoon mountains use bold outlines and basic shapes. They usually have smooth slopes, high peaks, and minimal texture, making them perfect for beginner or children’s illustrations.
2. Realistic Rocky Mountains
Realistic mountains focus on natural rock formations, uneven ridges, and detailed shading. Instead of drawing every crack, suggest texture with short, varied pencil strokes.
Use different pencil pressures to create light and dark areas that give the mountain depth.
3. Snow-Capped Mountains
Snow-covered mountains are easy to recognize because their peaks remain bright while the lower areas show exposed rock.
Leave parts of the paper white to represent snow instead of shading every surface, and add shadows beneath the snowy sections to make them stand out.
4. Fantasy Mountains
Fantasy mountains let your imagination take over; You can draw floating mountains, crystal peaks, volcanoes, or towering cliffs with unusual shapes.
There’s no right or wrong design, so experiment with dramatic landscapes and creative details.
5. Minimalist Mountain Landscapes
Minimalist mountain drawings rely on clean lines and simple silhouettes rather than detailed textures. A few overlapping peaks with light shading can create an elegant landscape.
This style is great for beginners who want attractive results without spending hours on fine details.
Tips to Make Your Mountain Drawings Look More Realistic
Small improvements can make a big difference in your artwork. As you practice, these tips will help your mountain drawings look more natural and detailed.
- Sketch an uneven “heartbeat line” first so peaks naturally vary in height.
- Break each slope into 3-4 angled segments rather than a single straight line.
- Layer at least 3 mountains, each peak starting partway up the one in front.
- Shade with the pencil’s side using short ½-inch strokes, not smooth circles.
- Use a 4B-6B pencil for close mountains, HB-2B (and lighter pressure) for distant ones.
- Keep 3-5 reference photos open and check them as you draw, not just once at the start.
Final Thoughts
Learning how to draw mountains becomes much easier when you break the process into simple steps. Start with basic shapes, build the peaks, and gradually add texture and shading to create depth.
Don’t worry about making every mountain look the same, since natural landscapes are full of unique shapes and sizes. The more you practice, the better you’ll understand light, perspective, and realistic details.
Keep experimenting with different mountain styles, and each sketch will help improve your drawing skills.
Frequently Asked Questions
Should Beginners Draw Mountains from Photos?
Yes. Reference photos help you understand mountain shapes, shadows, and textures, making it easier to draw realistic landscapes.
What Is the Easiest Mountain to Draw? A simple triangle-shaped mountain is the easiest place to start. Once you are comfortable with the basic shape, you can add ridges, shadows, and extra details to make it look more realistic.
What Colors Should I Use for Mountain Drawings?
Gray, brown, green, and blue are common mountain colors. Add white for snow and soft purple or orange tones if you’re drawing a sunrise or sunset scene.