Have you ever tried folding paper stars, those tiny, enchanting little creations that somehow feel like magic in your hands?”
These little folded gems have brought luck and joy for centuries, and anyone can make them.
Whether you want to fill a wish jar, decorate your space, or give someone a gift they will never forget, this guide walks you through everything you need to know.
The Story Behind Origami Lucky Stars
According to Japanese legend, a girl named Hoshi watched stars fall from the sky and folded paper stars to replace them. That single act of kindness sparked a beautiful tradition.
Also called wishing stars or Chinese lucky stars, these tiny folded gems symbolize luck, love, wishes, and positivity.
Giving someone 100 handfolded stars is said to grant them a wish. Some people even fold 365 stars as a gift, one for every blessing in a year.
Today, lucky stars adorn gift jars, garlands, and jewelry, each one a tiny gesture of care and intention.
What You Need to Make Paper Stars
You only need a few simple supplies to get started. The good news is that most of them are probably already at home waiting for you.
| MATERIAL | DETAILS |
|---|---|
| Paper strips | Lightweight paper works best. Try printer paper, scrapbook paper, magazines, or gift wrap. Avoid cardstock. |
| Strip size | About 11 inches long and half an inch wide is ideal for beginners. |
| Pre-cut strips | Ready-made origami star strips are available online if you want to skip the measuring. |
| Scissors or paper cutter | For cutting strips to size. |
| Pen (optional) | Write a secret message on the strip before folding. |
How to Make Paper Stars: Step-by-Step Tutorial
Making origami lucky stars is easier than it looks. Follow these five simple steps, and you will have a perfect puffy star in minutes.
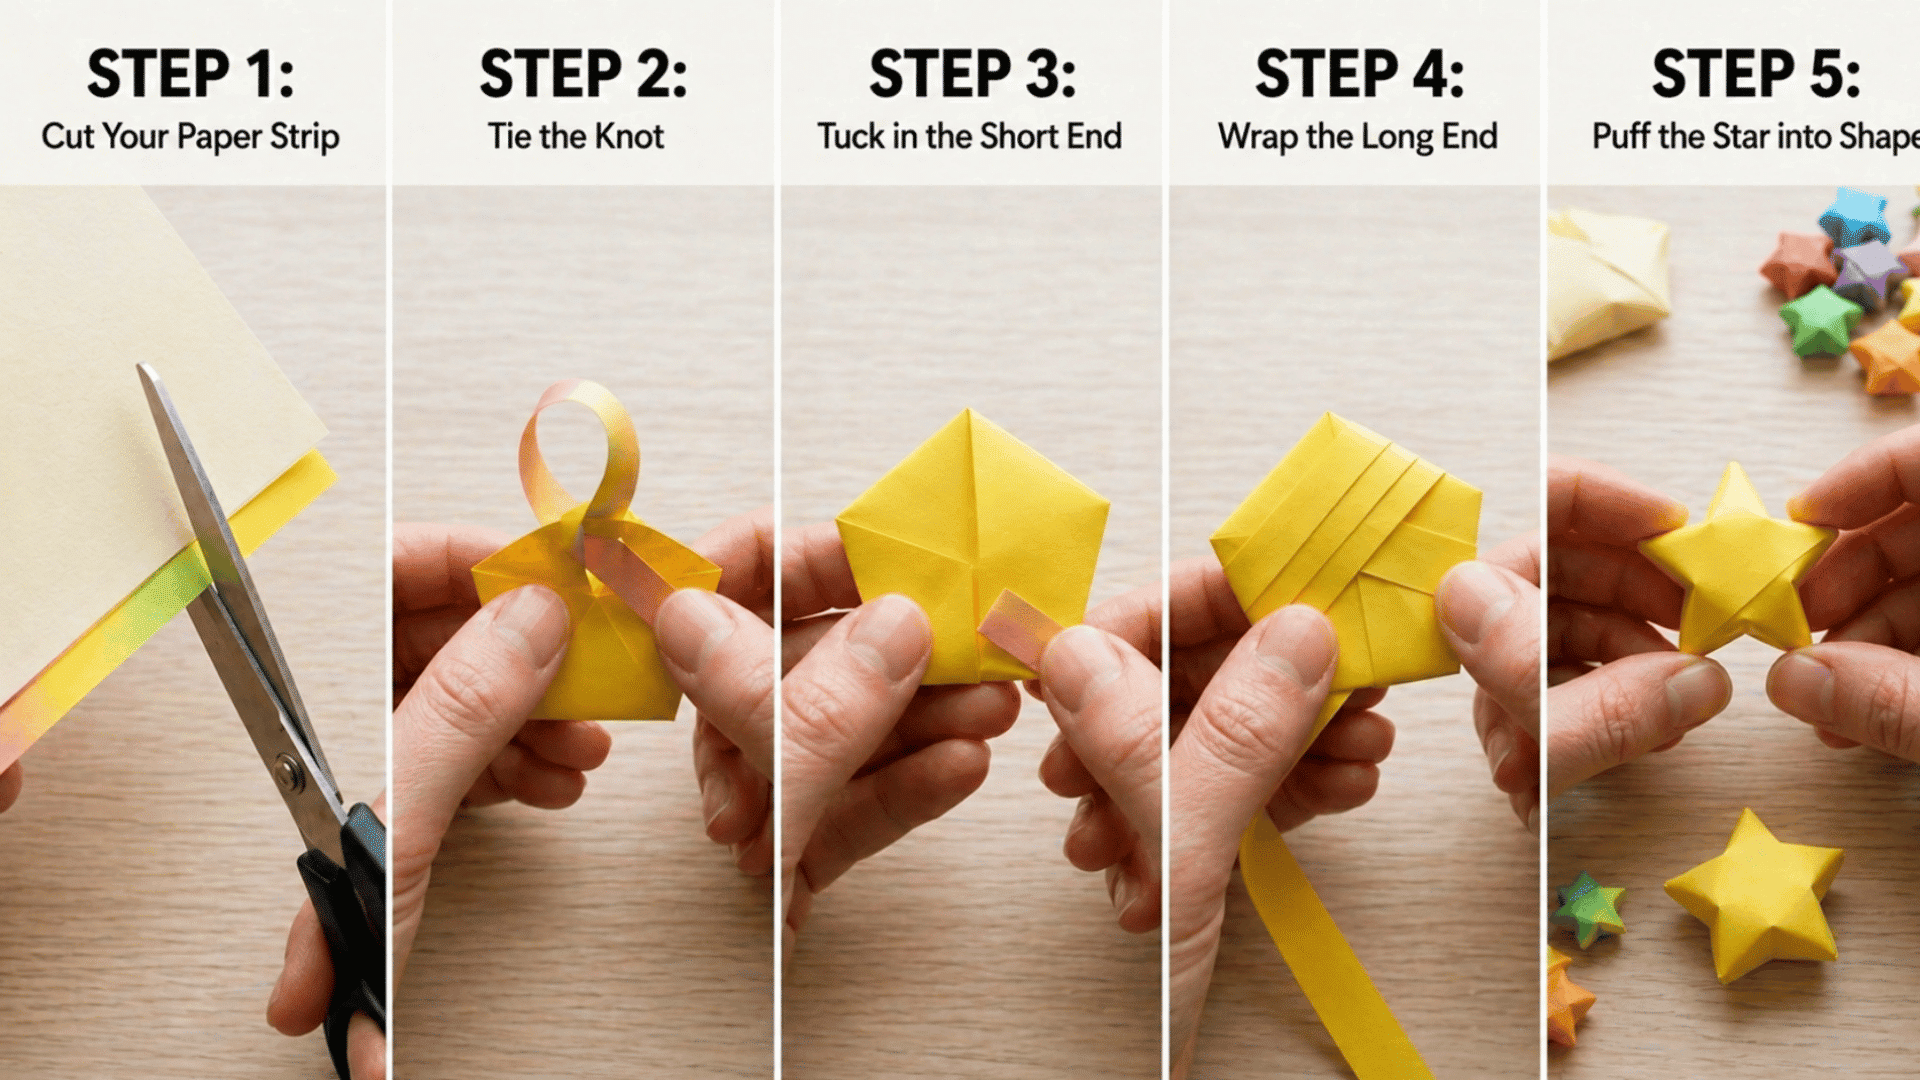
Step 1: Cut Your Paper Strip
Cut a strip approximately 1cm wide and 30cm long from a standard A4 sheet. Lightweight paper works best for clean, even folds.
If your strip is too thick or too short, the star will not puff out properly at the end.
Step 2: Tie the Knot
Loop one end of the strip around and push the short end through to form a knot. Pull gently to flatten it into a pentagon shape without tearing or creasing too sharply.
Take your time here because this pentagon base is what gives your star its even five-sided shape.
Step 3: Tuck in the Short End
Flip the pentagon over and tuck the loose short end neatly into the back. Trim it down if it is too long to tuck in cleanly.
This step keeps the base flat and tidy, so your wrapping stays even in the next steps.
Step 4: Wrap the Long End
Fold the long end across each flat side of the pentagon, flipping and wrapping as you go. Work as neatly and tightly as possible to keep the star even and sturdy.
Each wrap should line up flush with the edge of the pentagon for the best result.
Step 5: Puff the Star into Shape
Tuck the final end into the last fold to secure it. Then gently pinch each of the five points inward until the star puffs out into its full round shape.
If your star does not puff easily, your wrapping may be too loose, so try again with a little more tension next time.
Tips for Perfect Paper Stars
A few small tricks can make a big difference in how your stars turn out. Keep these in mind before you start folding.
- Use thin, lightweight paper for the smoothest folds. The thinner the paper, the easier it is to wrap neatly and puff out at the end.
- The width of your strip controls the size of your star. Wider strips make larger stars, so adjust the width to get the size you want.
- Write a message on the strip before you start folding. Use a pen that does not bleed through the paper so the writing stays clean and readable.
- Avoid creasing the pentagon too firmly while wrapping. Gentle, even pressure gives you a rounder, fuller star shape when you puff it at the end.
- Practice with plain printer paper first before using decorative paper. It helps you get the tension and technique right without wasting your prettier supplies.
Creative Ways to Use Your Paper Stars
Once you get the hang of folding lucky stars, you will want to make them by the handful. Here are five beautiful ways to use them.
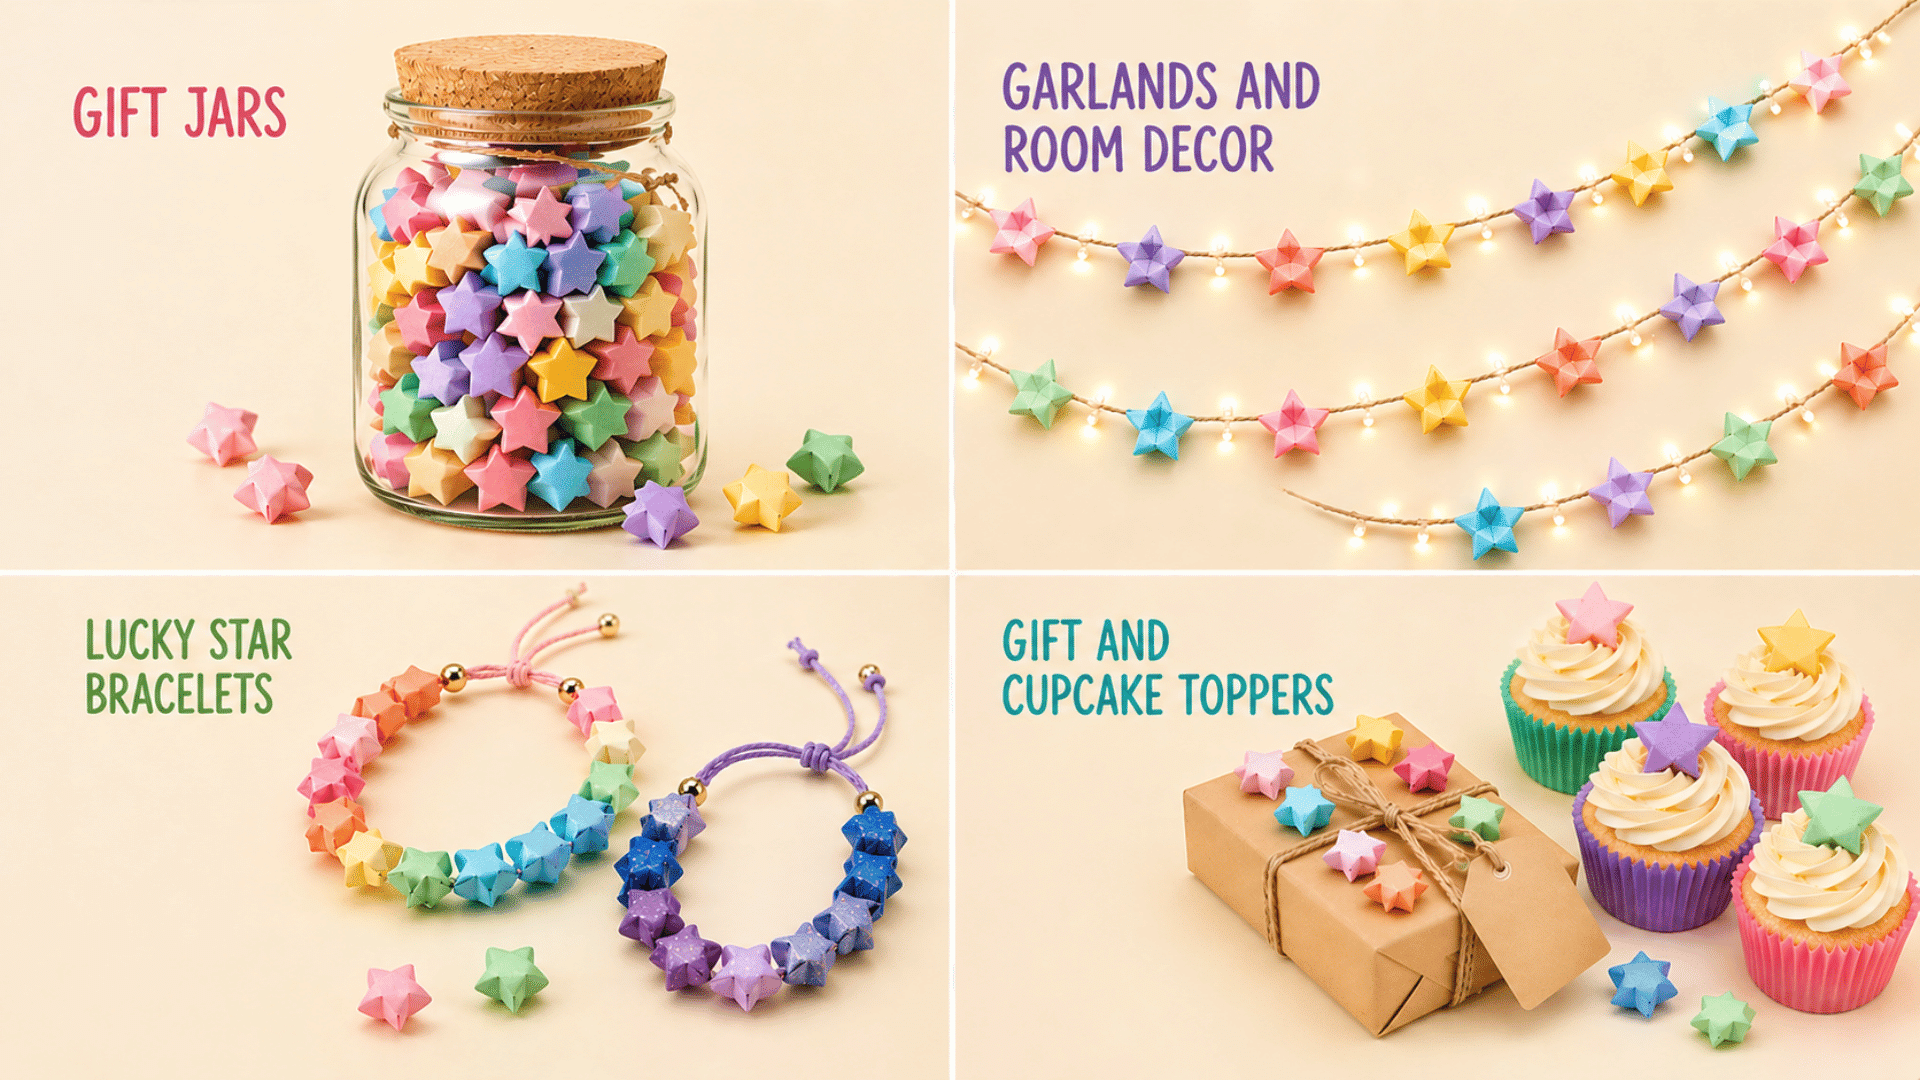
1. Gift Jars
Fill a jar with 100 or even 365 handfolded stars and give it to someone special. It is a deeply personal gift that shows you thought of them every single day of the year.
Best for: Birthdays and long-distance friendships
2. Garlands and Room Decor
Tape or glue stars onto a string in an evenly spaced pattern to create a charming decorative garland. They look beautiful strung across a bedroom wall, window, or party space.
Best for: Bedroom and holiday displays
3. Lucky Star Bracelets
Thread stars onto elastic or thin cord to make a sweet, handmade bracelet. They make wonderful friendship gifts and are lightweight enough to wear every day.
Best for: Kids’ crafts and friendship gifts
4. Gift and Cupcake Toppers
Tuck a few stars into gift wrapping or press them onto cupcakes as decorative toppers. They add a handmade, heartfelt touch to any celebration or special occasion.
Best for: Parties and wedding favors
5. Festive Metallic Stars
Fold stars from metallic or holographic wrapping paper for a shiny, festive look. They work beautifully as Christmas tree decorations or table scatter for parties and events.
Best for: Christmas and New Year decor
Wrapping It Up
Now that you know how to make paper stars, the only thing left to do is start folding. Each little star you create carries its own quiet meaning, whether it is a wish, a memory, or a moment of care.
Stack them in a jar, string them into a garland, or give them away one by one.
However you use them, these tiny stars have a way of meaning much more than their size suggests.