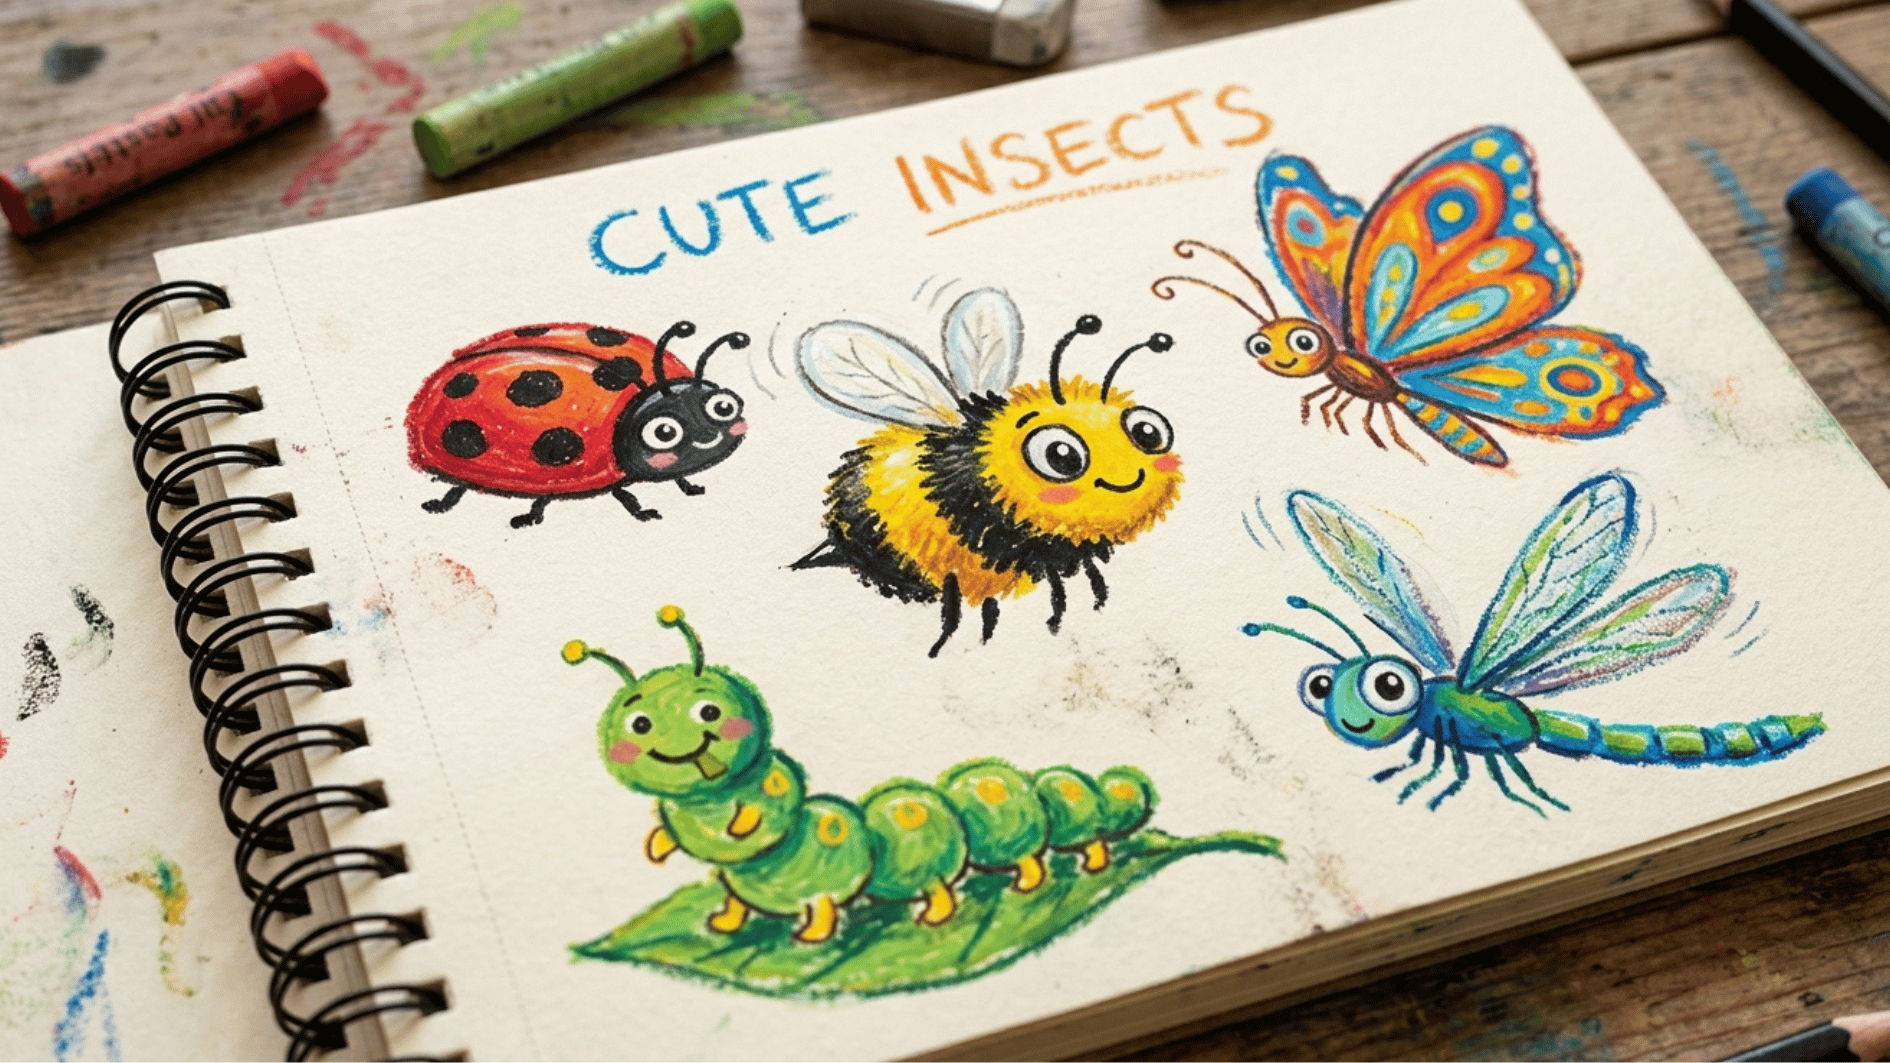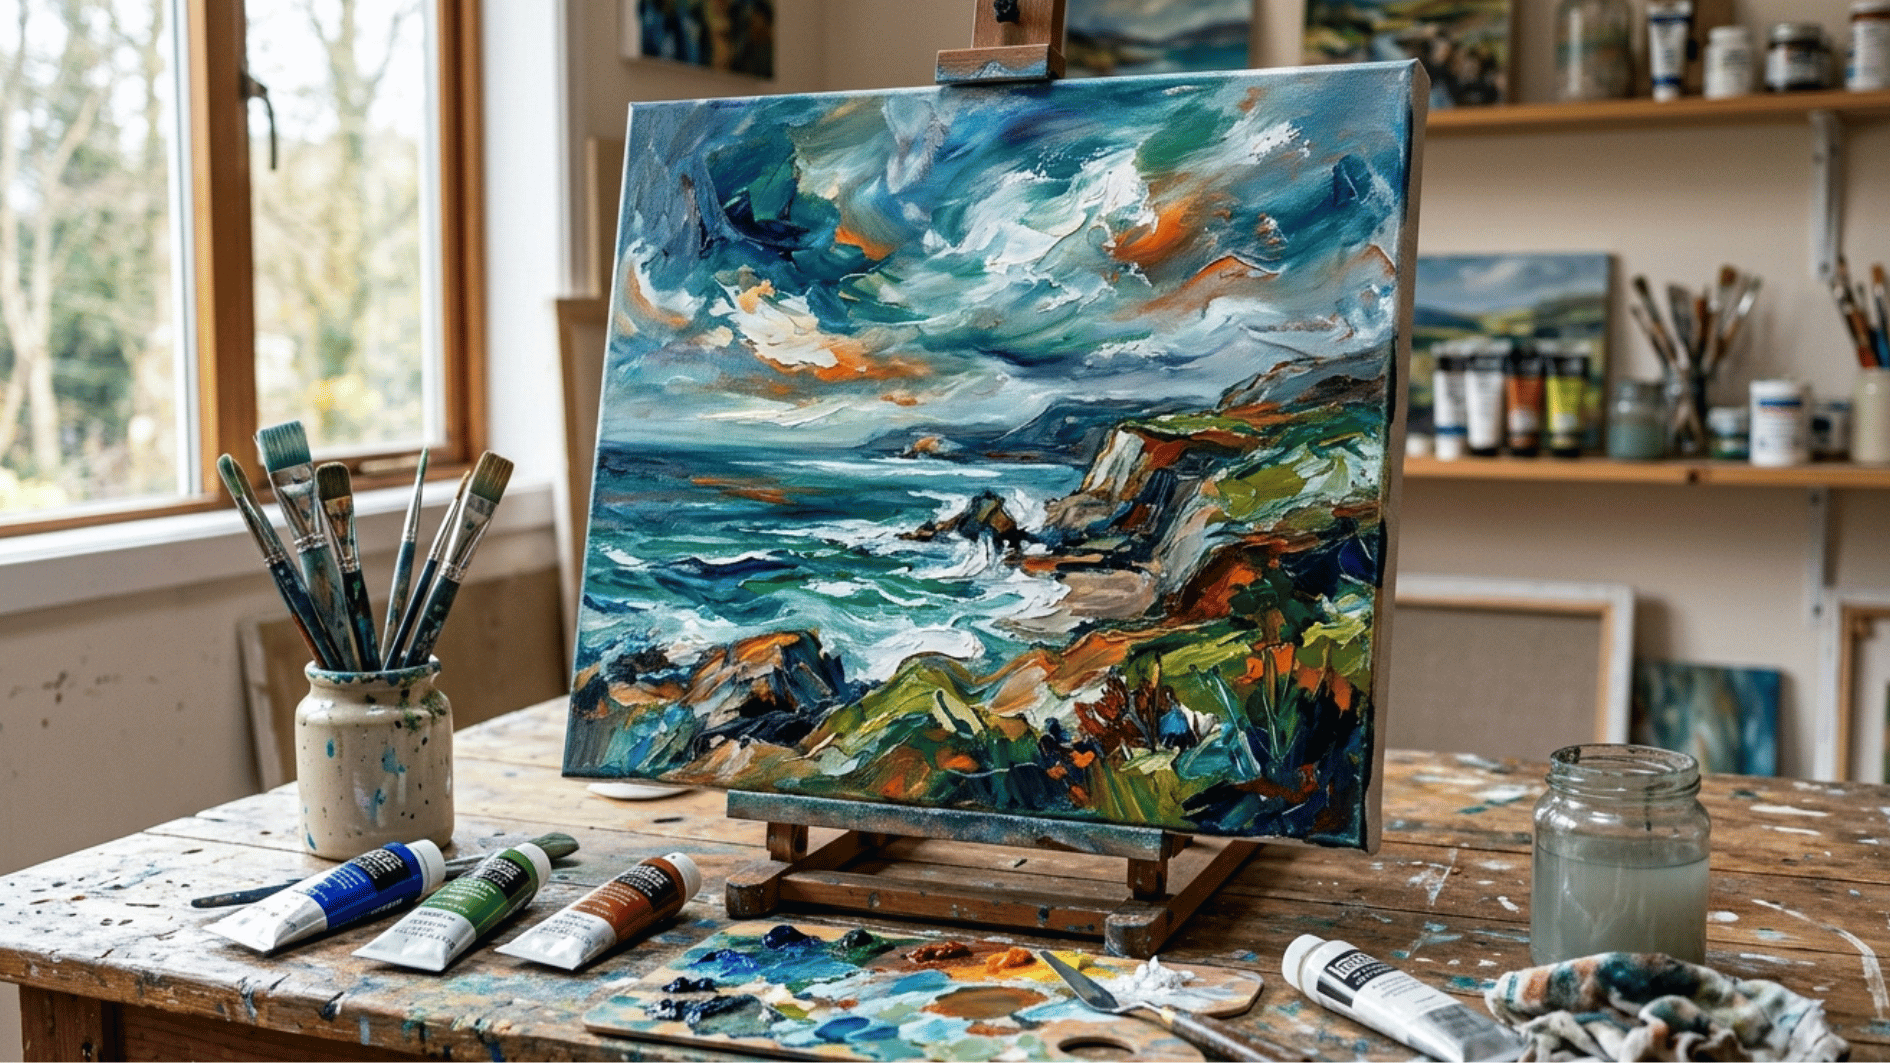
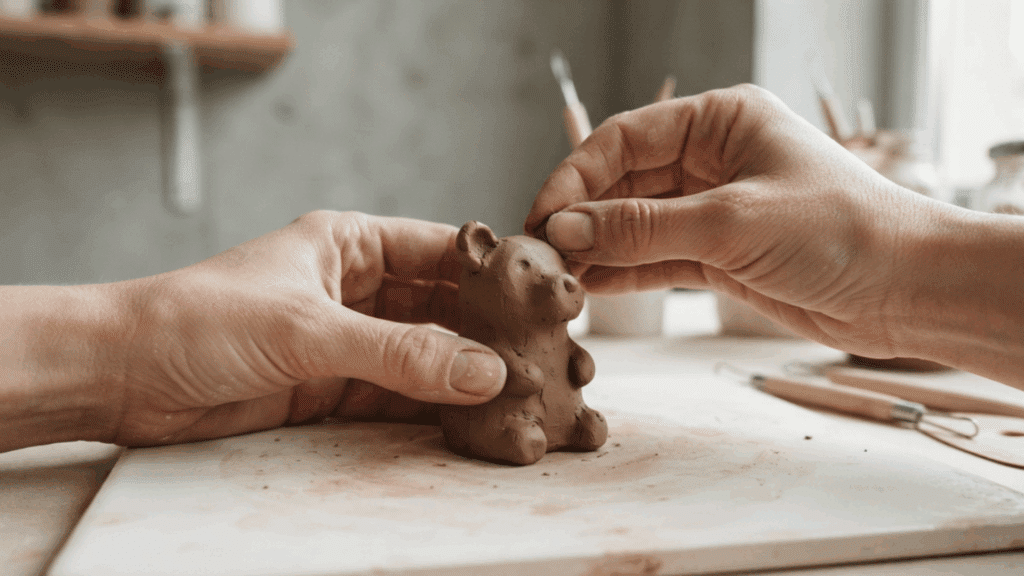
A small piece of clay can become a character, a keepsake, or a work of art with just a few creative touches.
Clay sculpting is a fun activity for beginners and experienced artists who want to shape their ideas into handmade pieces.
These clay sculpture ideas can help you practice basic forms, improve your skills, and try new techniques with different designs.
In this blog, you will learn about easy projects, creative art pieces, kid-friendly ideas, sculpting methods, and simple tips to improve your clay creations.
What Makes Clay Sculpting a Fun Creative Activity?
Clay sculpting is a fun creative activity because it gives people the freedom to turn simple ideas into handmade pieces.
Working with clay can feel relaxing and rewarding as each shape develops through your own effort.
It helps improve creativity, patience, and control while making something personal. Clay also allows you to try different forms, textures, and designs without needing advanced skills.
You can create smooth surfaces, detailed patterns, or unusual shapes by using simple tools and techniques. This flexibility makes clay suitable for artists of all skill levels.
Materials and Tools Needed for Clay Sculpting
Having the right materials and tools makes clay sculpting easier and helps create cleaner shapes, better details, and finished artwork.
- Different types of clay: Choose from air-dry clay, polymer clay, or traditional clay based on your project needs and skill level.
- Basic sculpting tools: Use clay knives, shaping tools, and detail tools to create lines, textures, and small features.
- Rolling tools and cutters: Rollers and cutters help flatten clay evenly and create consistent shapes for different designs.
- Paints and finishing materials: Add color, protect surfaces, and improve the final look with paints, varnishes, or sealants.
- Workspace setup tips: Keep a clean, flat area with enough space, proper lighting, and a surface that prevents clay from sticking.
For most ideas here, start with these beginner-friendly air-dry projects in mind.
Easy Clay Ideas for Beginners
Simple forms help beginners learn pressure, balance, joining, and surface texture without managing too many parts. These five projects use basic shapes and common household tools.
1. Pinch-Pot Face
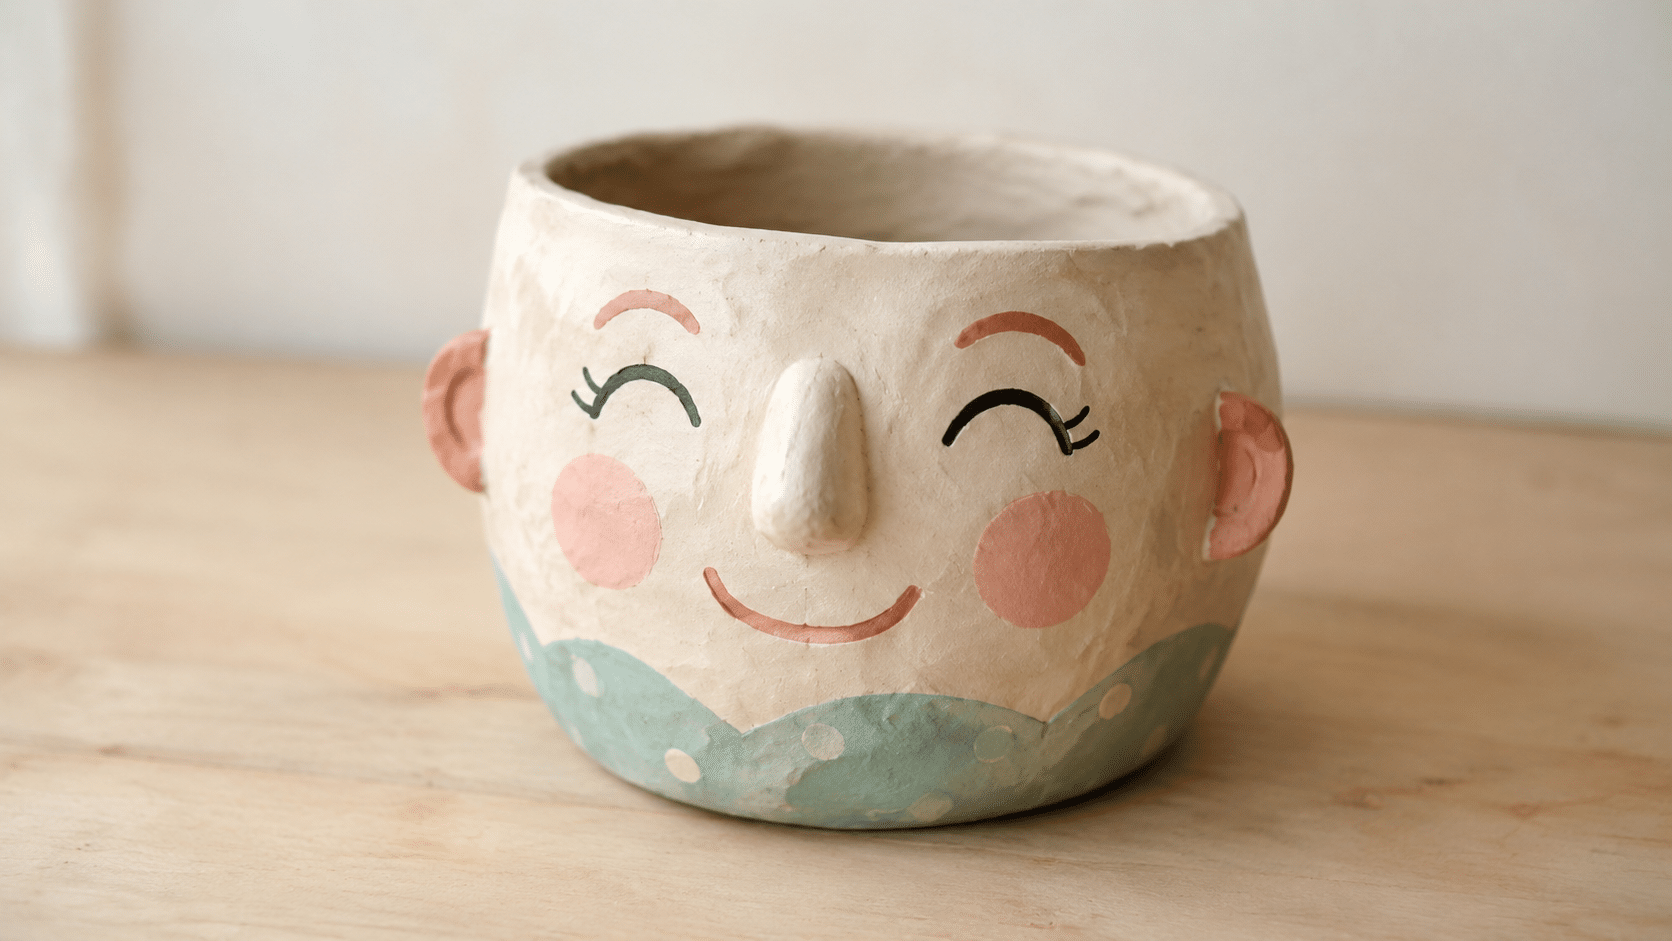
A pinch-pot face begins as a smooth ball pressed into a small bowl. The rim becomes the hairline, while tiny pieces form the nose, ears, and eyebrows.
Score and dampen every join on air-dry clay; the first time I skipped that step, both ears popped off on day two. It’s the same method behind these simple pinch-pot builds.
- Best clay: Air-dry or ceramic clay
- Main skills: Pinching, joining, and shaping features
- Finish: Acrylic paint with a clear craft sealer
2. Mini Coil Bowl
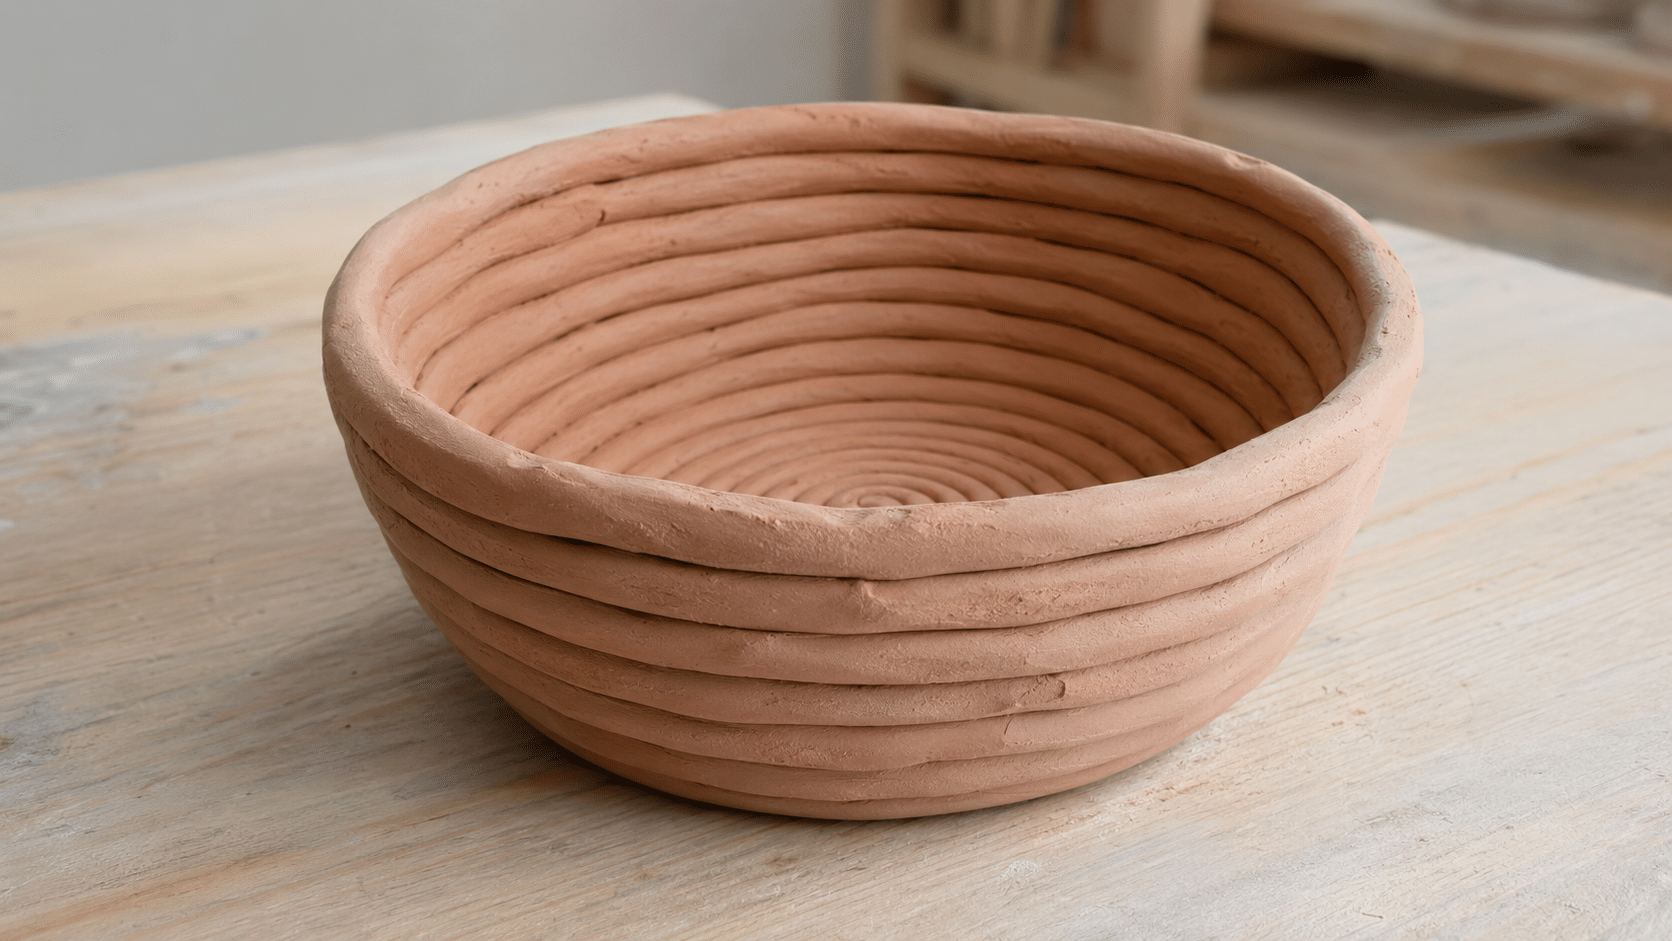
A mini coil bowl teaches even rolling and strong joining. Roll several clay ropes of similar thickness, form one into a flat spiral, then stack the others around its edge.
Press each layer gently into the one below while keeping the outside coil pattern visible. A bottle cap can help support the shape during construction.
- Best clay: Air-dry or ceramic clay
- Main skills: Rolling, stacking, and smoothing
- Finish: Paint the inside and leave the coils natural
3. Clay Mushroom Set
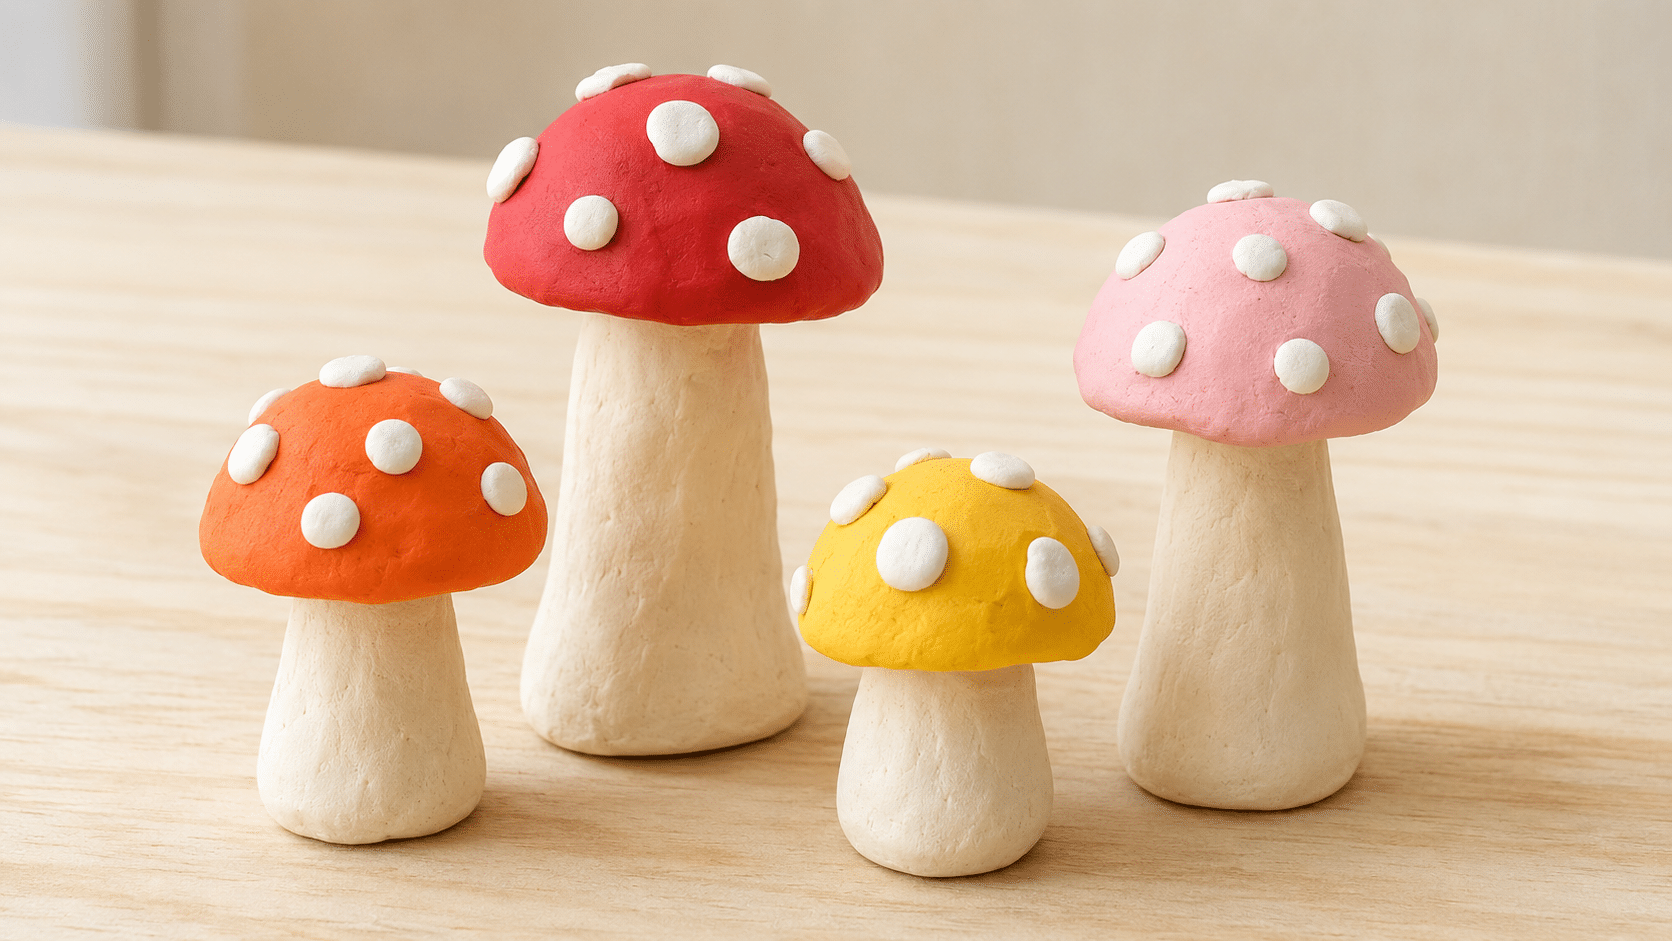
A mushroom set uses two beginner-friendly forms: short stems and rounded caps. Make each stem slightly wider at the base, then press a shallow hollow beneath every cap before joining the pieces.
Different heights make the small group look more natural. Add spots with tiny clay dots or paint after drying.
- Best clay: Air-dry or polymer clay
- Main skills: Forming domes and joining parts
- Finish: Earthy browns, warm reds, or pastel colors
4. Simple Clay Ghost
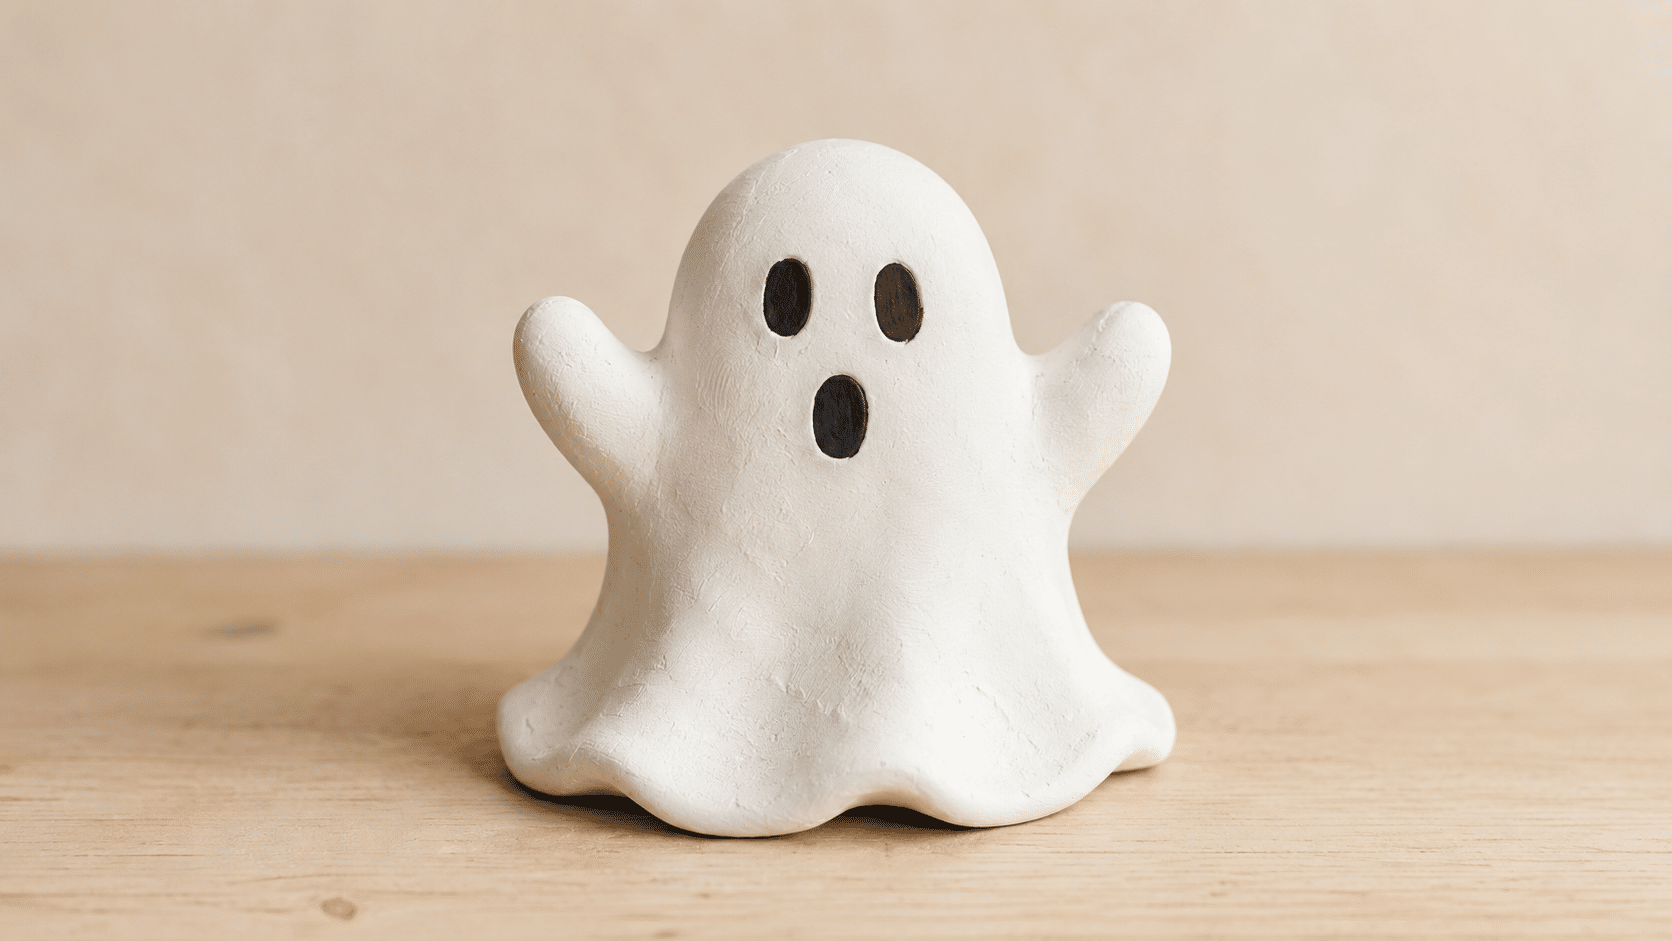
A small ghost needs only a rounded cone with a soft, flowing base. Shape the body first, then pull or press the lower edge into three gentle waves.
Two eye holes create an instant expression, while raised arms add more character. A crumpled piece of paper can support a larger hollow form as it dries.
- Best clay: Air-dry or polymer clay
- Main skills: Tapering, bending, and making holes
- Finish: White paint with black facial details
5. Patterned Ring Dish
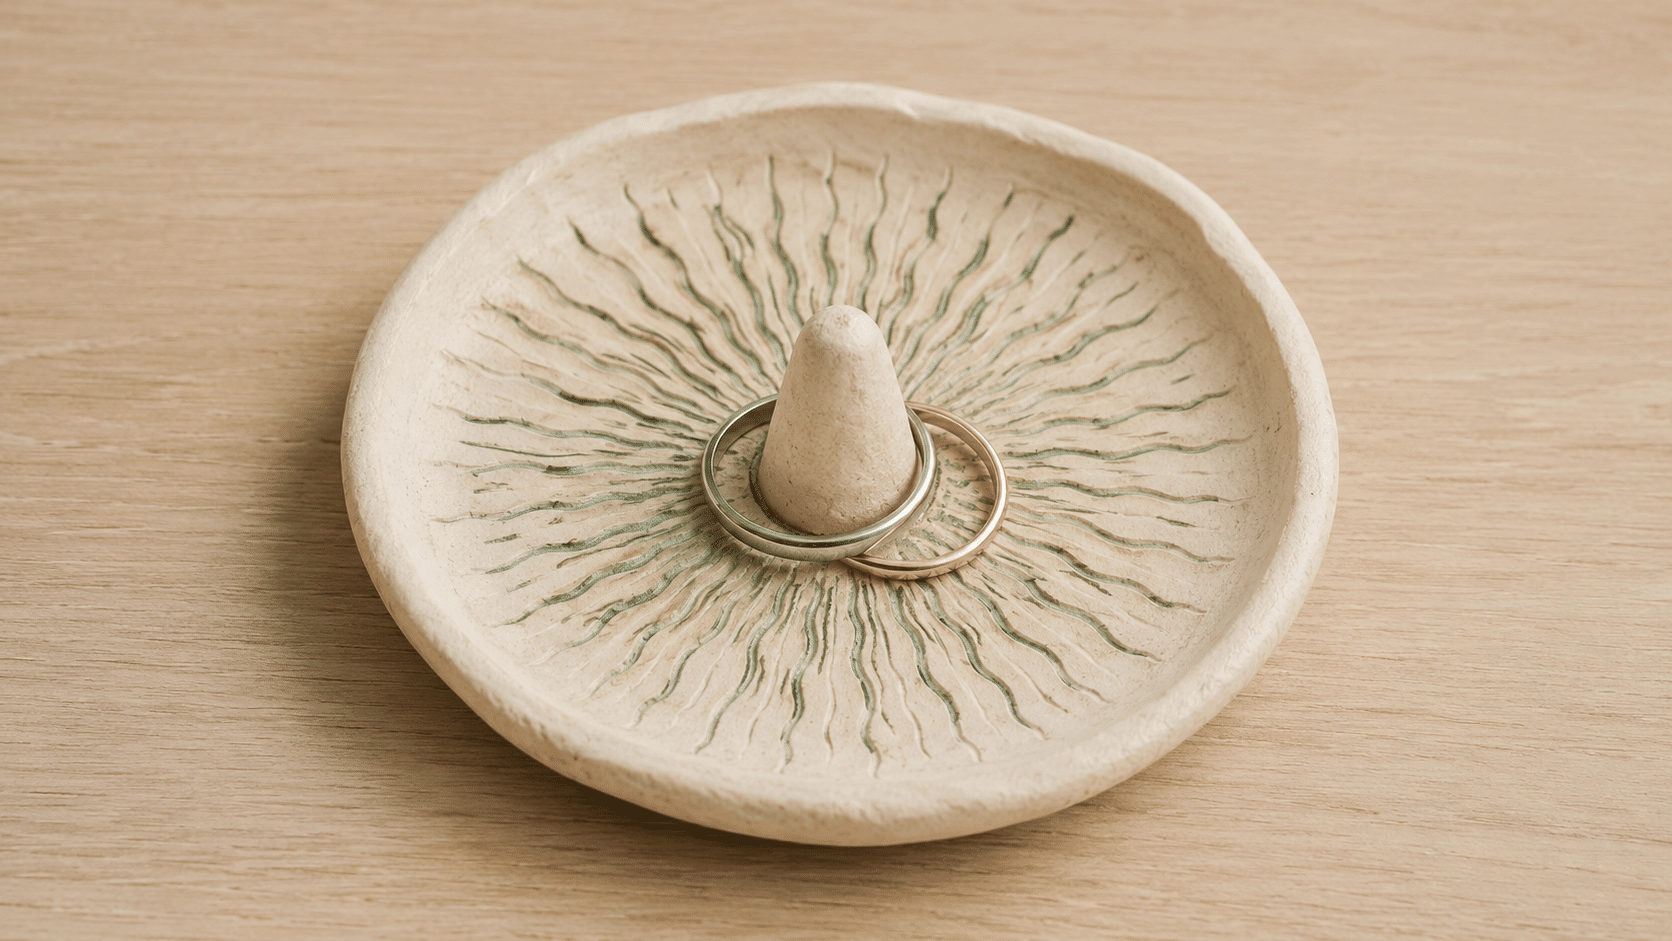
A ring dish starts with a flat clay circle shaped over a shallow bowl or curved in the palm.
Smooth the rim with a damp finger, then press lace, leaves, buttons, or carved lines into the surface. Keep the center fairly level so small jewelry pieces do not easily slide out.
- Best clay: Air-dry or ceramic clay
- Main skills: Rolling, cutting, and imprinting texture
- Finish: Paint only the raised pattern for contrast
Clay Sculpture Ideas Inspired by Animals
Animal figures are useful for practicing body proportions and personality. Rounded shapes keep these projects approachable, while ears, tails, wings, and facial details provide room for variation. If you’re making these with kids, these easy animal craft ideas pair well for a whole afternoon.
6. Sleeping Cat
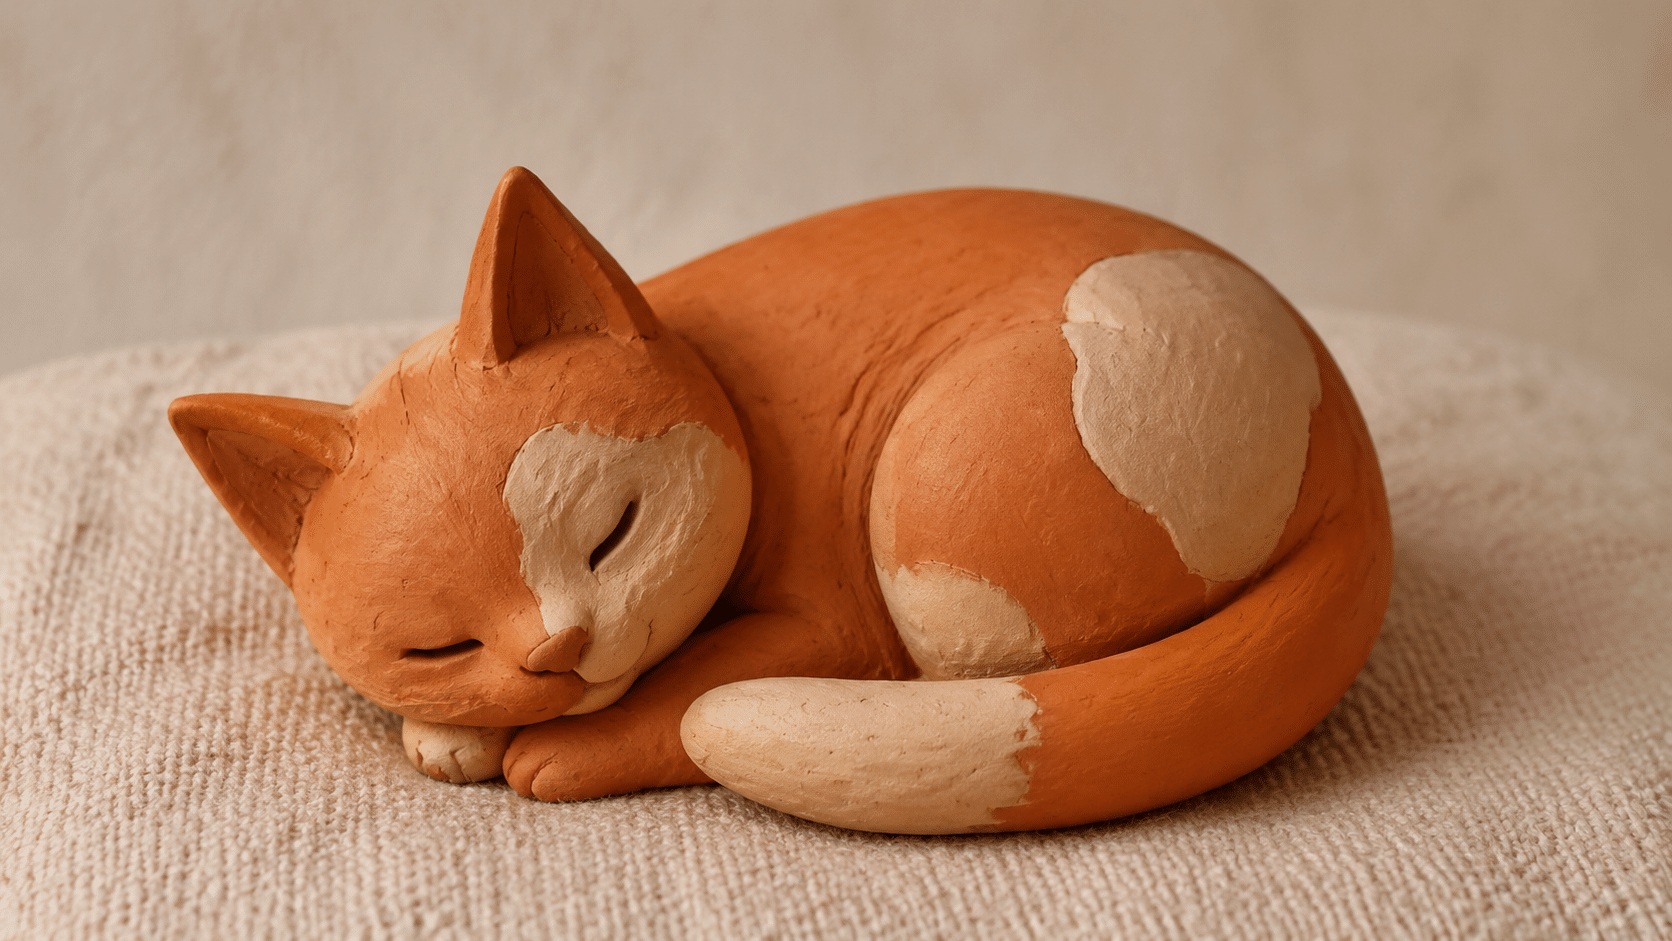
A sleeping cat can be formed from one thick oval curled into a crescent. Add a round head near the front paws, two triangular ears, and a tail wrapped along the body.
Closed eyes need only two shallow curved lines. Flatten the base slightly so the figure rests securely after drying.
- Best clay: Air-dry or polymer clay
- Main skills: Curving, attaching, and balancing forms
- Finish: Add stripes, patches, or solid natural colors
7. Round Penguin
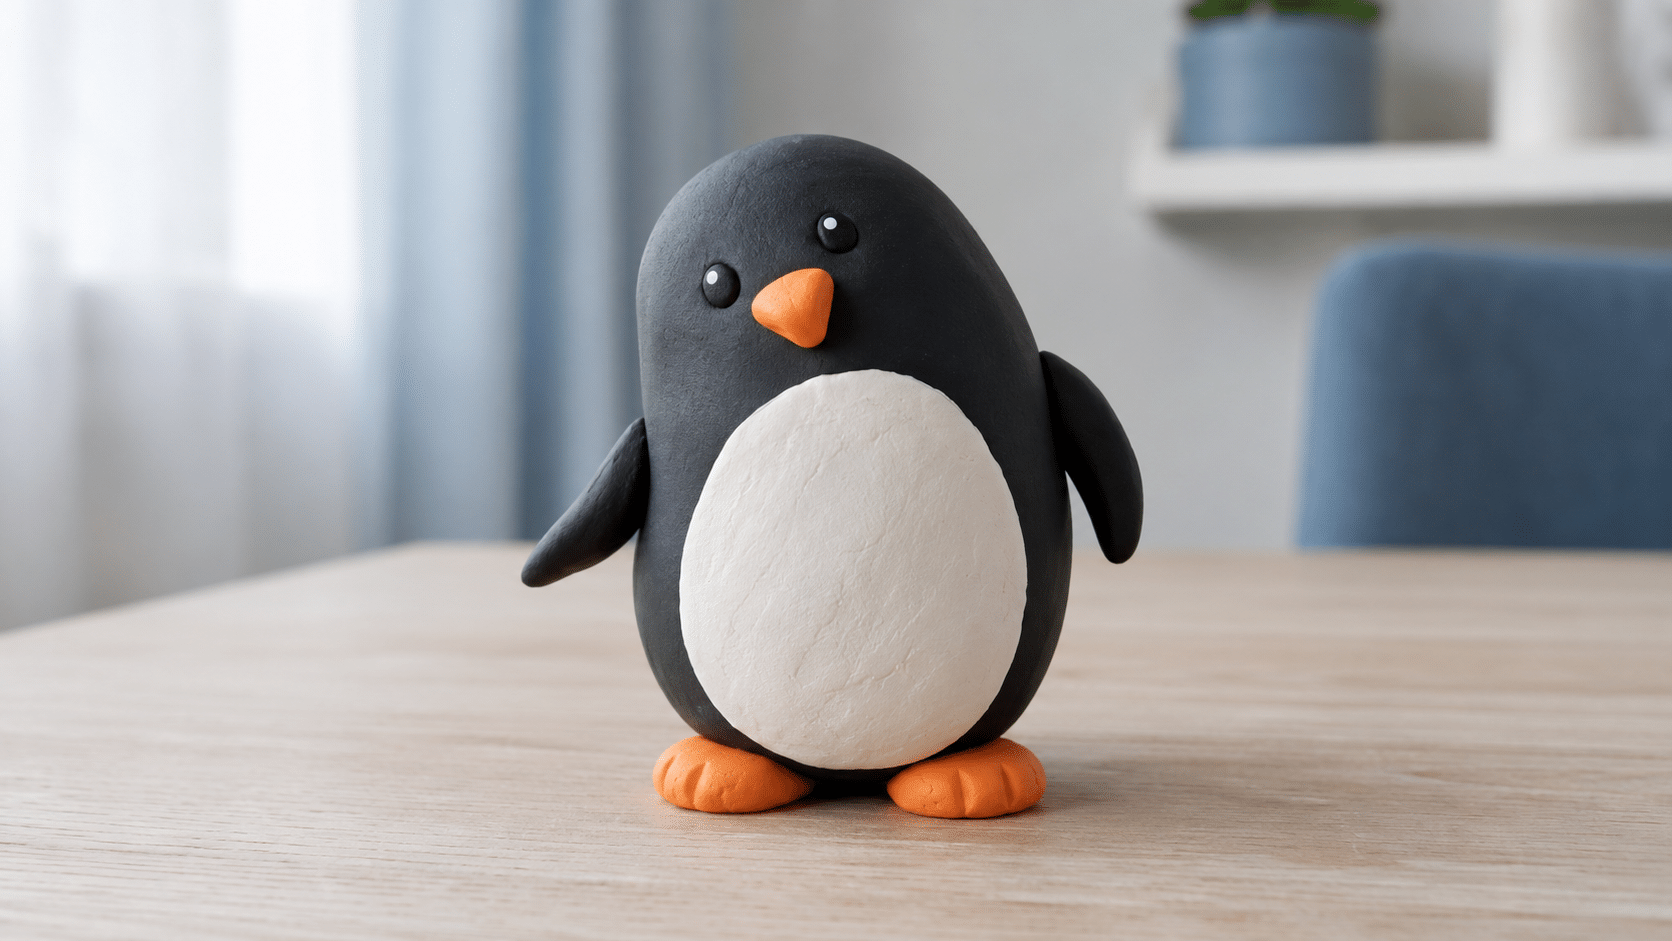
A round penguin begins with an egg-shaped body that stands on a flat base. Add two thin wings, tiny feet, a small beak, and an oval belly patch.
Keeping the parts thick reduces the chance of breakage. A slight head tilt gives the bird a curious look without adding another separate form.
- Best clay: Air-dry or polymer clay
- Main skills: Shaping an oval and adding small pieces
- Finish: Black, white, orange, and one accent color
8. Tiny Turtle
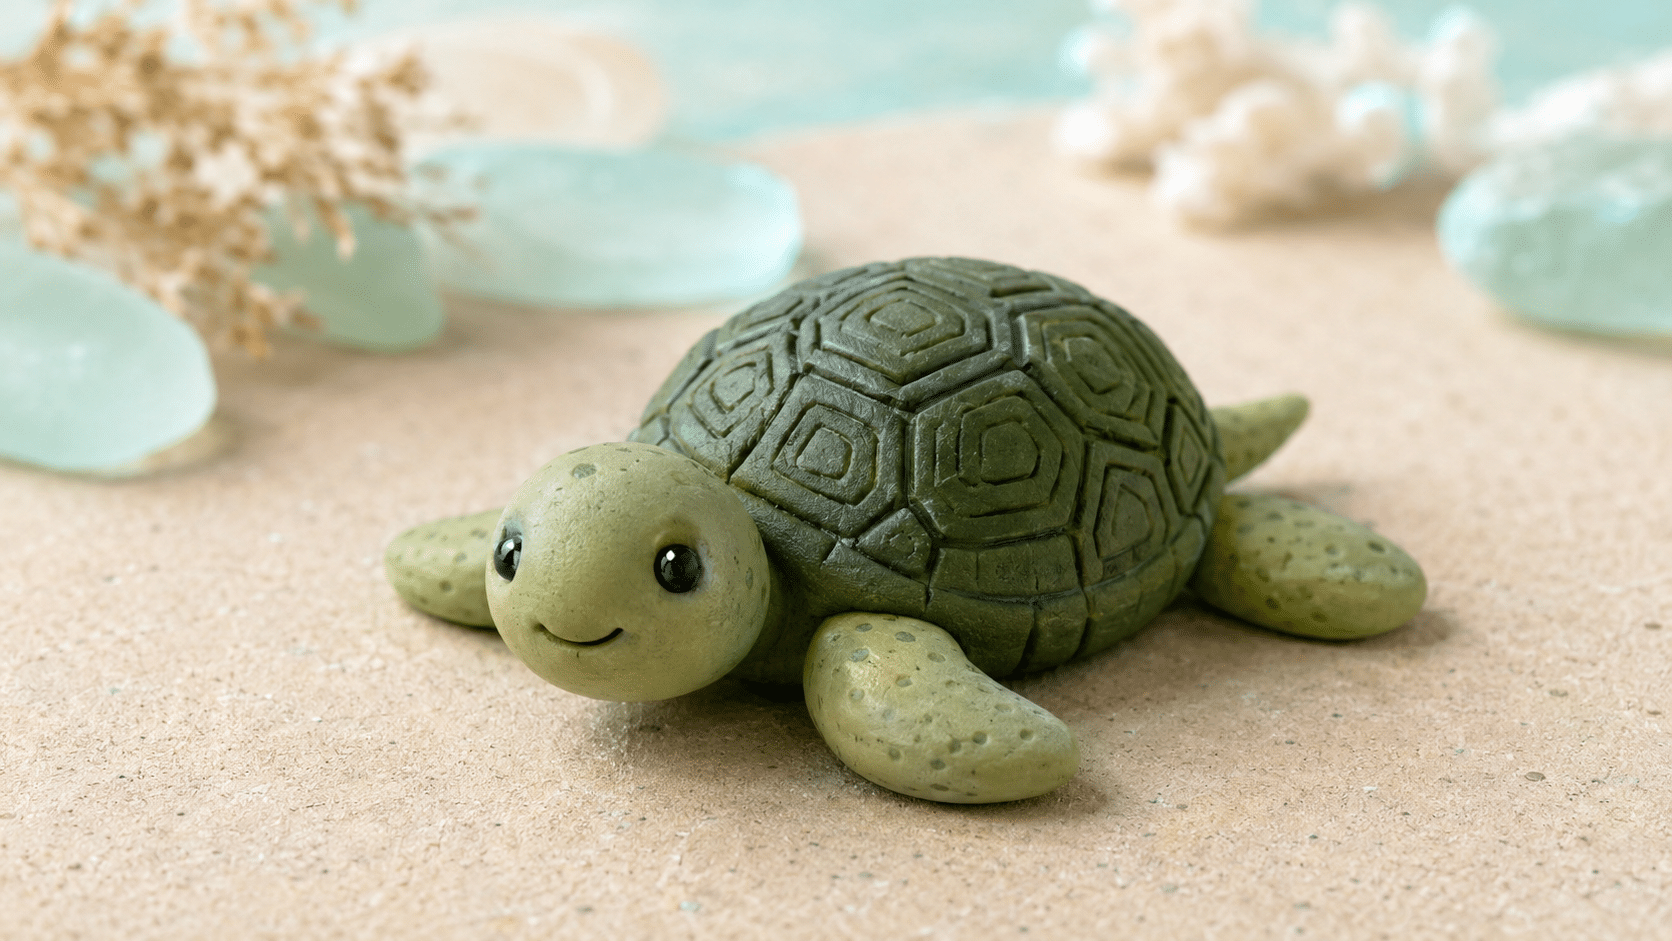
A turtle combines a low oval shell with a small head, four flippers, and a short tail. Press hexagons, spirals, or dots into the shell before attaching it to the body.
The wide, low form makes the sculpture stable and easy to handle. Keep the flippers thick where they meet the body.
- Best clay: Polymer or air-dry clay
- Main skills: Layering shapes and pressing patterns
- Finish: Blend greens, browns, or ocean-inspired blues
9. Sitting Fox
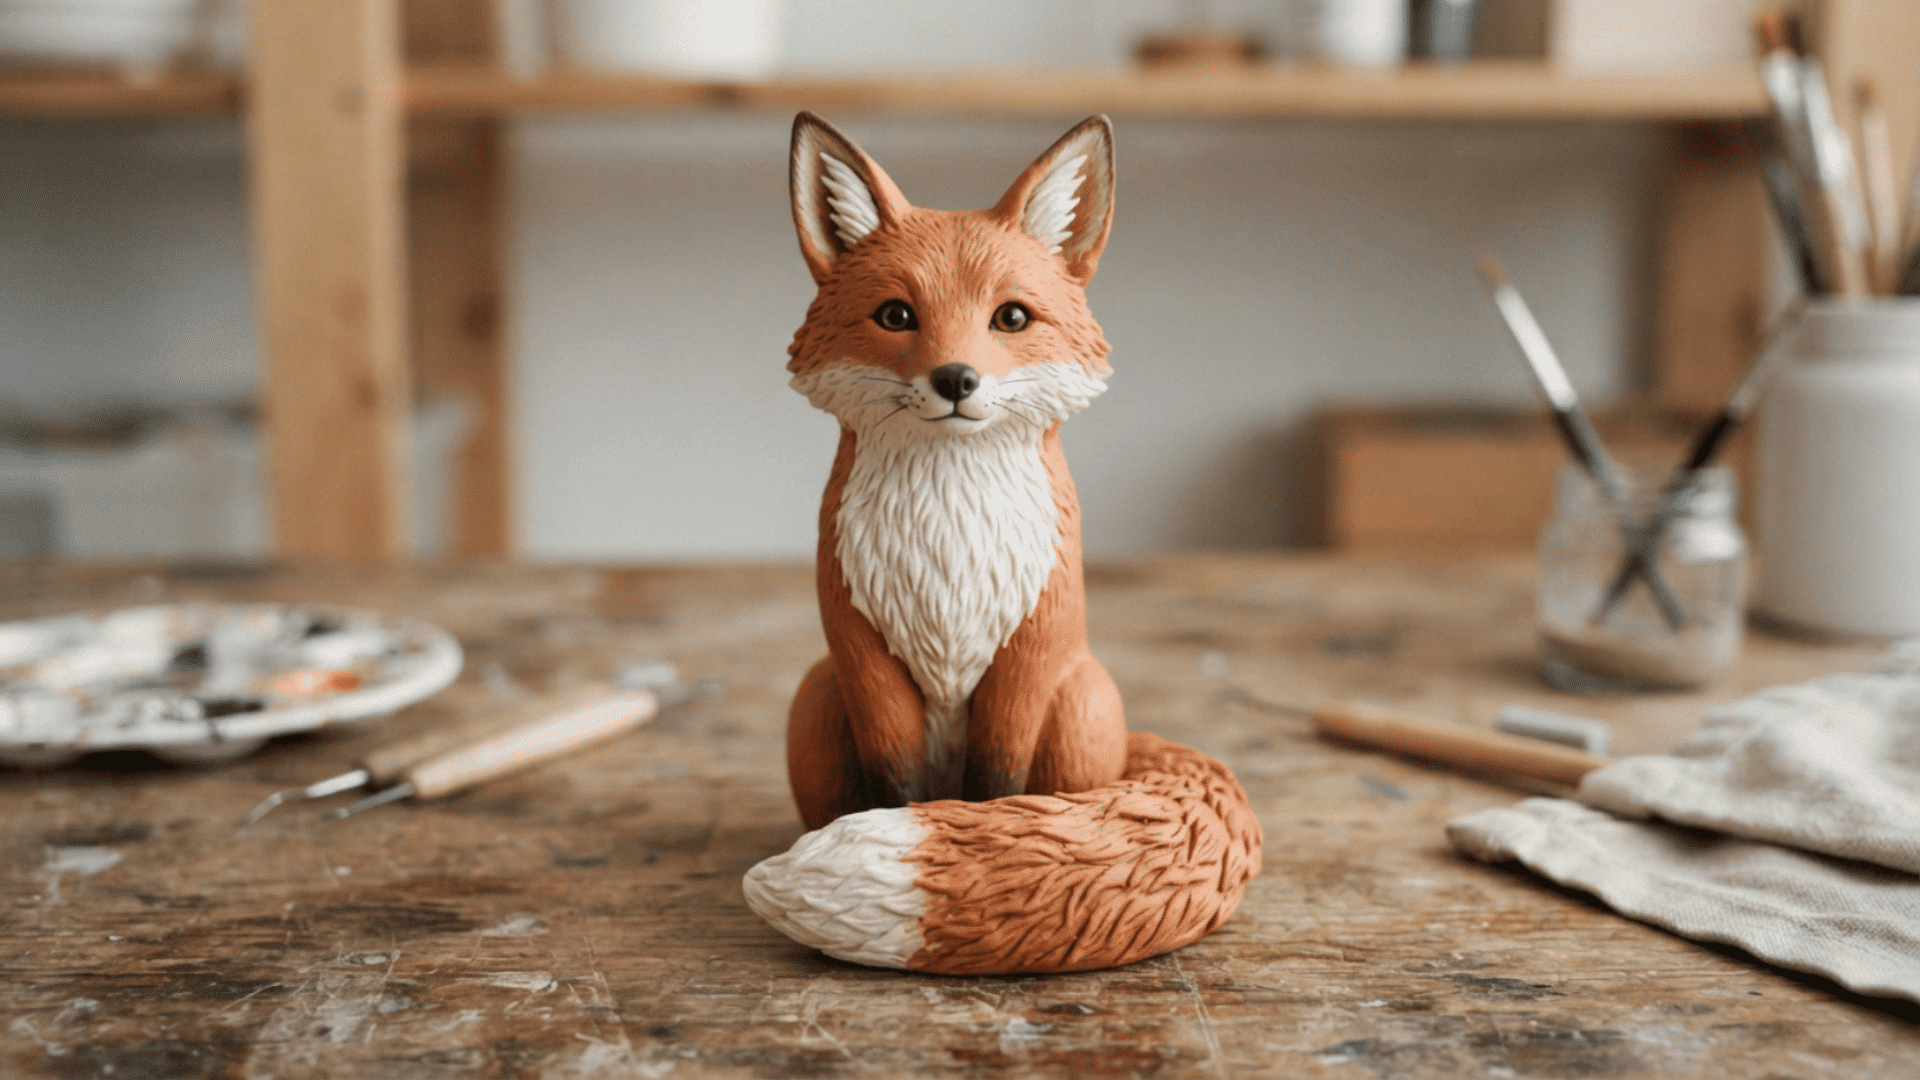
A sitting fox uses a tapered body, rounded chest, pointed face, and two tall ears. Wrap the thick tail around the feet to support the pose and reduce separate fragile parts.
White clay or paint can mark the chest, muzzle, and tail tip. Small black dots work well for the eyes and nose.
- Best clay: Polymer or fine air-dry clay
- Main skills: Tapering, symmetry, and facial placement
- Finish: Burnt orange, white, and dark brown
- 10. Friendly Snail
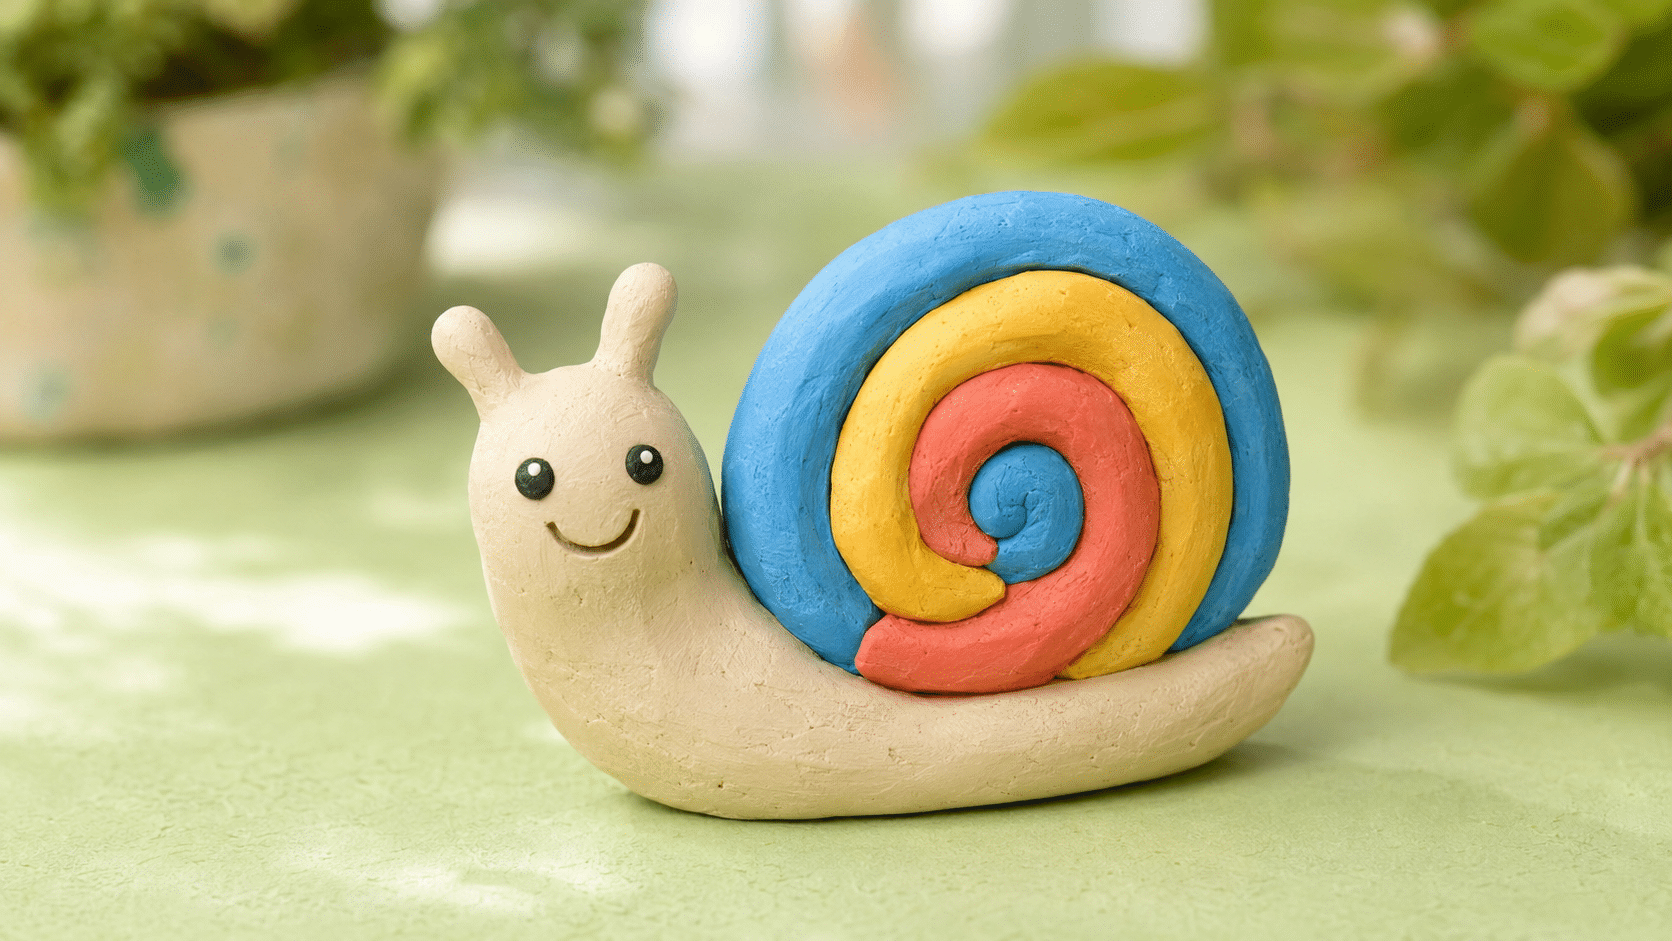
A friendly snail starts with a thick body tapered at the tail and lifted slightly at the head. Roll a separate clay rope into a spiral for the shell, then attach it across a broad area.
Short feelers are less likely to snap than thin ones. A smile and uneven shell dots add a playful handmade style.
- Best clay: Air-dry or polymer clay
- Main skills: Rolling, spiraling, and secure joining
- Finish: Use contrasting body and shell colors
Nature-Inspired Clay Sculpture Ideas
Leaves, flowers, trees, and ocean forms provide patterns that already feel balanced. Real natural objects can also serve as texture tools. Choose fallen leaves and loose materials instead of removing living plants, then clean and dry them before pressing them into clay.
11. Leaf-Imprint Wall Plaque
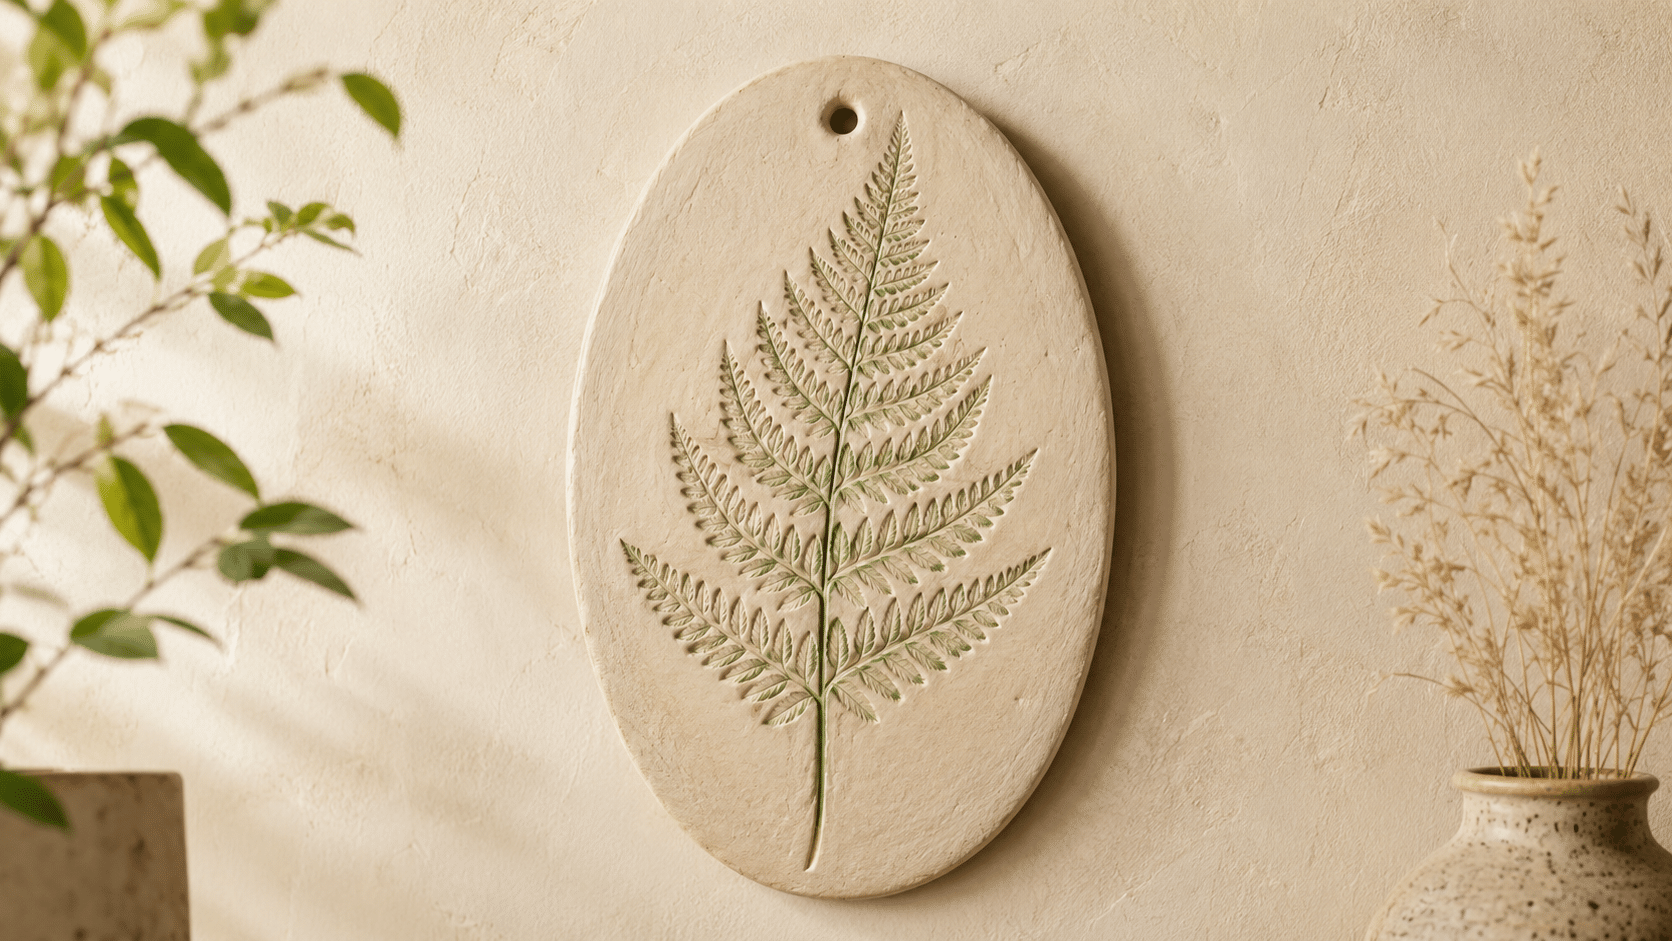
A leaf-imprint plaque records fine veins without complex carving. Roll a thick clay slab, place a clean leaf vein-side down, and press it evenly with a rolling pin.
Peel it away before cutting the plaque into an oval or organic shape. Make a hanging hole while the clay is still soft.
- Best clay: Air-dry or ceramic clay
- Main skills: Rolling, imprinting, and clean cutting
- Finish: Brush darker paint into the recessed veins
12. Mini Desert Cactus
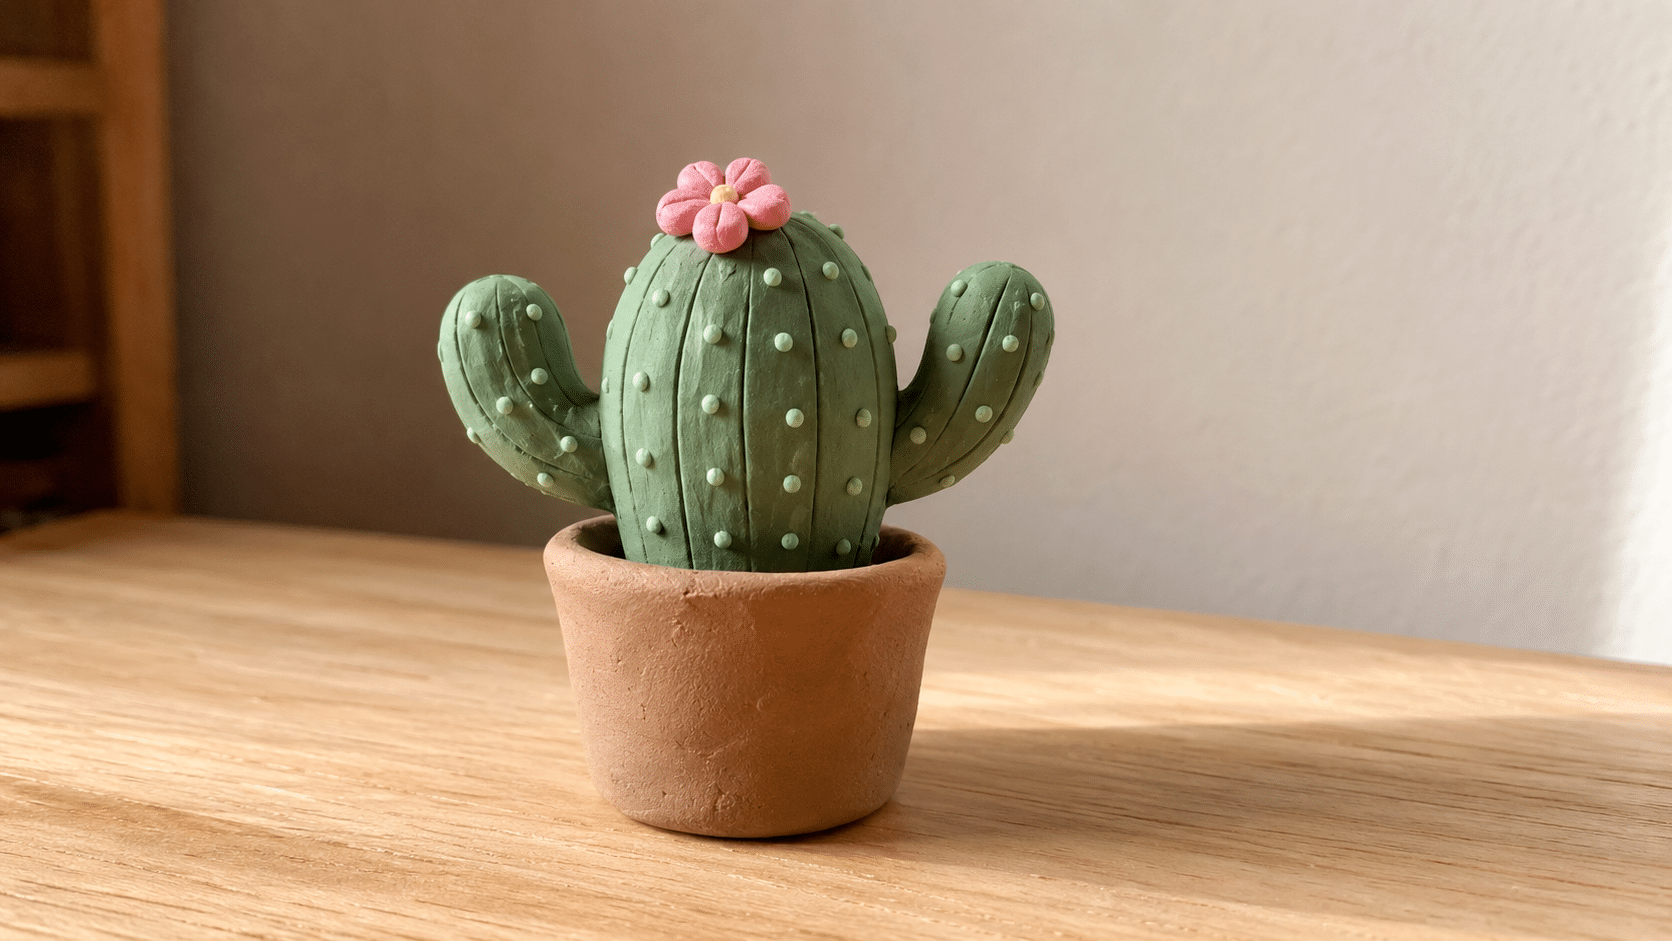
A mini cactus is made from a thick upright stem with short rounded arms. Press tiny holes or shallow lines into the surface instead of adding sharp spines.
A small clay pot forms a stable base and allows contrasting colors. Several cactus shapes can be grouped into a compact desert display.
- Best clay: Polymer or air-dry clay
- Main skills: Tapering, joining, and adding texture
- Finish: Use layered greens with a sandy brown pot
13. Sculpted Flower Dish
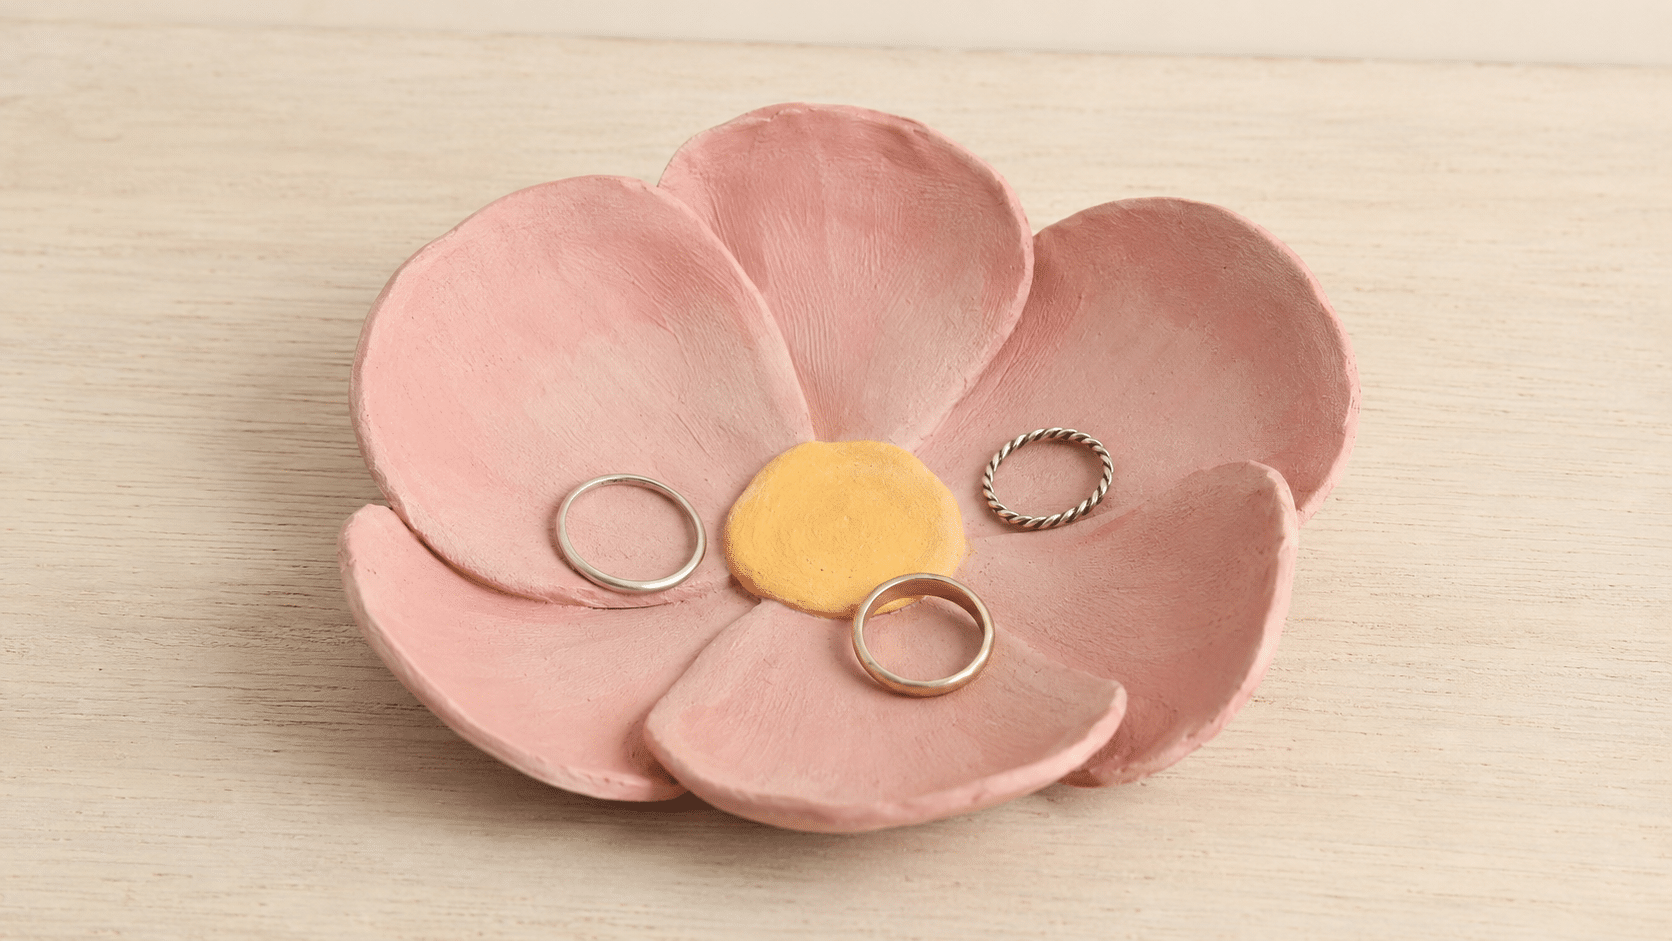
A sculpted flower dish uses overlapping clay petals arranged around a shallow center. Form each petal from a flattened oval, then pinch one end and press the pieces together in a circle.
Curve the outer edges upward so the design can hold rings or beads. Keep the petal bases thick for strength.
- Best clay: Air-dry, polymer, or ceramic clay
- Main skills: Repeating shapes and layered assembly
- Finish: Blend two shades from center to edge
14. Textured Tree Sculpture
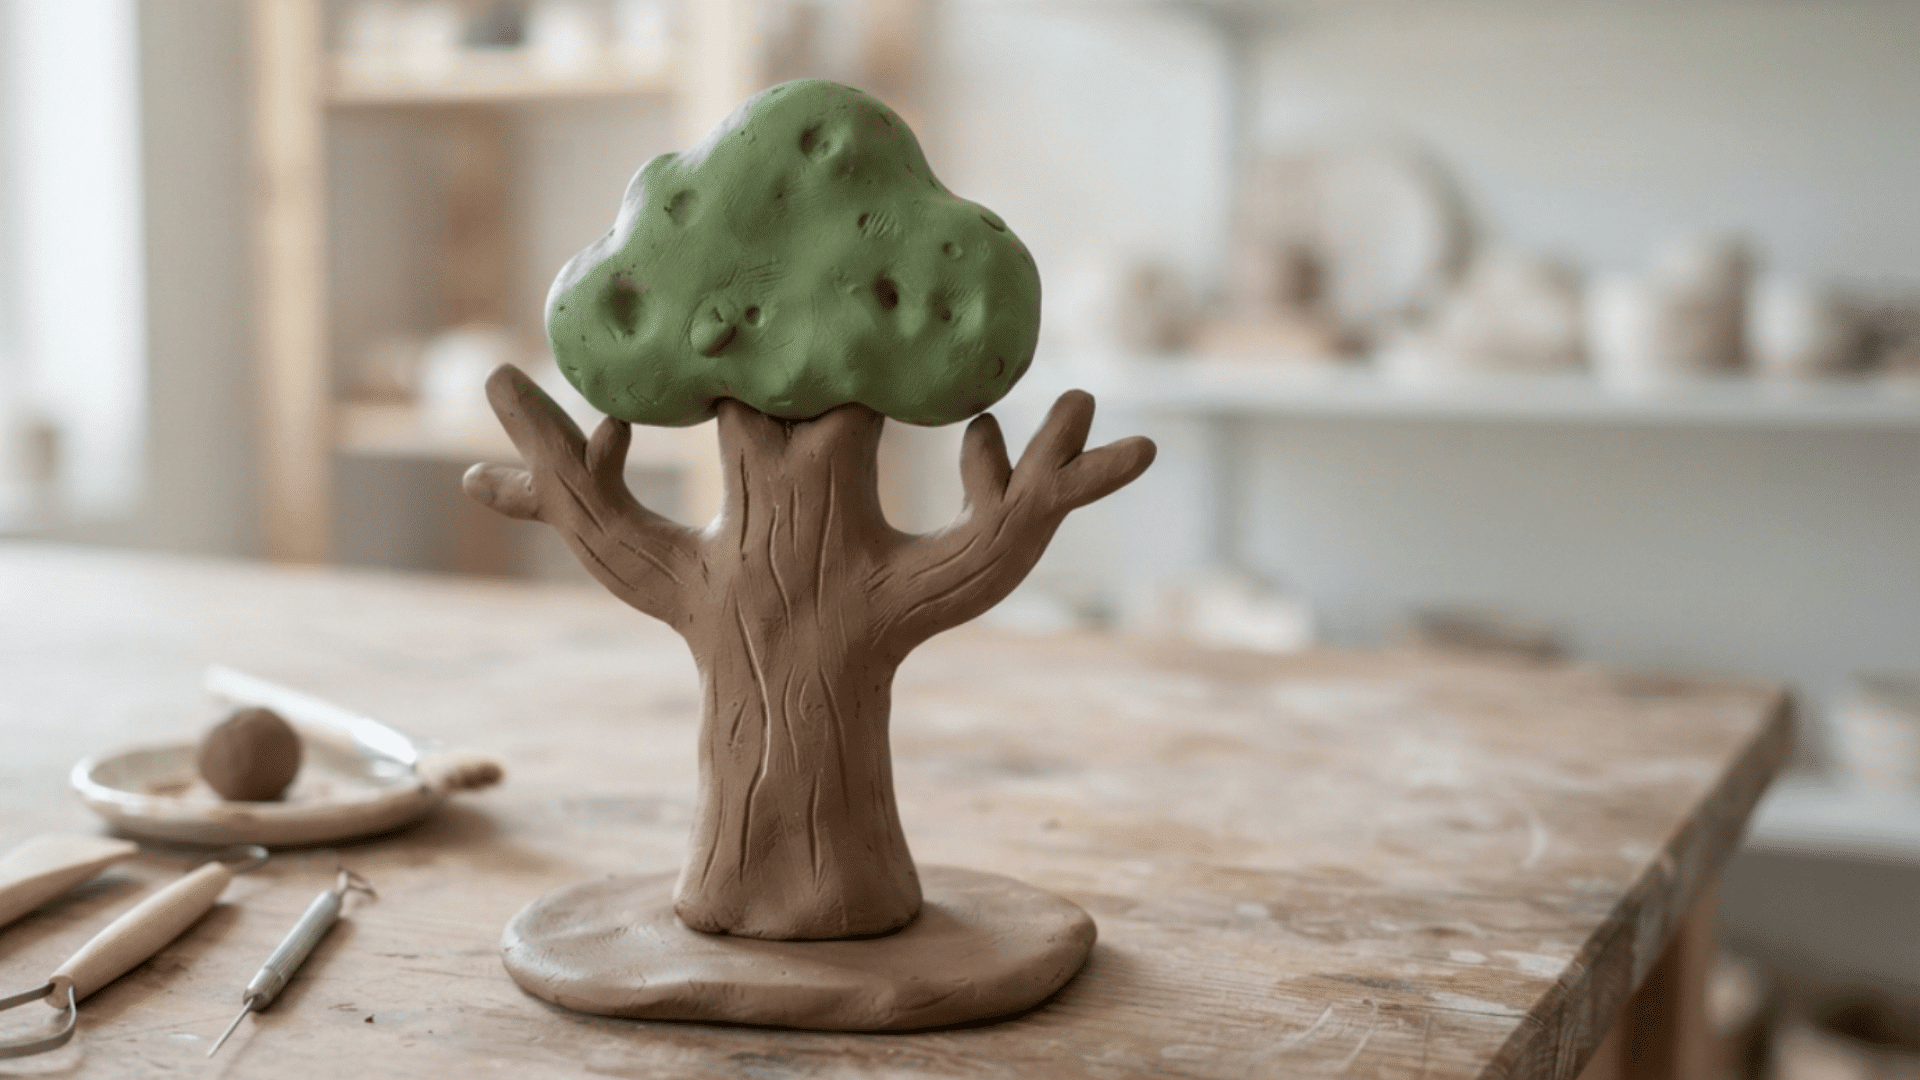
A small tree sculpture begins with a sturdy trunk that divides into a few thick branches. Scratch natural bark lines with a toothpick, then add a broad clay base or visible roots to prevent tipping.
The canopy can be one rounded mass, clusters of leaves, or bare branches for a winter look.
- Best clay: Air-dry or ceramic clay
- Main skills: Building support and carving texture
- Finish: Dry-brush lighter paint across raised bark
15. Mini Coral Reef Scene
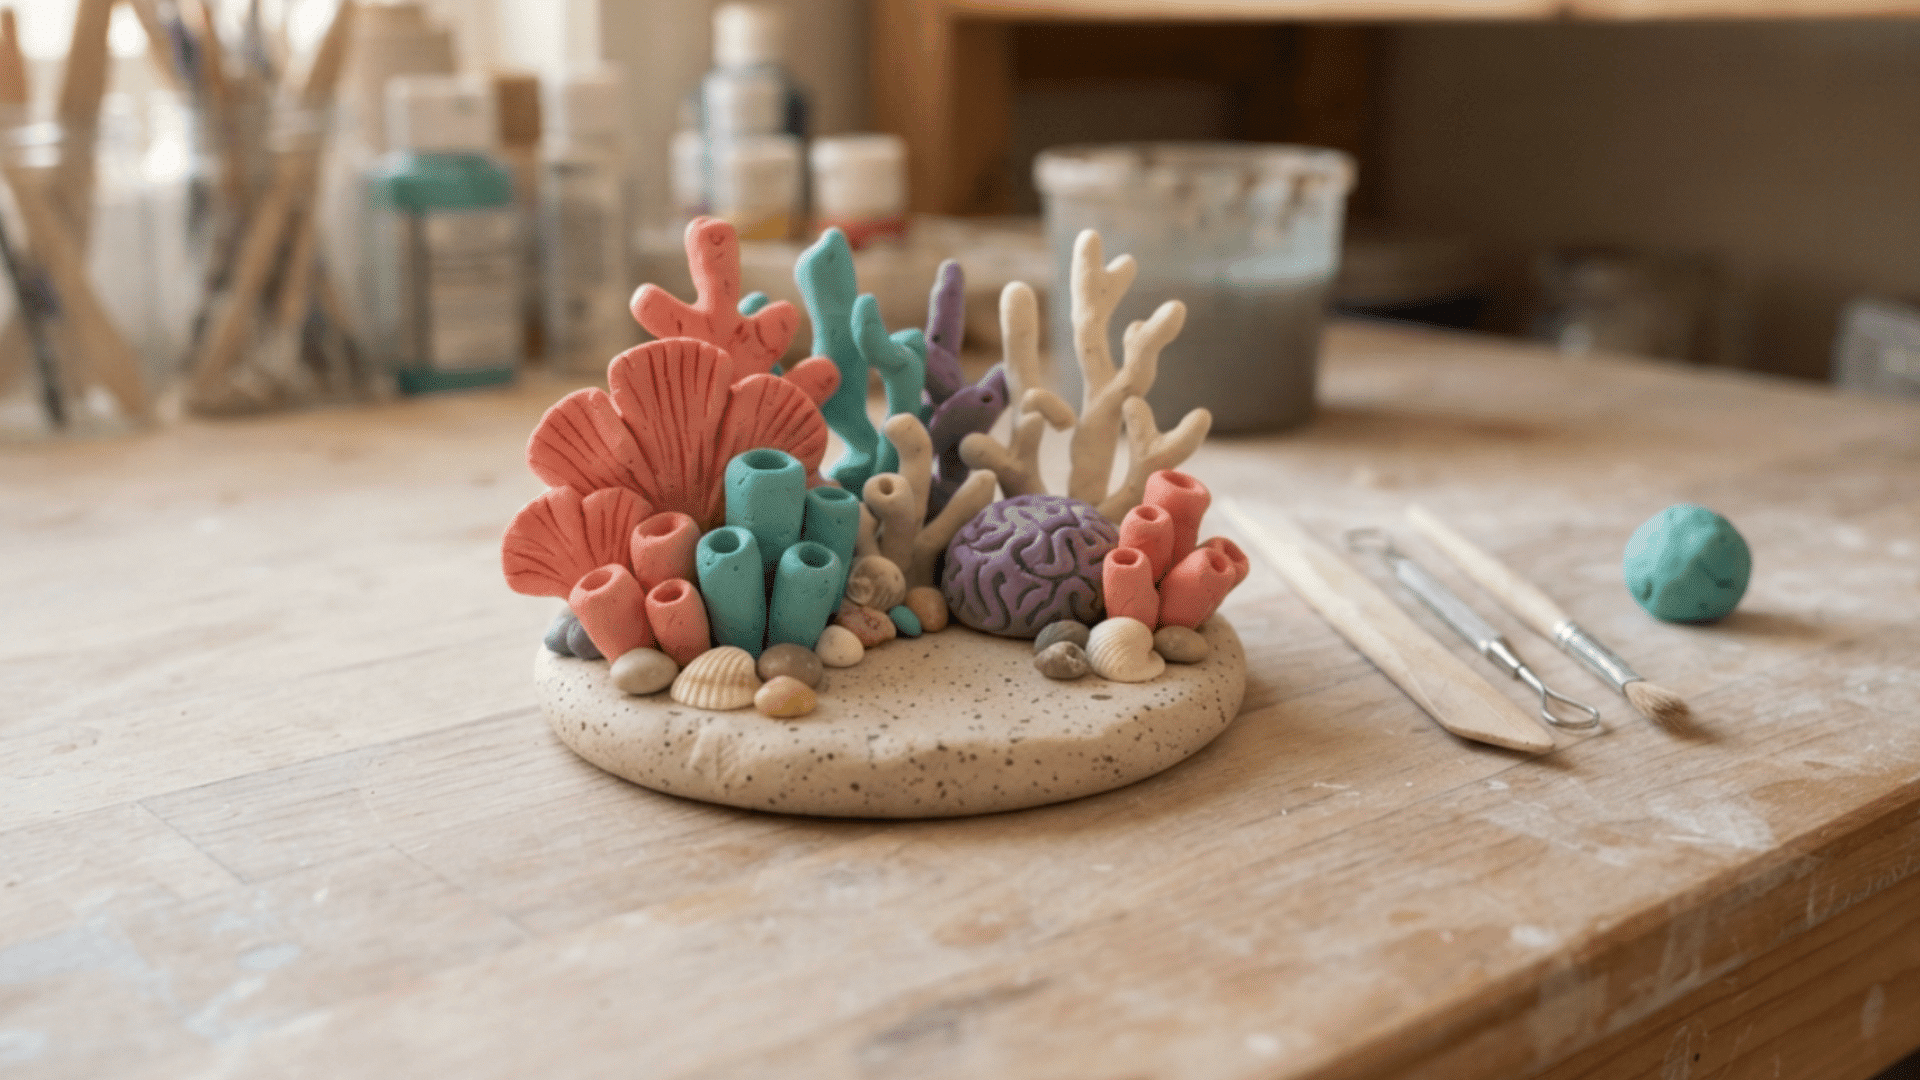
A mini reef combines branching coral, tube shapes, shells, and small pebbled forms on one wide base. Build the tallest pieces near the center and keep thin branches short.
An old toothbrush creates porous texture, while a rounded tool makes coral openings. Bright colors give the scene an underwater feel.
- Best clay: Polymer or fine air-dry clay
- Main skills: Arranging forms and varying surface texture
- Finish: Use coral pink, turquoise, purple, and cream
Food-Inspired Clay Projects
Miniature foods are playful projects for practicing color, scale, and texture. They can become magnets, charms, ornaments, or display pieces, but craft clay should never be presented as edible.
Keep finished miniatures away from very young children and pets because small parts can be a choking hazard.
16. Layered Cake Slice
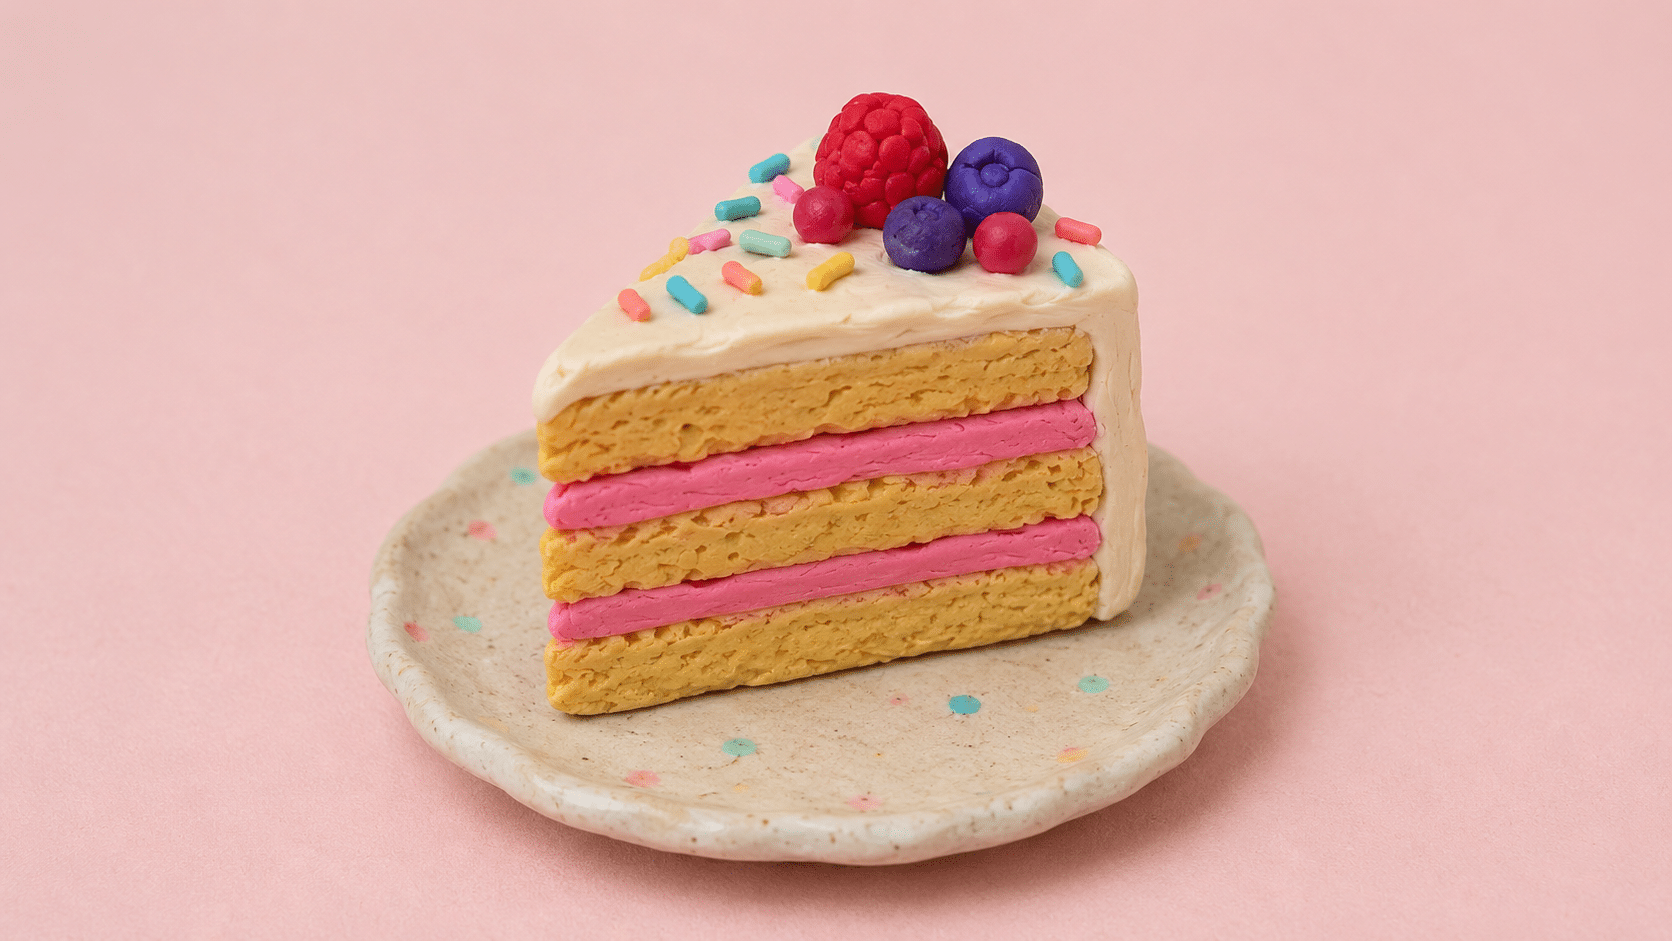
A cake slice starts with two or three clay triangles stacked into even layers. Add thin strips between them for filling, then cover the back and top with a smooth frosting layer.
A toothpick can gently roughen the cut sides to resemble soft cake crumbs. Finish with berries, swirls, or tiny sprinkles.
- Best clay: Polymer clay
- Main skills: Cutting layers and adding fine details
- Finish: Pastel frosting with contrasting cake and filling
17. Glazed Donut Pair
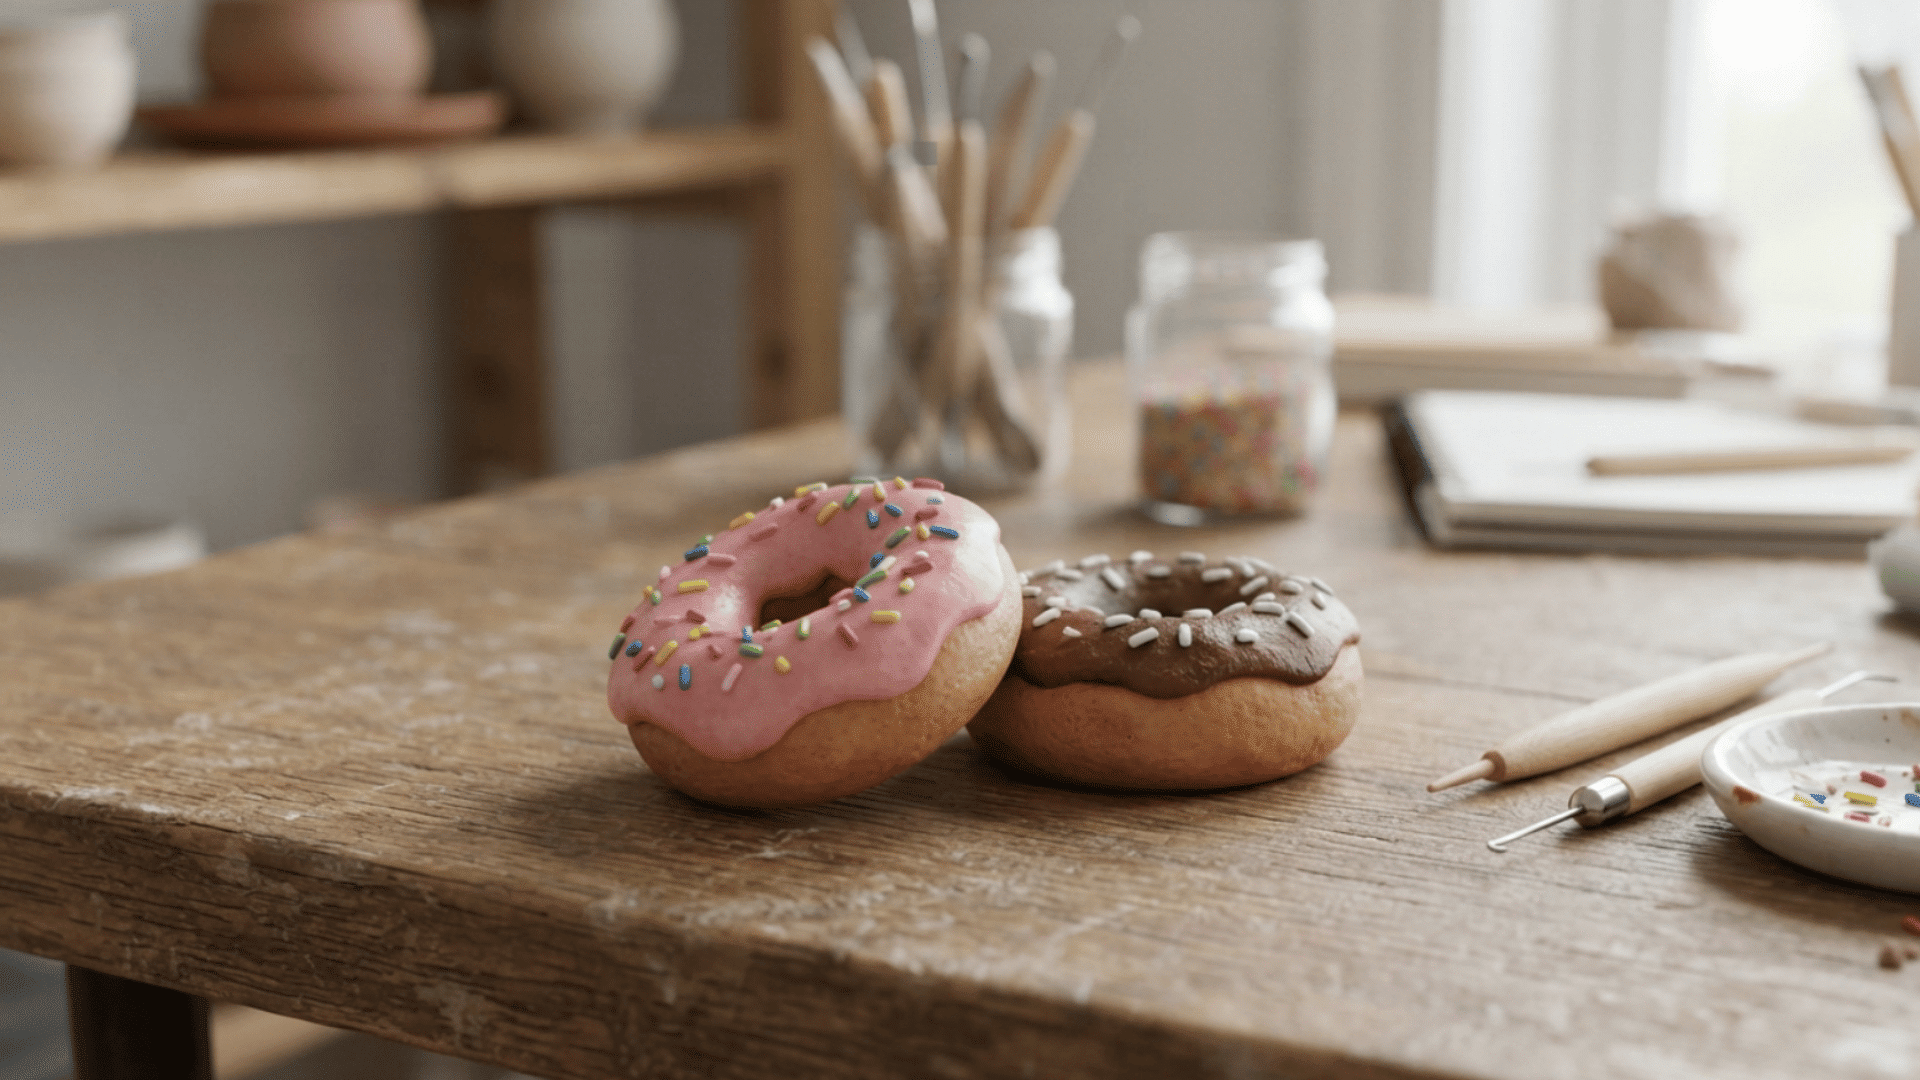
A clay donut forms from a smooth ball pressed into a thick disk. Make the center hole with a rounded tool, then soften the edges so the shape looks baked rather than sharply cut.
Add a thin, uneven icing layer and small clay sprinkles. Two different toppings create a more interesting pair.
- Best clay: Polymer or air-dry clay
- Main skills: Shaping rings and layering toppings
- Finish: Gloss sealer only over the icing
18. Mini Clay Cupcakes
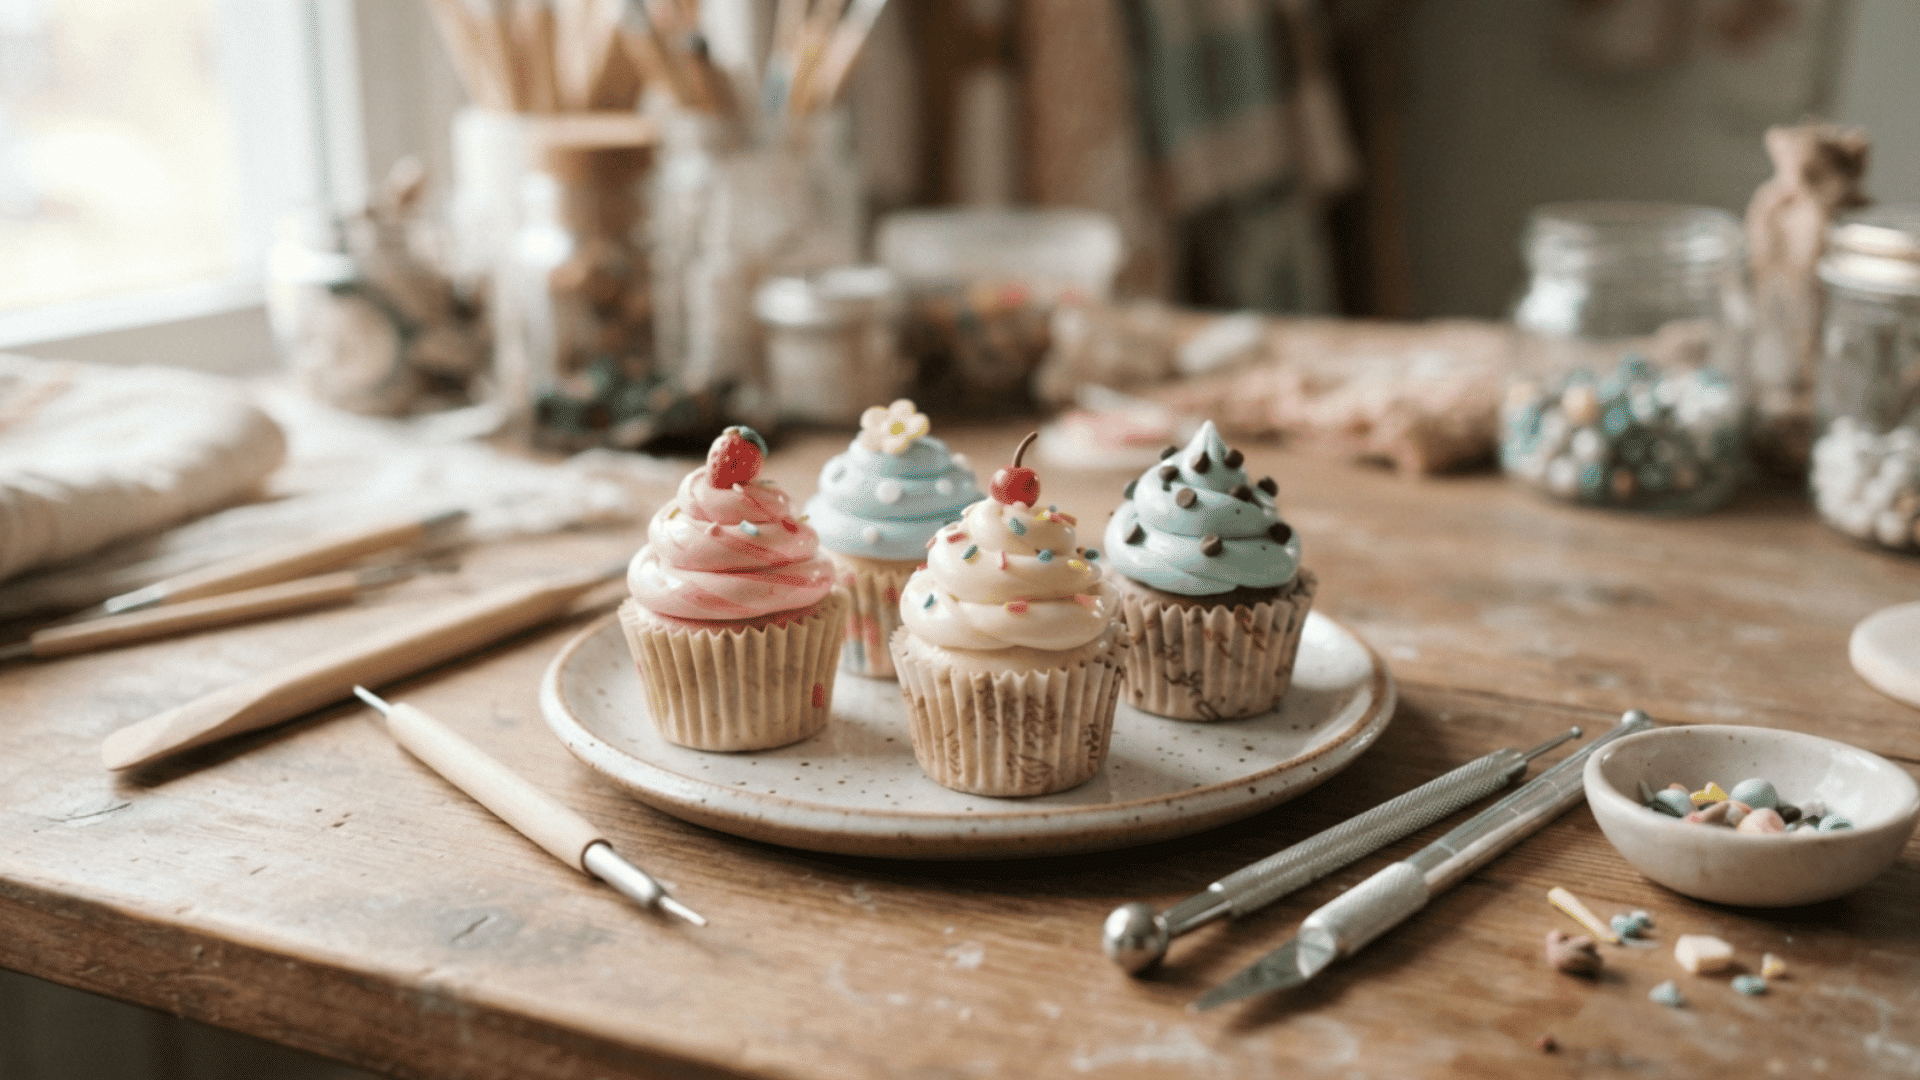
A mini clay cupcake combines simple shapes with fun details. Shape a small cupcake base, add a swirled frosting layer on top, and decorate it with tiny sprinkles, fruit pieces, or candy-like toppings.
Smooth frosting textures and small decorations help the cupcake look more realistic. Create different flavors by changing the icing colors and adding unique toppings to each piece.
- Best clay: Polymer clay or air-dry clay
- Main skills: Layering, shaping, and adding small details
- Finish: Add a glossy sealer over the frosting for a realistic look
19. Clay Cookie Charms
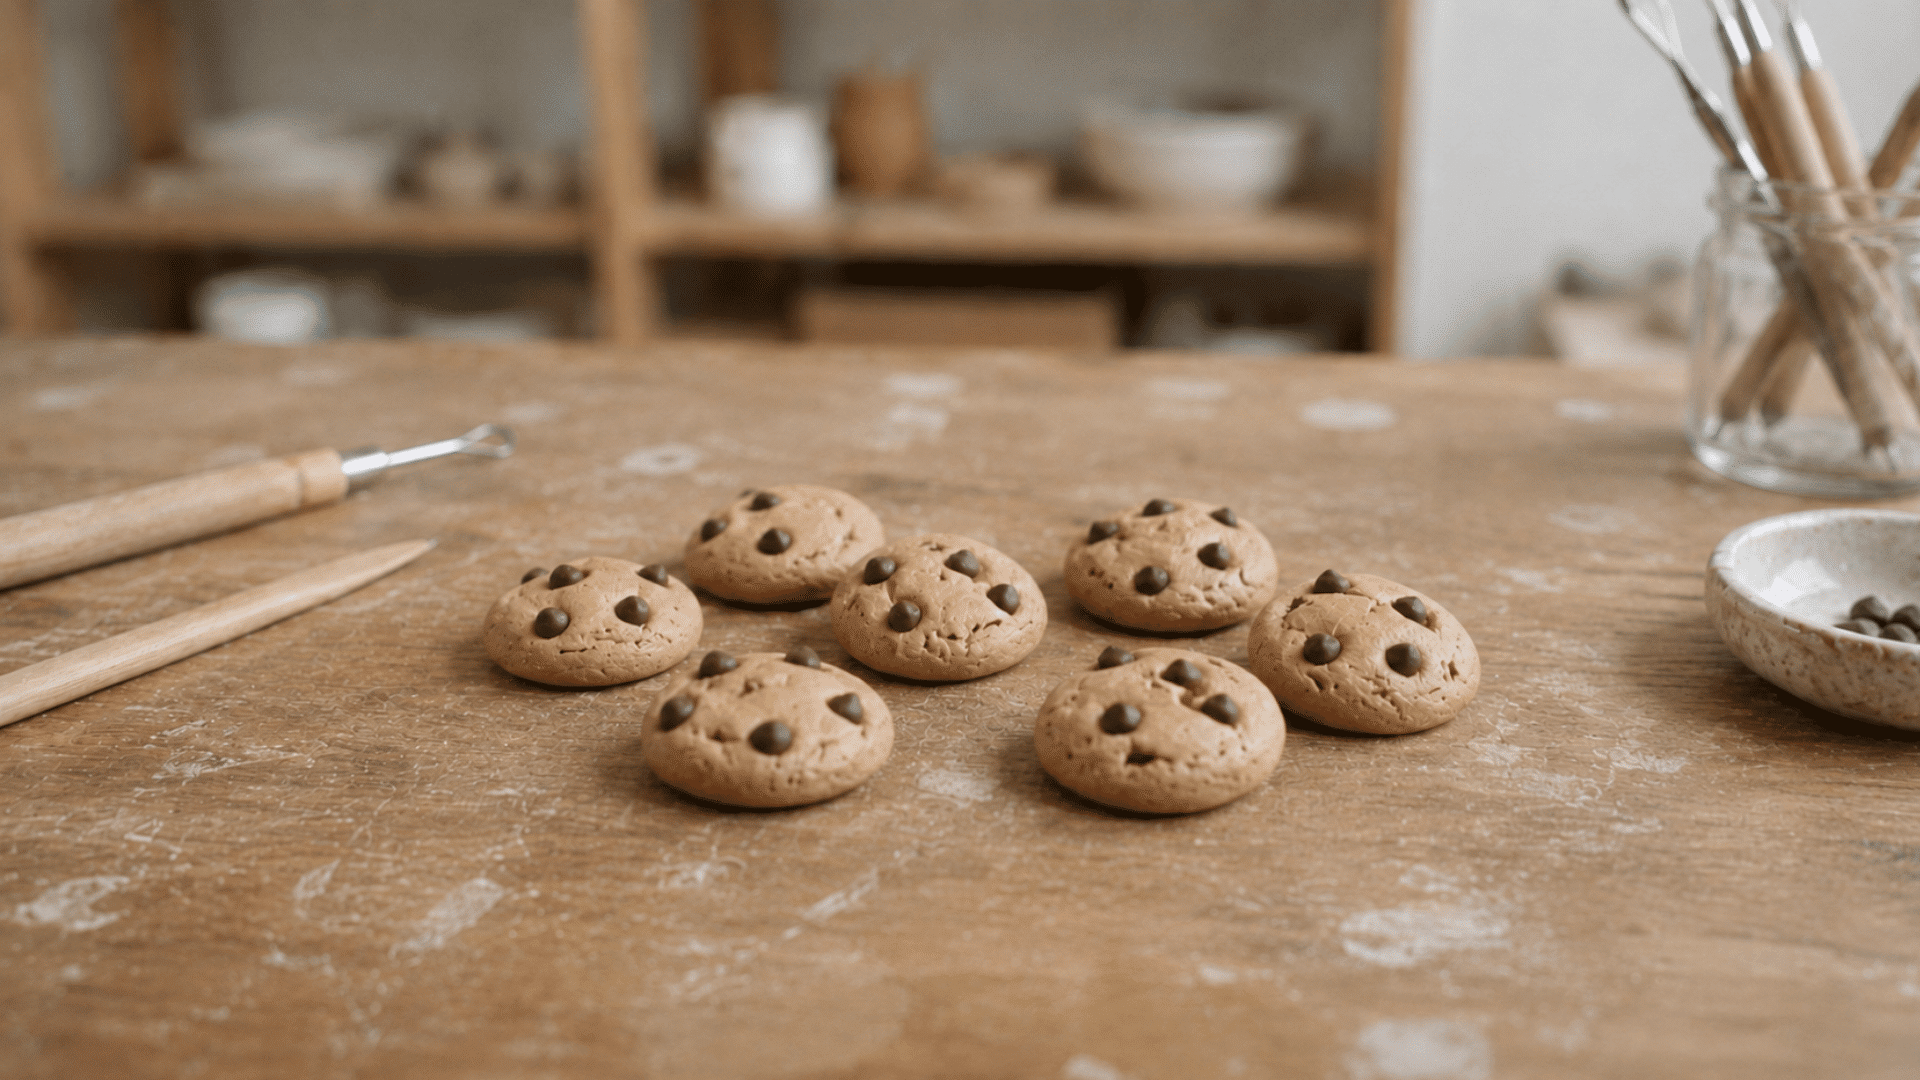
Clay cookie charms bring small food designs to life with simple shapes and tiny details. Shape miniature cookies in different styles, then add chocolate chips, icing patterns, sprinkles, or fun decorations to make each piece unique.
Small texture marks and carefully placed details help the cookies look more realistic. These tiny creations can also be used as cute decorative pieces, keychains, or desk accessories.
- Best clay: Polymer clay
- Main skills: Shaping small forms and adding fine details
- Finish: Add a glossy sealer for a fresh baked look
20. Breakfast Toast Plate
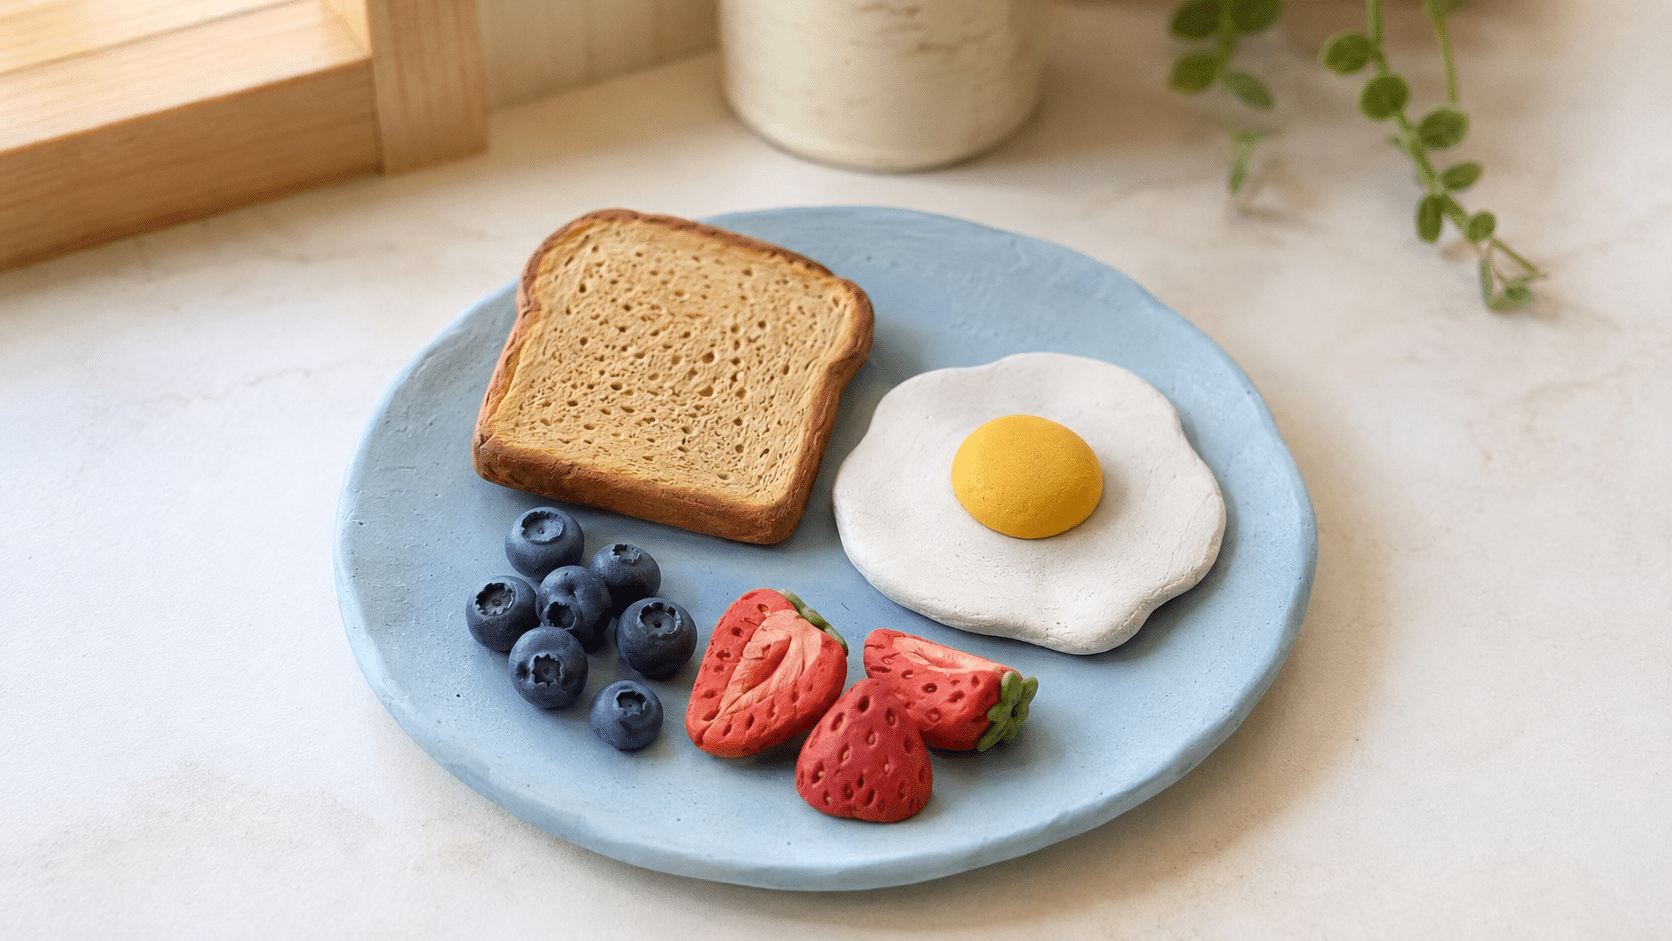
A breakfast plate can hold one textured toast slice, a fried egg, and a few berries.
Press a clean toothbrush lightly into tan clay for realistic bread texture, then add a darker crust around the edge. Flatten white clay unevenly for the egg and place a rounded yellow center on top.
- Best clay: Polymer clay
- Main skills: Flattening, texturing, and arranging small pieces
- Finish: Shade the toast edges with soft brown pastel
Decorative Clay Projects for the Home
Useful objects give sculpting practice a clear purpose. These designs focus on lightweight decoration rather than heavy-duty storage. Air-dry clay is usually not waterproof or heat-safe, so glass inserts, battery lights, and dry decorative uses help protect both the piece and the surrounding surface.
21. Abstract Face Planter
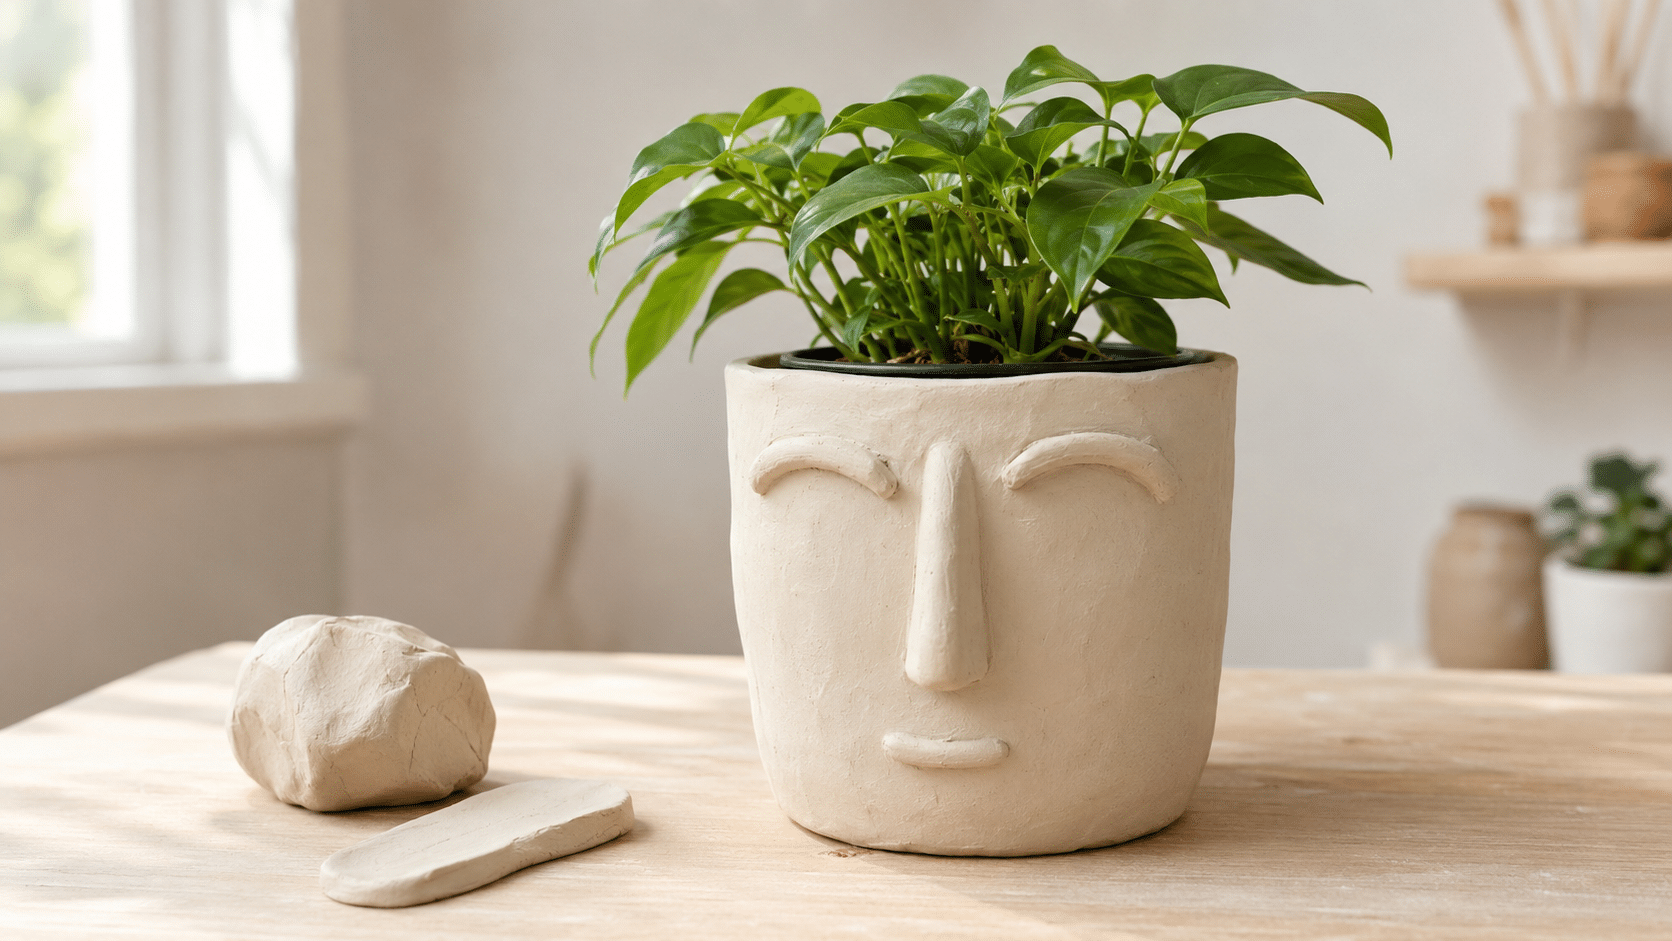
An abstract face planter can be built around a small recycled pot or shaped as a hollow clay cover.
Add a raised nose, curved brows, and a simple mouth to the front, keeping the back plain. A real plant should remain in a separate inner container so water does not soak the clay.
- Best clay: Air-dry or kiln-fired ceramic clay
- Main skills: Building around a form and facial placement
- Finish: Matte neutral paint or simple color blocking
22. Moon Phase Wall Hanging
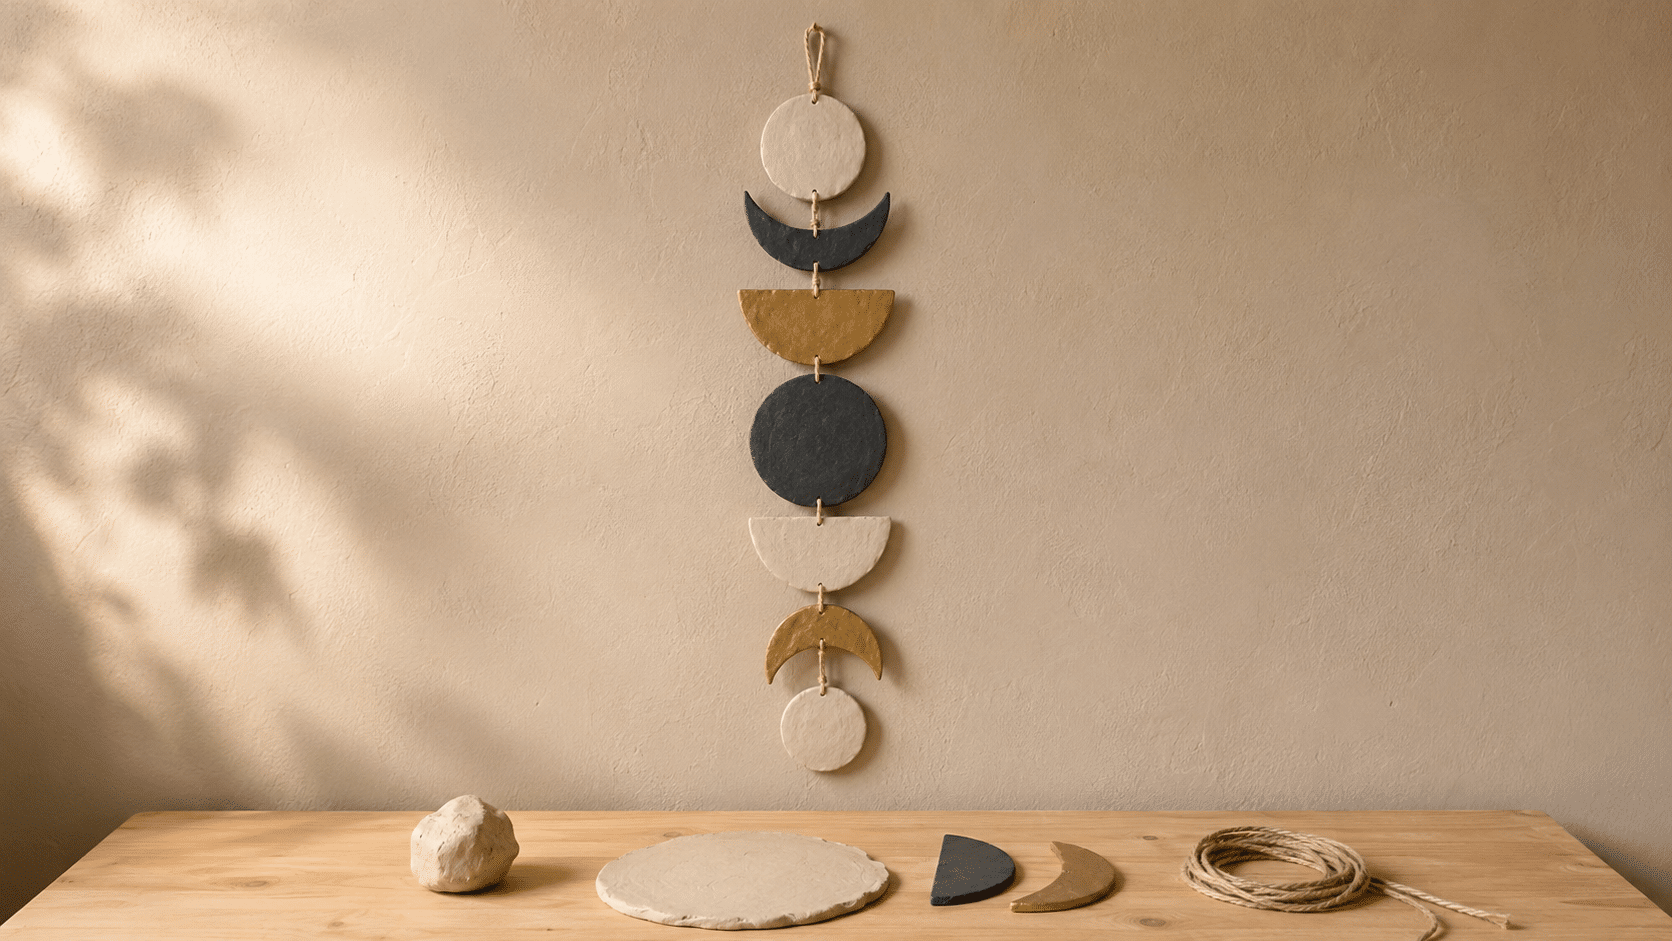
A moon phase hanging uses five or seven flat clay pieces cut as circles and crescents. Make two small holes in each piece before drying, then connect the shapes vertically with cord.
Pressing subtle stars or dots into the surface adds detail without making the design busy. Keep every piece similar in thickness.
- Best clay: Air-dry or polymer clay
- Main skills: Rolling evenly, cutting, and planning spacing
- Finish: White, charcoal, gold, or deep blue paint
23. Tiny House Village
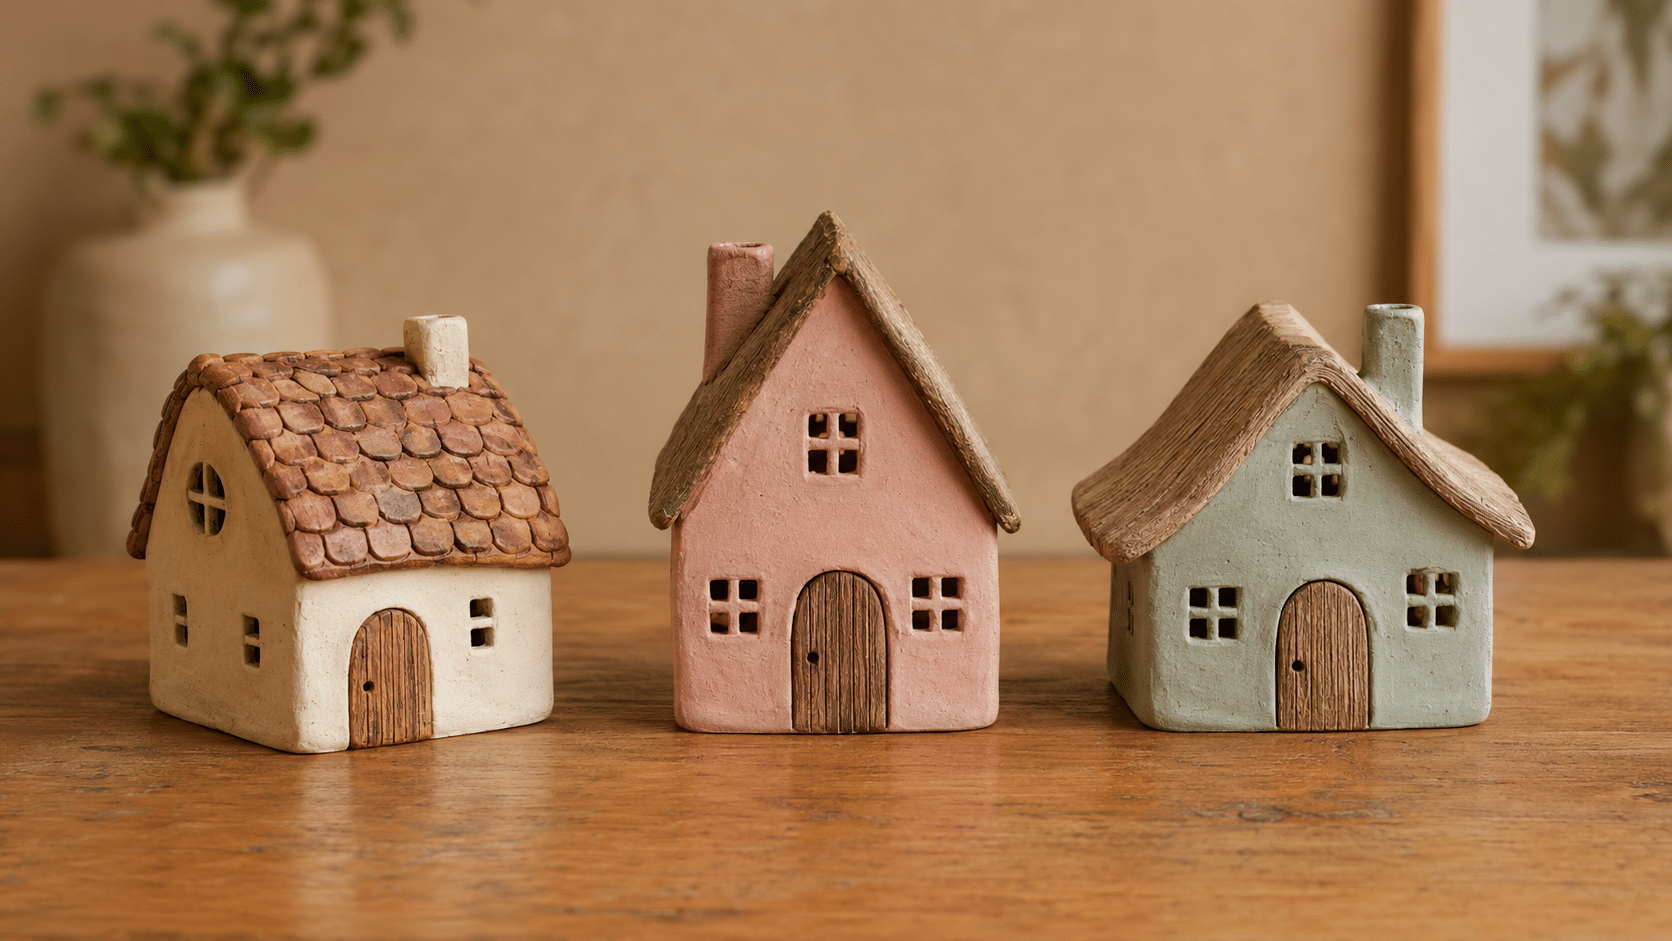
A tiny house village can be made from solid blocks or hollow folded slabs. Vary the rooflines, doors, and window shapes while keeping the bases flat.
Three to five houses create a full scene without taking much shelf space. Battery-operated lights placed behind open windows can add a soft evening glow.
- Best clay: Air-dry or ceramic clay
- Main skills: Straight cutting, joining walls, and carving openings
- Finish: Muted colors with white window details
24. Terrazzo Trinket Tray
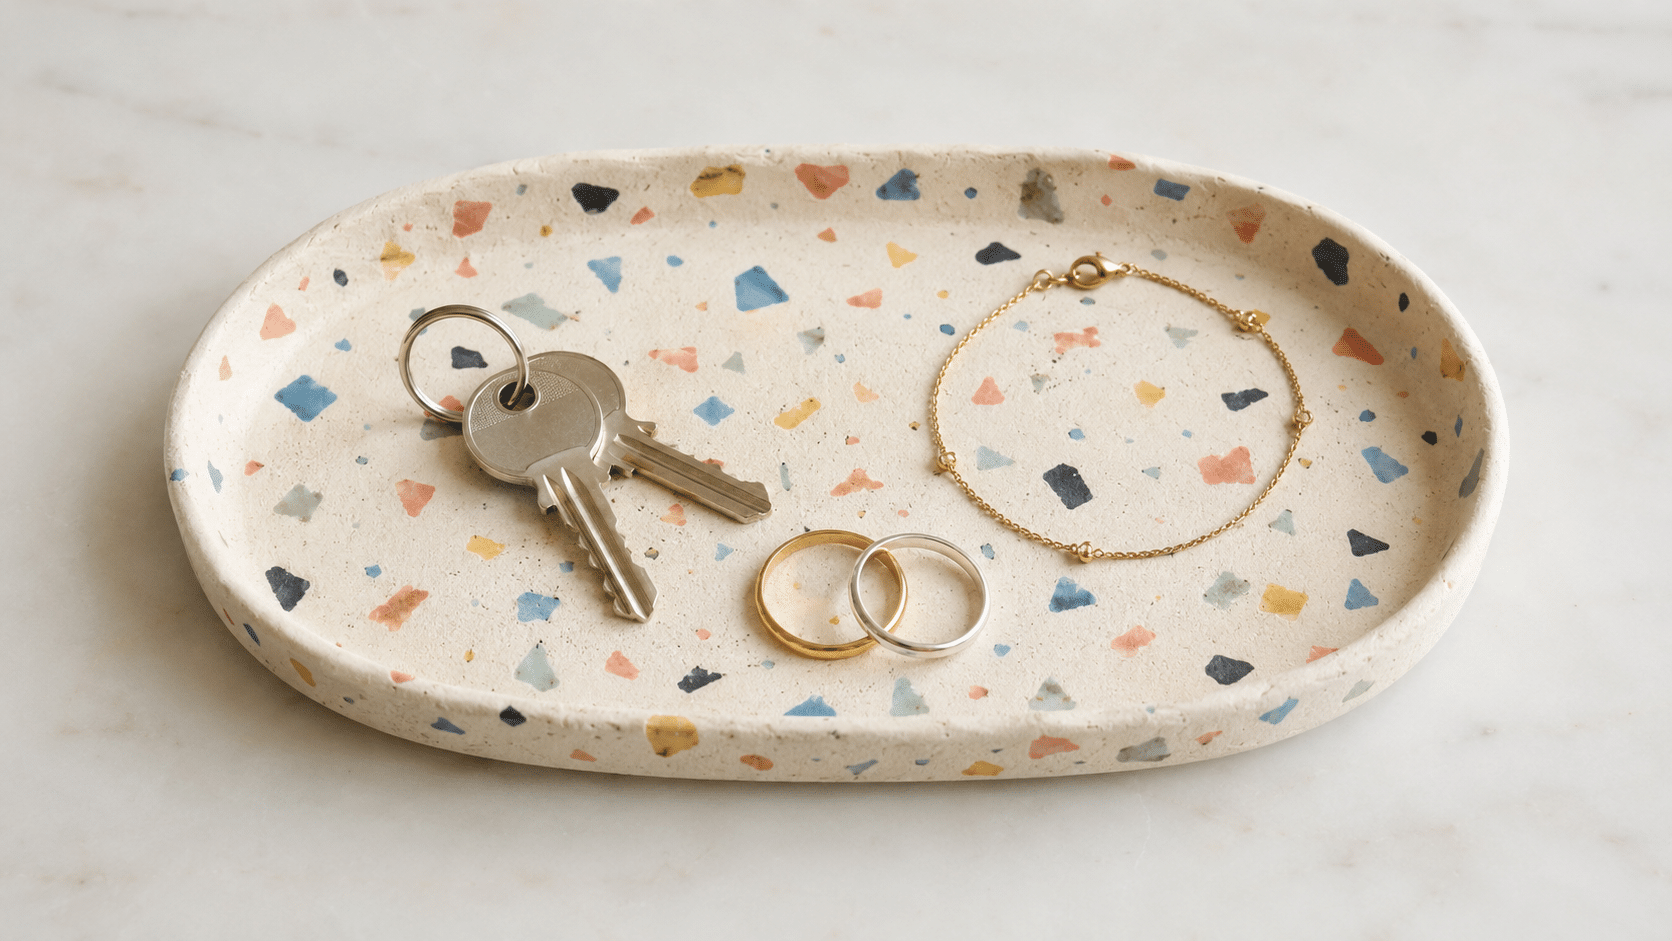
A terrazzo tray uses tiny colored clay chips pressed into a larger neutral slab. Roll the surface once more to level the pieces, cut a clean oval or rectangle, and lift the edges slightly.
Space the chips unevenly so the pattern looks natural. The tray works best for dry items such as keys or jewelry.
- Best clay: Polymer or air-dry clay
- Main skills: Color planning, rolling, and edge shaping
- Finish: Sand rough edges after fully curing or drying
25. Botanical Photo Holder
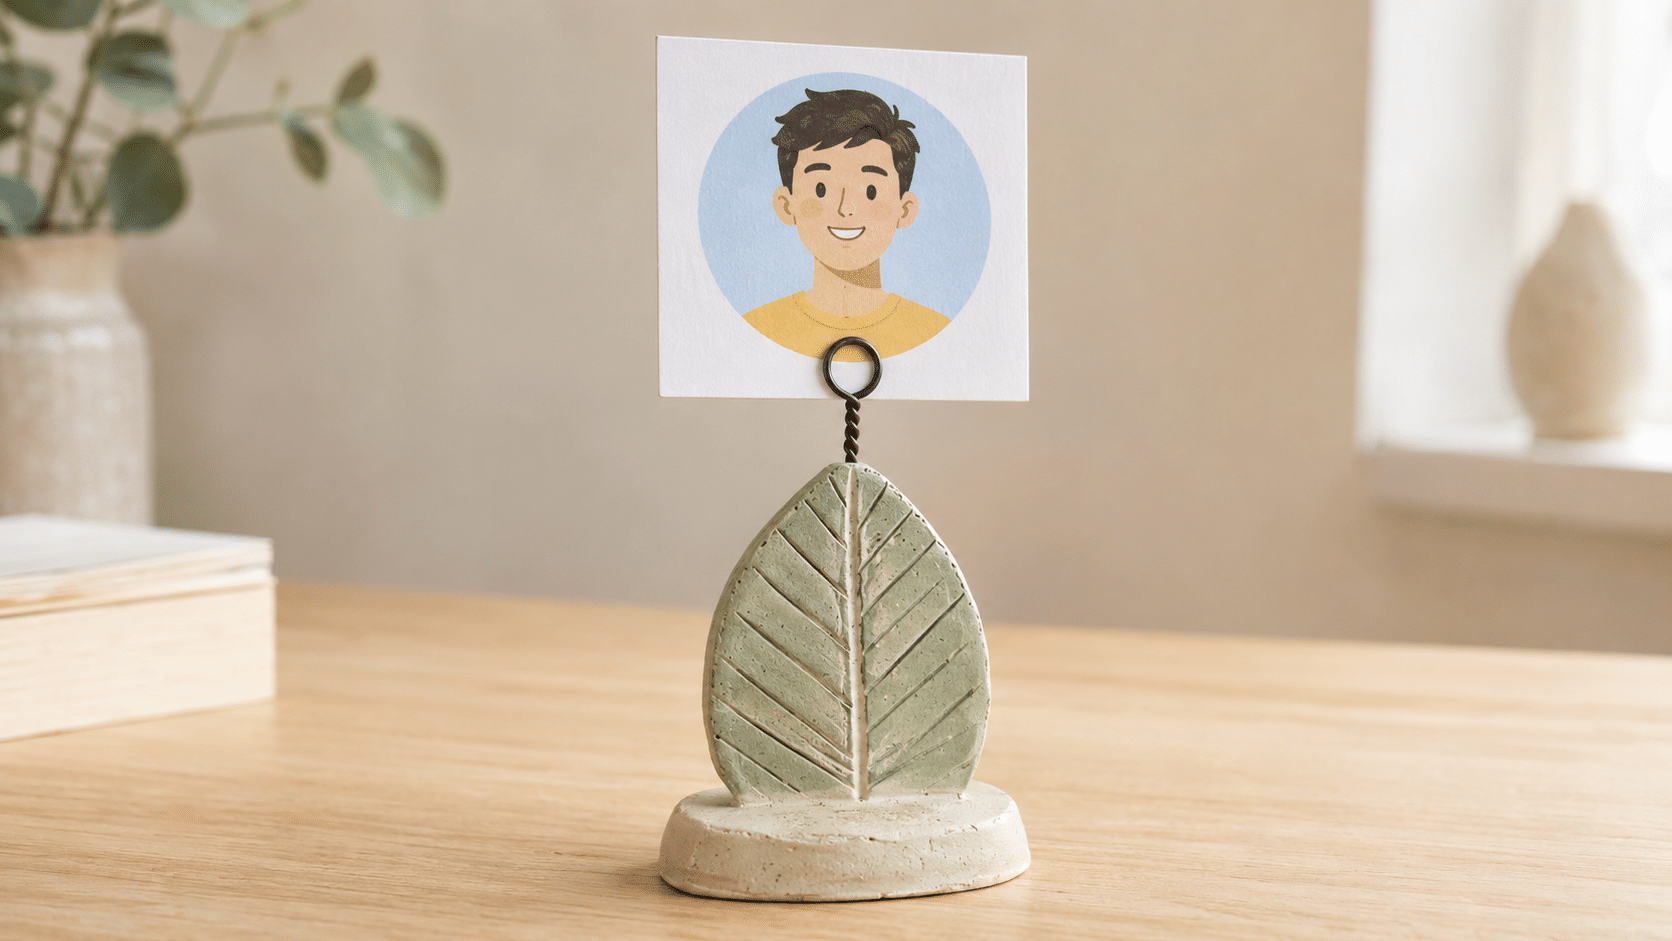
A botanical photo holder combines a weighted clay base with a short wire loop.
Shape the base as a leaf, flower, or smooth pebble, then insert twisted wire while the clay is soft. Make the base wide enough to support a small printed photo or place card without tipping.
- Best clay: Air-dry or polymer clay
- Main skills: Forming a stable base and adding texture
- Finish: Paint raised leaf veins in a lighter tone
Tips to Improve Clay Sculpting Skills
Small improvements in technique can make clay projects cleaner, stronger, and more detailed. These simple tips can help you build confidence while practicing.
Start with simple shapes
Begin with basic forms like spheres, cylinders, and cubes to understand clay handling before making detailed designs.
Keep clay at the right moisture level
Maintain the proper softness of clay to prevent cracks, dryness, or difficulty while shaping.
Practice small details regularly
Work on tiny features like textures, lines, and patterns to improve control and accuracy over time.
Use references for inspiration
Look at pictures, objects, or other artworks to understand shapes, proportions, and design ideas.
Allow enough drying and finishing time
Let your sculpture dry properly and add finishing touches carefully for a smoother final piece.
How to Preserve and Finish Clay Sculptures
Preserving and finishing clay sculptures helps maintain their shape, color, and surface details for longer.
Drying methods depend on the clay type, as air-dry clay needs natural drying while polymer clay requires baking according to instructions.
Once dry, you can add color using acrylic paints and protect the surface with suitable sealers or varnishes.
A finished sculpture should be kept away from moisture, direct sunlight, and rough handling. Storing pieces in a safe, dry place and cleaning them gently can help protect the artwork over time.
Conclusion
Clay sculpting is a creative activity where every piece improves with practice, patience, and a little experimentation.
From beginner projects to detailed designs, these clay sculpture ideas can help you learn shaping, texturing, layering, and finishing techniques.
Simple creations can build your confidence over time without worrying about making everything perfect. Try different materials, colors, and styles to find what works best for you.
Which clay project from this list would you like to try first? Share your favorite idea or any creations you make in the comments below.
Frequently Asked Questions
Can Clay Sculptures Be Made without Using Any Tools?
Yes, many simple sculptures can be shaped using only your hands. Tools are helpful for adding details, but they are not always required.
How Can I Fix Cracks that Appear in a Clay Sculpture?
Small cracks can often be repaired by adding a little soft clay or smoothing the area before the piece dries completely.
Can Clay Sculptures Be Displayed Outdoors?
Most clay sculptures are better suited for indoor display unless they are made with outdoor-safe materials and properly protected from weather conditions.