Paper mache is one of those crafts that looks complicated but is surprisingly easy to master once you know the basics.
Master paper mache and create bowls, sculptures, masks, and more with just paper and paste.
If you are a complete beginner or picking it back up after years, this guide walks you through everything you need to create something strong, smooth, and impressive.
What is Paper Mache?
Mix paper with paste, shape it, let it harden, and you’ve got lightweight masks, bowls, or sculptures from supplies already at home. There are two paper mache methods:
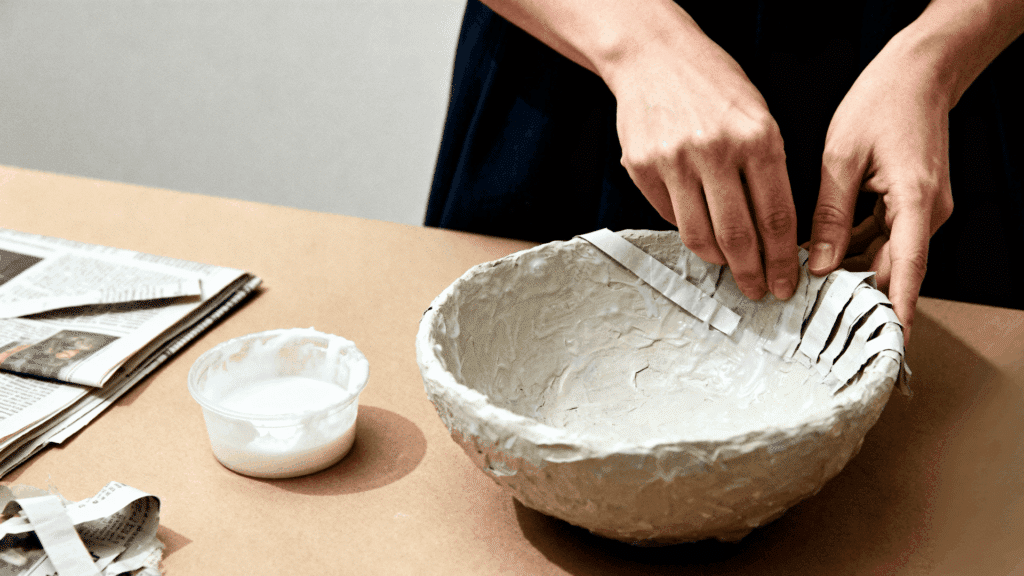
- The strips method is the best choice for beginners. You dip torn paper into paste and layer it over a shape, such as a balloon or mold.
- The pulp method is more advanced, using blended paper that works like clay. It gives you more detail but is harder to control. If you are just starting out, stick with strips.
Whichever method you choose, paper mache rewards patience, and every messy, creative step brings you closer to something uniquely your own.
Materials You Need to Make Paper Mache
You only need a few simple items to start paper mache at home. These materials are easy to find and safe for kids to use for fun craft projects.
| BASIC SUPPLIES | OPTIONAL SUPPLIES |
|---|---|
| Newspaper or scrap paper | Salt (prevents mold) |
| Flour or glue | Paint |
| Water | Sealant |
| Bowl | Balloon or mold base |
| Brush |
How to Make Paper Mache Paste: 3 Simple Methods
Making papier-mache paste takes under five minutes and uses ingredients you likely already have at home. The method you choose depends on your project’s size, setting, and the level of finish you need.
Recipe 1: Classic Flour and Water Paste
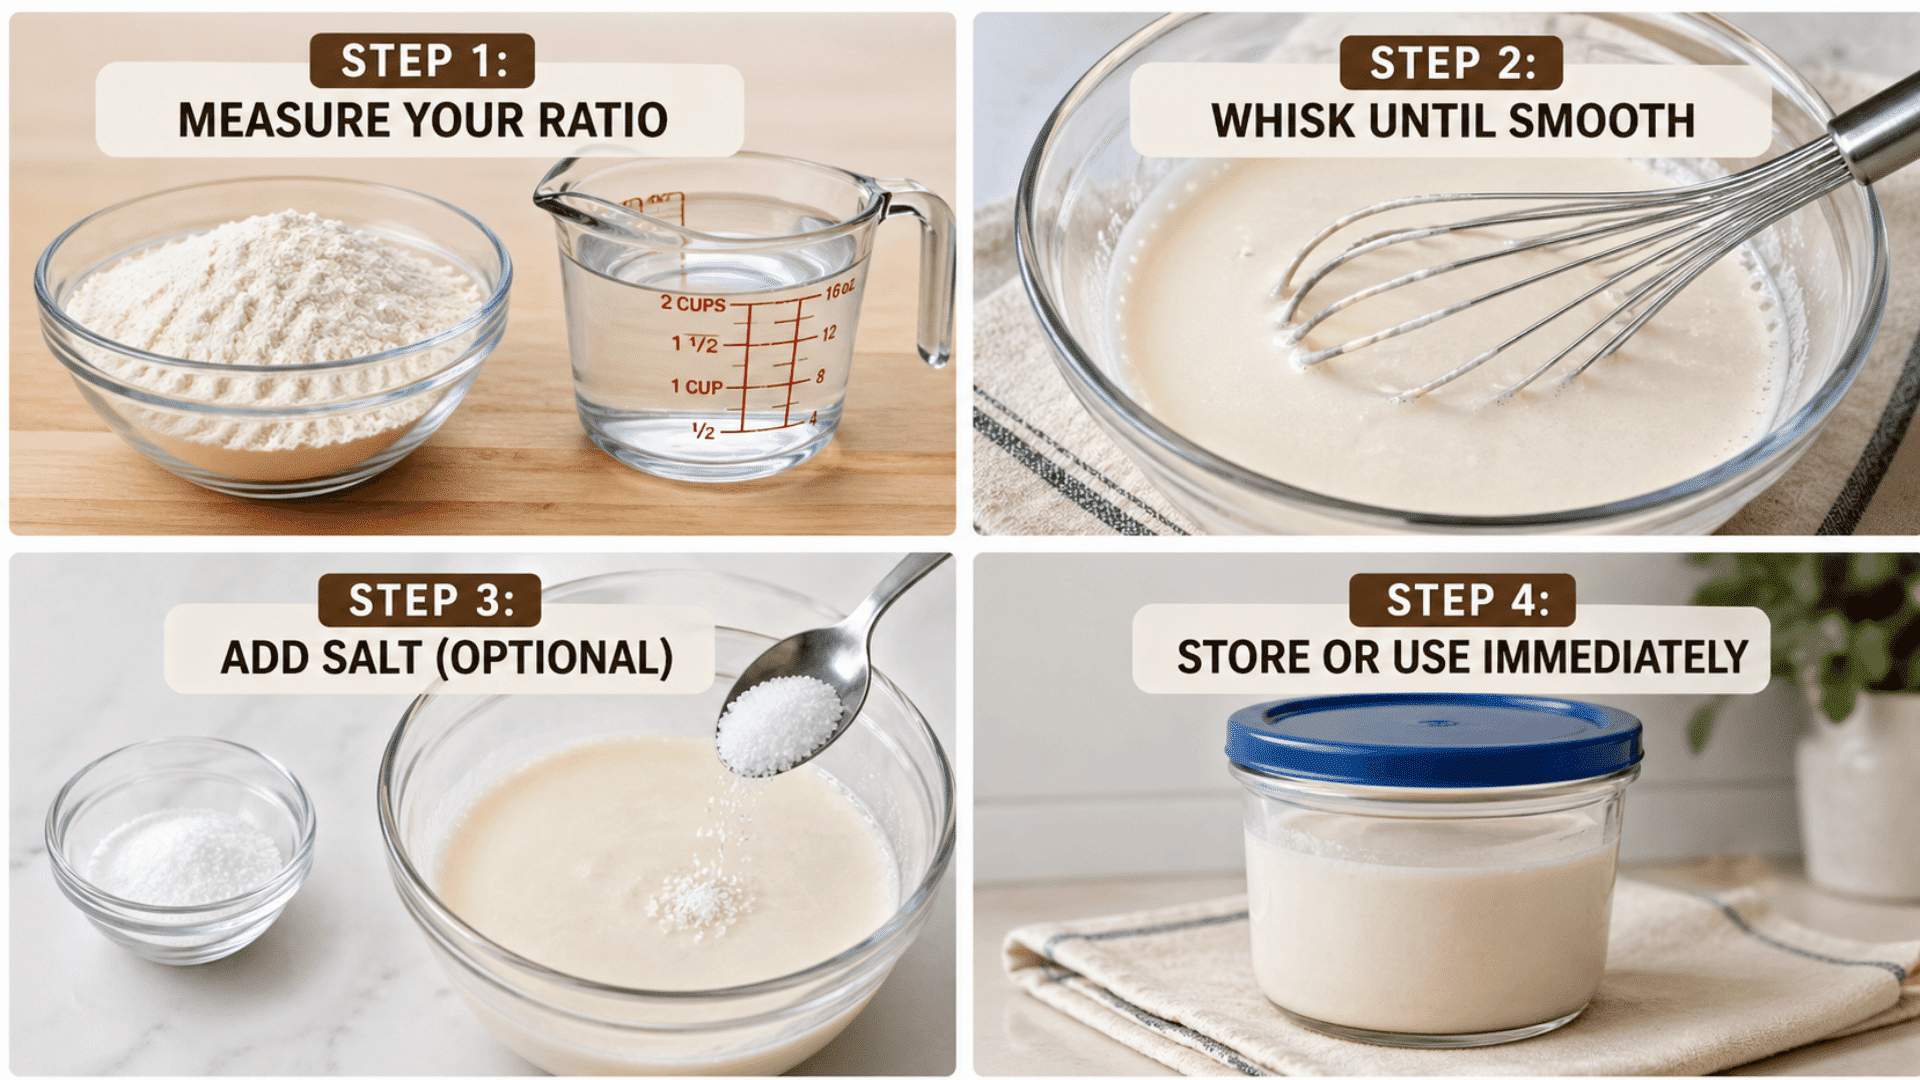
This inexpensive, biodegradable paste uses kitchen staples and is recommended by Red Ted Art for its strength, durability, and eco-friendliness. Glue is only suggested for a whiter finish, this is the easiest way to make the paste.
Step 1: Measure Your Ratio
Use 1 part flour to 2 parts water (or 1:4 for a thinner consistency on delicate projects). Start small; a cup of each is plenty for a first layer.
Getting the ratio right from the start saves you from having to adjust mid-mix, so measure before you pour rather than eyeballing it.
Step: 2 Whisk Until Smooth
Add the flour to a bowl first, then slowly pour in the water while whisking to avoid lumps. You’re aiming for a consistency close to thin pancake batter.
If small lumps remain, keep whisking; a smooth paste soaks into paper strips far more evenly than a lumpy one.
Step 3: Add Salt (Optional)
Stir in 1 tablespoon of salt if you’re working in a humid climate or storing the paste. Salt helps prevent mold from forming between sessions.
This small addition can noticeably extend your paste’s fridge life, especially in warm or coastal environments where moisture builds quickly.
Step 4: Store or Use Immediately
Use right away, or transfer to an airtight container and refrigerate for up to one week. Give it a quick stir before reusing.
If the paste thickens in the fridge, add a small splash of water and whisk briefly to restore the right consistency.
Pro Tip: Heating the mixture releases the starch in the flour, creating a noticeably stronger paste — cook it on the stove or microwave in 30–40 second bursts, stirring between each interval until thickened.
Recipe 2: PVA Glue (Elmer’s Glue) and Water Paste (Stronger and Cleaner)
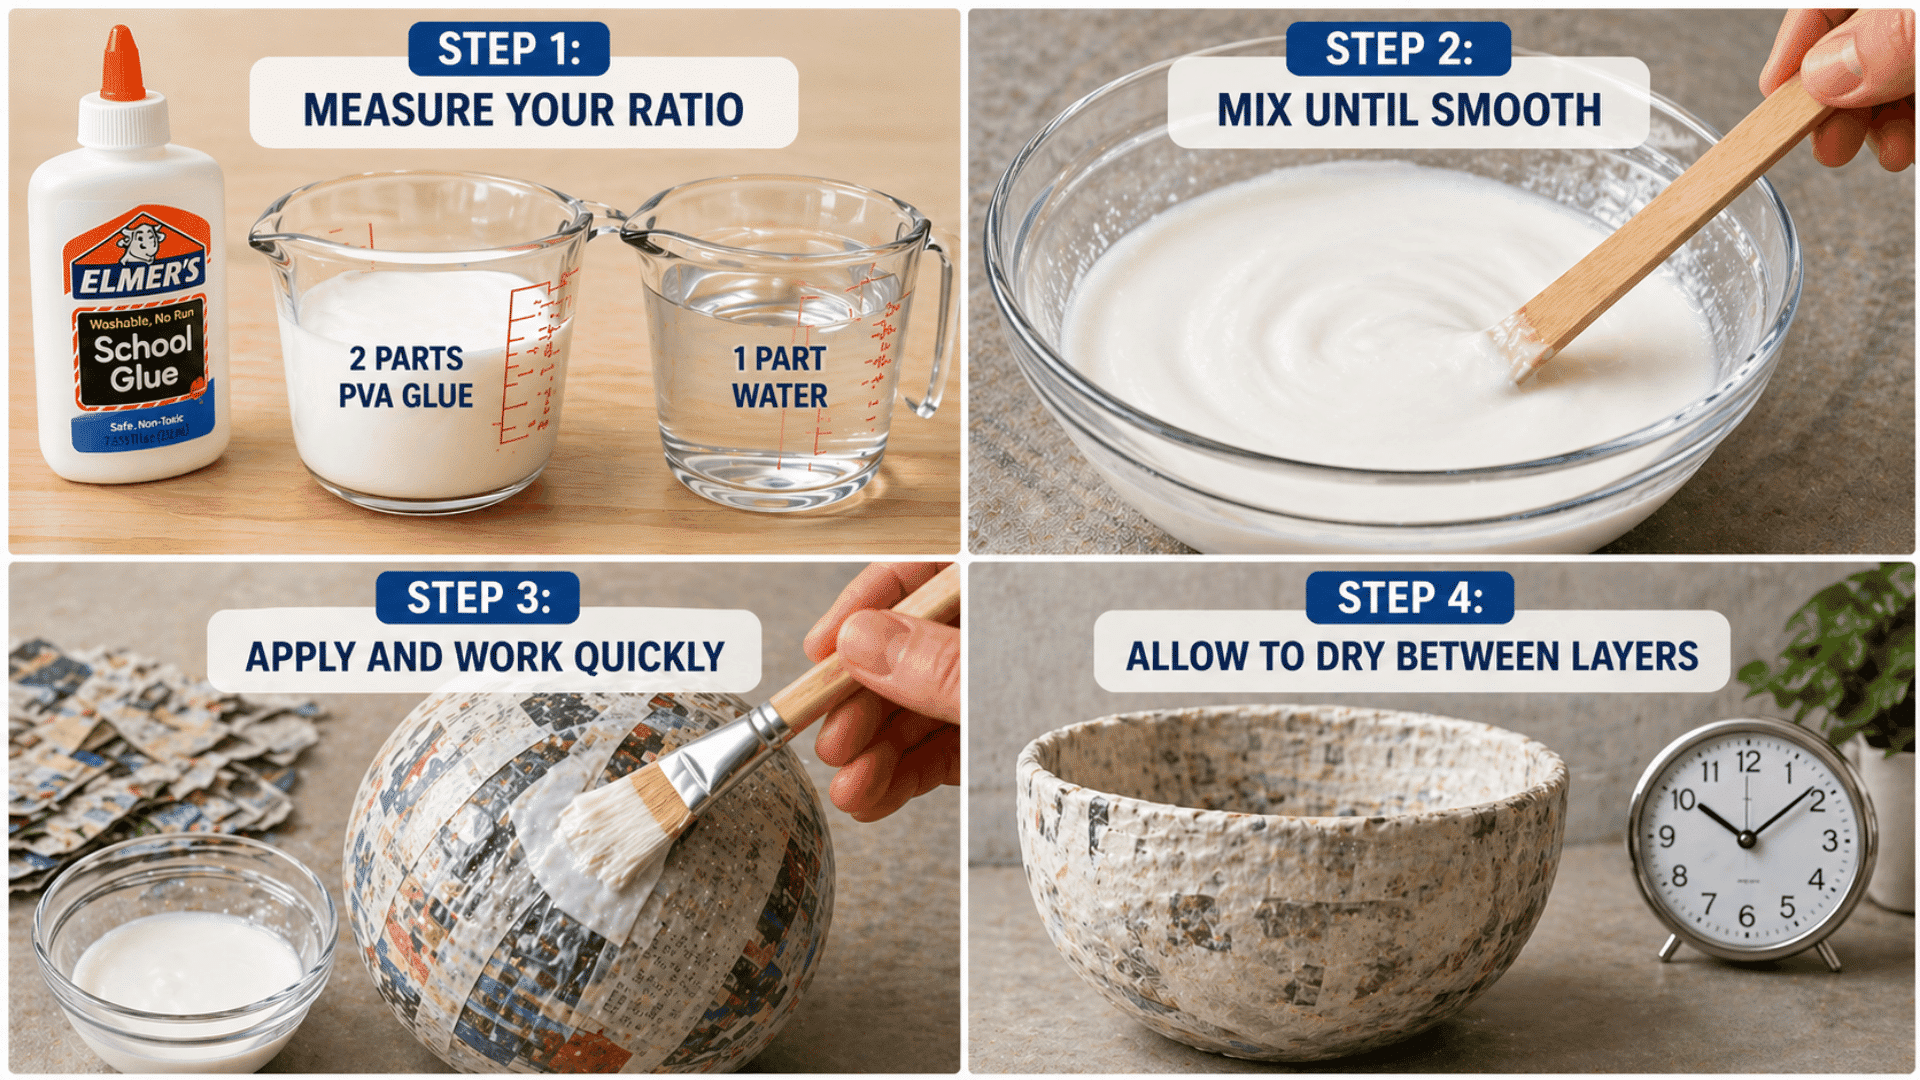
Jane Sawyer recommends a 50/50 mix for adult projects or humid conditions, as it stays slightly tacky, reduces soak time, and dries faster.
Step 1: Measure Your Ratio
Combine 2 parts PVA glue to 1 part water for a stronger hold, or go 1:1 if you prefer a slightly thinner coat that spreads more easily.
Having your ratio decided before you start means you won’t end up with a paste that’s too runny to grip or too thick to spread smoothly across your project.
Step 2: Mix Until Smooth
Stir the glue and water together in a bowl until fully combined, no whisking needed, just a steady stir for about 30 seconds.
Unlike flour paste, PVA blends almost instantly, so you’ll achieve a ready-to-use consistency far more quickly than with any other method.
Step 3: Apply and Work Quickly
The paste stays tacky while wet rather than soaking into the paper, so work in thin layers and smooth as you go for a cleaner, more controlled finish.
This tackiness is actually an advantage. Strips stay exactly where you place them instead of sliding around during application.
Step:4 Allow to Dry Between Layers
Let each layer dry fully before adding the next. PVA dries clear and firm, so the finish will be notably cleaner and harder than a flour-based result.
Rushing this step by adding layers too soon traps moisture inside and can cause the surface to crack or warp as it finally dries.
Recipe 3: Cooked Flour Paste
Best for piñatas, large builds, or anything needing real structural strength, cooked flour activates its starch, making this the toughest, most durable paste of the lot.
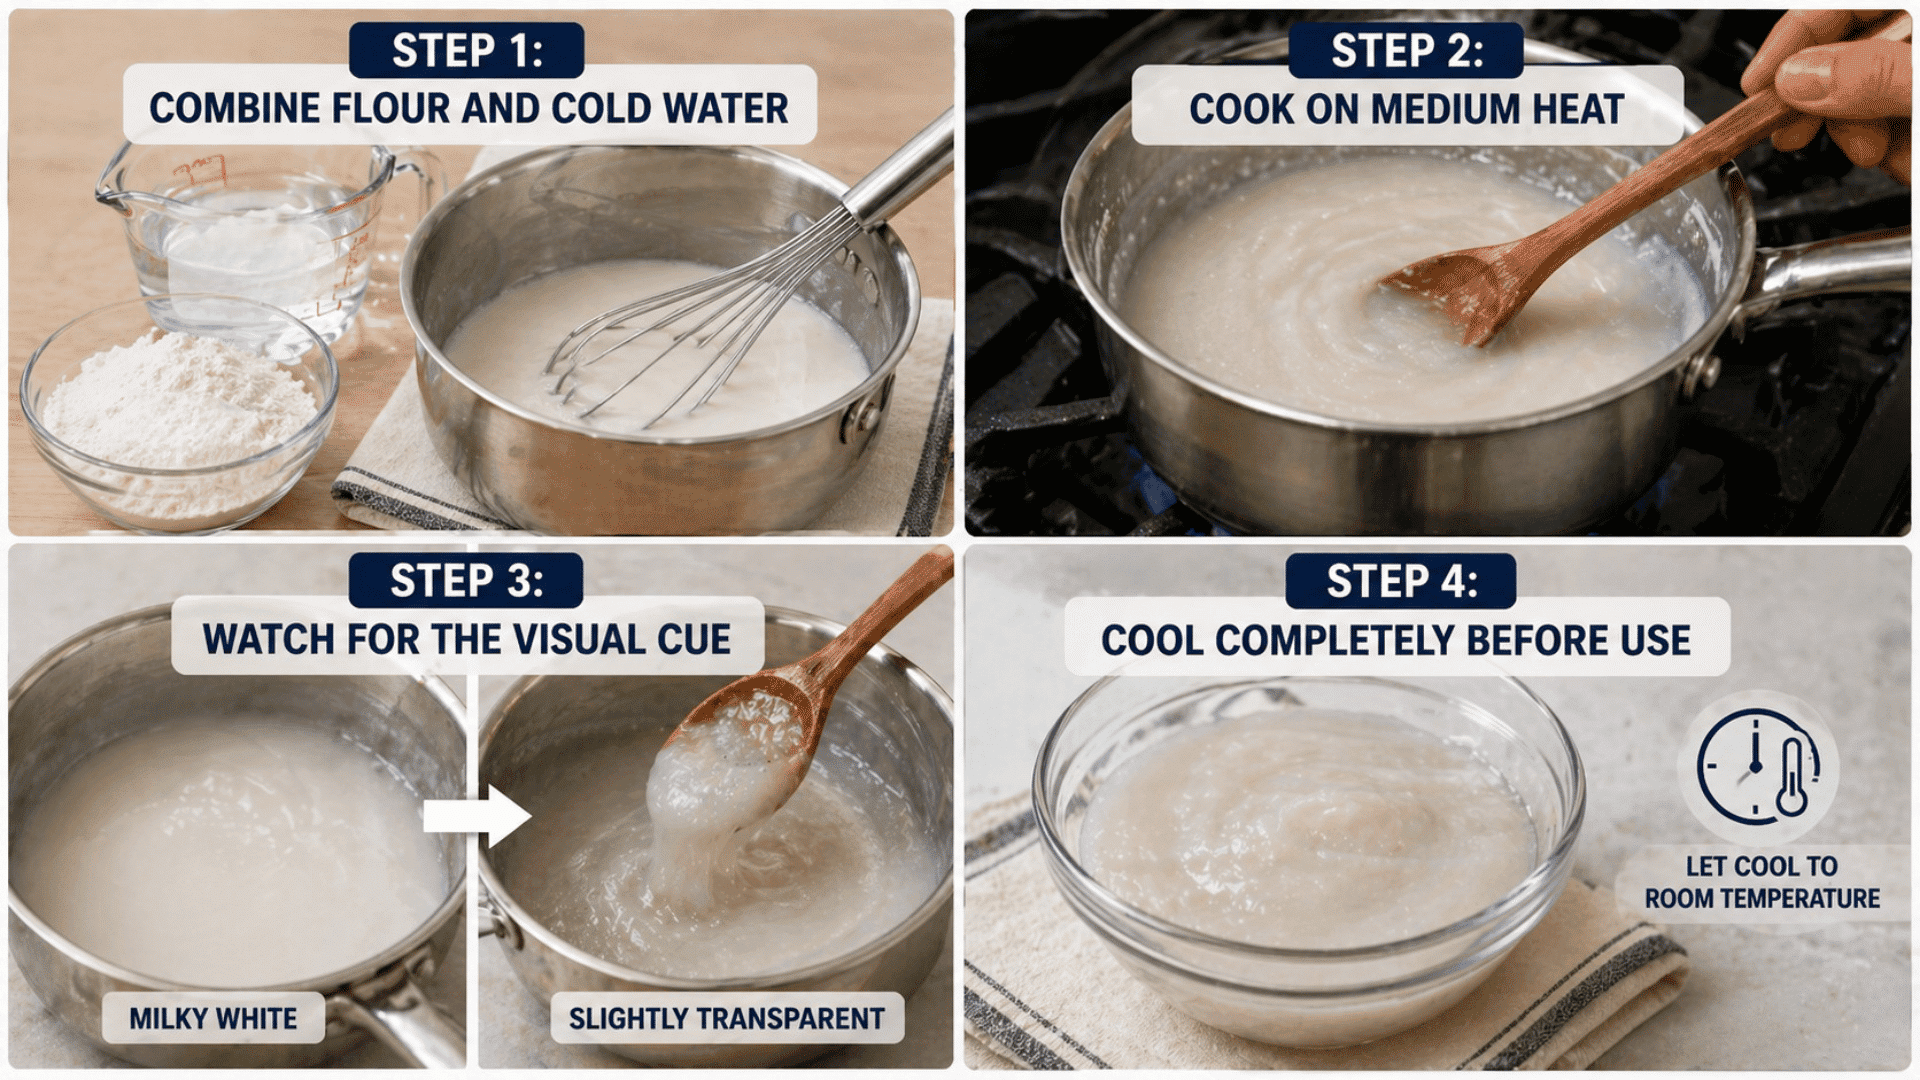
Step:1: Combine Flour and Cold Water
Whisk together 1 part flour with 4 parts cold water in a saucepan until smooth and lump-free, then heat.
Starting cold prevents the flour from clumping prematurely, and taking an extra minute here means you won’t spend the entire cooking stage chasing lumps around the pan.
Step 2: Cook on Medium Heat
Place the saucepan over medium heat and stir constantly to prevent the paste from sticking to the bottom.
Keep the heat moderate, coaxing it, not rushing it, as high heat can cause the outside to thicken too quickly while the center stays raw and uneven.
Step 3: Watch for the Visual Cue
Remove the pan at the first sign of a boil. HubPages notes the paste is ready when it shifts from milky white to slightly transparent, a reliable visual signal even for first-timers.
Don’t wait for a rolling boil; pulling it at the very first bubble locks in the ideal thickness before the starch begins to break back down.
Step 4: Cool Completely Before Use
Pour into a bowl and let it cool to room temperature before applying; using it hot will weaken the paper strips and make layering messy and uneven.
If you’re short on time, spreading it into a wider bowl speeds up cooling considerably without affecting the paste’s final strength.
How to Make Paper Mache: Step-by-Step Instructions

Paper mache is a straightforward craft that rewards patience. Follow these steps in order, and you’ll end up with a strong, smooth, paint-ready piece every time.
Step 1: Prepare Your Mold and Paste
Choose your mold based on the shape you want: balloons work great for bowls and balls, while cardboard frames, foam balls, or clay forms suit more complex shapes.
Coat the surface with petroleum jelly or plastic wrap so the dried piece releases cleanly, then mix your paste to a thin pancake batter consistency using the recipe above.
Step 2: Tear Your Paper Into Strips
Tear paper by hand into pieces roughly 1–2 inches wide and 4–6 inches long, since tearing creates soft, feathered edges that blend between layers far more smoothly than clean-cut strips.
Never use scissors here; the rough edges are what make your layers seamless.
Step 3: Dip, Squeegee, and Apply
Submerge each strip in paste, then run it between two fingers to remove the excess. This squeegee step is what separates a firm, dry result from a soggy, weak one.
Lay strips across the surface, overlapping at different angles until every inch is covered.
Step 4: Dry and Repeat for 3–5 Layers
Allow a full 24 hours of drying between every layer, use a fan and rotate the project for even drying, and never rush this step, or you risk mold and a weak structure.
Alternate strip direction with each new layer, and finish with a final coat using white paper towels or printer paper for a smooth, paint-ready surface.
Step 5: Sand, Paint, and Seal
Once fully dry, lightly sand any rough spots and prime the surface with white gesso or a base coat to make your colors pop.
Finish with acrylic paints for lively results, then seal everything with Mod Podge or varnish for long-term durability.
Tips and Tricks for Better Paper Mache Results
A few small adjustments to your process can make a big difference in how clean, strong, and professional your finished piece looks. Here’s what experienced crafters swear by.
- Always use all-purpose white flour since whole wheat lacks enough starch and will weaken your paste
- Make only as much paste as you need per session and use it within a week before it spoils
- Add a pinch of cinnamon to your paste to neutralize the sour flour smell as it dries
- Smaller strips give smoother results while larger strips cover more area faster, so mix both depending on the stage
- Work on a plastic placemat to keep your workspace clean and make cleanup effortless
Troubleshooting Common Paper Mache Problems
Even experienced crafters run into hiccups along the way. Here are the three most common problems and exactly how to fix them.
- Molding is caused by humid climates, thick layers, or adding new layers before the last layer fully dries. Add 1 tbsp salt to the paste, use a fan, and allow 24+ hours between layers.
- Softness and slow hardening come from excess paste in strips or too many layers at once. Stop adding layers and move the project to a sunny window or to a location near a dehumidifier.
- A lumpy surface results from cut strips or paste applied too thickly. Switch to hand-torn strips and finish with a final layer of white paper towels for a smooth result.
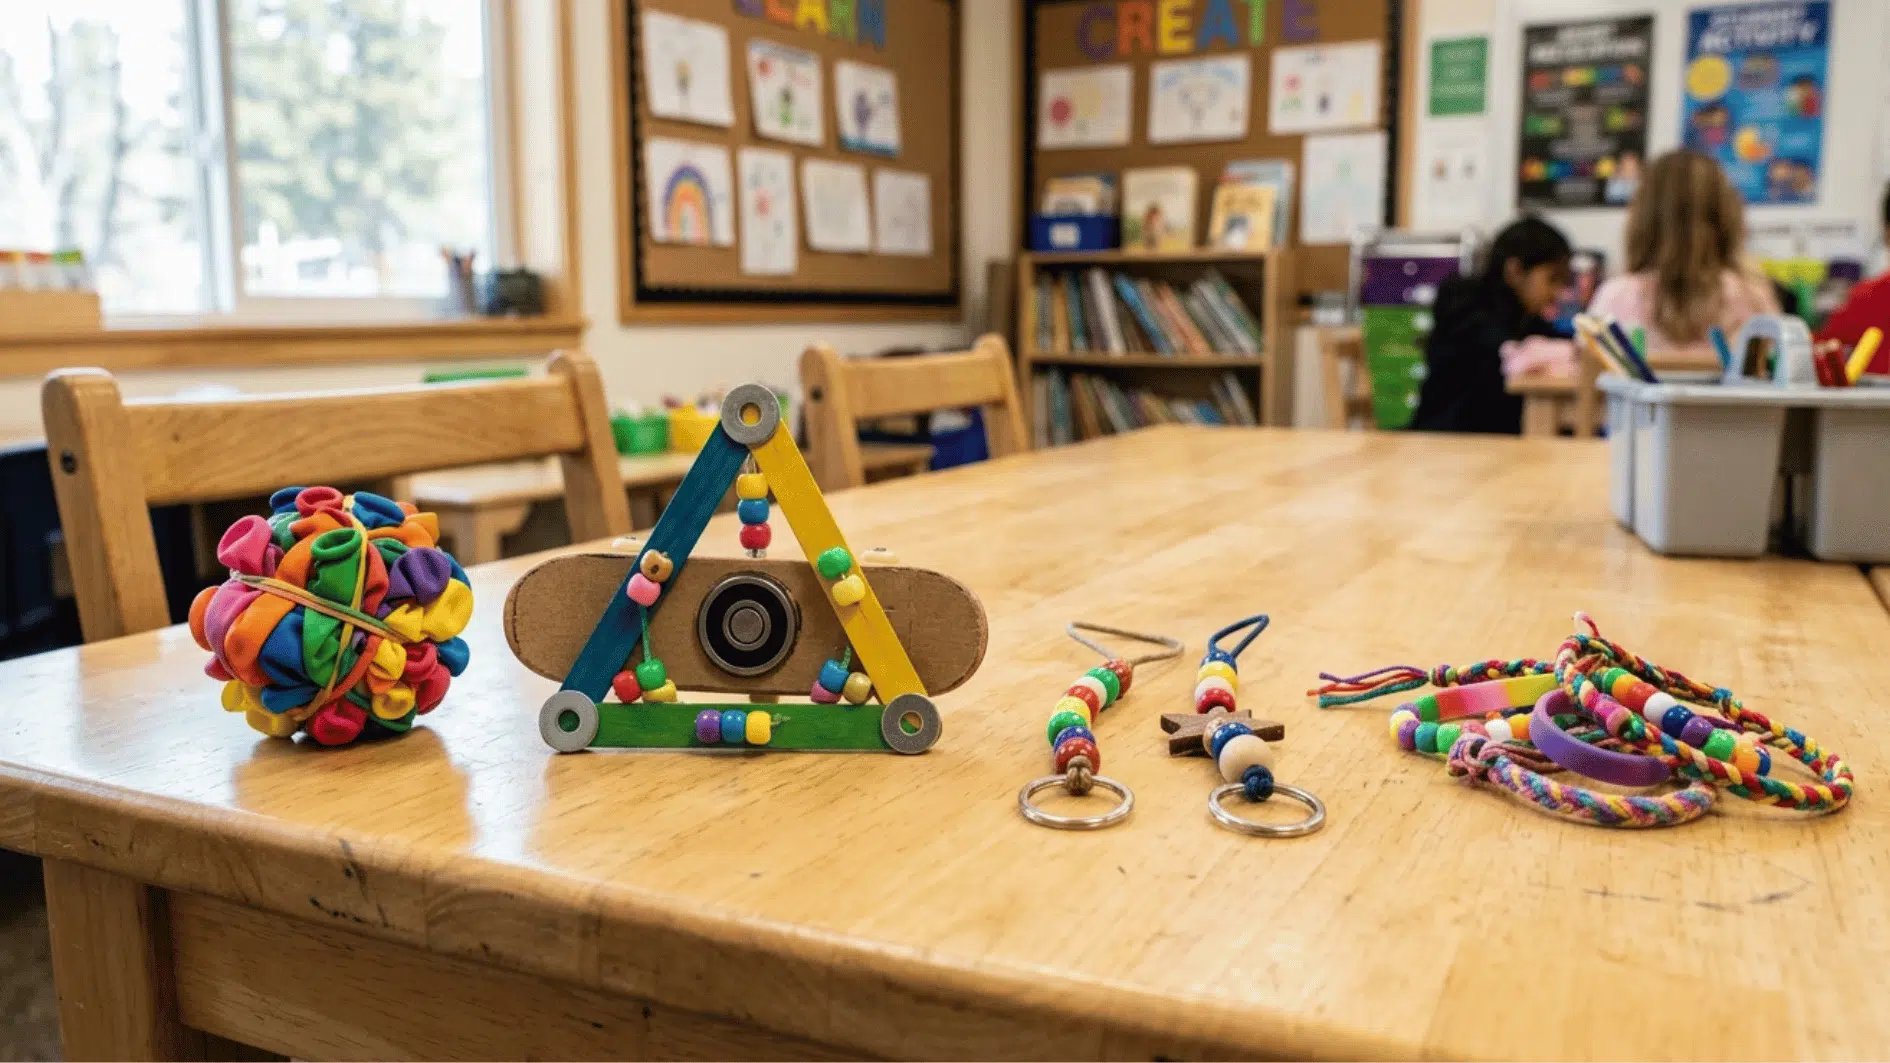
Easy Paper Mache Projects for Beginners
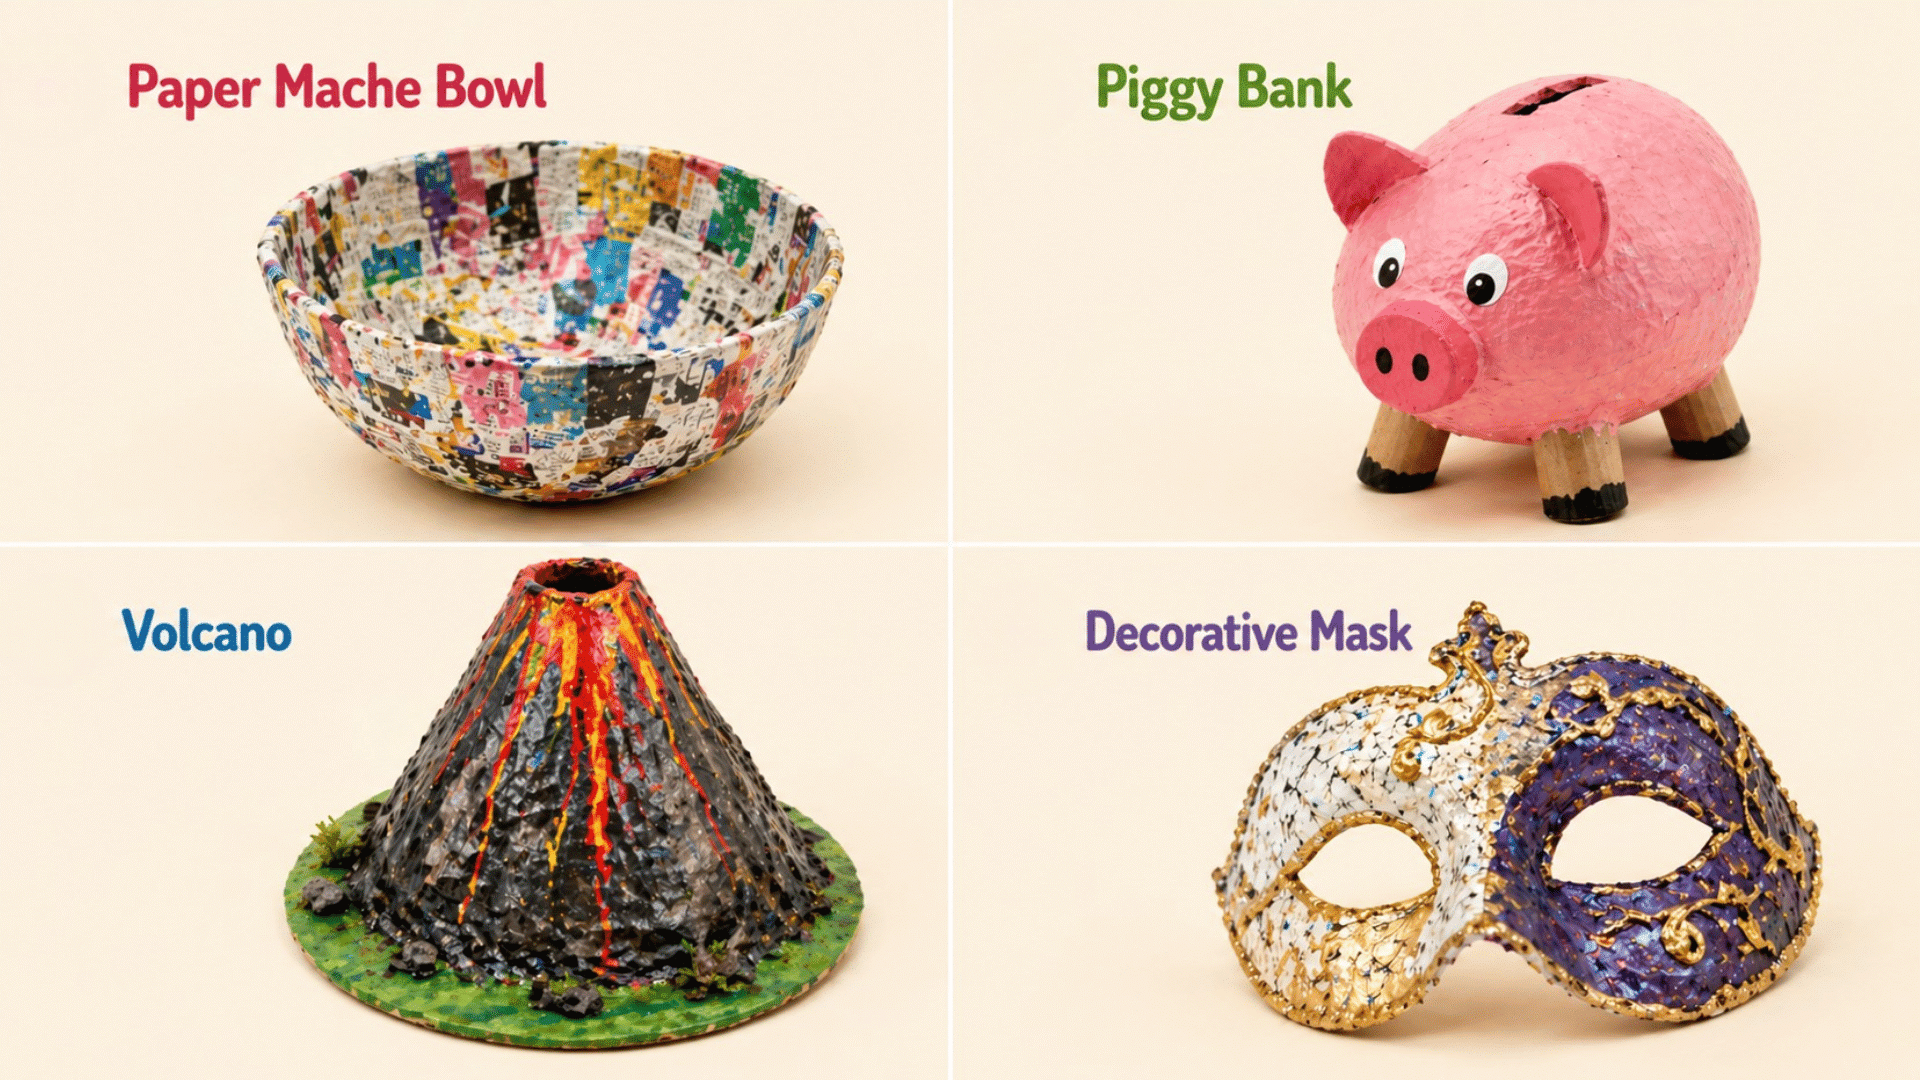
1. Paper Mache Bowl
A perfect first project that teaches layering and drying techniques. Simply drape strips over an upside-down bowl mold.
Best for: first-time crafters
2. Piggy Bank
A fun and functional project that kids absolutely love making. Use a balloon as the base and add cardboard legs.
Best for: kids and family crafts
3. Volcano
A classic school project that doubles as a great intro to sculpting. Build the cone shape over a cardboard frame.
Best for: school science projects
4. Decorative Mask
A creative project that lets you experiment with paint and texture. Layer strips directly over a plastic mask form.
Best for: Halloween and costume making
5. Animal Sculptures
A more hands-on project that builds confidence with 3D shapes. Use foam or cardboard as your armature base.
Best for: creative and artistic crafters
Wrapping It Up
Now that you know how to make paper mache, the only thing left to do is start creating. Every project gets easier with practice, and the materials are cheap enough to experiment freely.
Grab some flour, tear up old newspaper, and see what you can build.
Bookmark this guide to reference the steps, recipes, and troubleshooting tips whenever you need them throughout your next project.