Mushrooms are one of those subjects that seem simple at first: round cap, short stem, done. But get the proportions slightly off, and the whole thing falls flat.
Learning how to draw a mushroom is far more forgiving than most subjects. The shapes are organic, the details are flexible, and there is plenty of room to add your own creative spin.
From classic toadstools to glowing forest caps straight out of a fairy tale, this guide takes you through the process step by step, no experience needed, just a pencil and some curiosity.
Basic Shapes to Know Before You Start
Before you start drawing a mushroom, it helps to understand the simple shapes that form its structure.
- Cap: Dome/bell curve shape, wider at the base and rounded at the top
- Stem: Tapered cylinder, slightly wider at the base
- Gills: Curved lines that radiate outward from the stem on the underside
- Ring (annulus): Horizontal band, found on species like Amanita
Basic Materials Required
No specialized equipment is needed. These basics are enough to make a realistic mushroom; to make a mushroom realistic, one only needs to shade well.
| Tools | Purpose |
| HB pencil | Outlines and light detail |
| 2B or 4B pencil | Shading and darker tones |
| Kneaded eraser | Lifting highlights cleanly |
| Blending stump | Smooth, even gradients |
| Cartridge or Bristol paper | Holds pencil well, clean surface |
How to Draw a Mushroom: Step-by-Step
These steps work for a simple cartoon sketch or a more detailed, realistic mushroom drawing. Work lightly at first. Light lines are easy to fix; dark lines are not.
Step 1: Draw the Cap
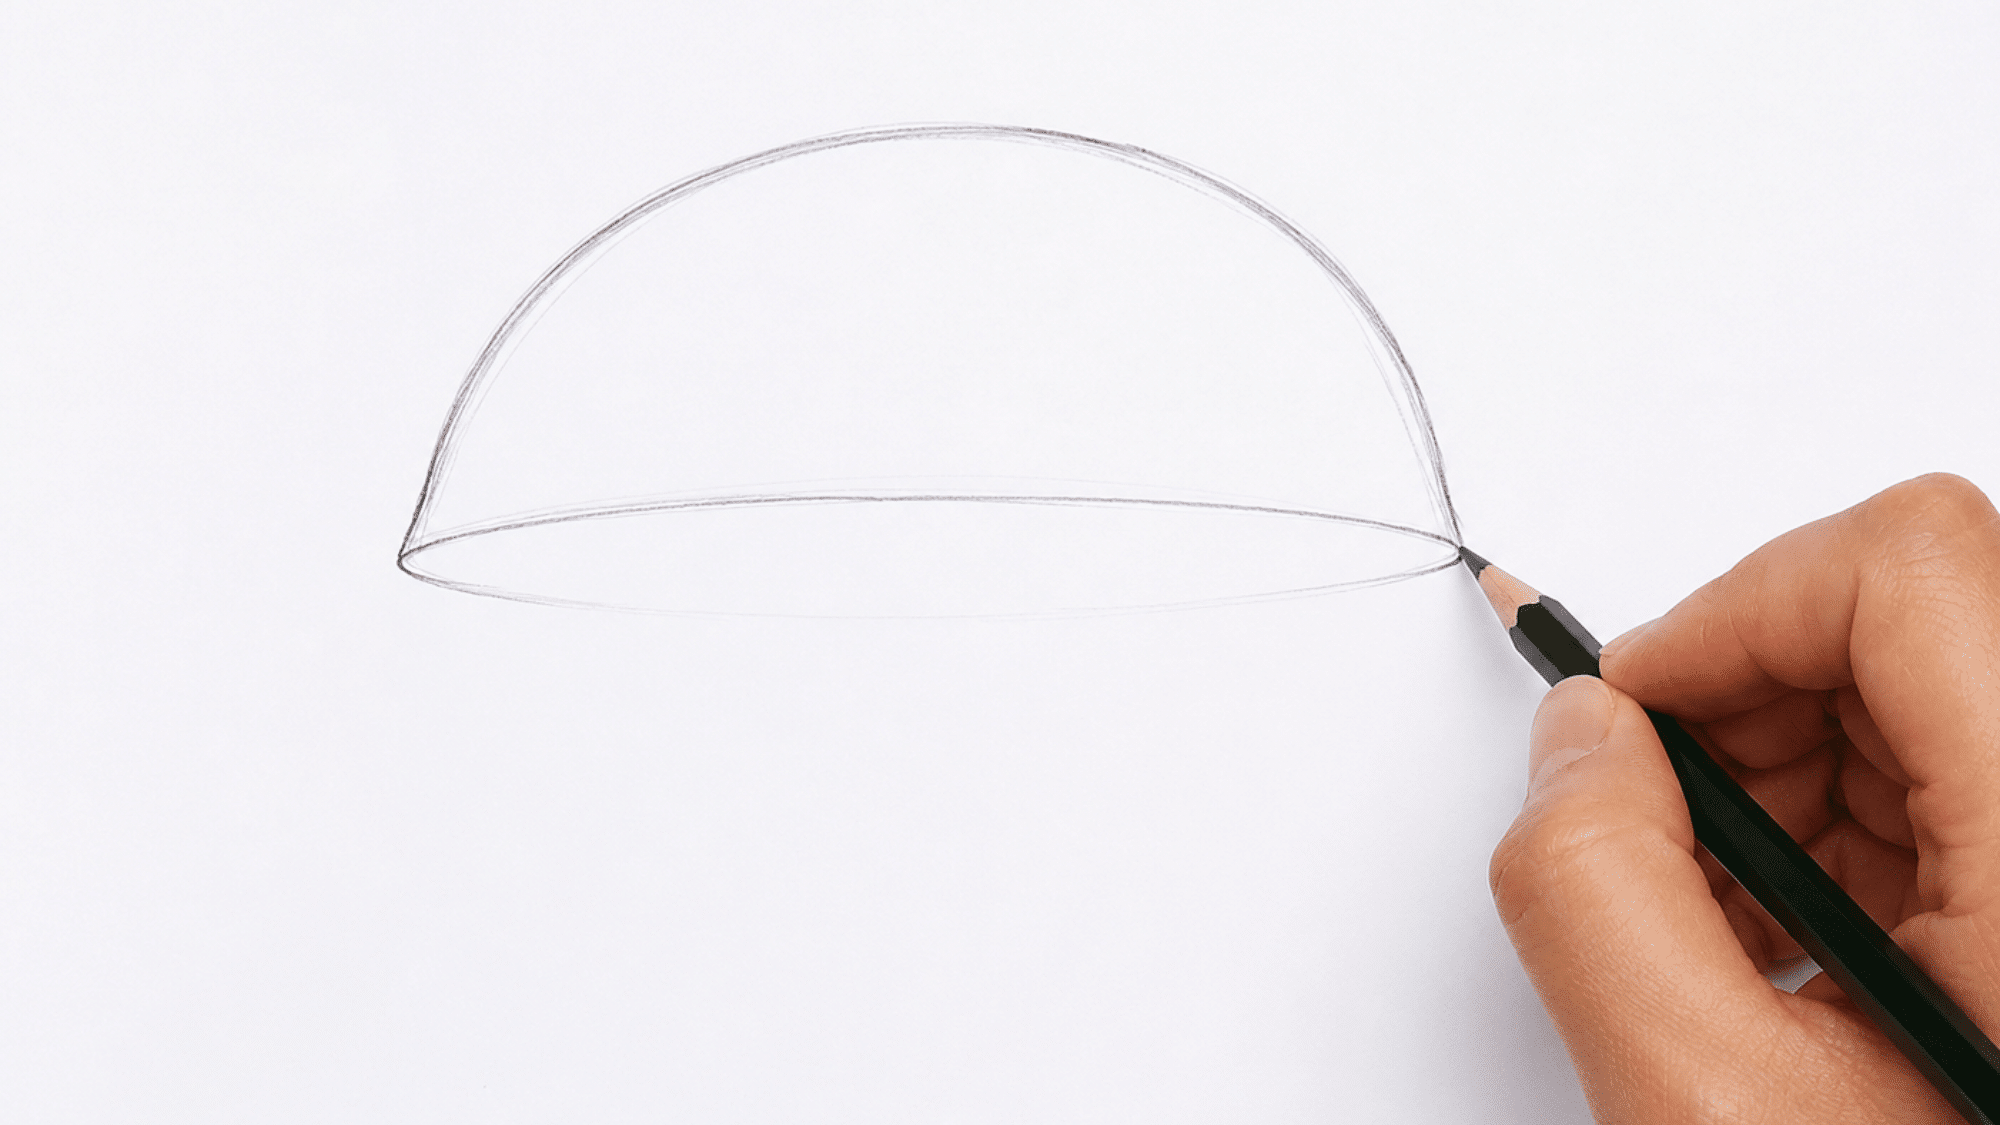
Draw a dome shape near the top of your page. The cap should be wider than the stem. Angle the outer edges downward so the rim curves under slightly, like an upside-down bowl with a slight flare.
For a standard field mushroom like Agaricus campestris, the cap is roughly two to three times the width of the stem. Keep that ratio in mind from the start.
Step 2: Add the Stem
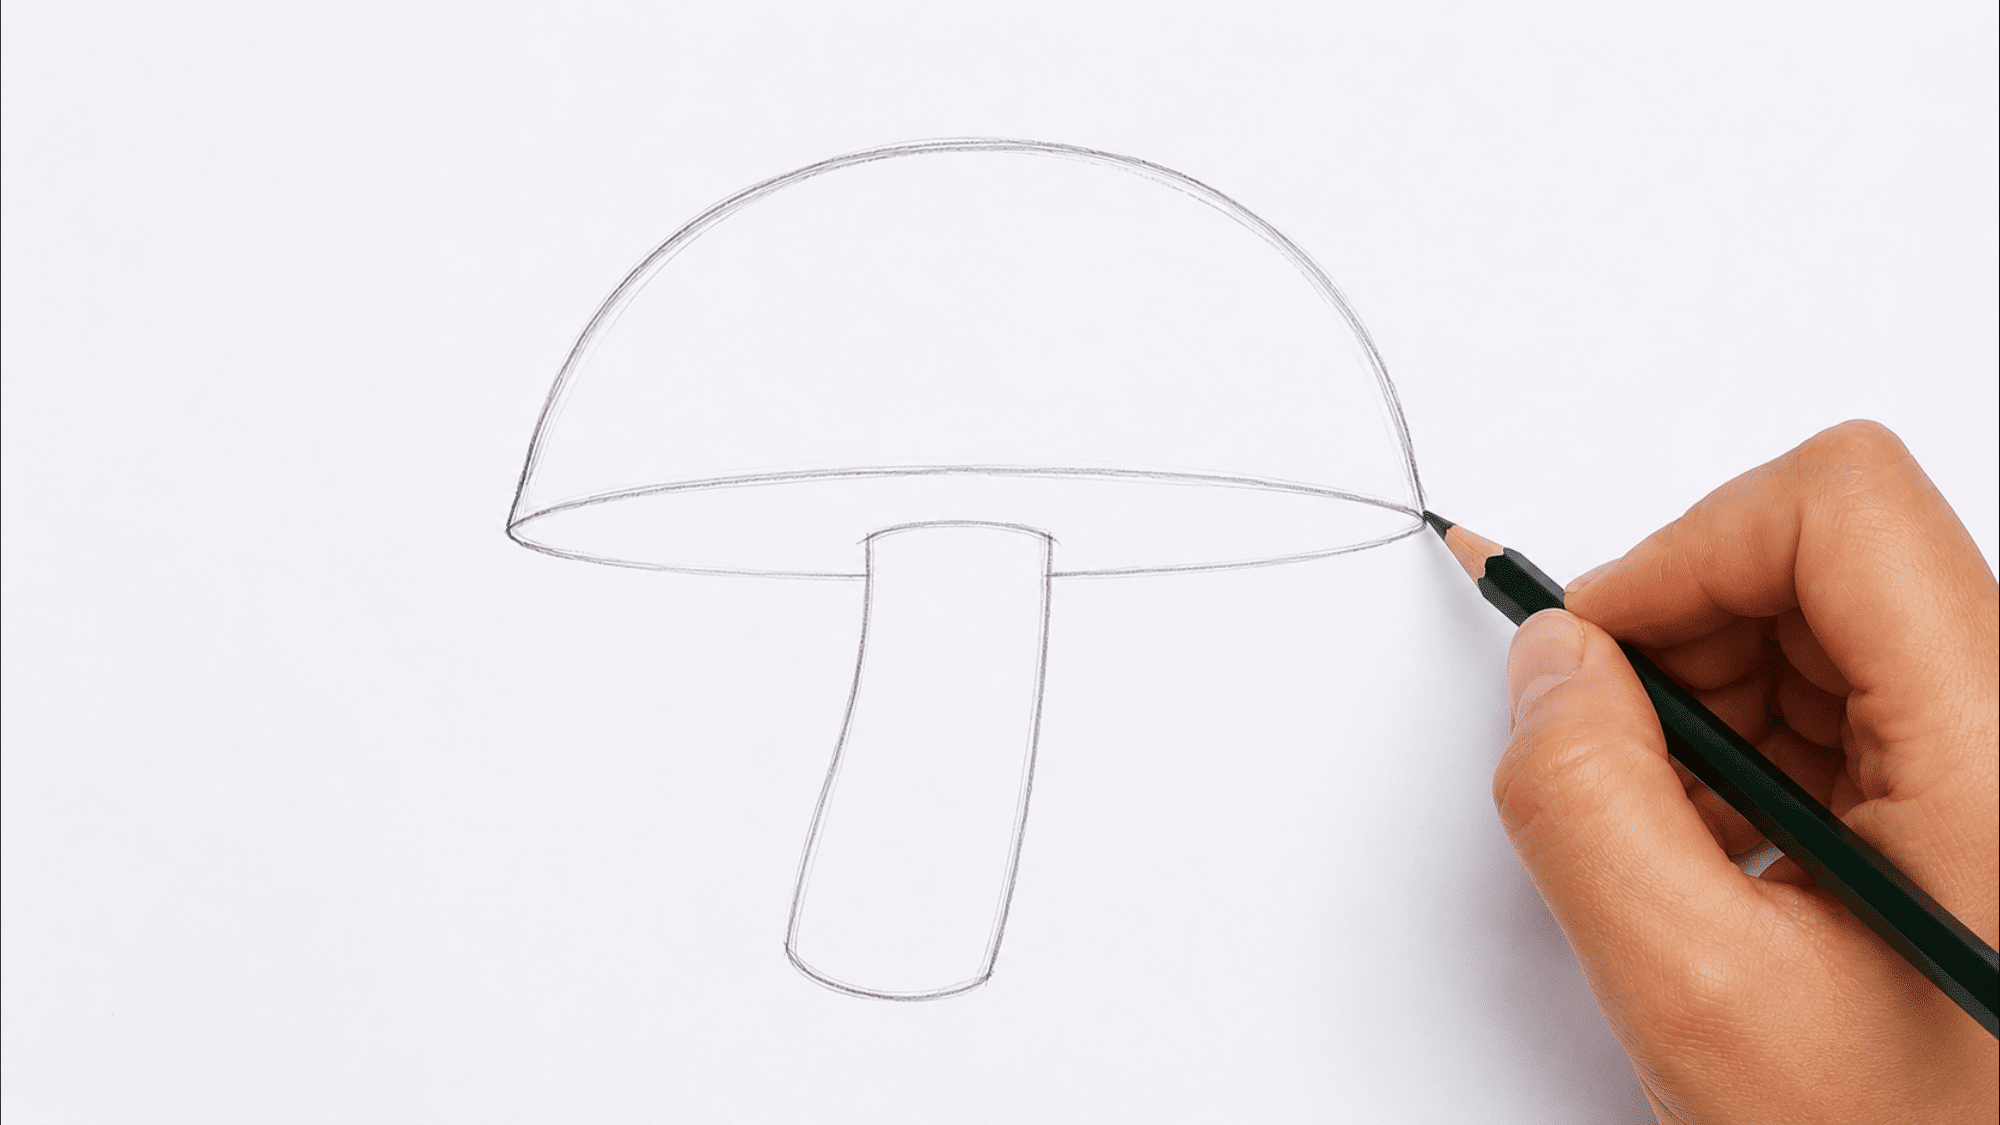
Below the cap, draw two slightly curved vertical lines. They should taper toward the base, wider at the top, narrower at the bottom.
Do not draw the stem perfectly straight. Real stems lean slightly. A rigid vertical stem looks unnatural no matter how clean the rest of the drawing is.
Step 3: Connect Cap to Stem
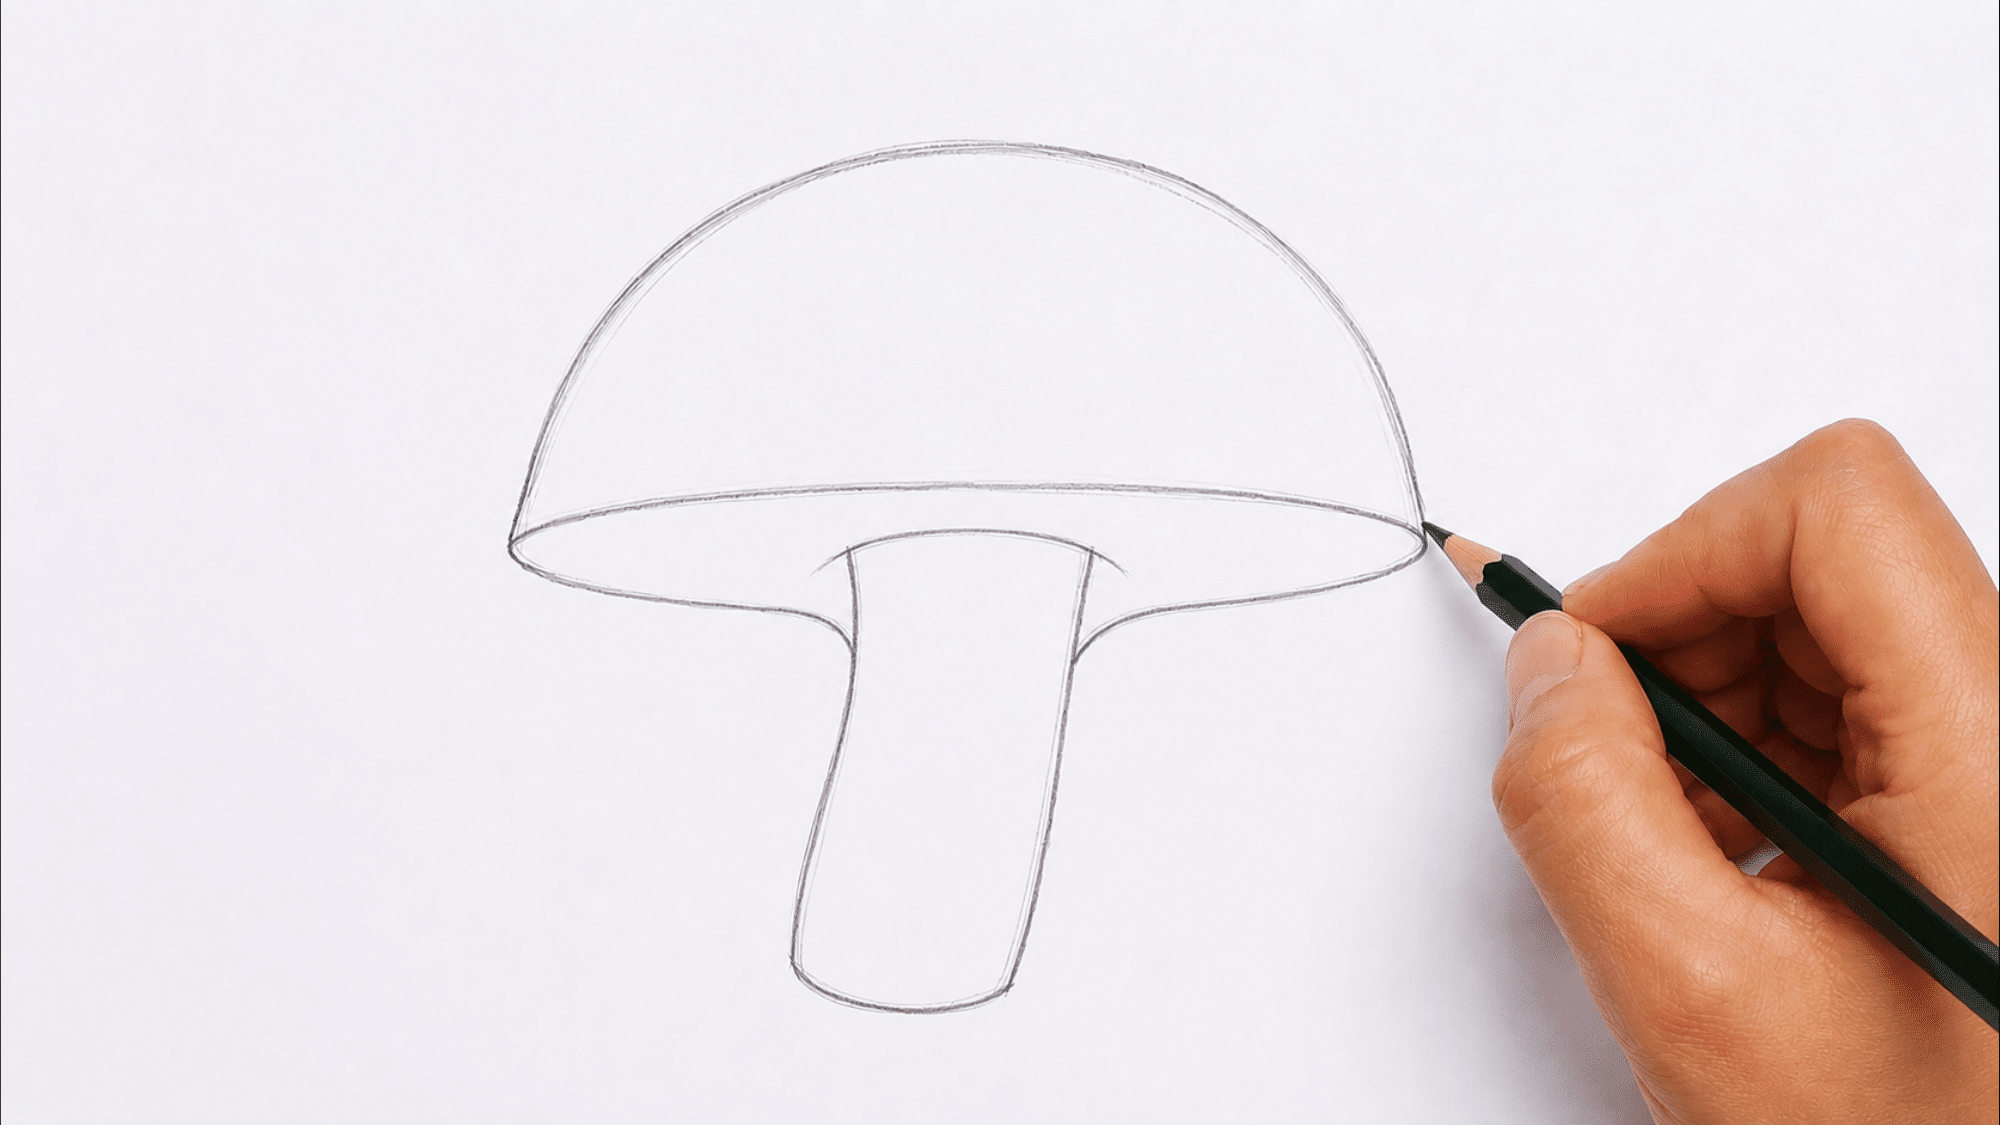
On each side of the cap’s underside, draw a curved line connecting to the top of the stem. This forms the concave area where the gills will sit, giving the mushroom a 3D look.
Do not rush this step. The cap-to-stem connection is where most drawings lose believability. The curve should flow, not angle sharply.
Practicing contour drawing trains your eye to follow edges like this slowly and accurately. It is exactly the kind of observation skill that makes this connection feel natural rather than forced.
Step 4: Draw the Gills
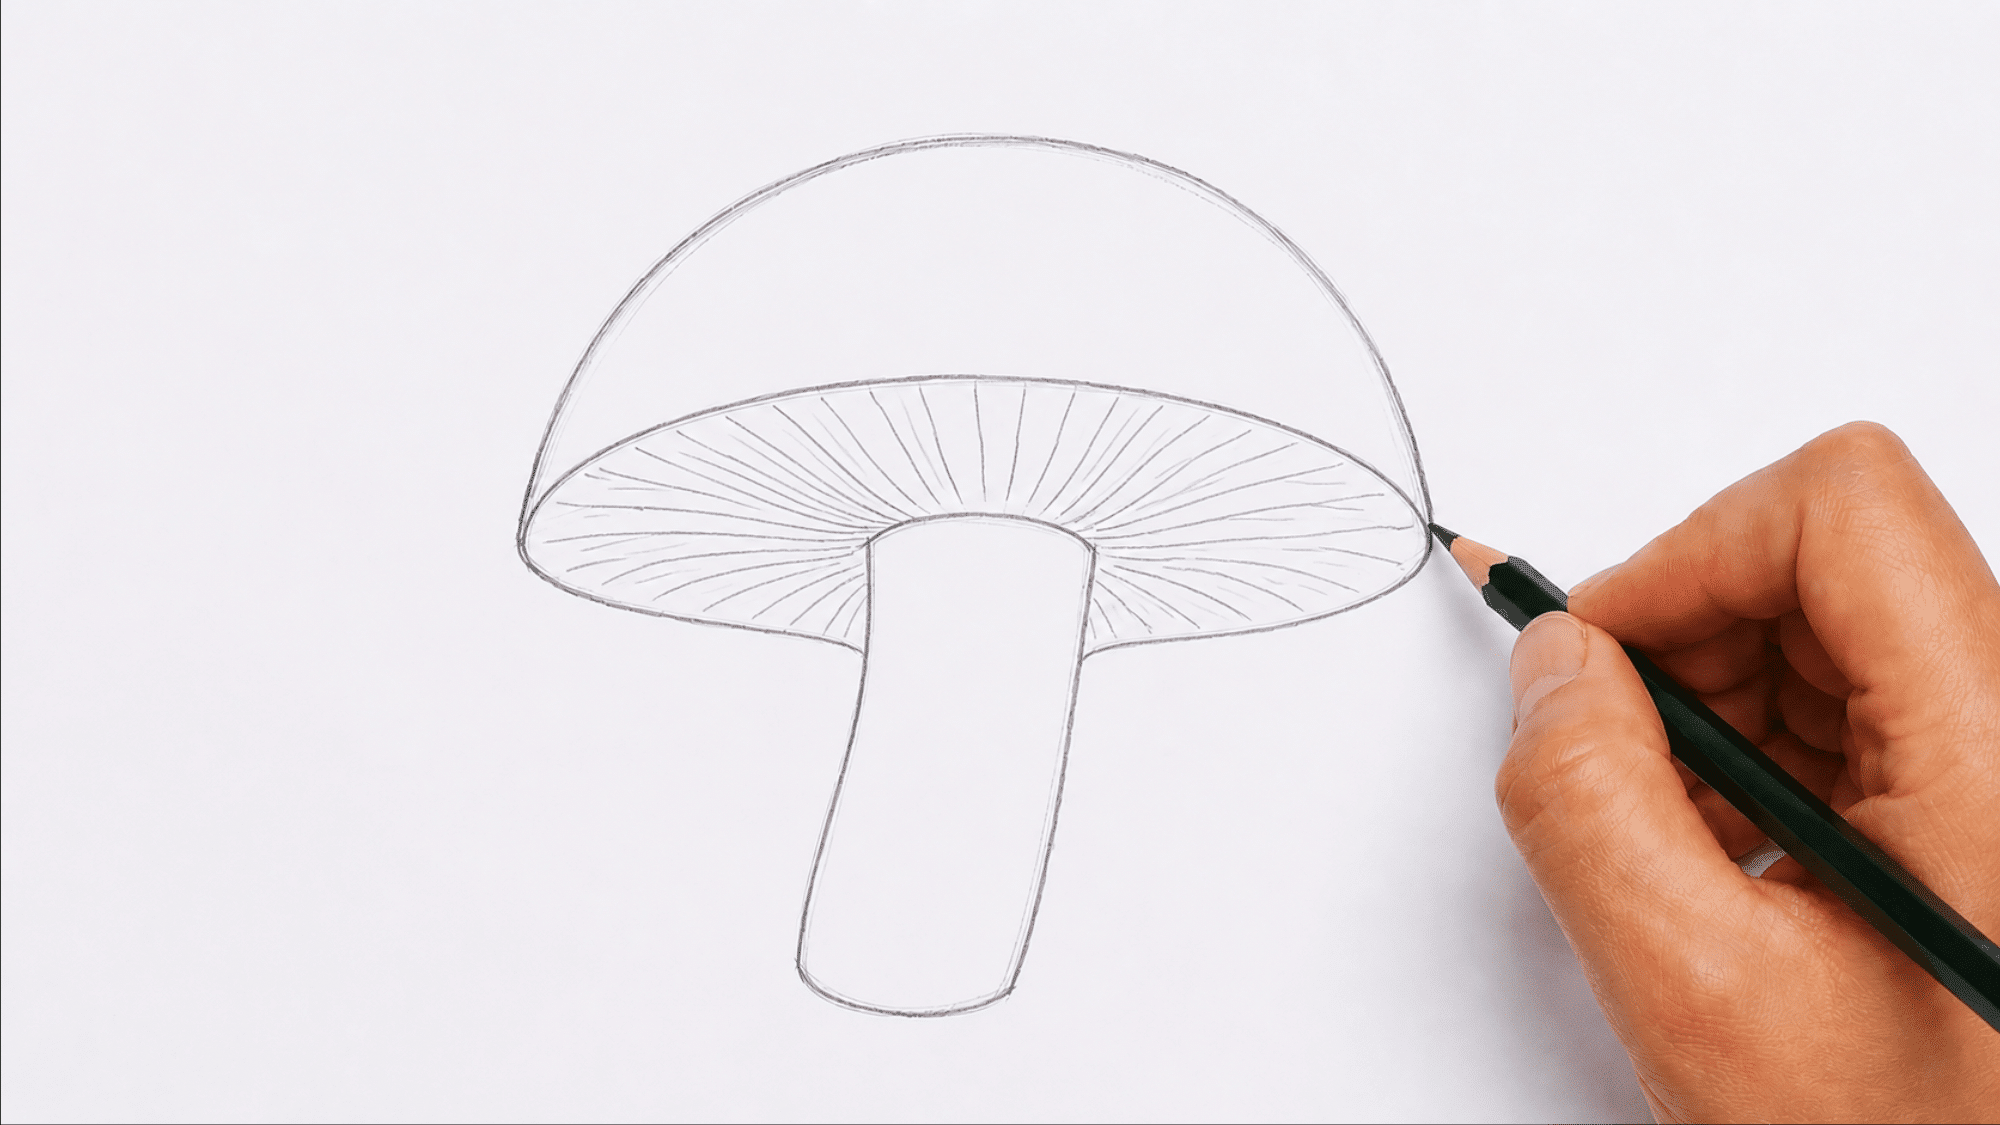
Inside the underside, draw thin curved lines radiating out from the stem toward the cap’s edge.
They do not need to be even, as real gills have natural spacing variation. A few well-placed lines read better than a crowded row of tight ones.
Step 5: Add Surface Details

For an Amanita muscaria-style cap, add small irregular spots across the surface. For a plain field mushroom, draw three to five light lines radiating from the cap’s center outward.
That is enough to suggest texture. Too much detail too early makes shading harder.
Step 6: Shade and Refine
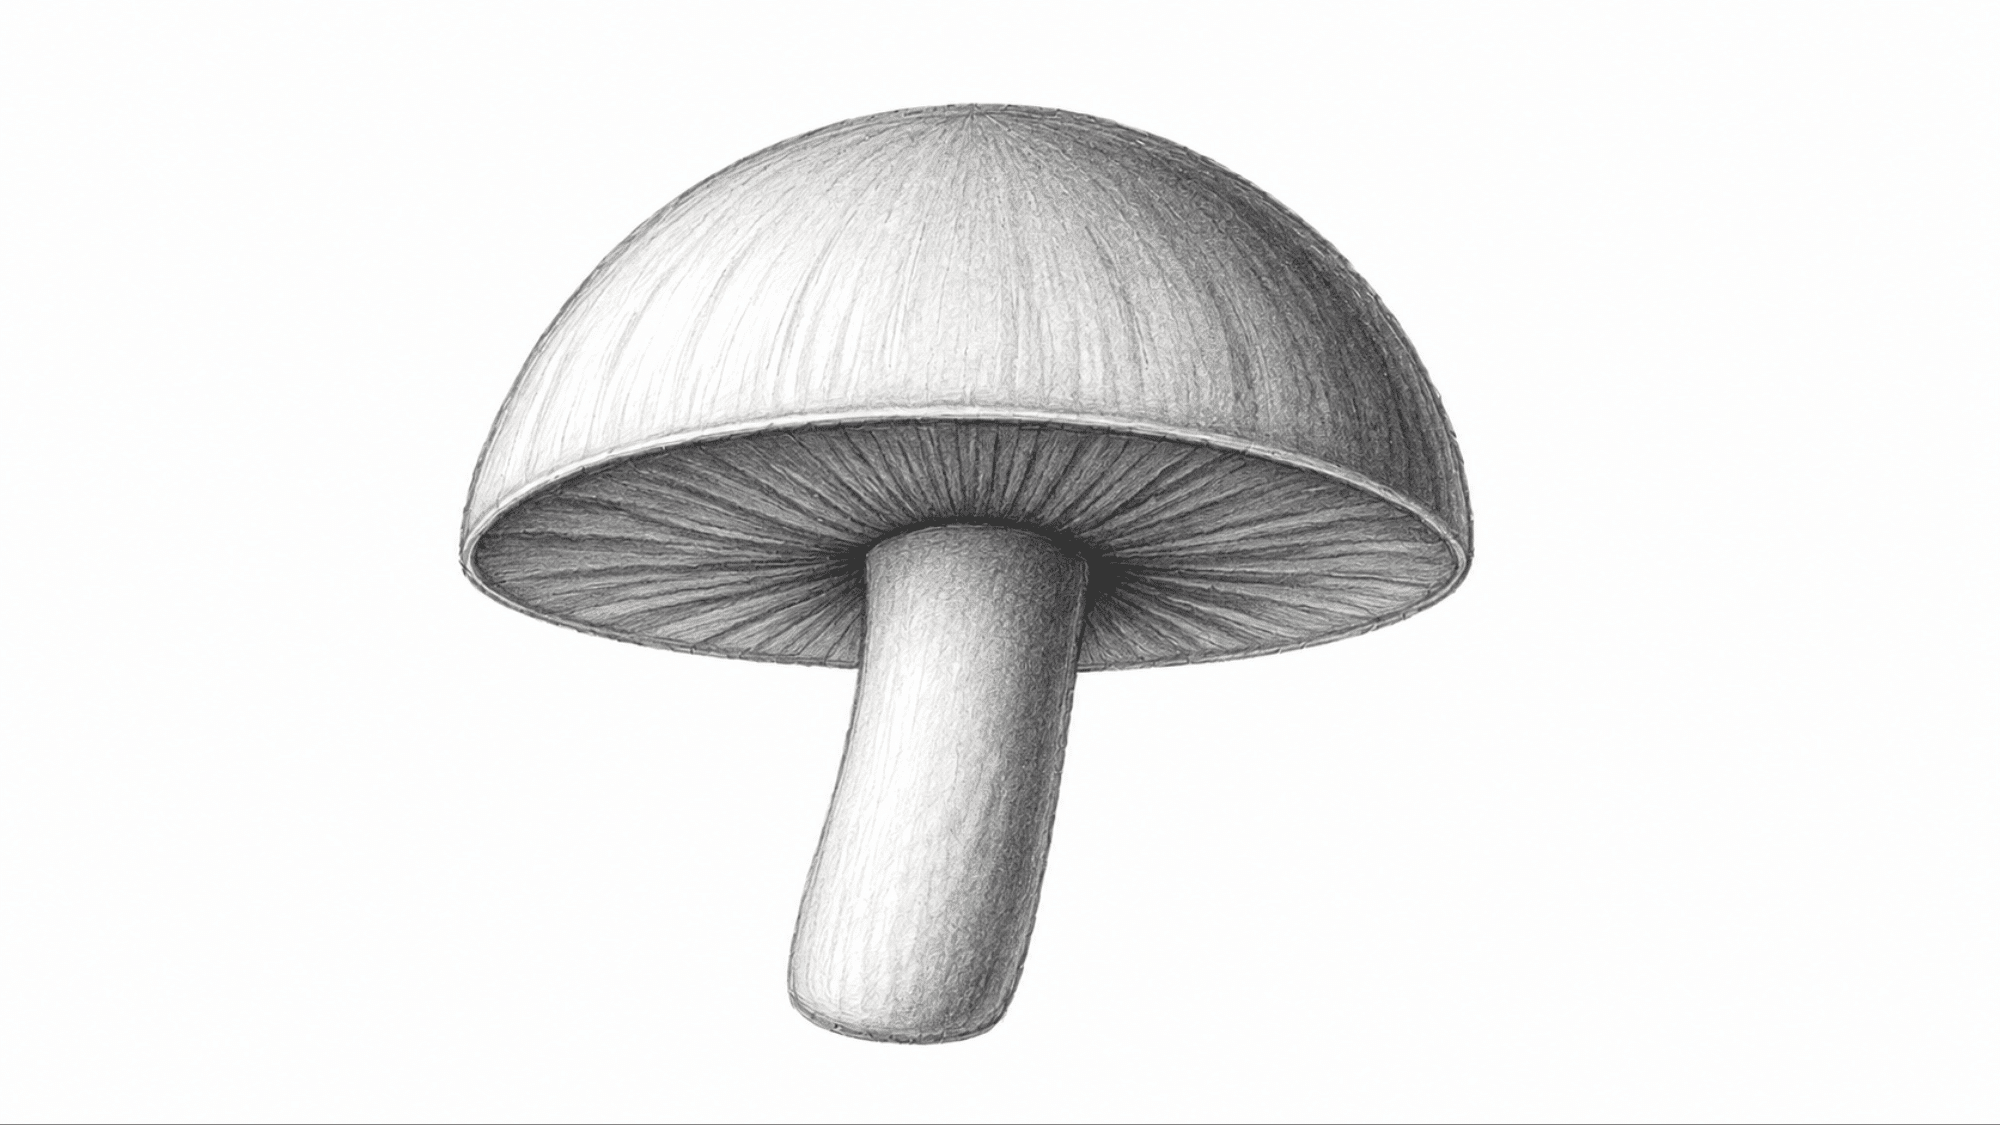
Pick a light source, left or right, and stay consistent. Shade with pencil the opposite edge of the cap and stem. The underside gill area is always the darkest zone.
Use a blending stump or your finger to soften the strokes. Build tone in layers rather than pressing hard once.
Common Mushroom Drawing Mistakes and How to Fix Them
Most mushroom drawing errors come down to proportion and shading, not line quality.
| Mistake | Fix |
|---|---|
| Cap too narrow | The cap should be at least 2× the stem’s width |
| Stem perfectly straight | Add a slight natural curve |
| Gills drawn as horizontal lines | Gills curve downward toward the stem |
| No shading on the gill area | The underside is always darker, shade it first |
| Too much surface detail | Keep texture lines sparse; let shading carry the depth |
Best YouTube Tutorials for The Beginners to Improve Their Skills
For more practice, these beginner-friendly video lessons and written guides can help you build key skills like perspective, shading, composition, and depth.
- Biowars: Good for beginners because it starts with basic shapes, then moves into cleanup, depth, texture, and shading.
- katrinacrouch: Best for improving realistic pencil shading, smooth blends, and surface texture.
- artsydee: Good alternative for ink drawing, especially if you want line detail instead of pencil blending, and shows how to draw a mushroom easily.
- Art for Kids Hub: Simple, beginner-friendly cartoon tutorial from a family-safe drawing channel, great for kids or anyone who wants an easy mushroom sketch with a cute style.
The Bottom Line
Drawing a mushroom is one of those small creative wins that builds real confidence at the drawing table.
Once you understand the basic shapes: the rounded cap, the curved stem, the subtle shadows underneath, you stop seeing a mushroom and start seeing a structure you can actually recreate.
From simple cartoon sketches to detailed realistic illustrations, the same foundational principles apply. Proportion, line, shading, and a little patience go a long way.