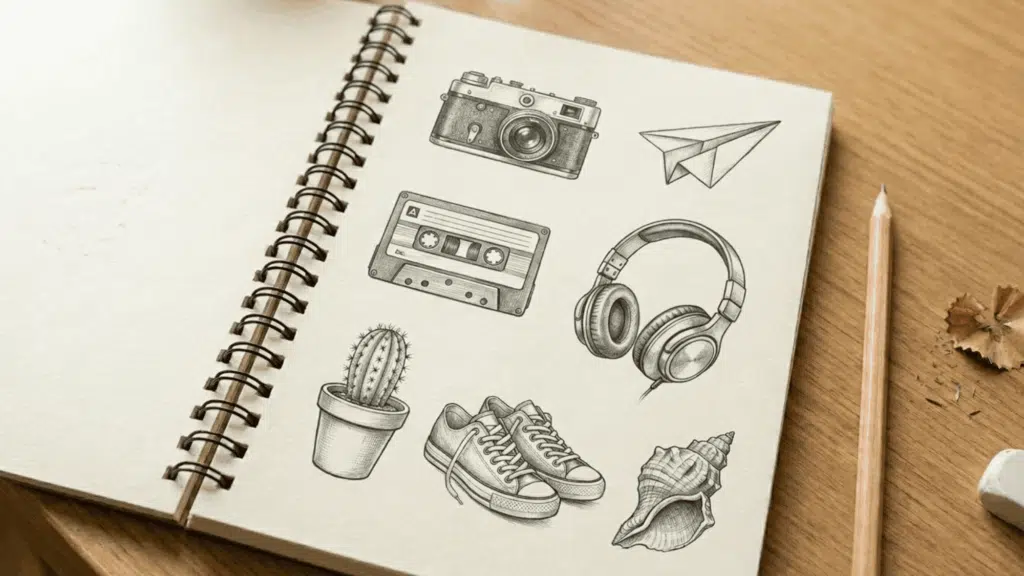
Opening a blank sketchbook can feel exciting, but it can also leave you wondering where to begin. Some days, even picking a subject takes longer than the drawing itself.
Instead of waiting for the perfect concept, you can choose something simple, familiar, or slightly more detailed and start with light pencil lines.
This blog offers simple and detailed pencil drawing ideas for artists of all skill levels, from beginners to frequent sketchers.
All you need is a pencil, a page, and a little time to get started!
Before You Start: What You Need to Know
Simple art drawing ideas often work best when you are building a regular sketching habit. Pick whatever catches your attention, whether it is something quick or a more detailed drawing.
Try not to overthink your supplies, because drawing often, even through small doodles, helps you build real skill over time. A pencil and paper are enough to begin.
A pencil and paper are enough to begin. Start with light lines so you can adjust shapes as you go, and save the darker shading for later.
How to Turn Your Ideas Into Sketches
These pencil drawing ideas can help you fill your sketchbook with simple, small, and creative sketches that do not feel too hard to begin.
1. A Single Flower or Leaf
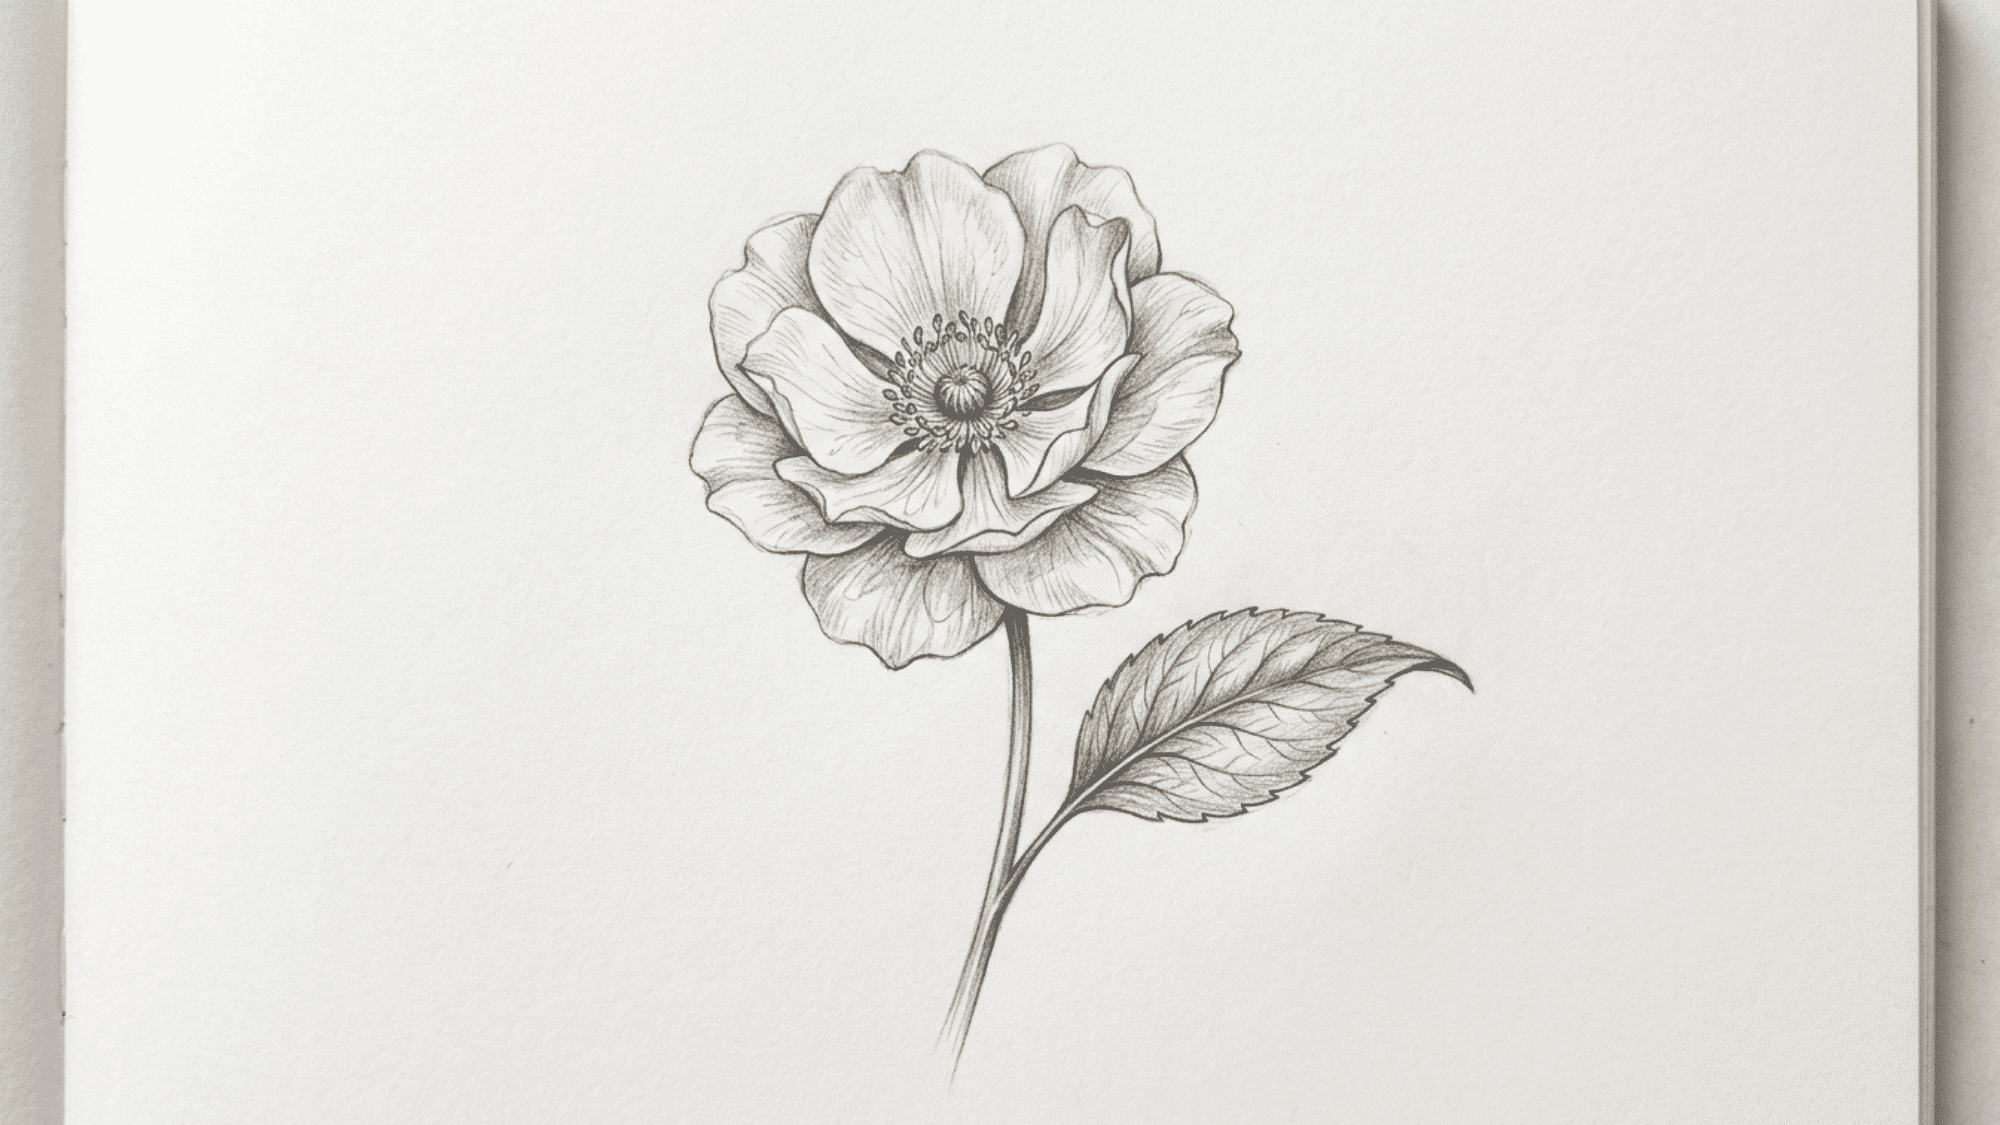
Simple natural subjects, like a flower or a leaf, help you build control over shape and shading without pressure. They are also great starting points when working through pencil drawing ideas.
Steps:
- Lightly block the overall outline using soft pencil pressure, keeping the shape loose so adjustments are easy later
- Mark the central vein or main flower core so the structure feels balanced before adding outer details
- Build the edges slowly, keeping curves natural and avoiding harsh lines in the early stage
- Add inner details like veins or petal folds while keeping strokes light and controlled
2. Your Favorite Mug or Cup
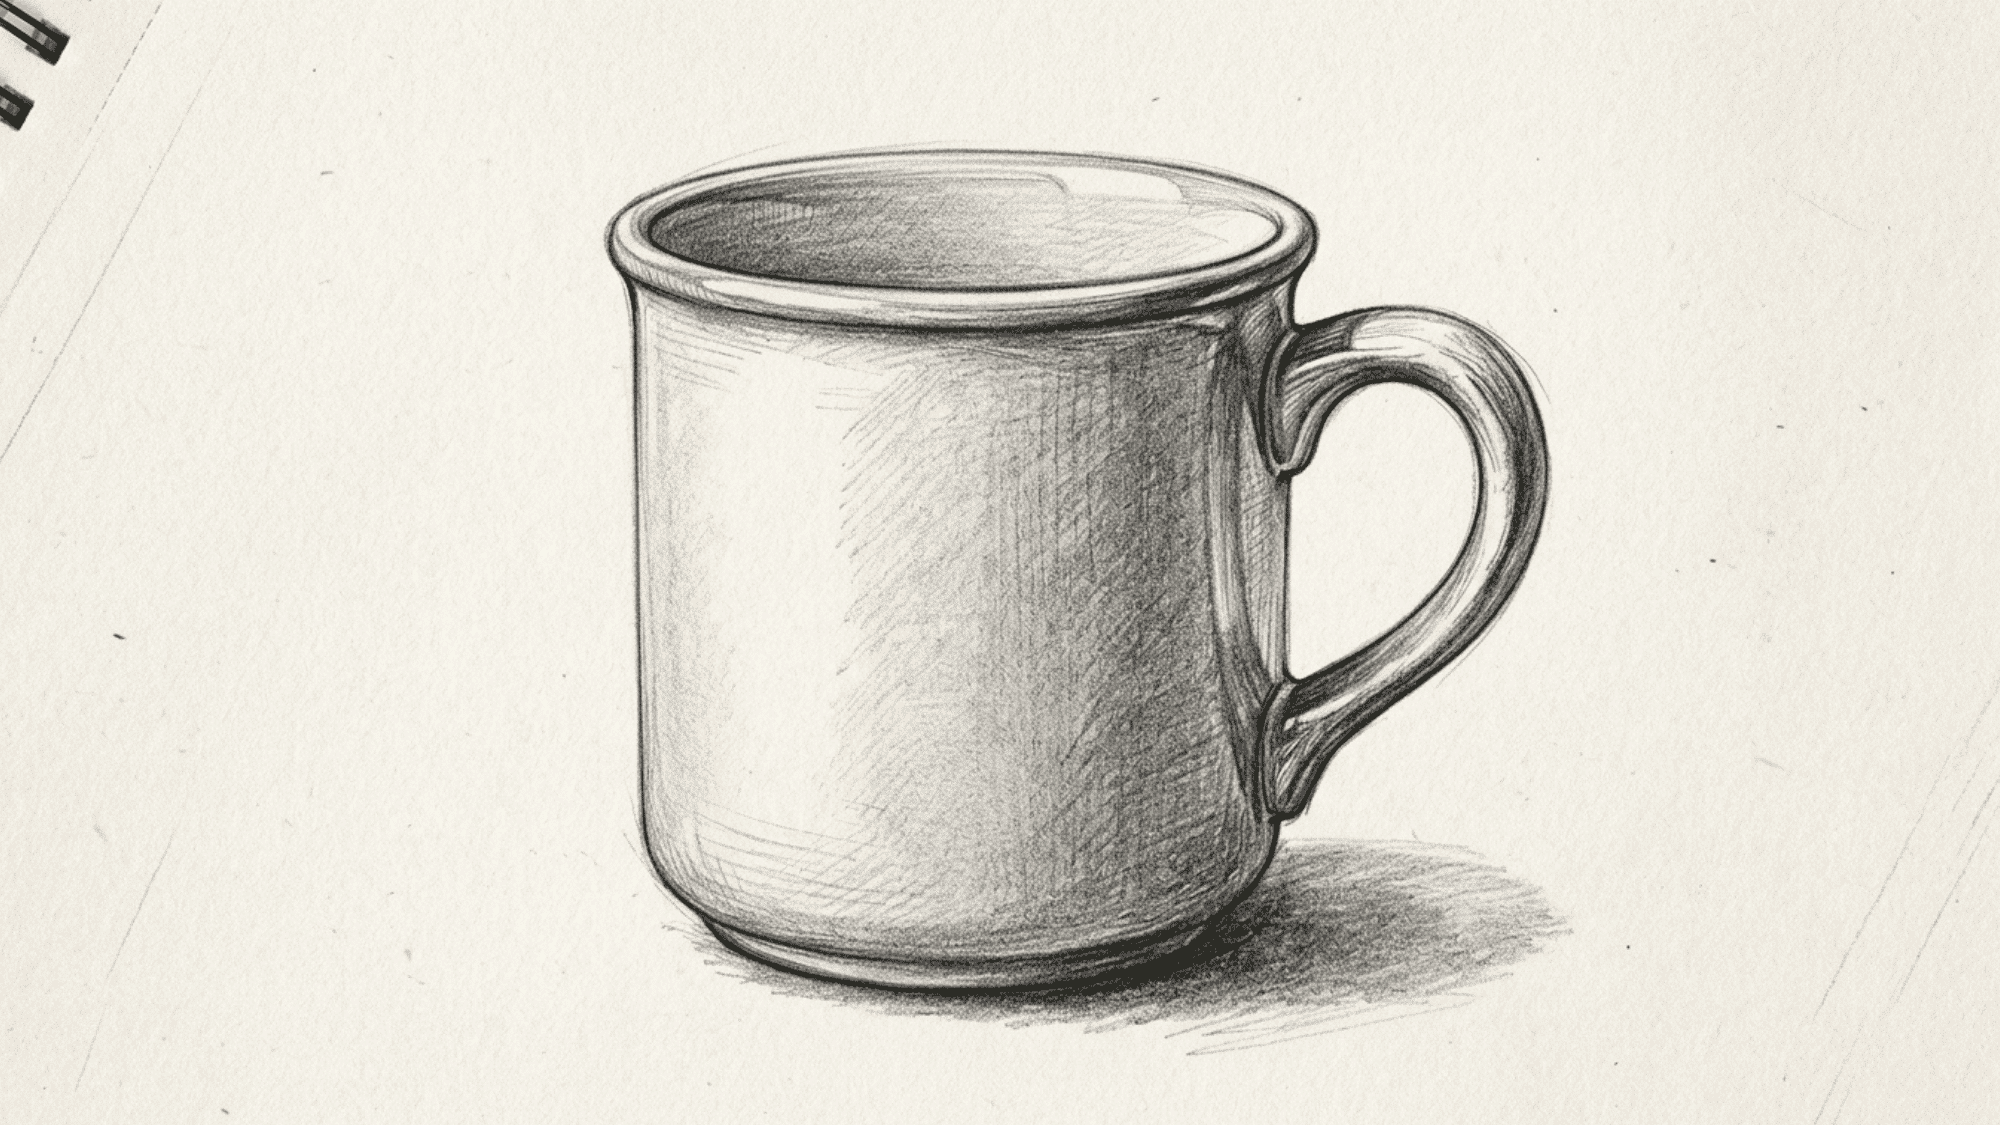
A mug is an easy, everyday object that helps with proportion, curves, and shadow control. Its simple form still offers enough detail for steady practice.
Steps:
- Draw a basic cylinder shape that forms the body of the mug while keeping the sides even
- Add the handle by mapping its curve and connecting it smoothly to the main body
- Refine the rim and base so the structure feels stable and properly aligned
- Mark light and shadow zones inside and outside the mug based on imagined lighting
- Strengthen darker areas under the base and inside the cup to show depth clearly
3. A Detailed Tree with Bark Texture
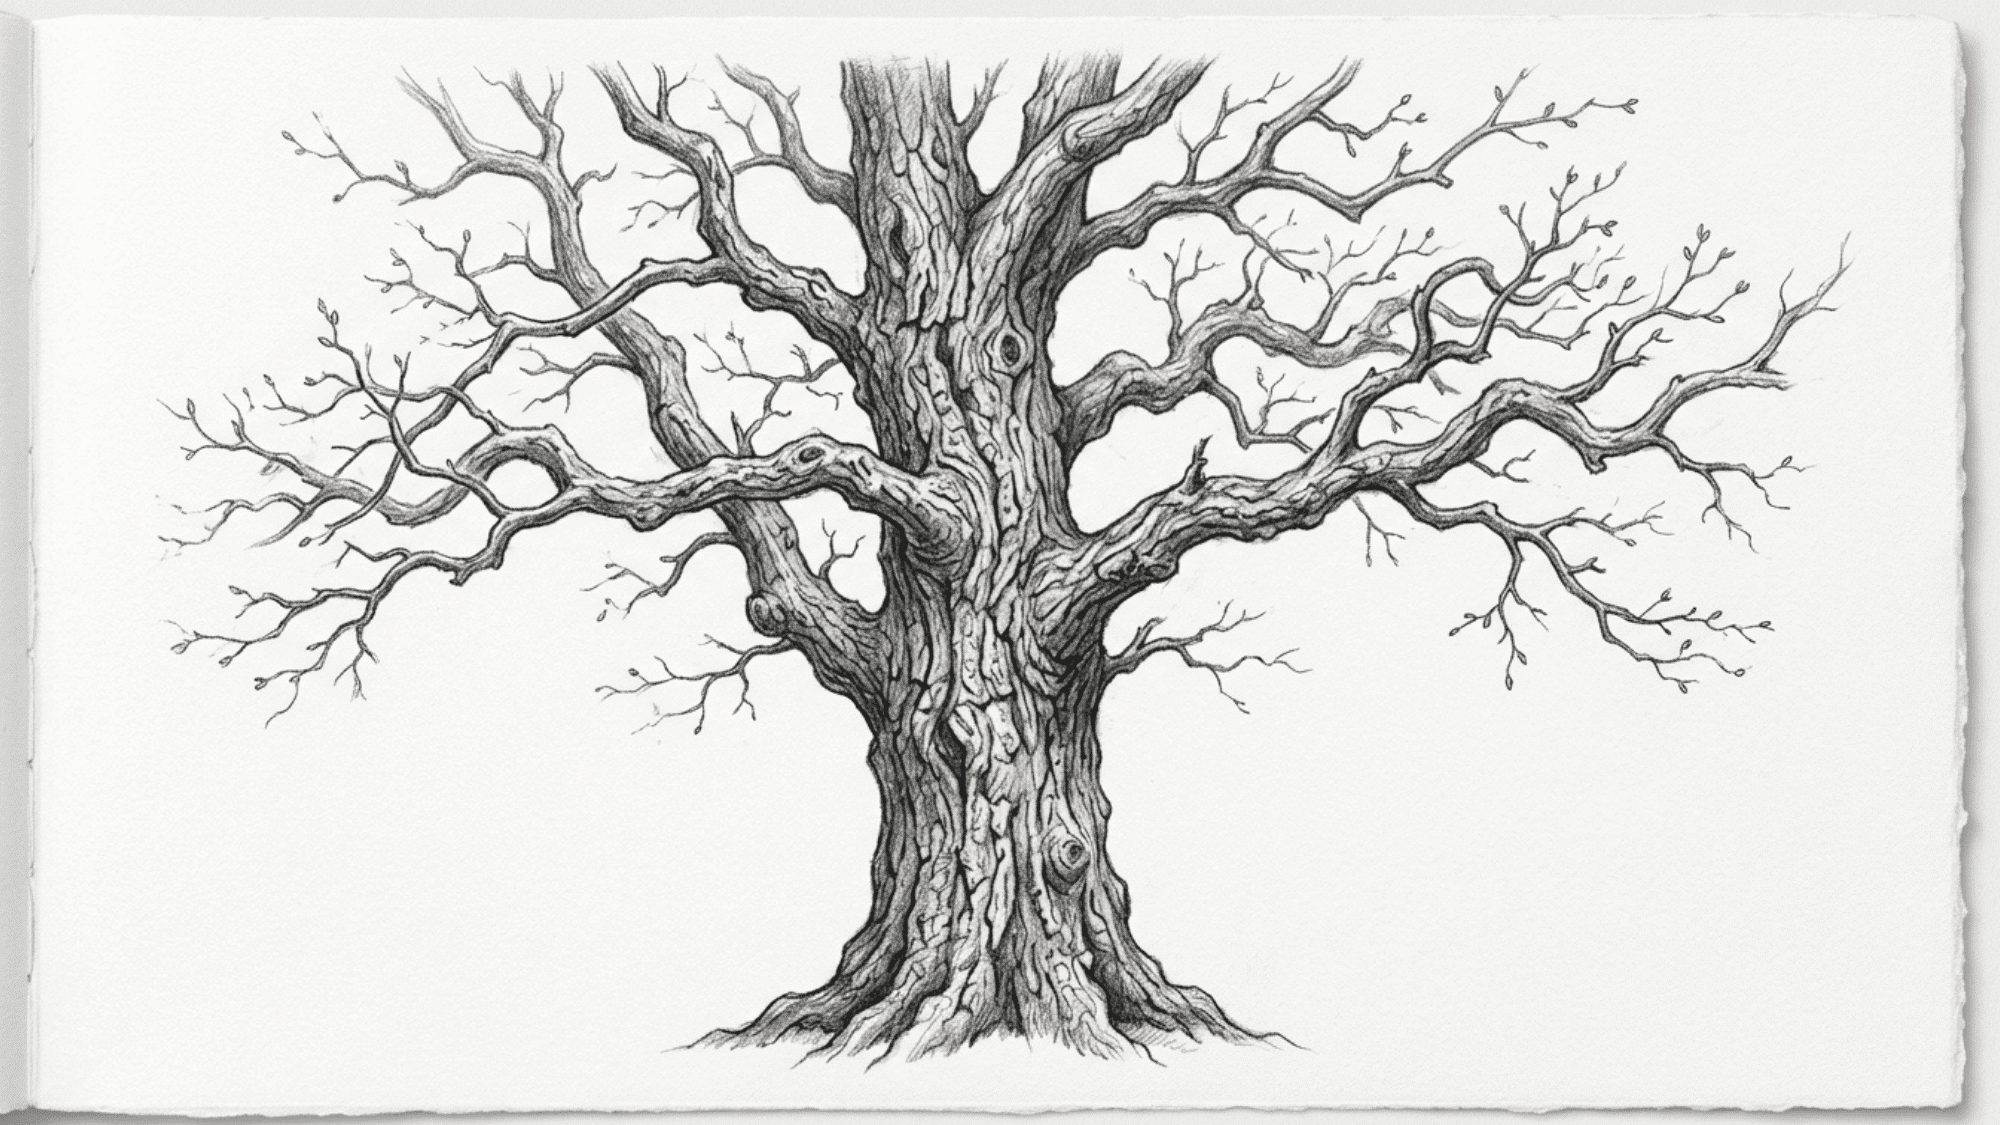
A tree gives you room to practice rough texture and natural shapes. No two trees look exactly alike, which makes them interesting subjects to study.
Steps:
- Sketch the trunk with a slightly uneven outline so it feels natural instead of rigid
- Add the main branches, making sure they split in different directions with gradual thinning
- Build bark texture using short, uneven strokes that follow the direction of growth
- Layer smaller branch lines and add variation so the structure feels fuller and more realistic
- Add light shading on one side to show depth and create a grounded look
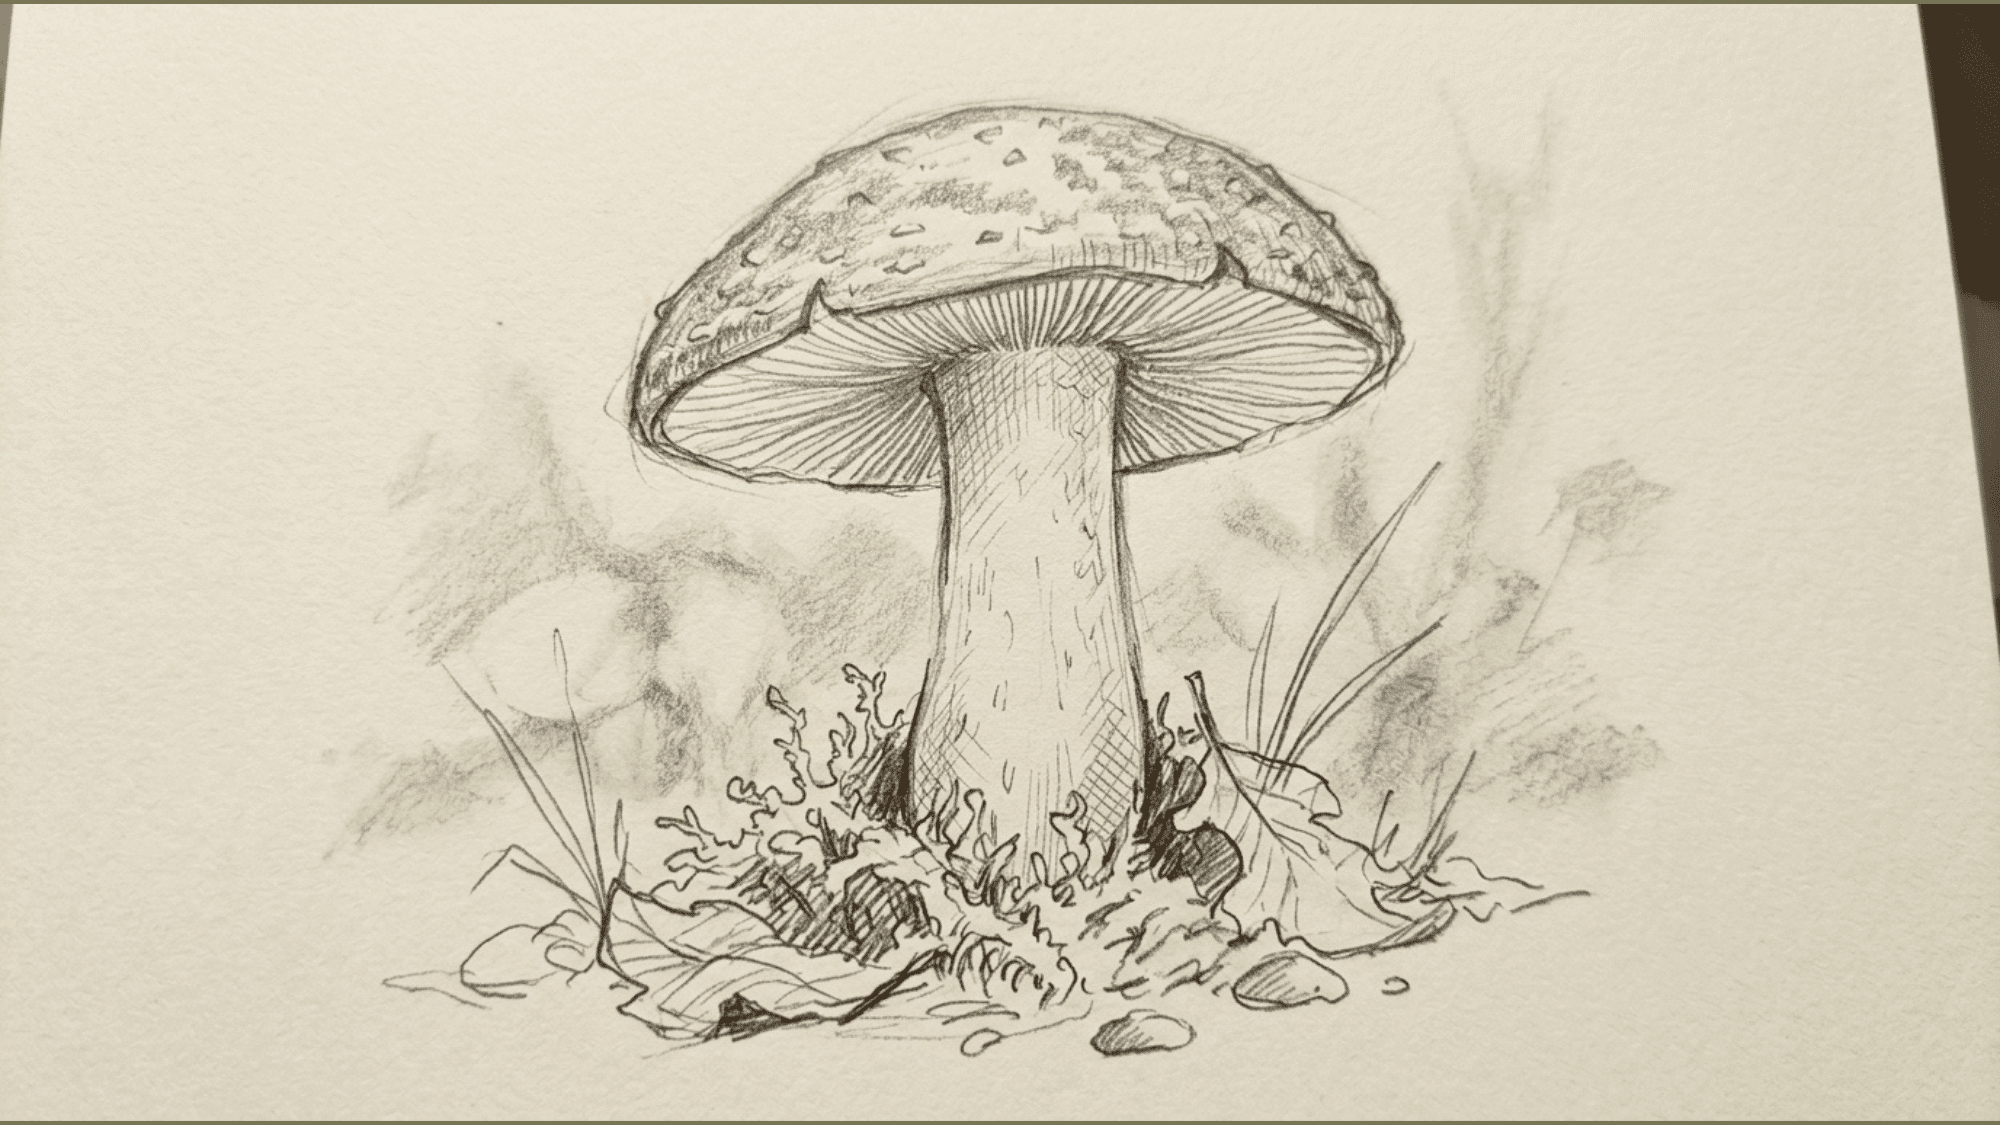
4. Mushrooms in a Forest Setting

Mushrooms allow practice with rounded forms and soft shading while building a small natural scene. Grouping them together makes the drawing feel more complete.
Steps:
- Place mushroom caps first, varying their size and tilt so the group feels natural
- Draw stems underneath each cap, keeping proportions slightly different for variety
- Add ground elements like grass and stones to build a simple base layer
- Sketch shadows under each mushroom to anchor them to the surface
- Add small details like fallen leaves or uneven soil texture for extra depth
- Lightly shade the background area to keep focus on the main group
5. A Window with Light Coming Through
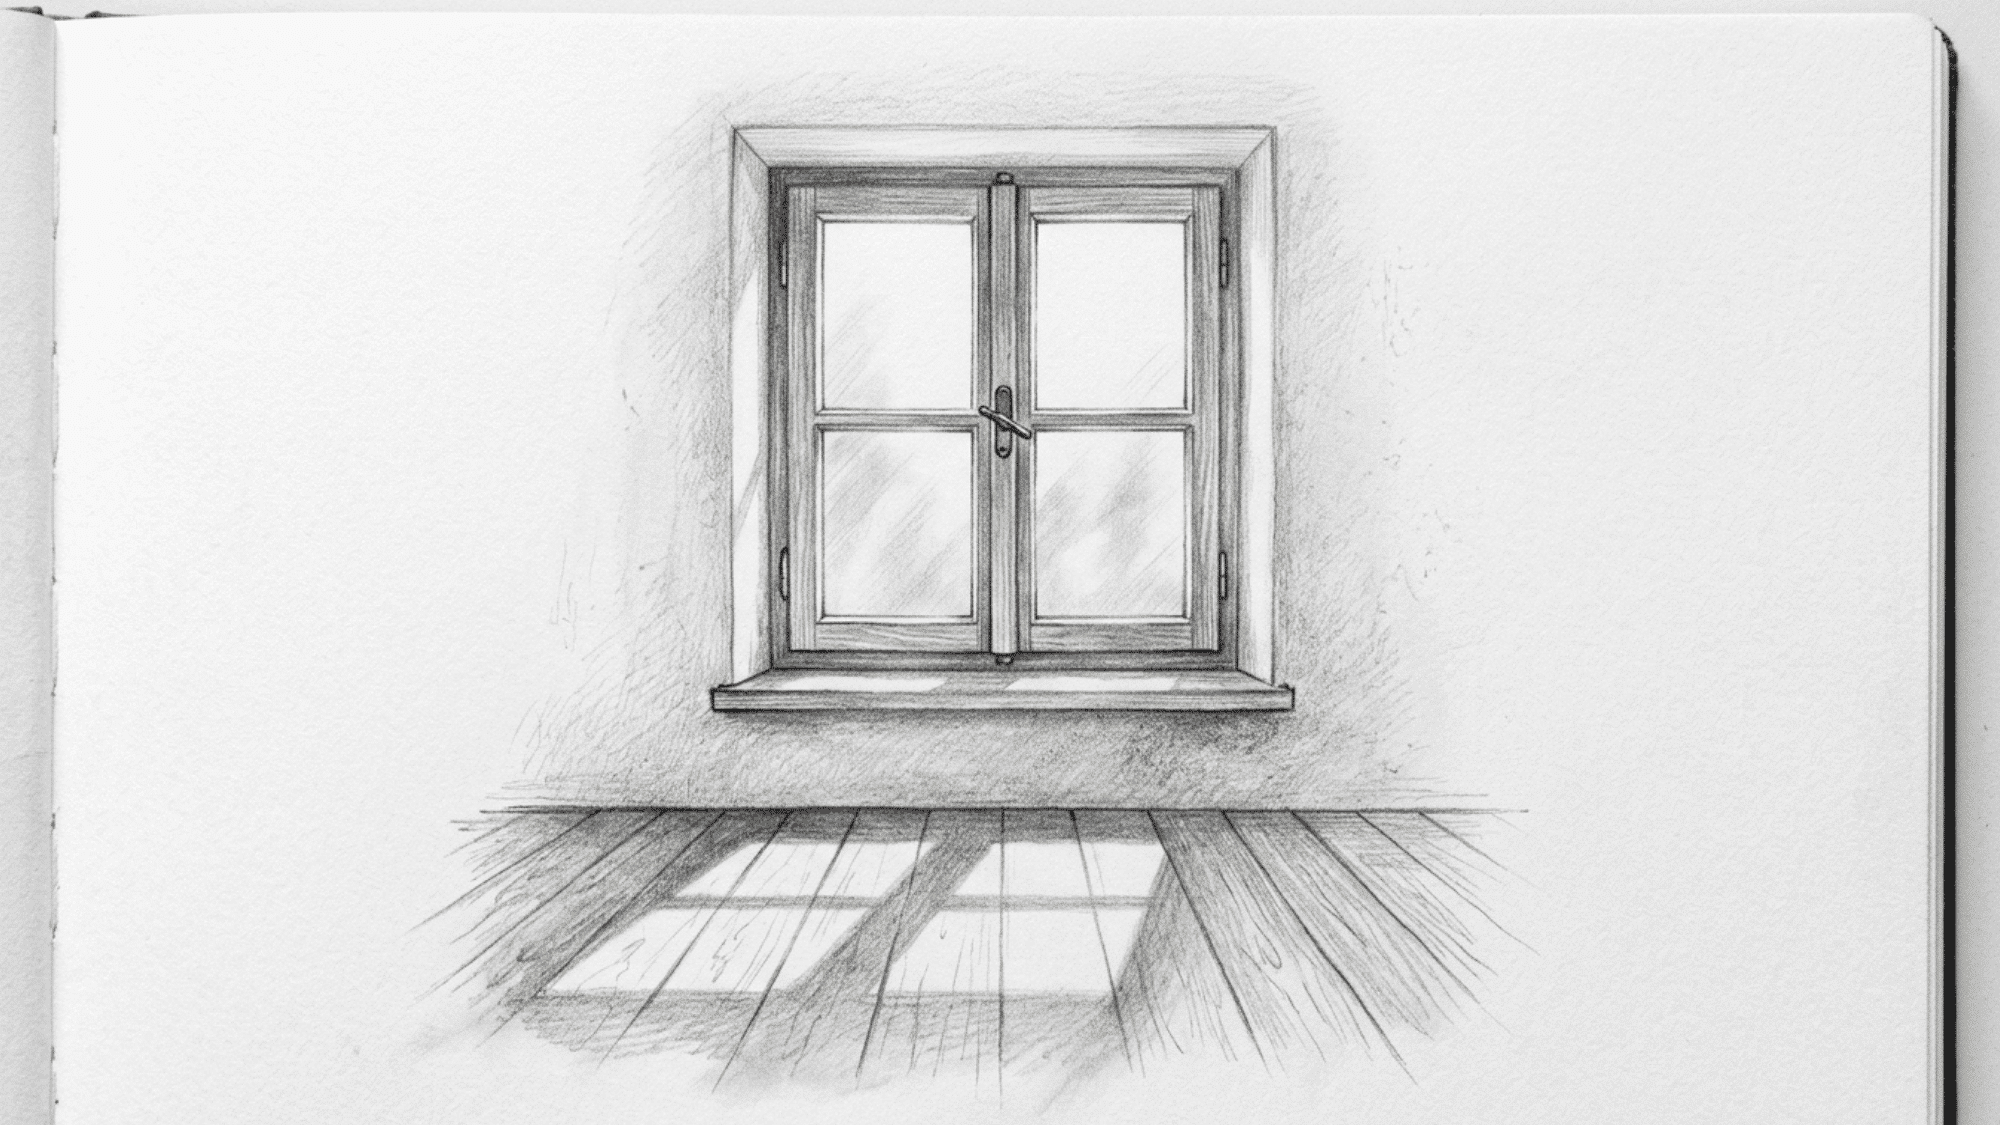
A window scene helps with straight lines and learning how light changes surfaces. It also builds awareness of simple indoor compositions.
Steps:
- Draw the outer window frame with clean, straight lines and even spacing
- Divide the frame into panels while keeping proportions consistent
- Indicate the direction of light coming through the glass using soft guide marks
- Add nearby elements like curtains or a plant to make the space feel lived in
- Shade areas where light is blocked to create contrast and depth
6. Old Keys or Coins
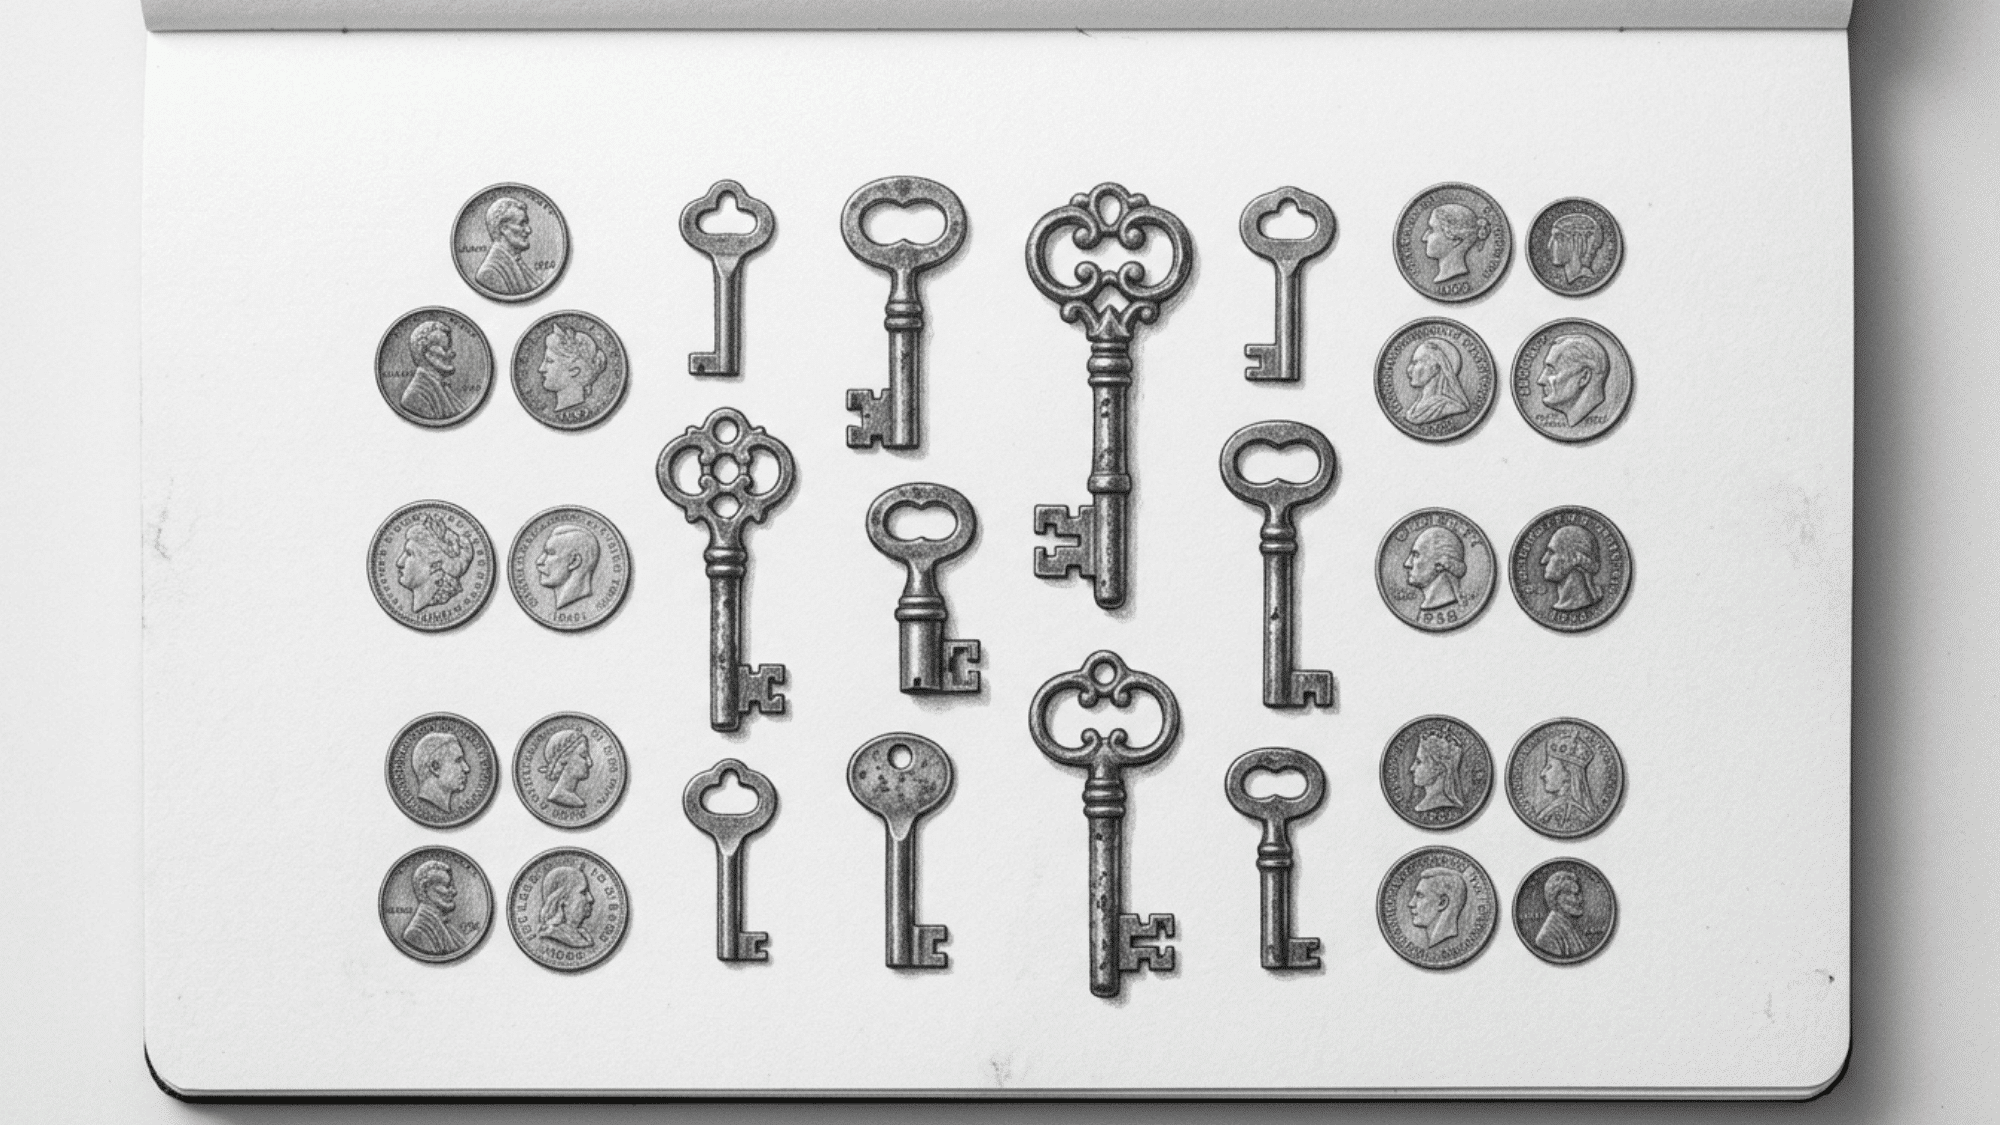
Small objects like keys and coins are useful for practicing detail work and texture control. Their worn surfaces give strong reference points for shading.
Steps:
- Sketch basic shapes for each object, keeping proportions simple at first
- Arrange them in a small group so that spacing and overlap can be studied
- Add surface markings like scratches, engravings, or dents with light strokes
- Define edges more clearly so each object stands out from the others
- Build shadow areas underneath and around objects to create weight and realism
7. A Sleeping Cat Curled Up
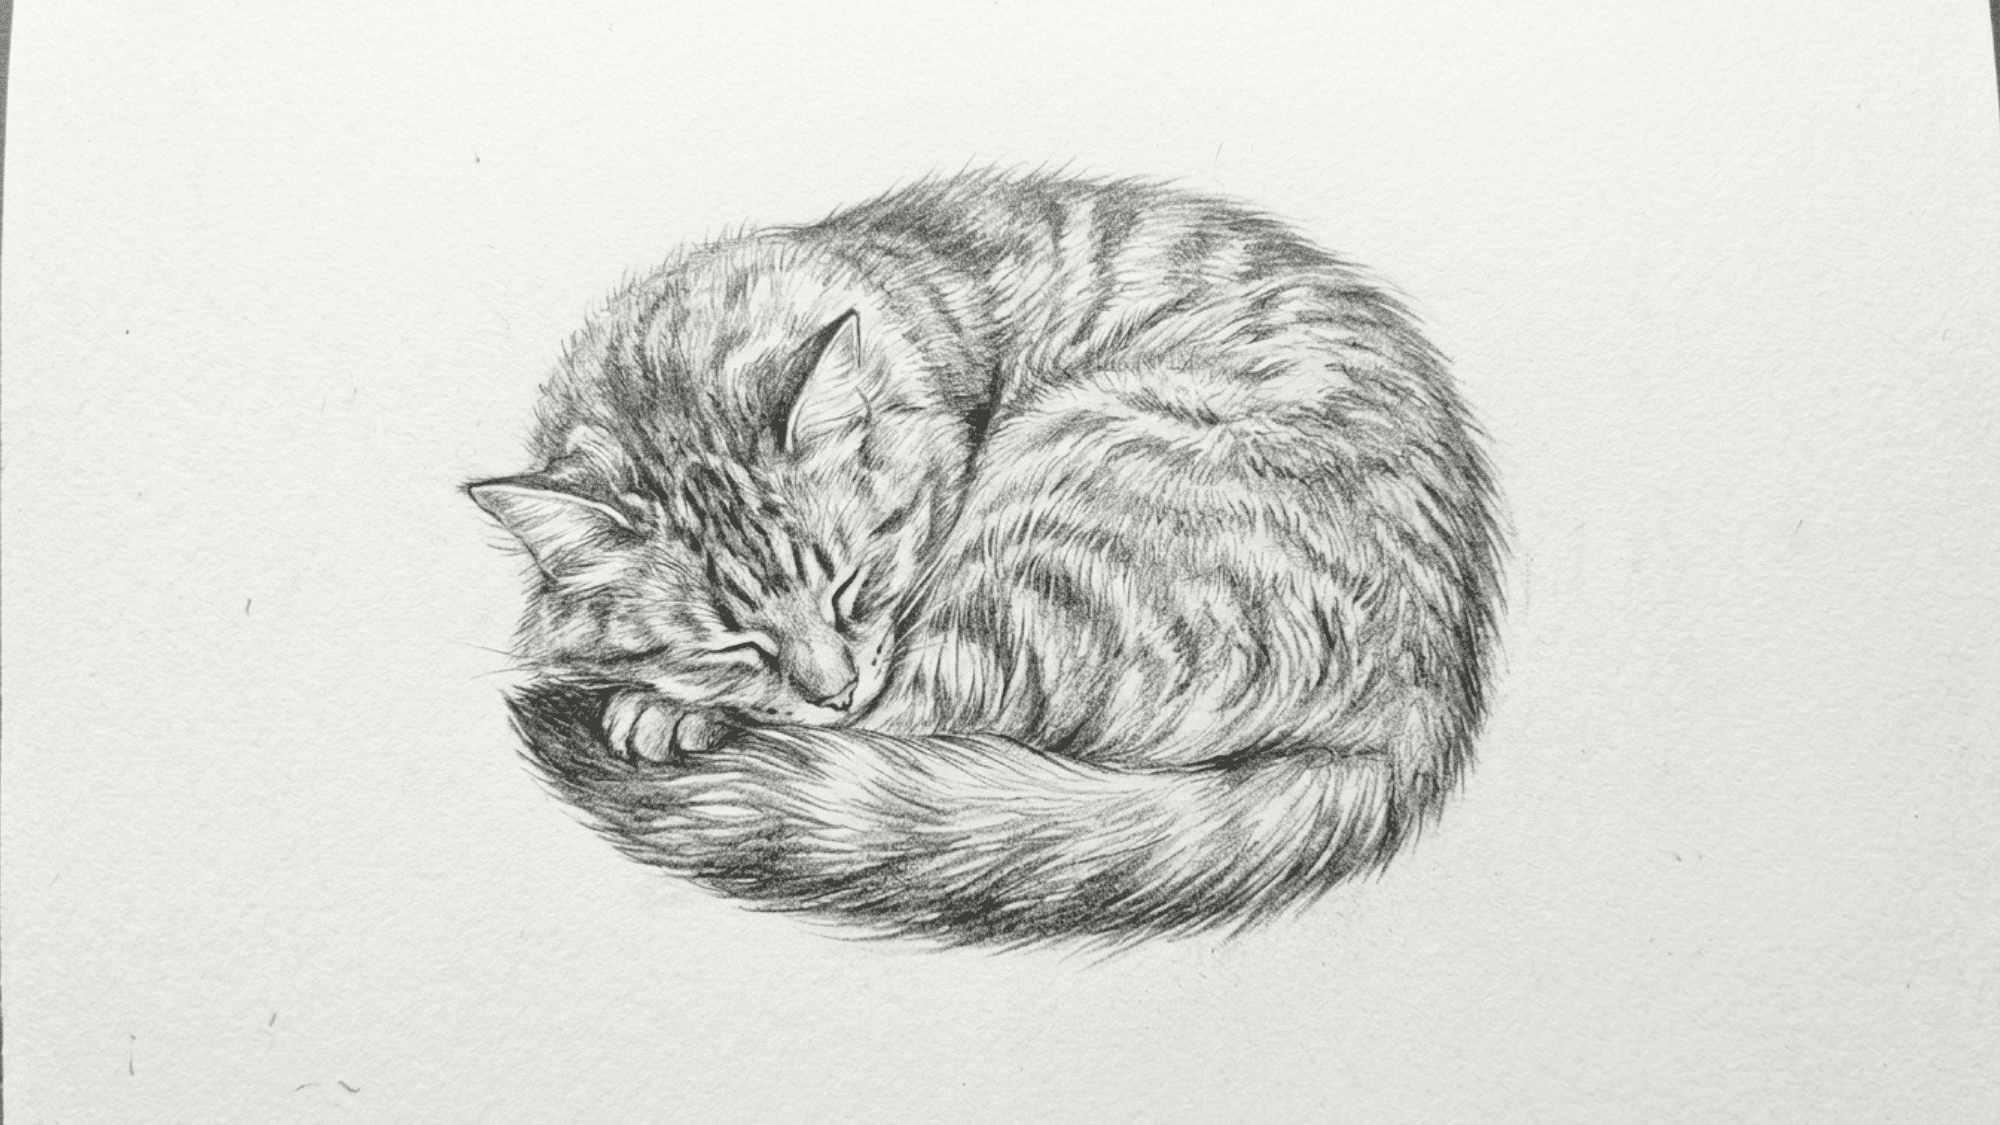
A curled-up cat has soft shapes that help with flow and proportion practice. The pose keeps things simple while still looking expressive.
Steps:
- Draw a rounded base shape that forms the overall body position
- Add the head placement within the curve of the body
- Sketch tucked paws and tail positioning to complete the curled form
- Refine the outer body line so the shape feels smooth and connected
8. A Dog Mid-Yawn
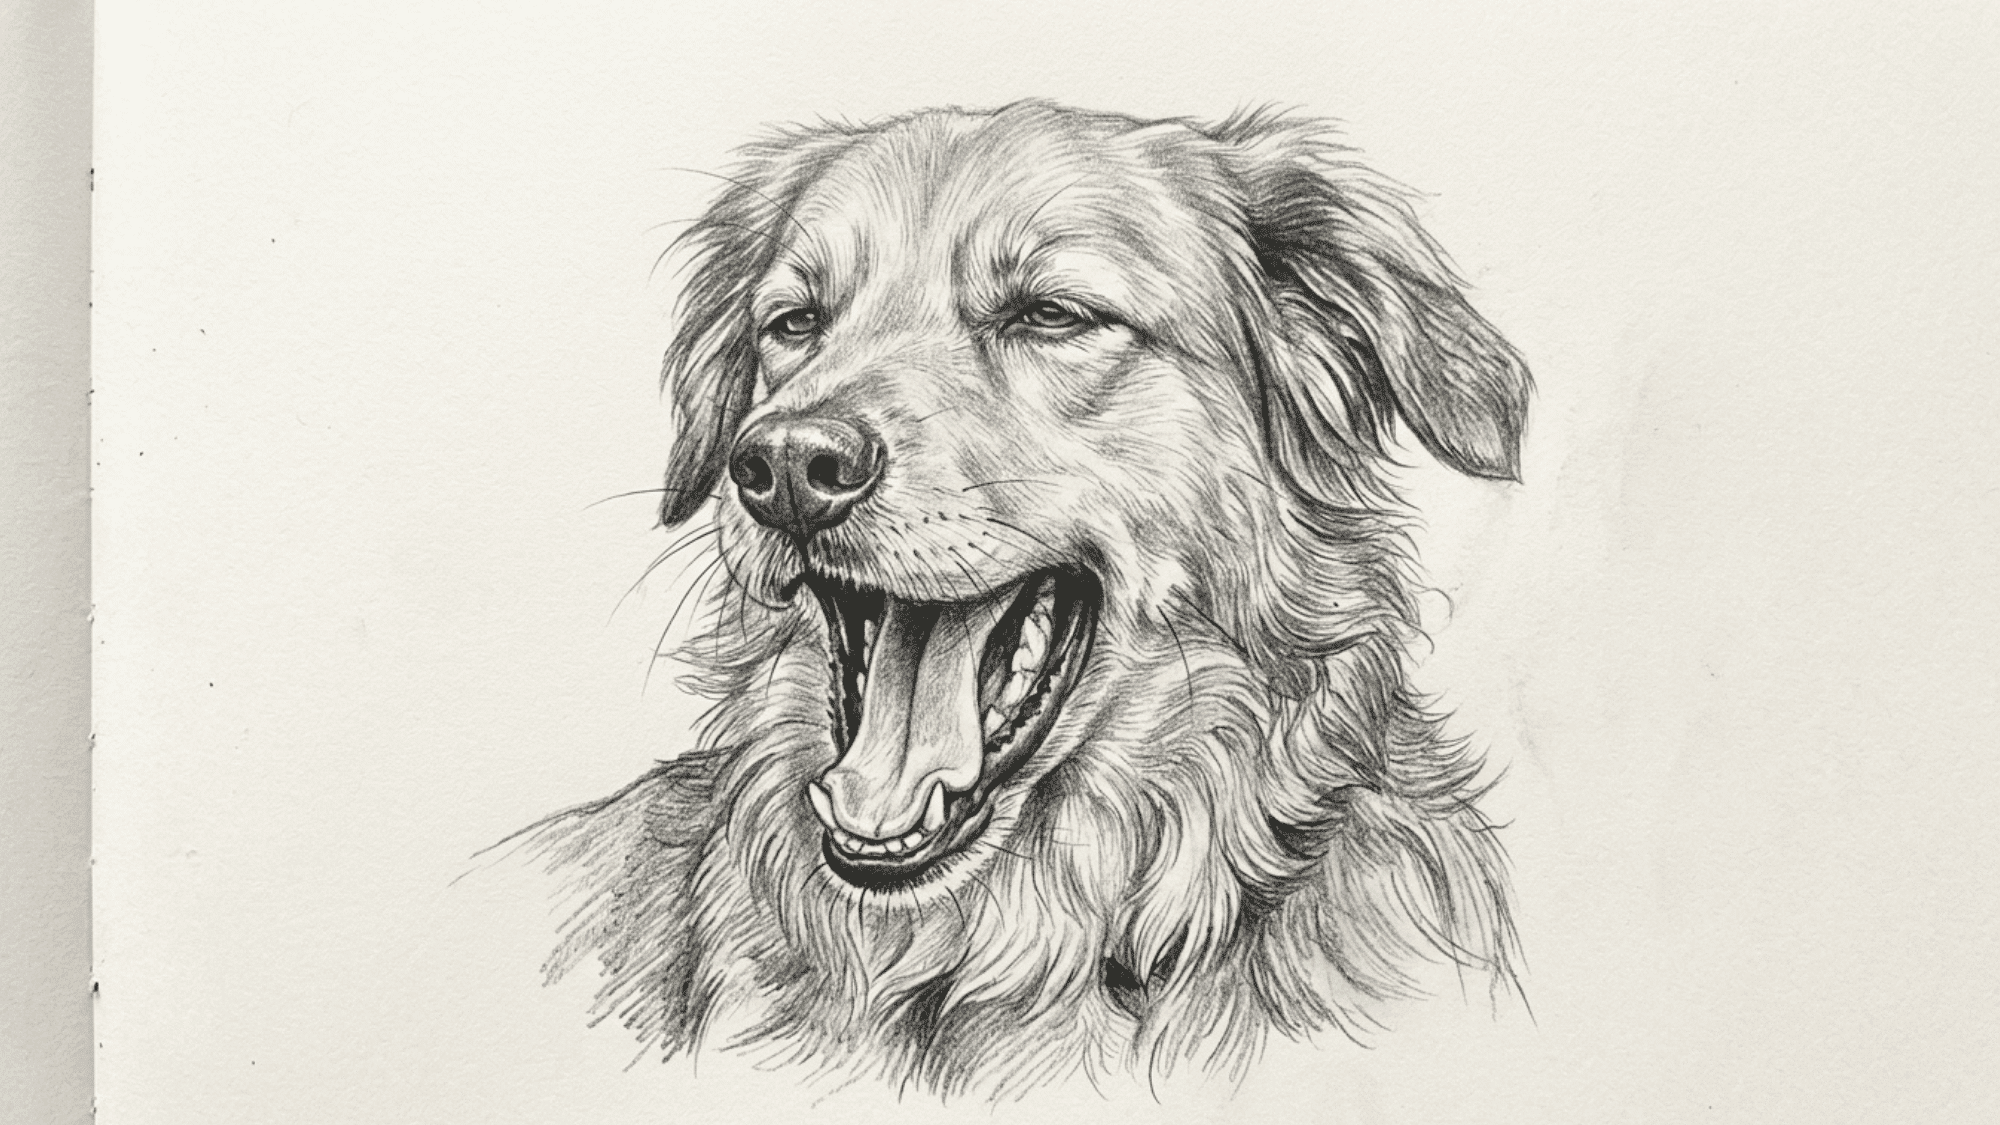
This subject brings movement into sketching and helps with facial structure practice. The open mouth adds a bit of complexity without being overwhelming.
Steps:
- Start with a basic head shape to establish size and angle
- Add ear placement so the expression feels balanced
- Draw the open mouth area, focusing on proportion rather than detail, first
- Add tongue and inner mouth structure with light guiding lines
- Refine facial features so the expression feels clear and natural
9. An Owl with Feather Detail

An owl is a strong choice for practicing patterns and texture. Its large eyes and layered feathers provide plenty of detail without becoming overwhelming.
Steps:
- Sketch a rounded head shape and mark eye positions clearly
- Build large eyes first so the focus of the drawing stays strong
- Add feather layers around the face using short, controlled strokes
- Extend texture into wings and body while keeping direction consistent
10. A Spider Web with Dew Drops
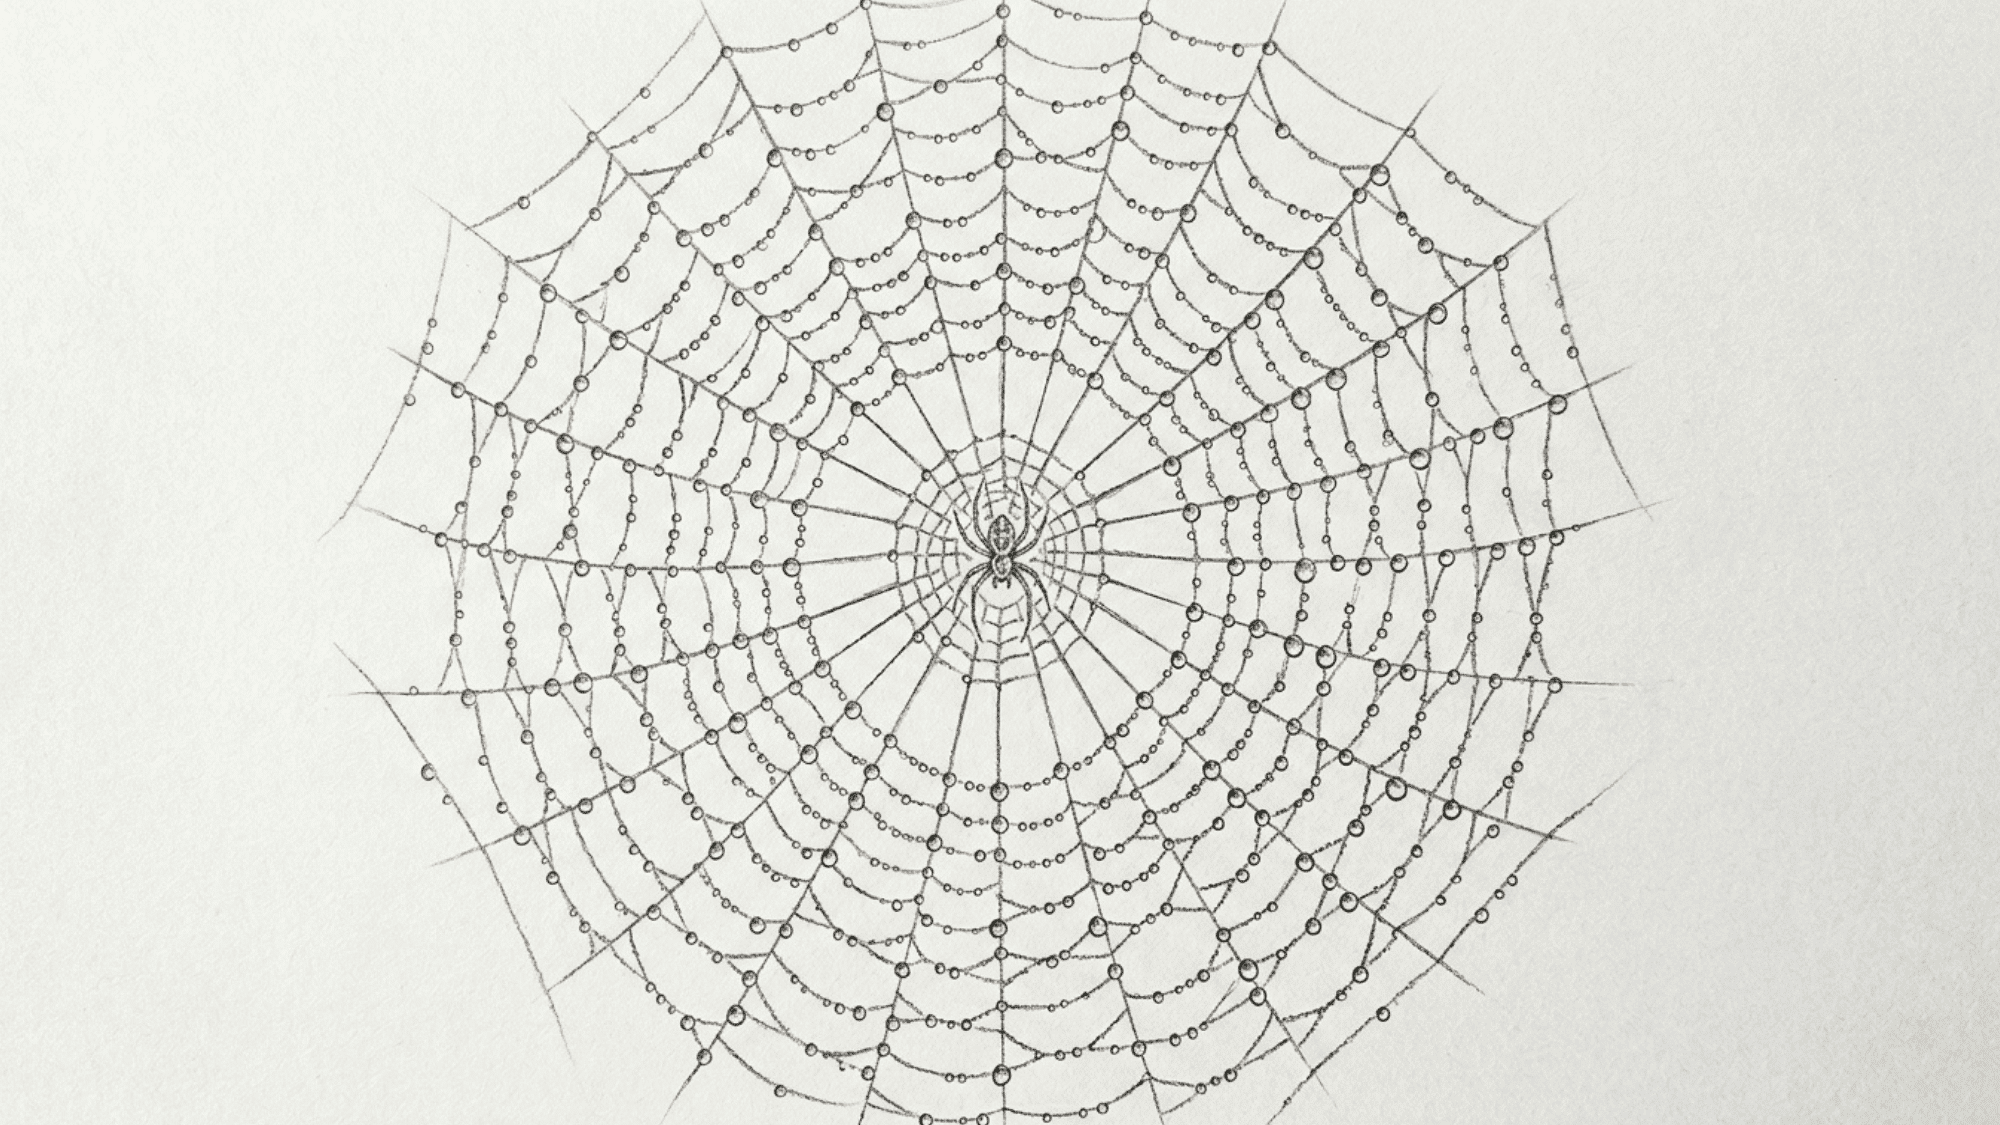
A spider web lets you work on fine lines and spacing. It requires patience and careful observation rather than heavy shading.
Steps:
- Mark a central point and draw evenly spaced radial lines outward
- Connect circular strands carefully, keeping spacing balanced
- Reinforce main web lines so the structure becomes easier to read
- Add small dew drop placements along selected intersections
- Shade droplets lightly to show reflection and roundness
11. A Stack of Books
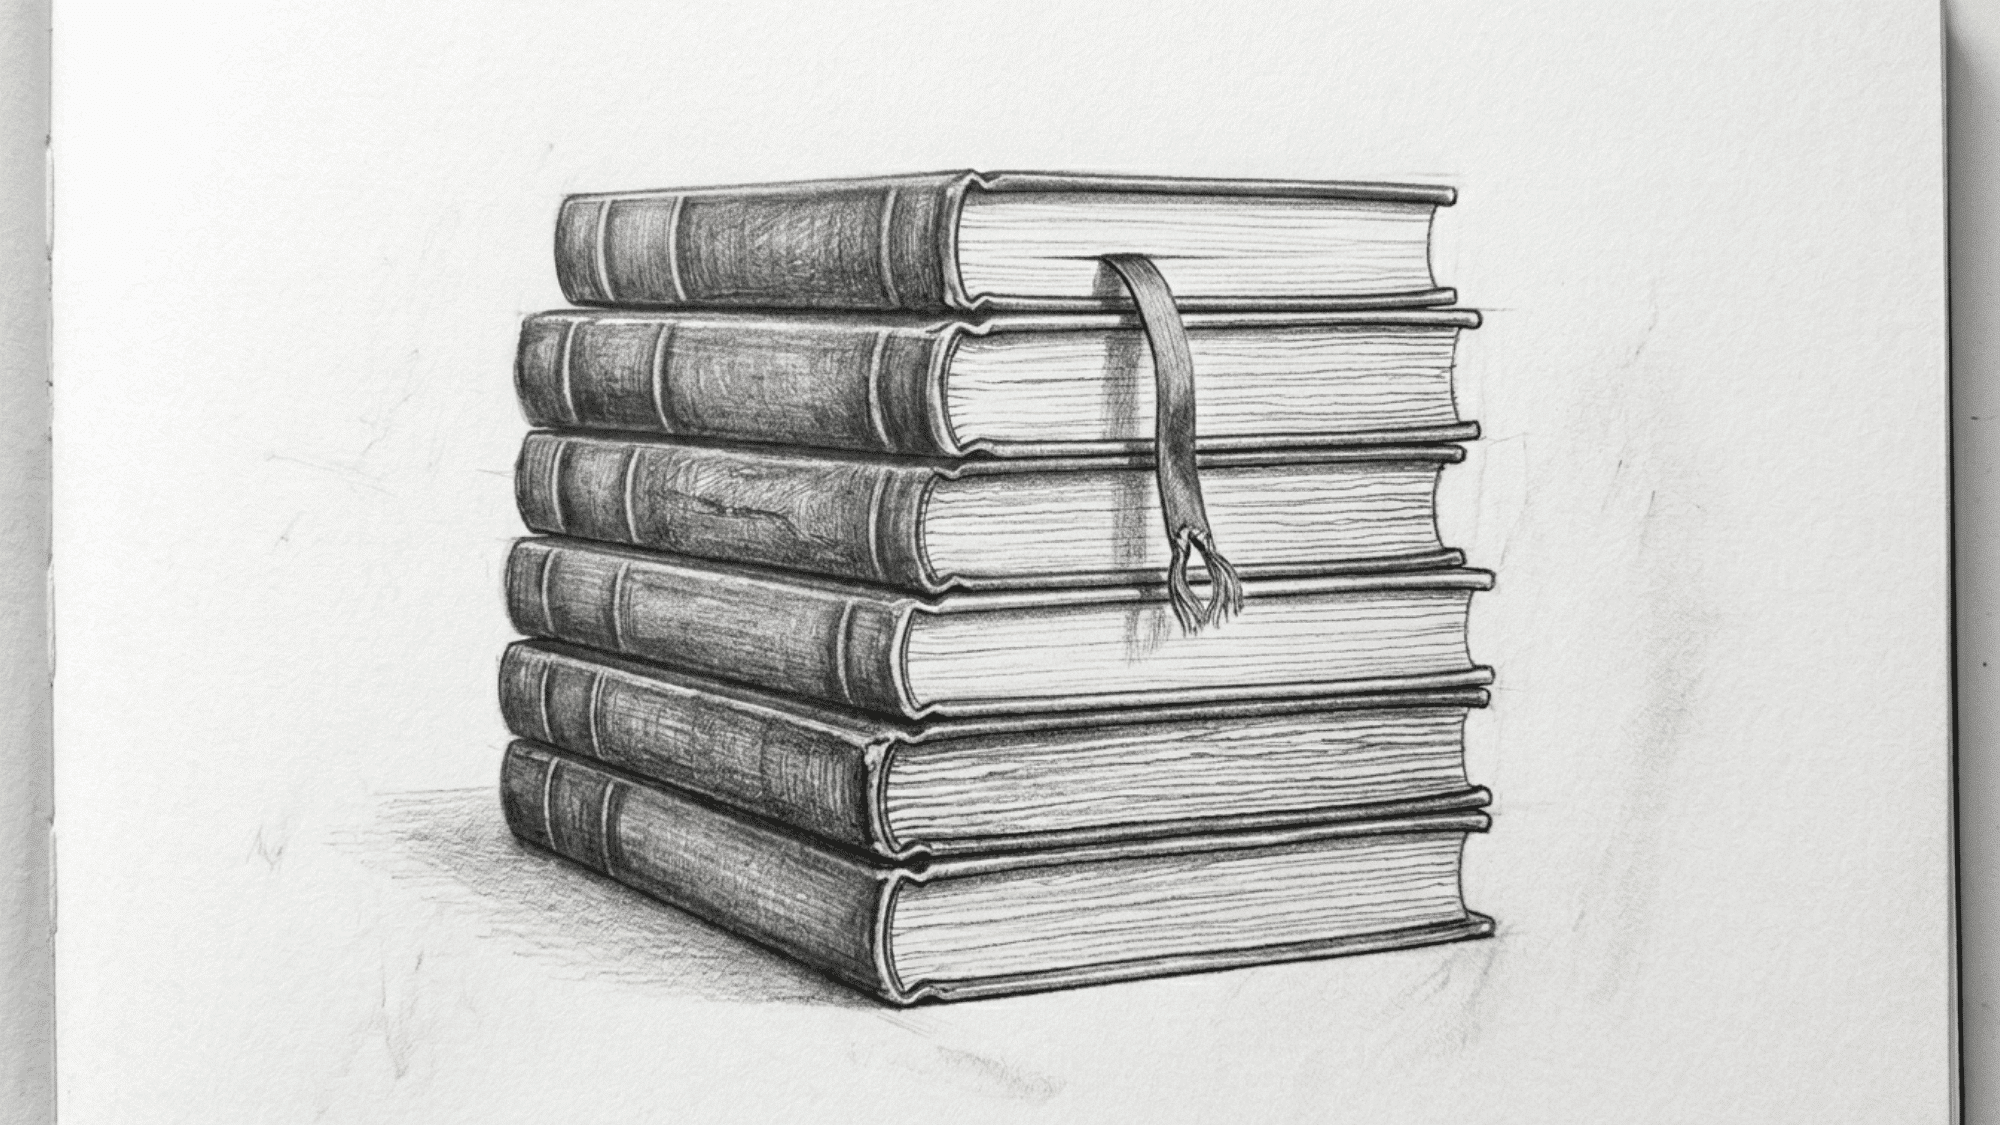
Books are helpful for learning angles, edges, and simple shading. They are also easy to arrange into different compositions.
Steps:
- Draw the base book shape with straight edges and slight perspective
- Add additional books on top, adjusting angles for a stacked effect
- Define page edges and thickness to show separation between layers
- Add small details like bent corners or bookmarks for realism
- Shade between layers to create depth and separation
12. A Butterfly with Patterned Wings
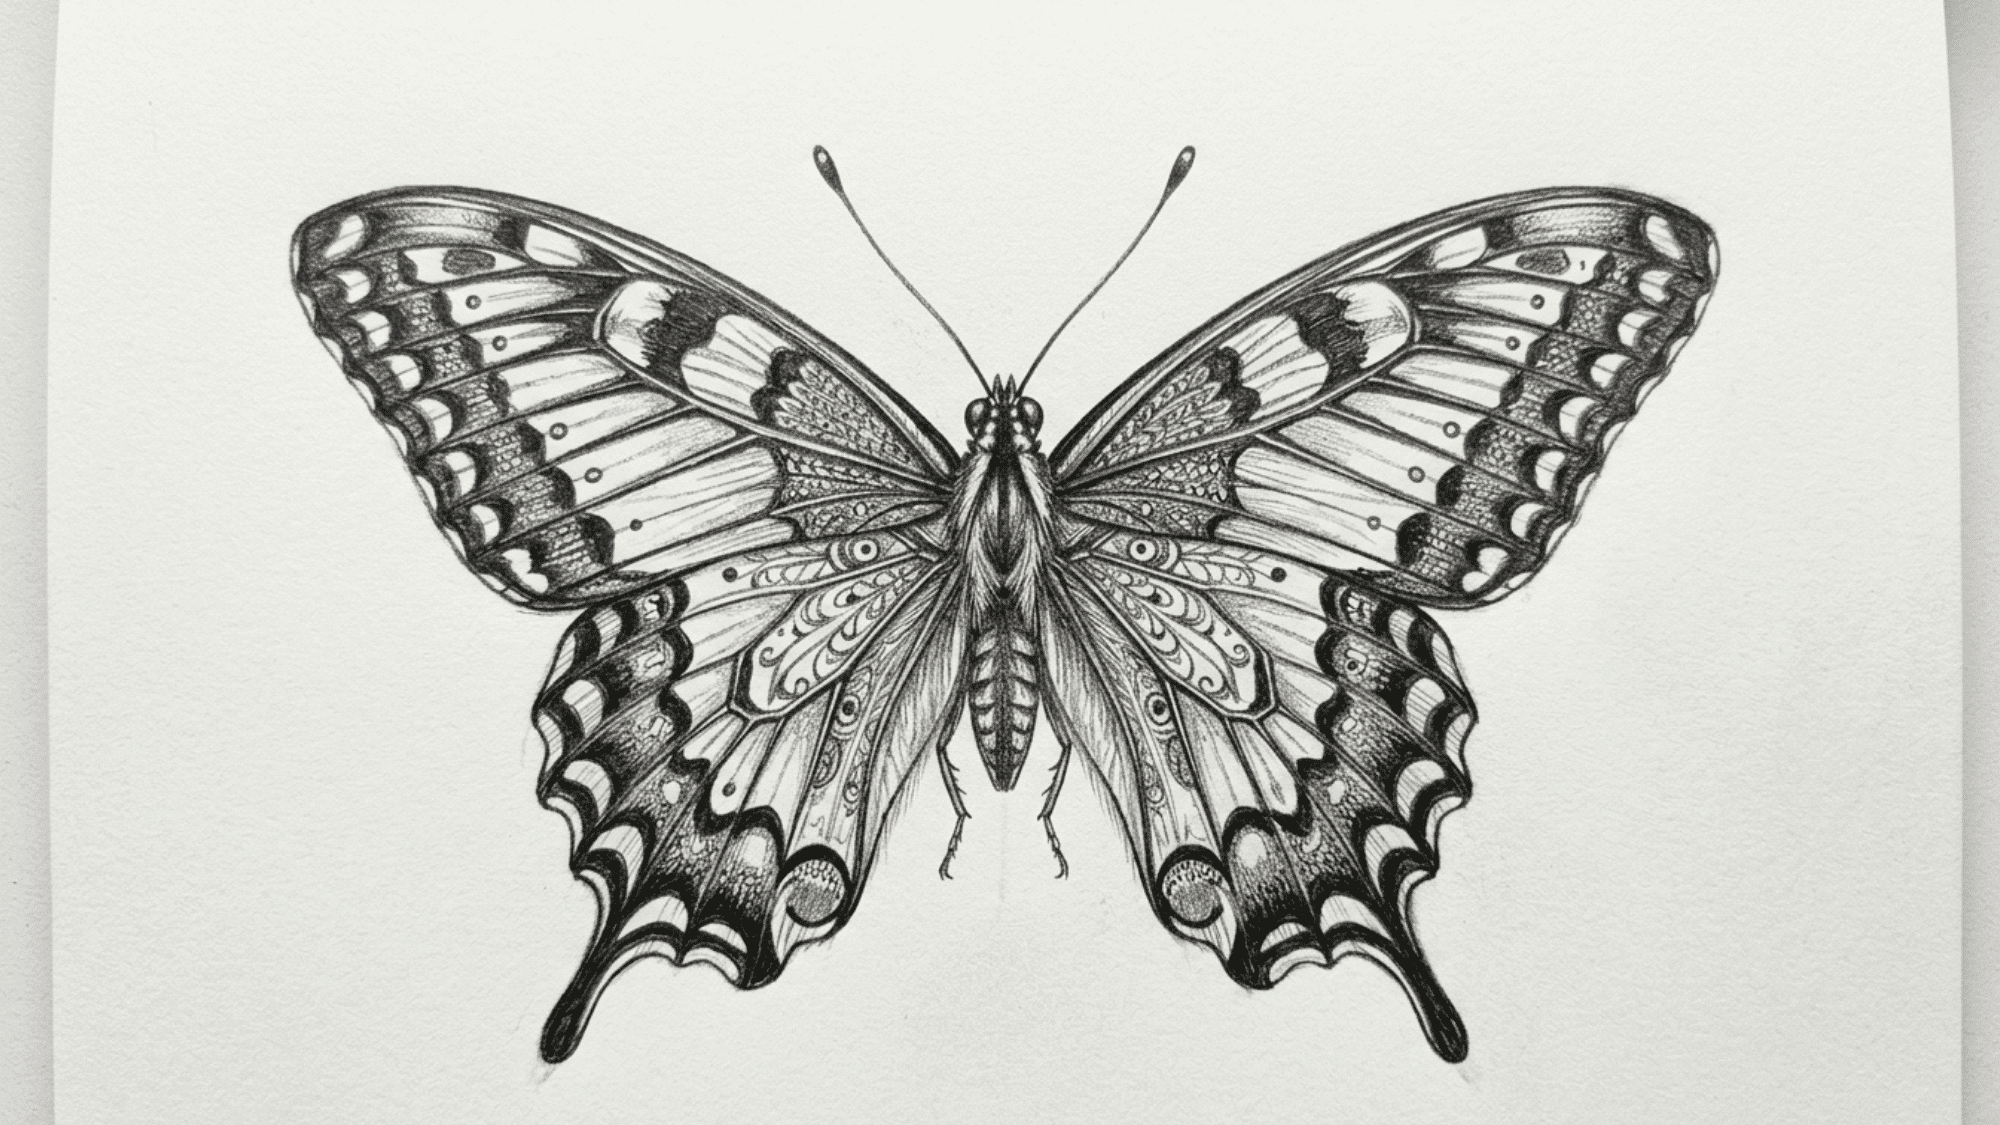
A butterfly is useful for symmetry and careful line work. Its wings provide a natural framework for practicing patterns and decorative details.
Steps:
- Draw a vertical center line to guide symmetry
- Sketch one wing shape and mirror it on the opposite side
- Add internal wing patterns while keeping both sides aligned
- Refine edges and adjust curves for smoother symmetry
- Apply light shading to give slight depth without overpowering detail
13. A Dragon Curled Around a Mountain

A dragon gives you space to mix imagination with structure. You can design the creature however you like while still practicing anatomy and texture.
Steps:
- Sketch a curved body line that wraps around the mountain base
- Add head and tail placement to define the creature’s flow
- Draw a mountain structure with rough edges for a natural look
- Add scales along the body using small repeated strokes
- Refine claws and wings while keeping proportions balanced
14. A Robot Made of Everyday Objects

This is a playful way to turn everyday items into characters. It encourages creativity while helping you draw a variety of shapes and forms.
Steps:
- Sketch a simple body frame using boxes and cylinders as base forms
- Add object parts like cans, buttons, or tools to build a character design
- Connect joints using lines or tubes so parts feel linked together
- Add surface details like bolts, wires, or scratches for texture
- Shade selected areas to show structure and weight
15. A Floating Island in the Sky
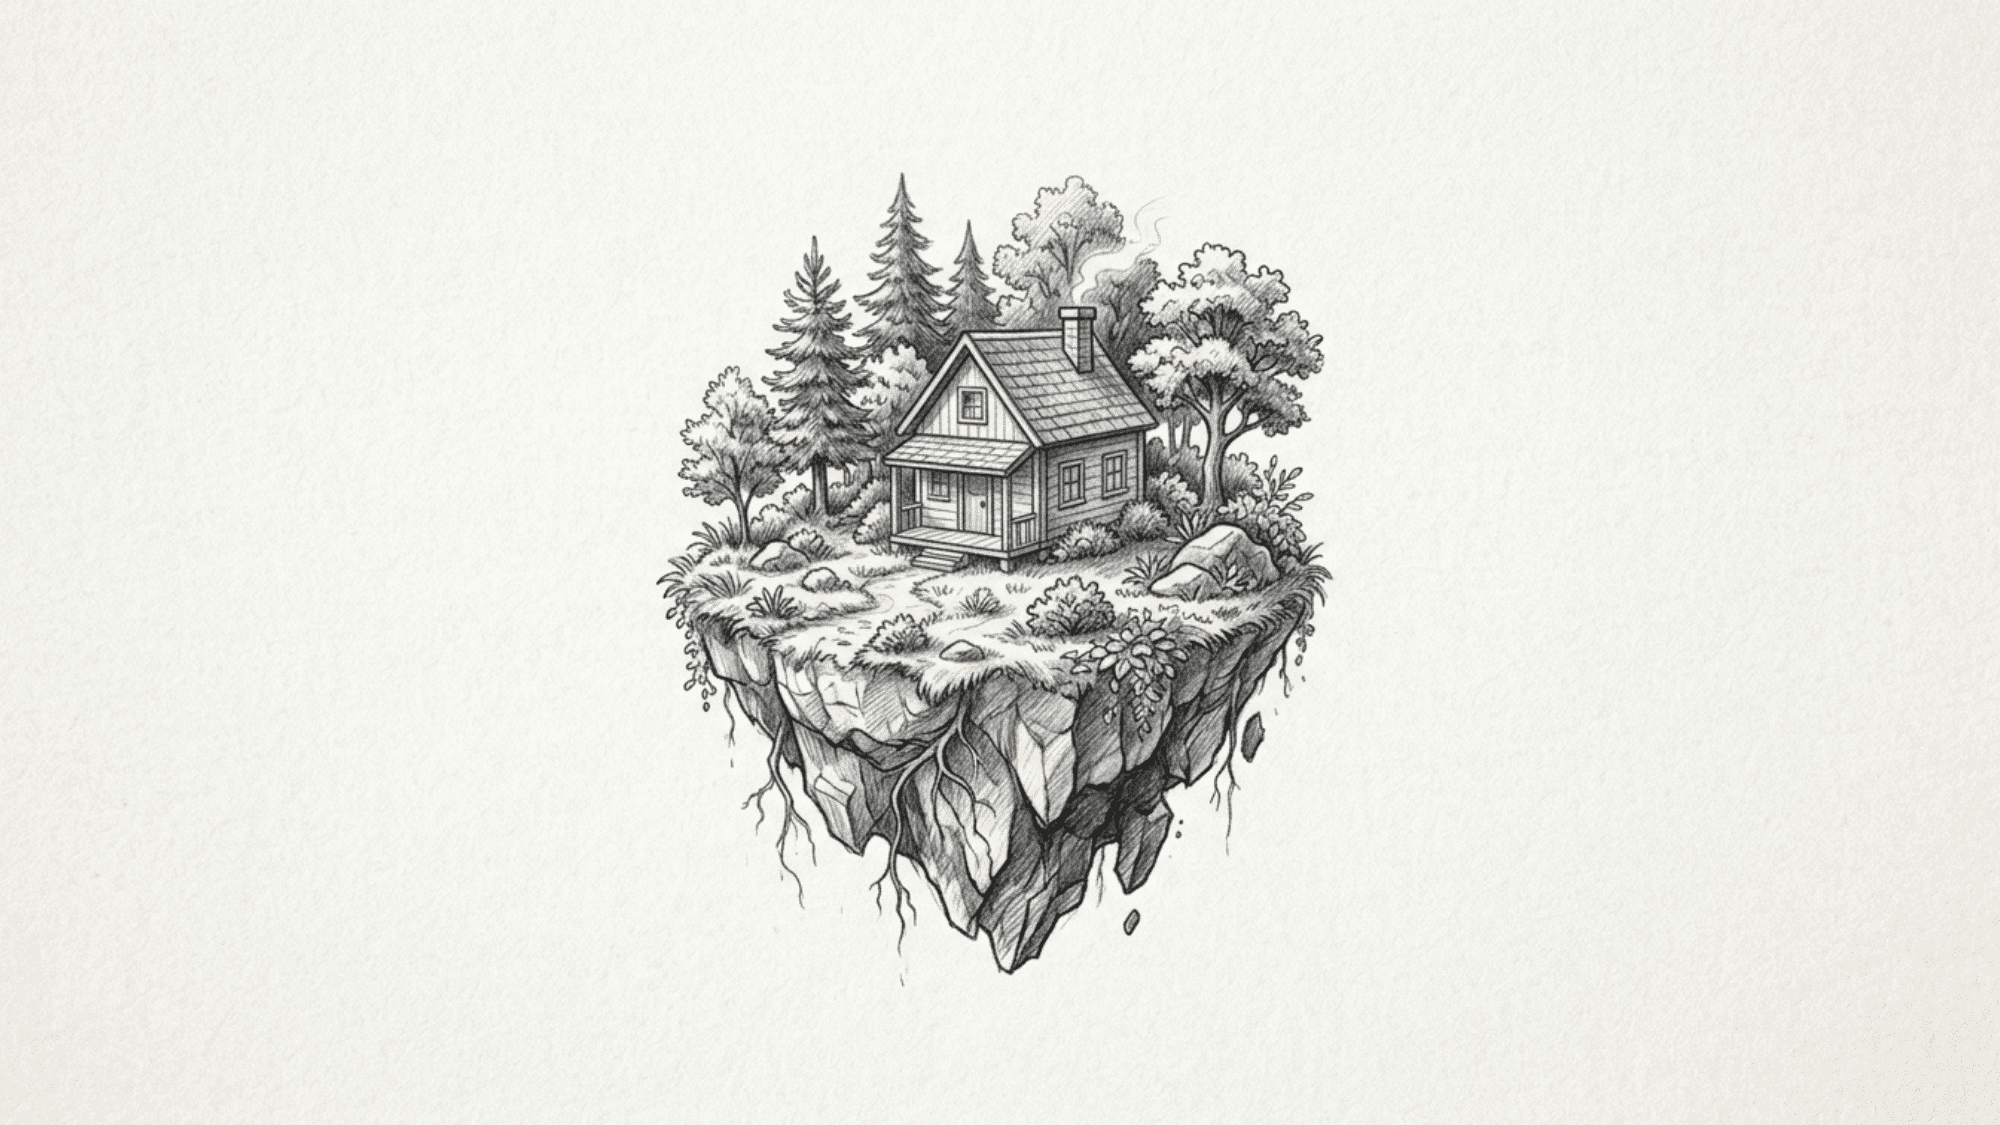
A floating island can include rocks, grass, trees, and a tiny house. It is a good choice when you want art drawing ideas with a bit of fantasy.
Steps:
- Draw the island base with uneven rocky edges for a floating effect
- Add grass, trees, and surface details on top of the island
- Place small structures, like a house or a path, to give scale
- Sketch clouds around and beneath the island for depth
- Add shading under the island to show separation from the sky
16. A Fox Sitting in Leaves
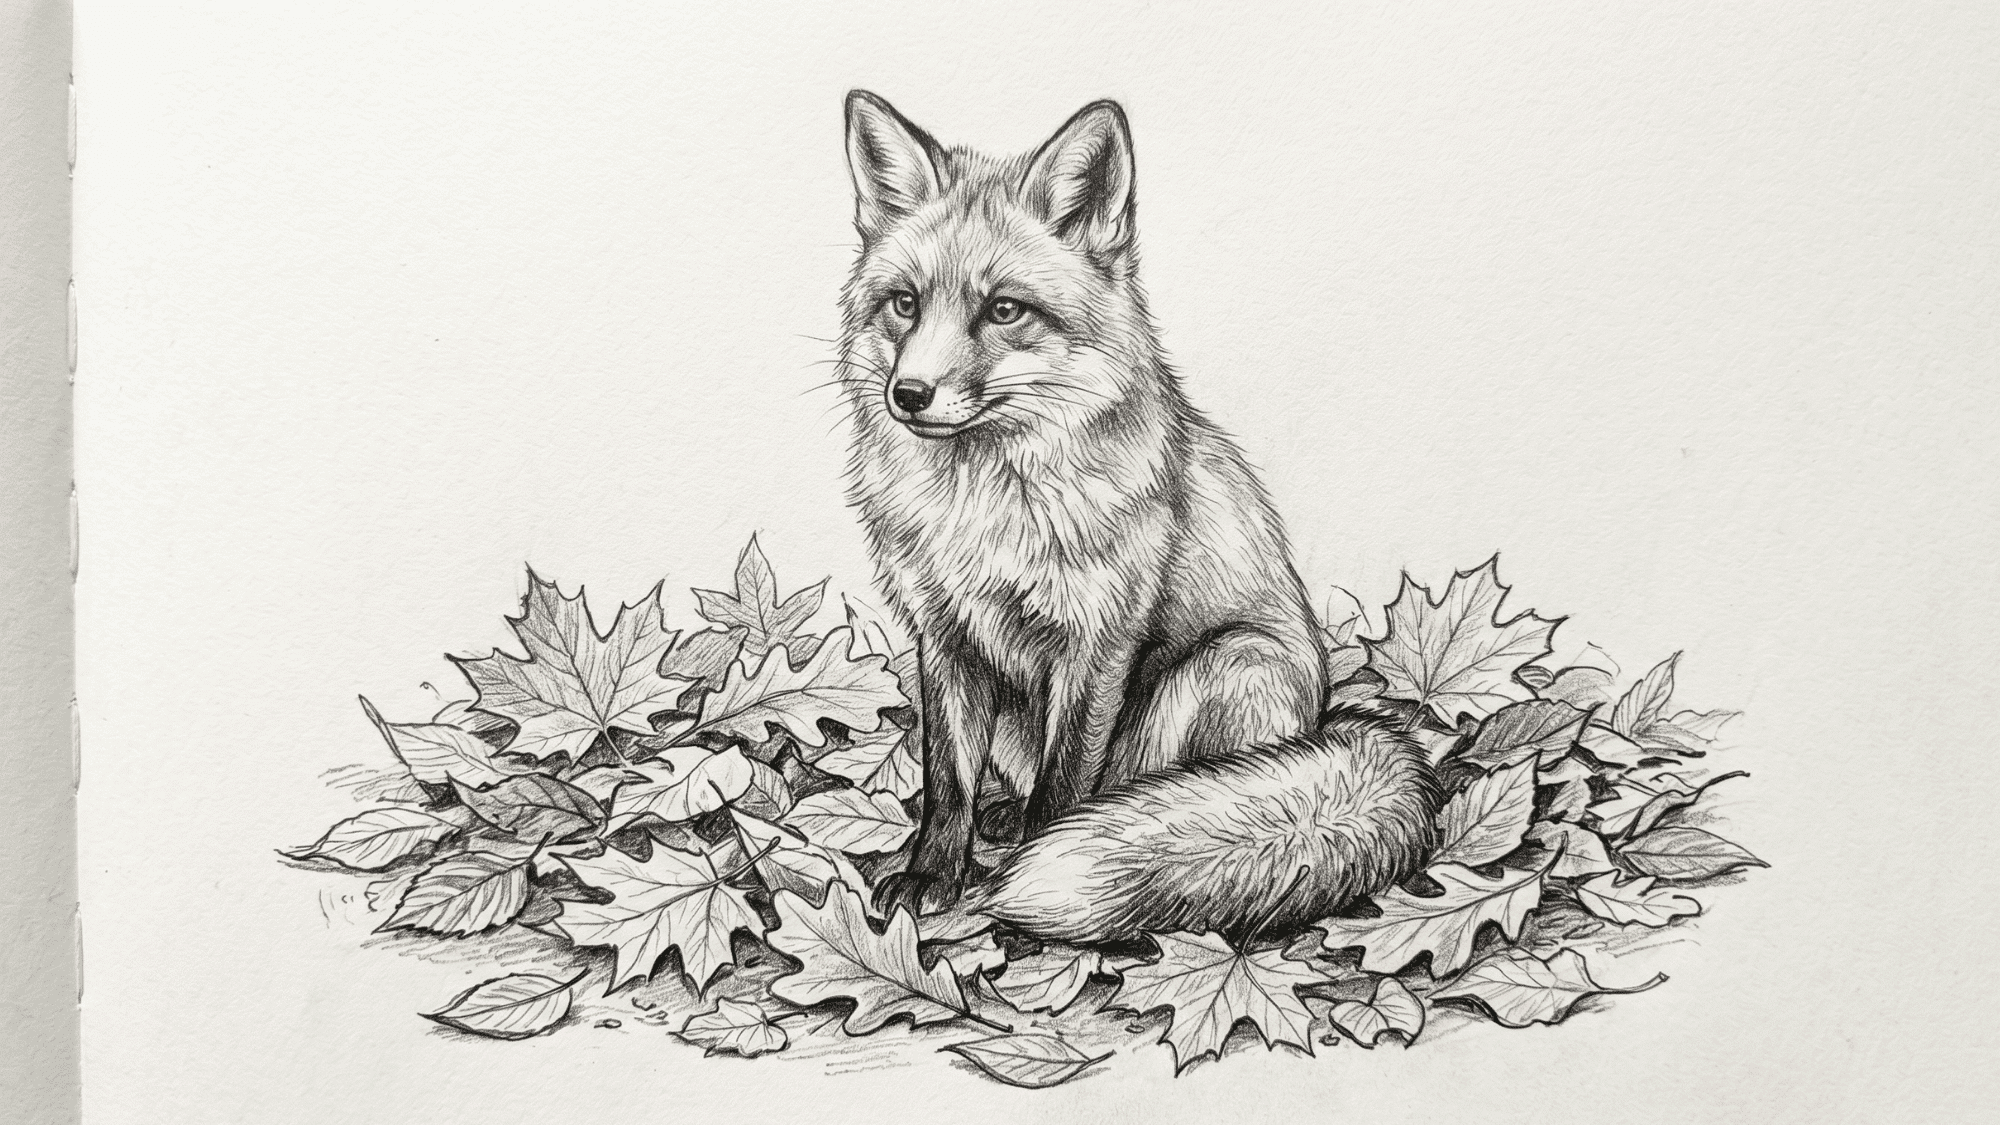
A fox helps with studying fur direction and pointed shapes in a natural pose. The surrounding leaves add context to the scene.
Steps:
- Sketch the body outline using soft curved shapes for structure
- Add head position and define the pointed facial structure
- Build fur direction using short strokes following body flow
- Place scattered leaves around the fox to set the environment
- Add shading under the body and leaves for grounding
17. Planets and Space Objects
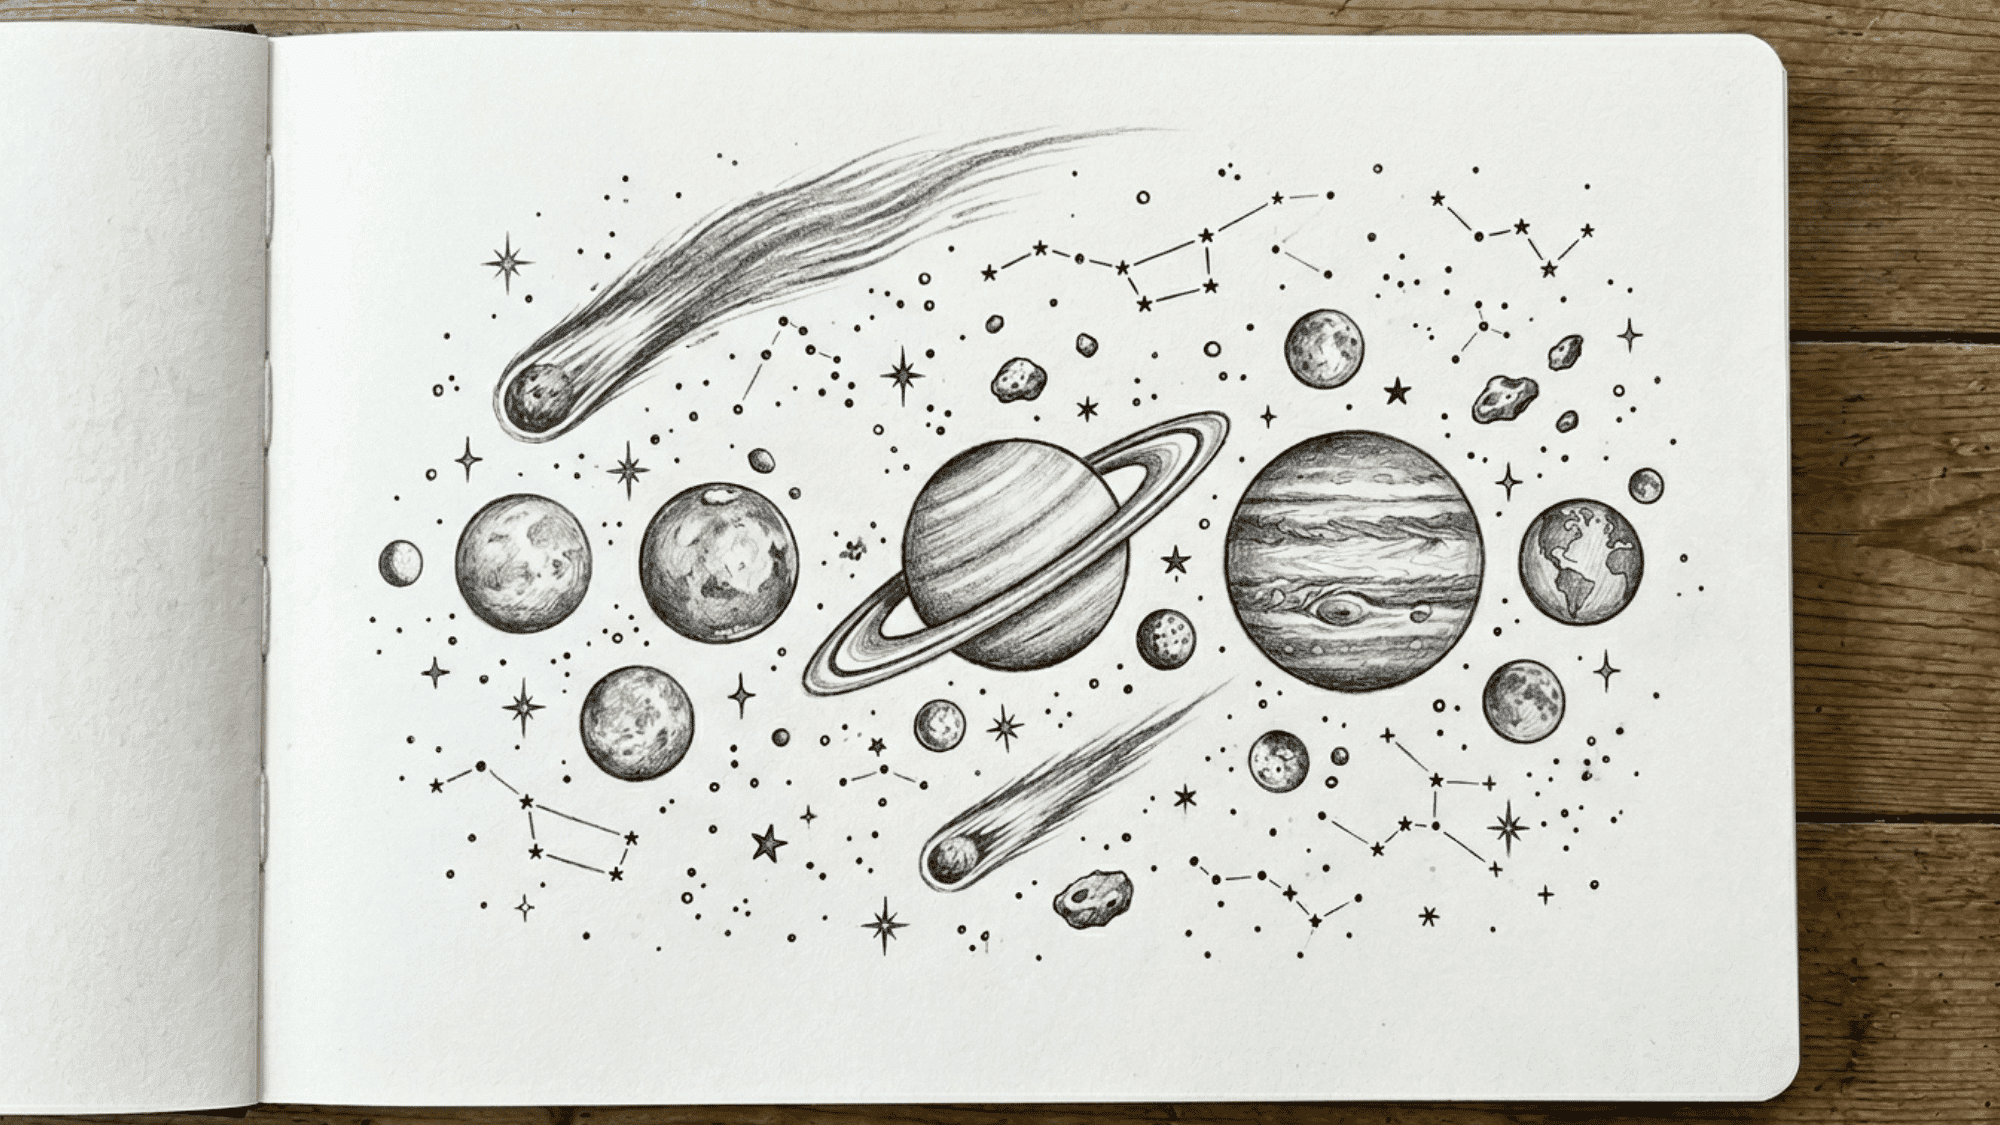
Planets, moons, stars, and comets are simple to start but easy to build on. They allow you to experiment with shading and creative compositions.
Steps:
- Draw circular planet shapes using light guiding lines
- Add rings, craters, or surface marks depending on the object
- Place stars and smaller objects to build a composition balance
- Apply smooth shading to create roundness and depth
18. A Hot Air Balloon Over Mountains
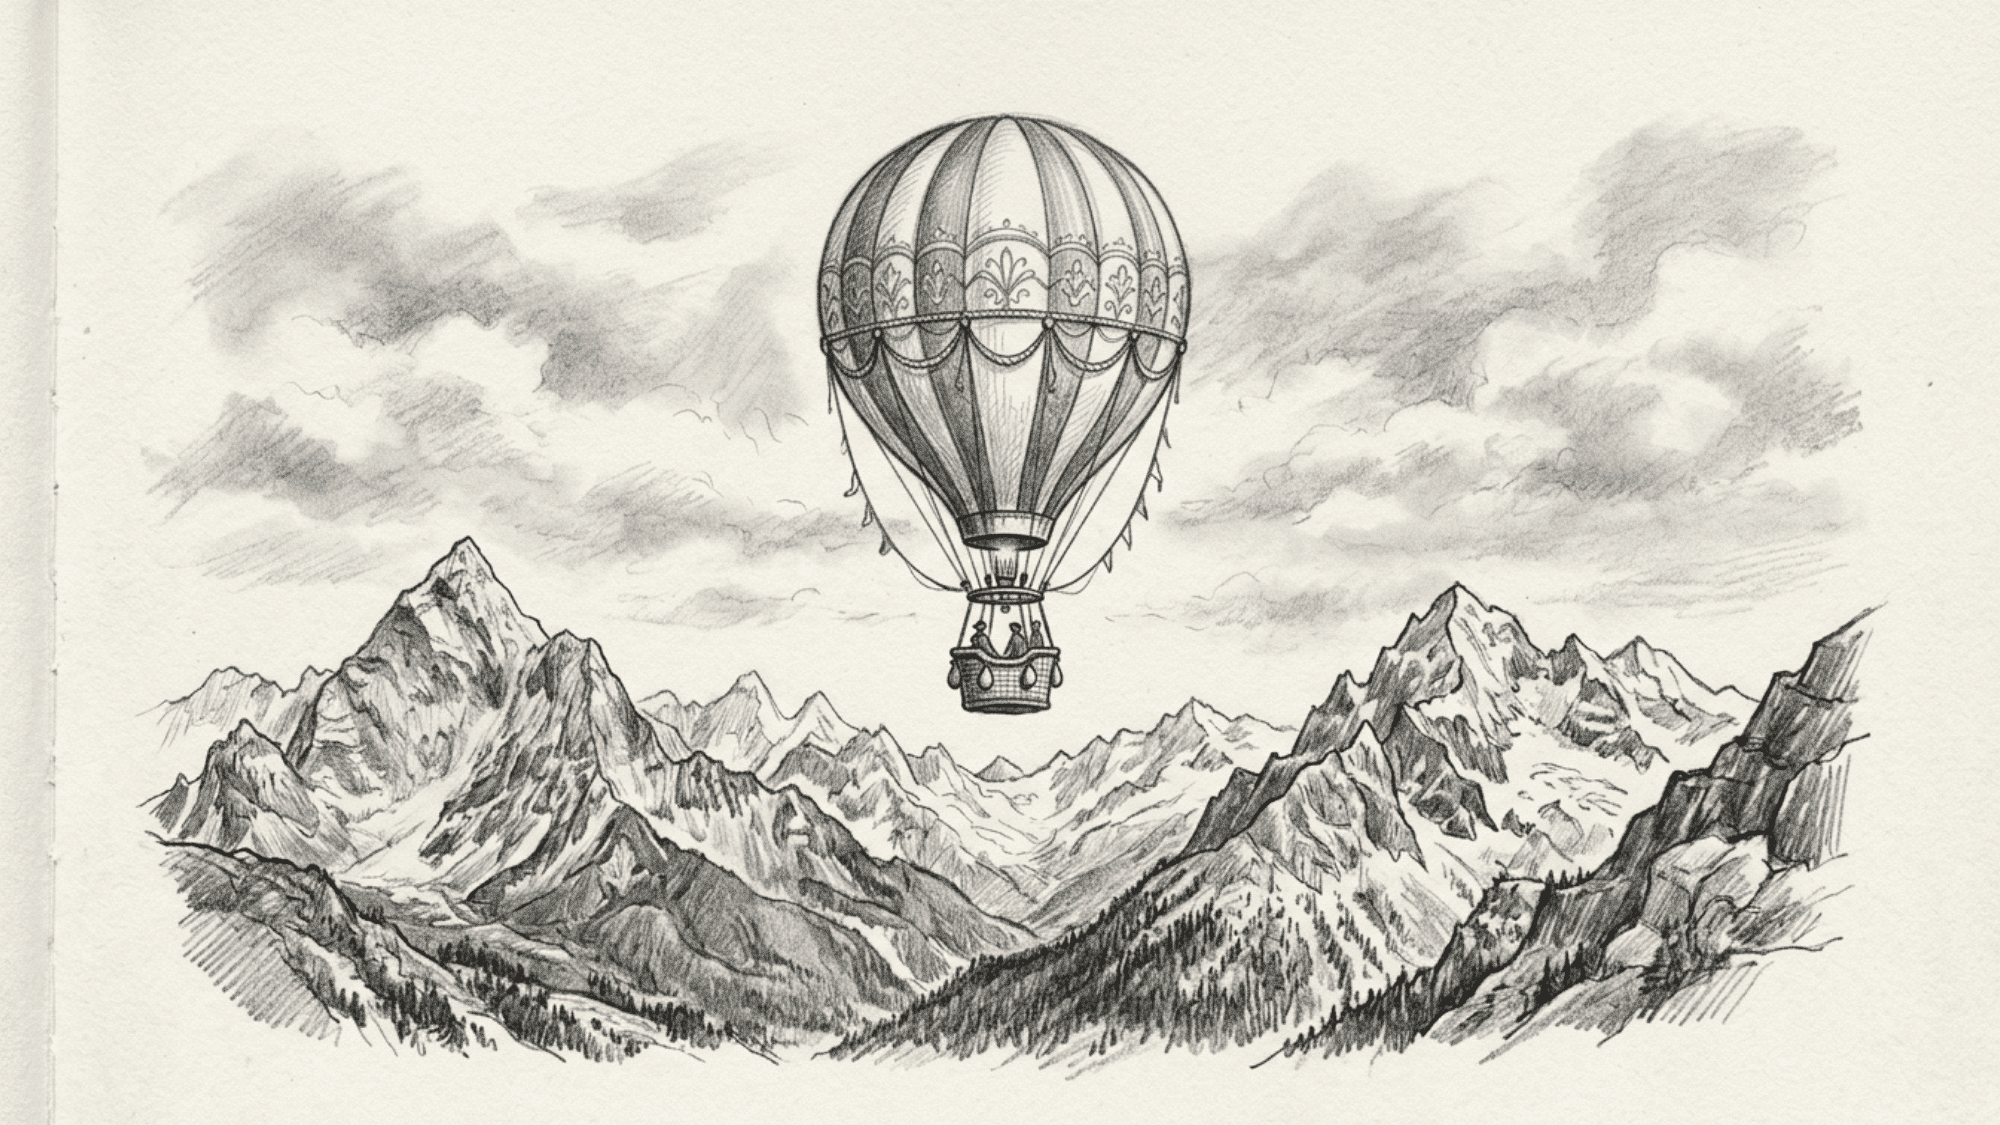
A hot air balloon scene helps you work with distance and scale. It combines simple shapes with a larger landscape setting.
Steps:
- Draw the balloon shape first using a clean, rounded form
- Add the basket underneath with straight, stable lines
- Keep the balloon larger in the foreground and make the mountains softer in the distance.
- Place sky elements like clouds to create spatial balance
- Add shading to the mountains for the distance effect
19. A Map of an Imaginary Land
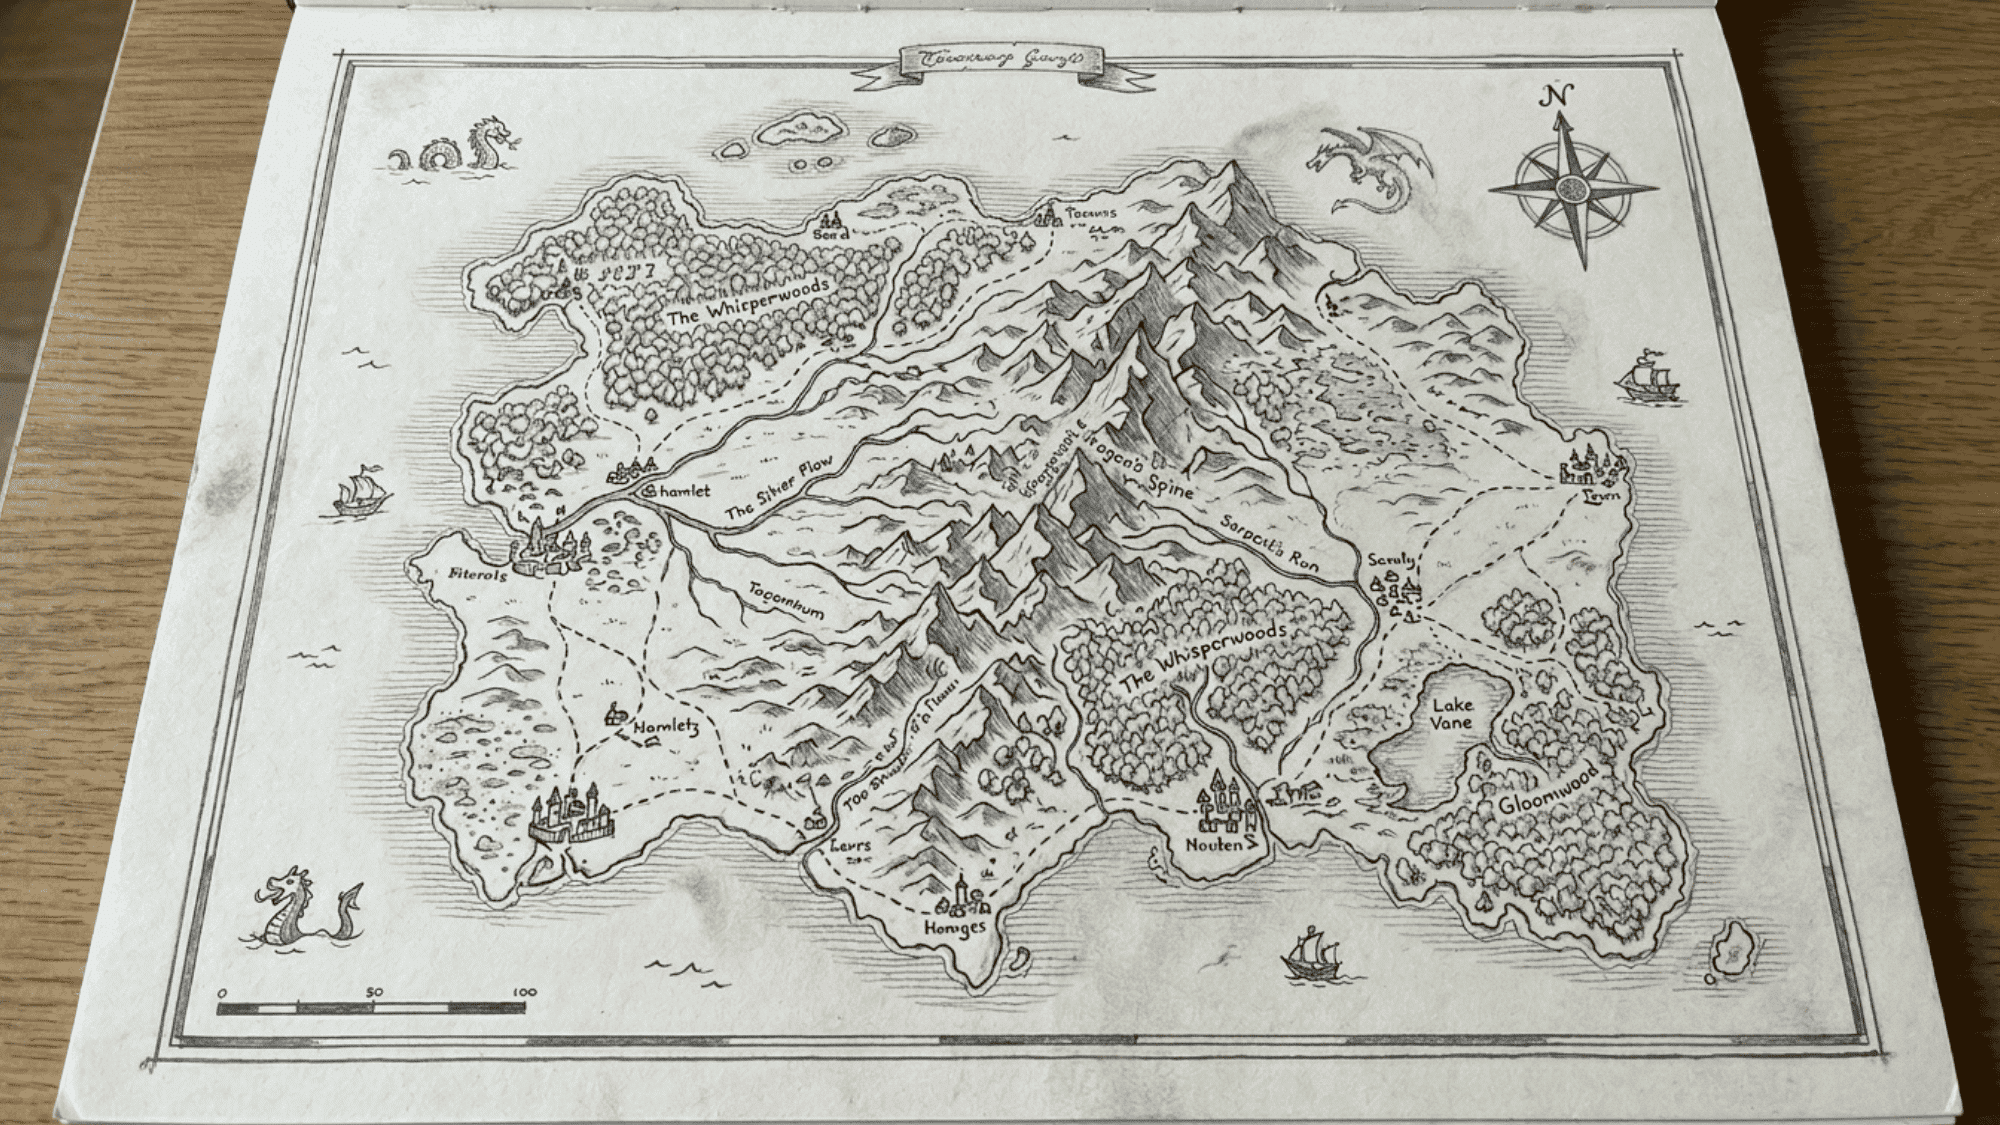
A map setup allows for the arrangement of landforms in a simple layout. It is a relaxed way to build structure without strict rules.
Steps:
- Outline the main land shape using loose, irregular lines
- Add rivers, roads, and paths flowing through the layout
- Place mountains, forests, and towns in different zones
- Refine borders and add small markers for detail
- Use light shading to separate regions visually
Tips to Keep Your Drawing Practice Going
- Try sketching daily, even if you only have 10 minutes.
- Keep a sketchbook nearby, start with light lines, and avoid erasing too much in the early stages.
- Drawing a flower, a mug, or a tree several times allows you to notice new details and see how your approach changes with practice.
- Progress often happens quietly.
- On days when you feel stuck, choose one sketch of cool things and keep it quick, loose, and low-pressure.
- Not every drawing needs to become a finished piece.
- Over time, you may notice cleaner lines, better proportions, and more confidence in your work without even realizing it happened.
Final Thoughts
The right pencil drawing idea is simply the one that helps you start today.
Save these ideas for days when your sketchbook is open, but your mind feels blank. Choose one idea, sharpen your pencil, and enjoy the process.
Some days, a simple leaf or mug may be enough, while other days you might feel ready to try a dragon, a map, or a full scene.
The more often you draw, the more natural it becomes to notice shapes, shadows, and small details around you.