Who knew a simple coffee filter could become a butterfly, a rainbow, or even a sparkling snowflake?
Coffee filter art is a simple yet magical way for children to polish their creativity. With just a few colors, a little water, and plenty of imagination, plain filters change into colorful masterpieces.
Parents and teachers will find plenty of inspiration to keep little hands busy and minds engaged.
Get ready for a path where ordinary coffee filters become extraordinary works of art.
All You Need To Know About Coffee Filter Art
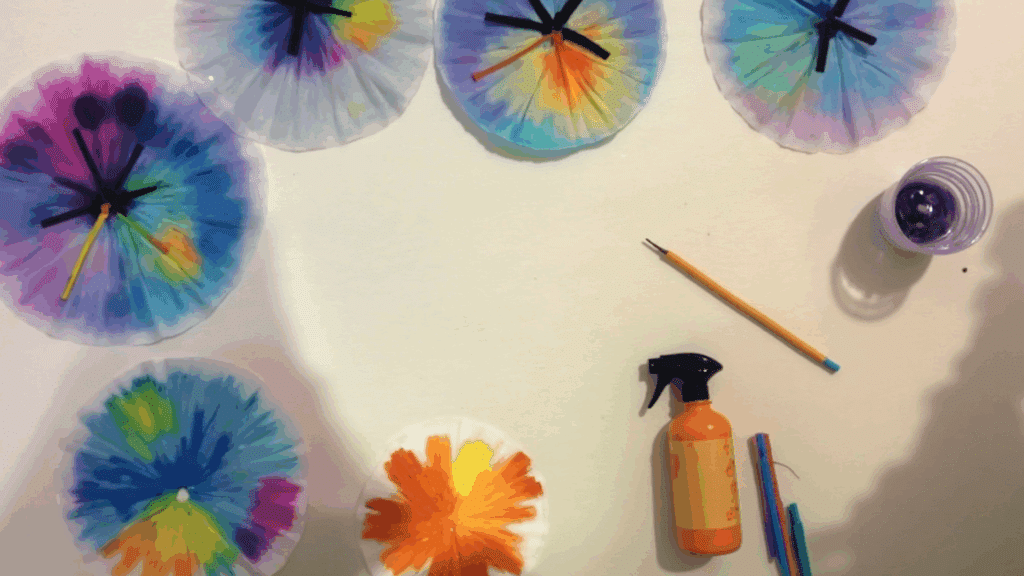
It is a fun and simple way to turn everyday coffee filters into colorful masterpieces. By adding markers, watercolors, or even food coloring, the filter’s thin paper soaks up the colors and creates beautiful tie-dye effects.
Kids love watching the colors spread and mix, almost like magic, while parents and teachers enjoy how easy and affordable it is.
From butterflies and flowers to holiday crafts and science experiments, coffee filter art gives children endless ways to approach creativity with just a few basic supplies.
The History of Coffee Filter Art
They were originally designed to brew smoother coffee, but artists and crafters soon found another use for them. Their thin, absorbent paper is perfect for soaking up colors and creating soft, tie-dye effects.
Over time, coffee filter crafts have become popular in classrooms, art projects, and DIY activities because they are inexpensive, safe for children, and readily available at home.
Today, coffee filter art is enjoyed worldwide, turning everyday kitchen supplies into vibrant butterflies, flowers, rainbows, and more.
It shows that creativity can emerge from the simplest materials and that art doesn’t need to be elaborate to be beautiful.
How to Make a Butterfly Using the Coffee Filter Technique
Look at this in-depth guide on creating a butterfly in simple seven steps, along with the tools required.
Tools and Materials Needed
| Item | Purpose |
|---|---|
| Coffee filters (1–2 per design) | Base for the artwork |
| Washable markers (variety of colors) | To create patterns and designs |
| Spray bottle with water (or a small cup of water) | For blending and spreading colors |
| Paper towels | To protect the table and absorb extra water |
| Scissors | To shape the butterfly (optional) |
| Clothespin | To hold the butterfly wings together (optional) |
| Pipe cleaners | To make antennae for the butterfly (optional) |
Here is a detailed tutorial on creating a Butterfly using Coffee Filter Art and making your first project.
Step 1: Prepare the Workspace
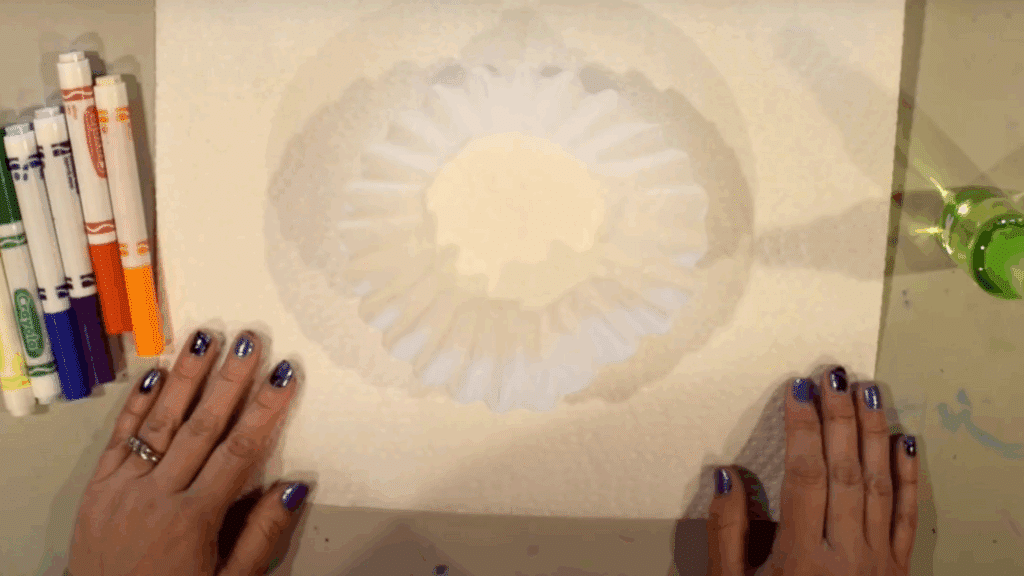
Lay down a paper towel to protect your table. Gather all your supplies: coffee filter, washable markers, and water. Make sure to use washable markers because permanent ones (like Sharpies) won’t blend.
Step 2: Fold the Coffee Filter
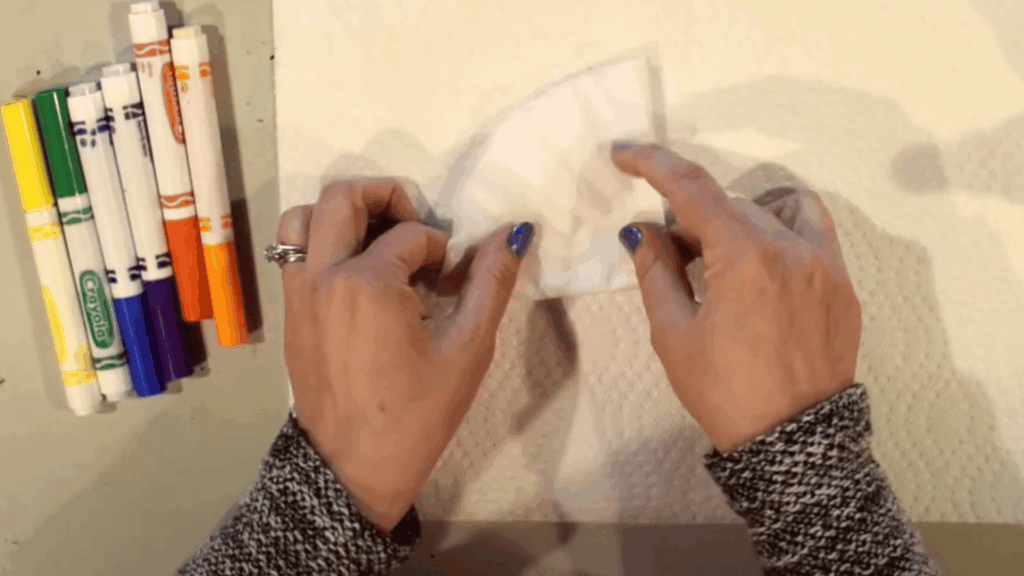
Take one coffee filter and fold it in half, then fold it again into quarters. This will help guide your radial design and give your pattern a balanced, circular look.
Step 3: Color the Filter Generously
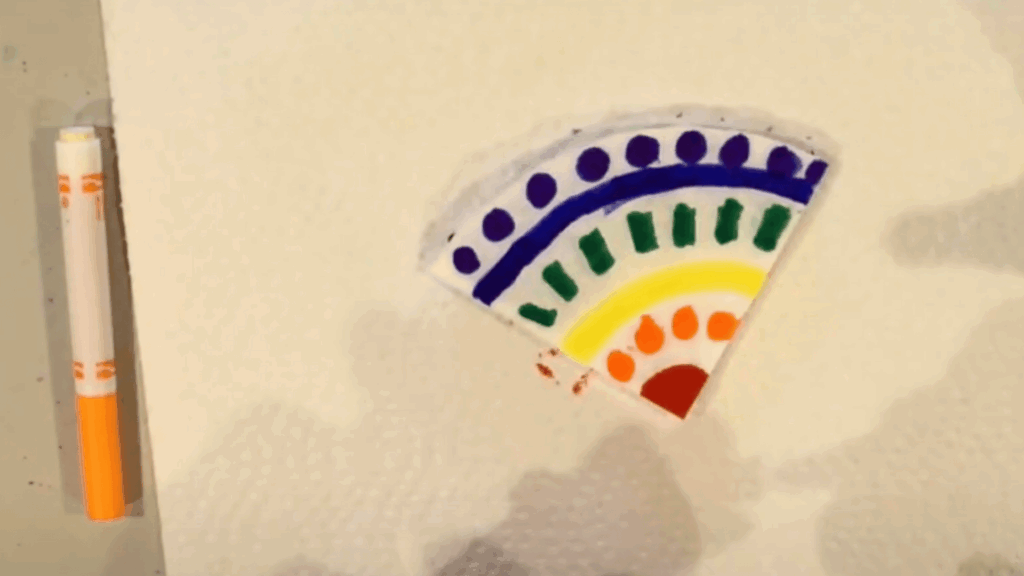
Use markers to draw bold lines or sections that start near the center point and move outward. You can follow the rainbow order or choose your favorite colors.
Press firmly and color over each section a couple of times so there’s plenty of ink. This helps the colors blend later. Don’t worry about being perfect, as uneven coloring still creates beautiful results.
Step 4: Apply Water to Blend the Colors
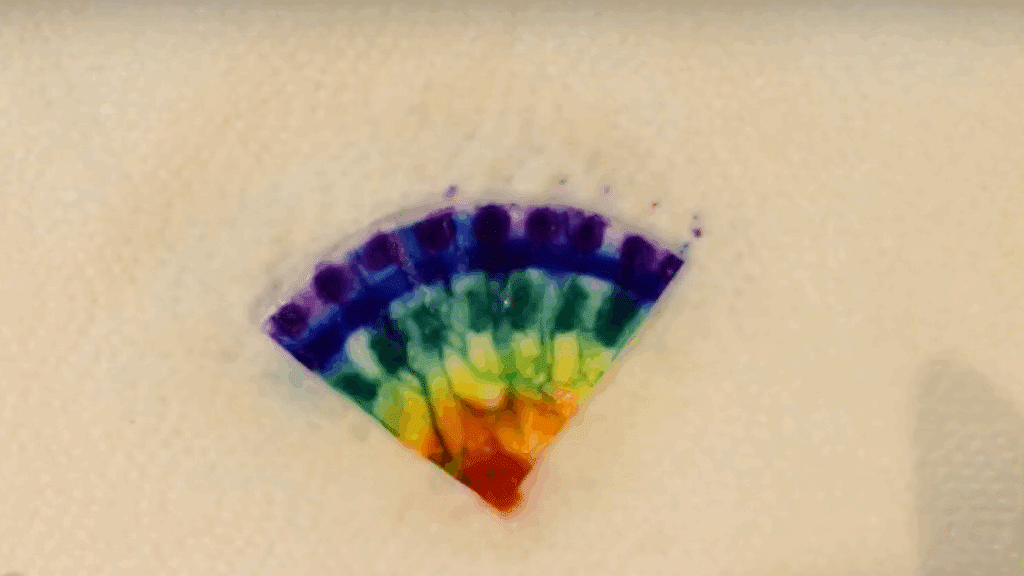
Place the folded filter flat on the paper towel. Spray water evenly across the surface until the colors begin to spread and blend.
If you don’t have a spray bottle, carefully drip water from a cup. Use enough water so the filter is fully damp, but be gentle so it doesn’t tear.
Step 5: Check and Press for Even Color
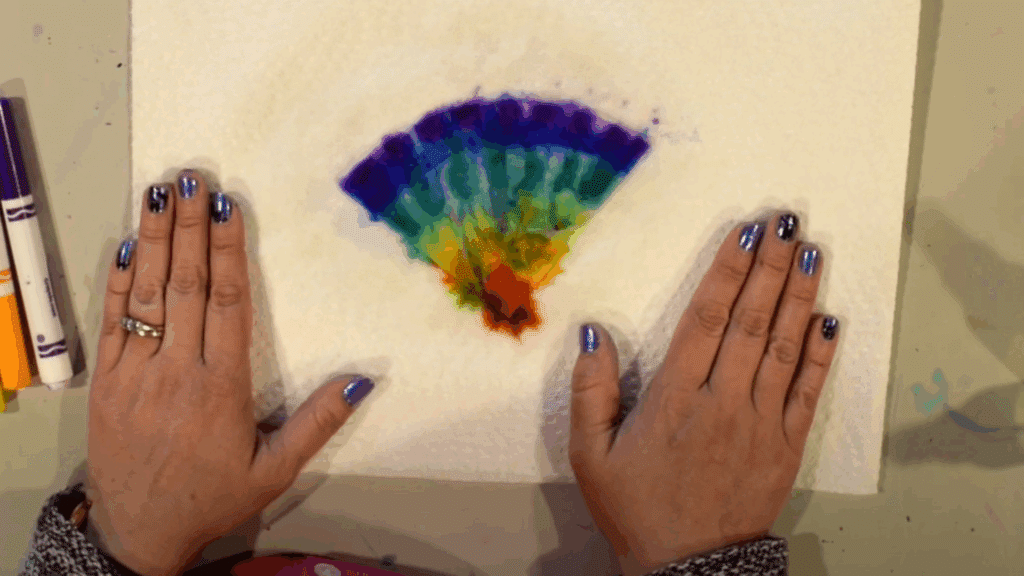
Flip the filter over and check the back. If some spots appear dry or uncolored, gently press them with your finger or a paper towel to distribute the colors evenly throughout all layers.
This step helps ensure your design appears bright and even.
Step 6: Dry and Reveal the Radial Design
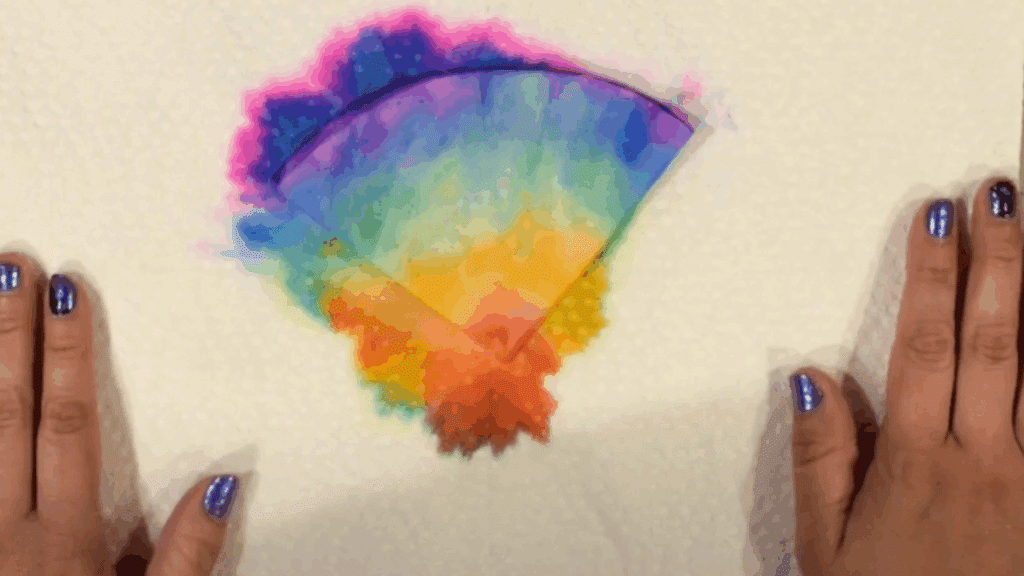
Let the coffee filter dry completely. Overnight is best, as this allows it to be less fragile. Once dry, open it carefully. You’ll see a circular radial pattern that looks like a flower, a snowflake, or stained glass.
Step 7: Turn It into a Butterfly
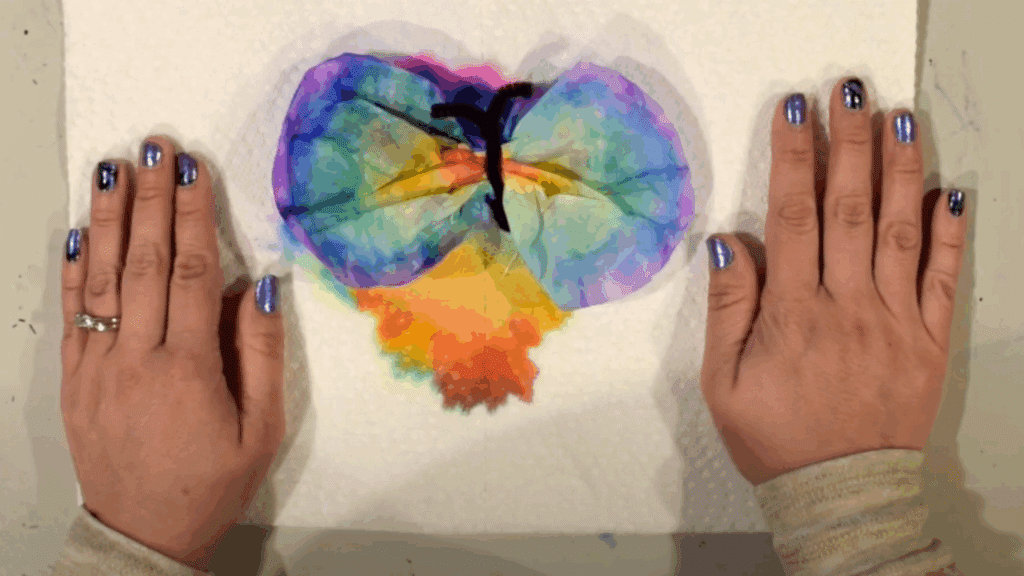
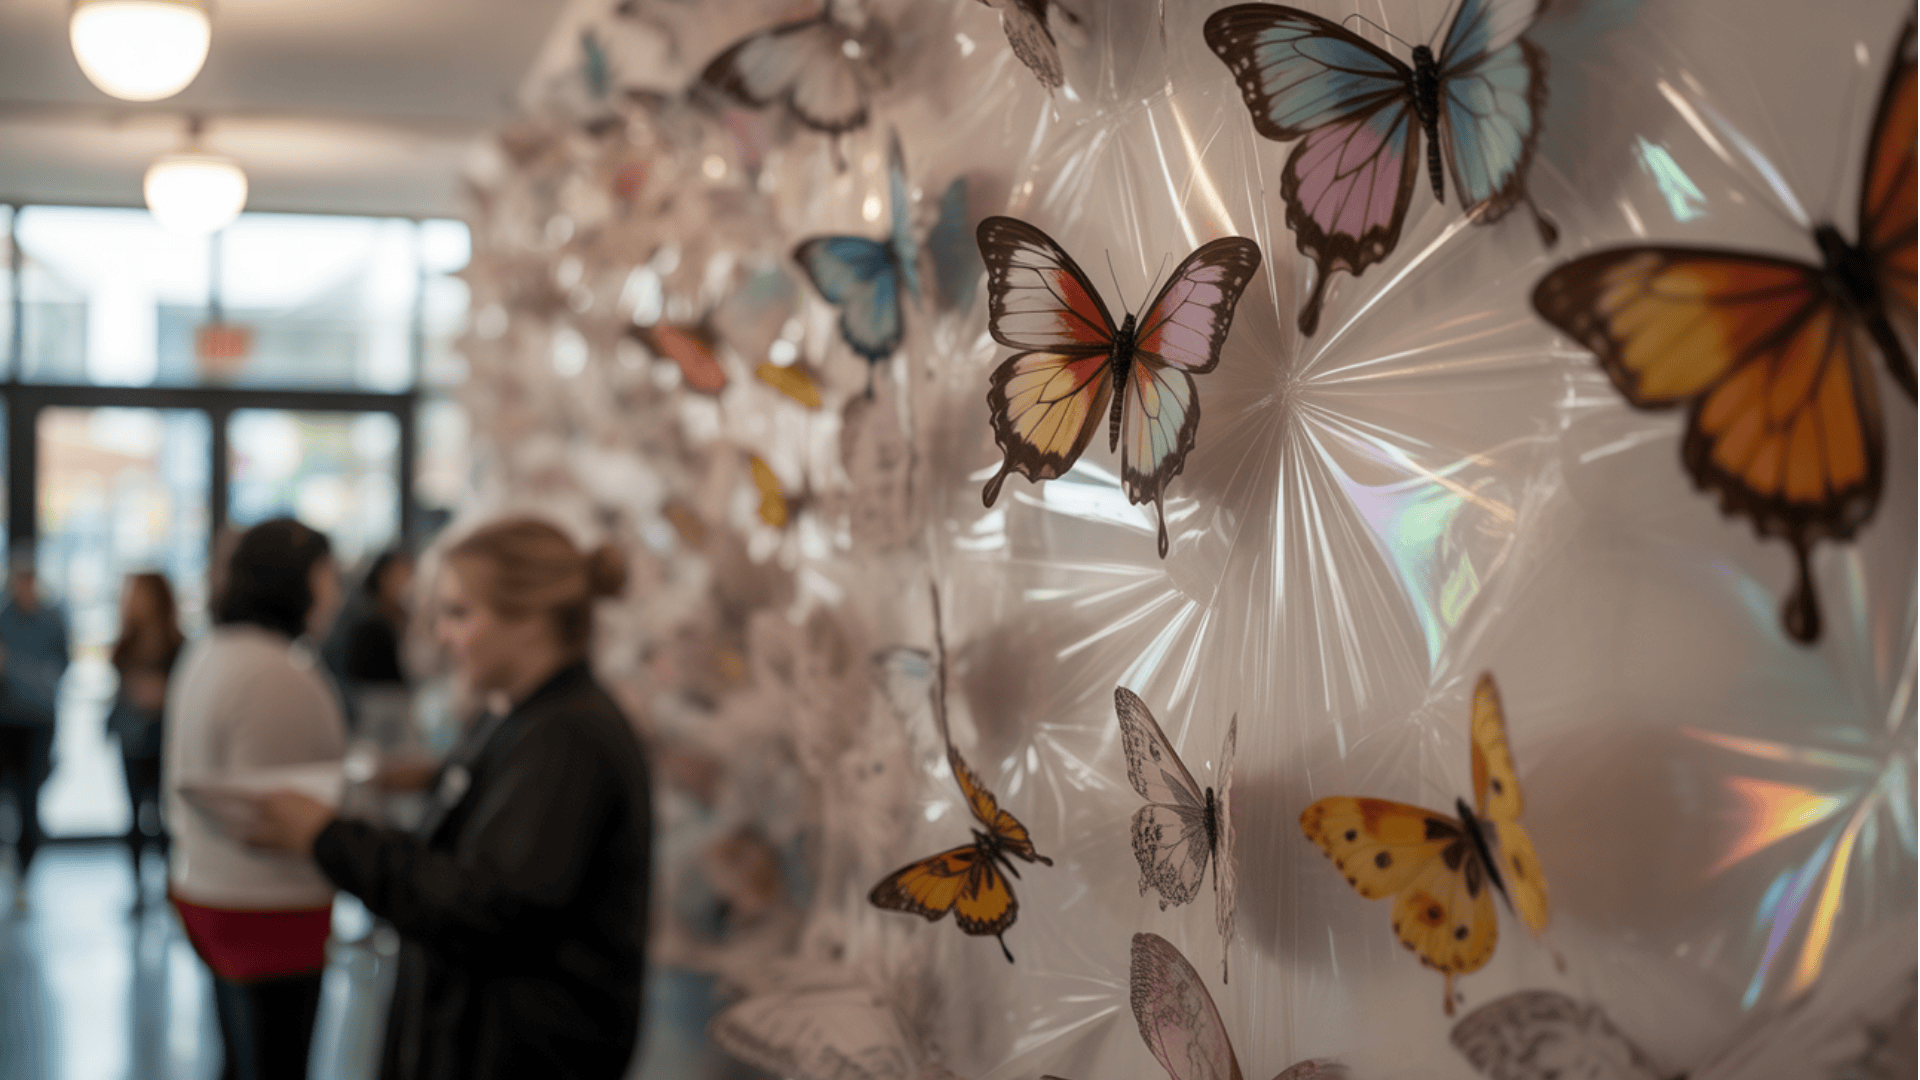
To make a butterfly, pinch the dry filter in the center so that it resembles two wings. Clip a clothespin in the middle and draw a small face on it. Or, twist a pipe cleaner around the center, shaping the ends into curly antennae.
Now you have a colorful butterfly to display in a window or on the wall.
For more detailed instructions, refer to the YouTube video below:
Other Coffee Filter Crafts Ideas
Coffee filters can be transformed into so much more than just flowers and rainbows. From festive decorations to creative classroom projects, these simple materials open the door to endless art adventures.
1. Coffee Filter Flowers (Bouquet Style)
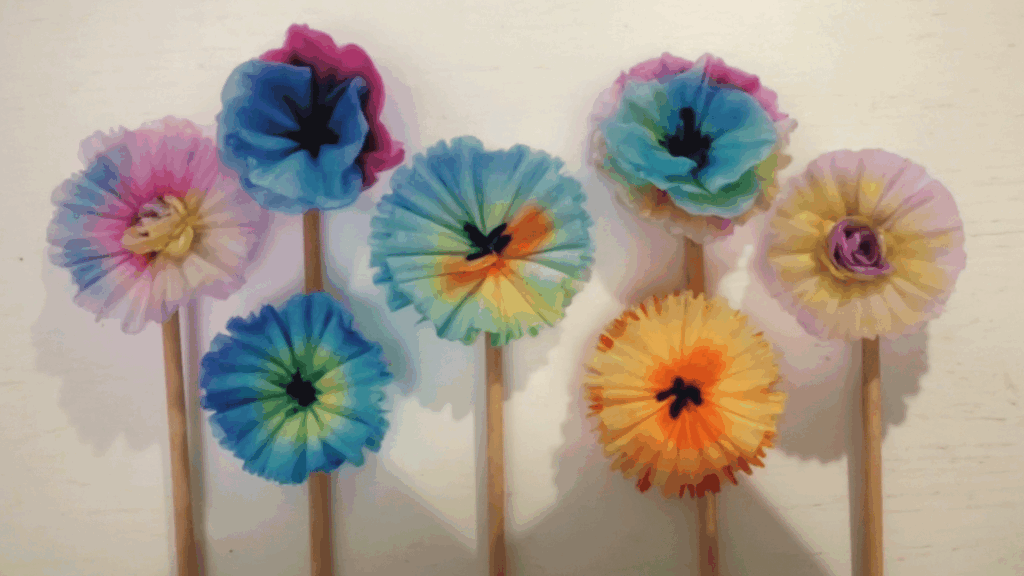
Coffee filters make the perfect base for creating colorful flowers that never wilt. Children can experiment with color blending and layering to build bouquets that look bright and cheerful.
These are wonderful as gifts or for decorating the classroom or home.
- Materials Needed: Coffee filters, markers/food coloring, water spray, pipe cleaners or straws, and glue.
- Perfect Age Group: Ages 5–10.
- Additional Tips: Let kids mix different colors for each filter and layer two or three filters for fuller, more vibrant flowers.
2. Coffee Filter Rainbows
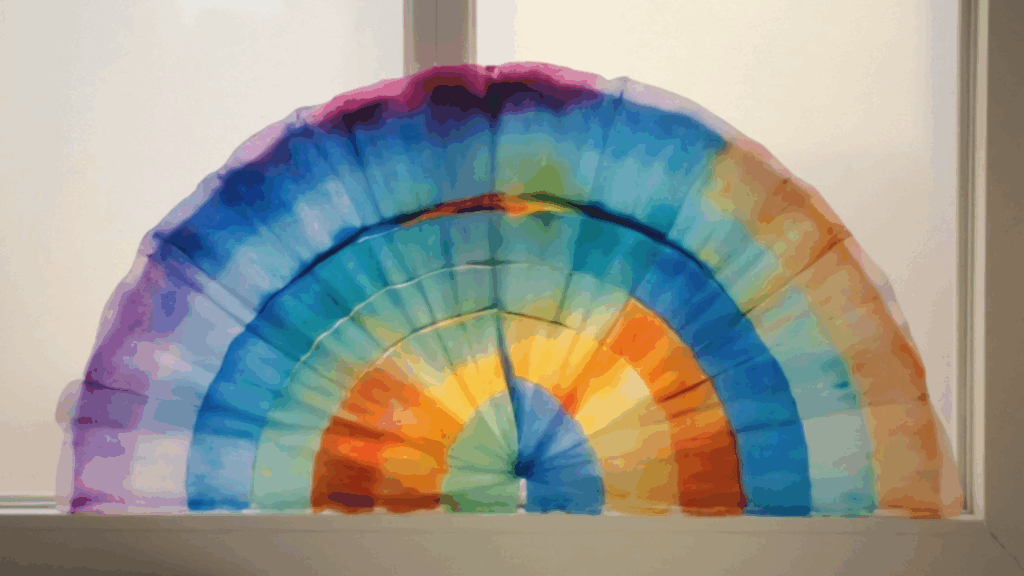
Rainbows made from coffee filters bring a burst of color into any room. Children will love seeing their marker designs reshaped into blended rainbow arcs after adding water. These make beautiful suncatchers when taped to windows.
- Materials Needed: Coffee filters, markers in rainbow colors, water spray, and tape for hanging.
- Perfect Age Group: Ages 3–7.
- Additional Tips: Fold filters in half before coloring for an arched rainbow shape.
3. Coffee Filter Earth Art (Earth Day Project)
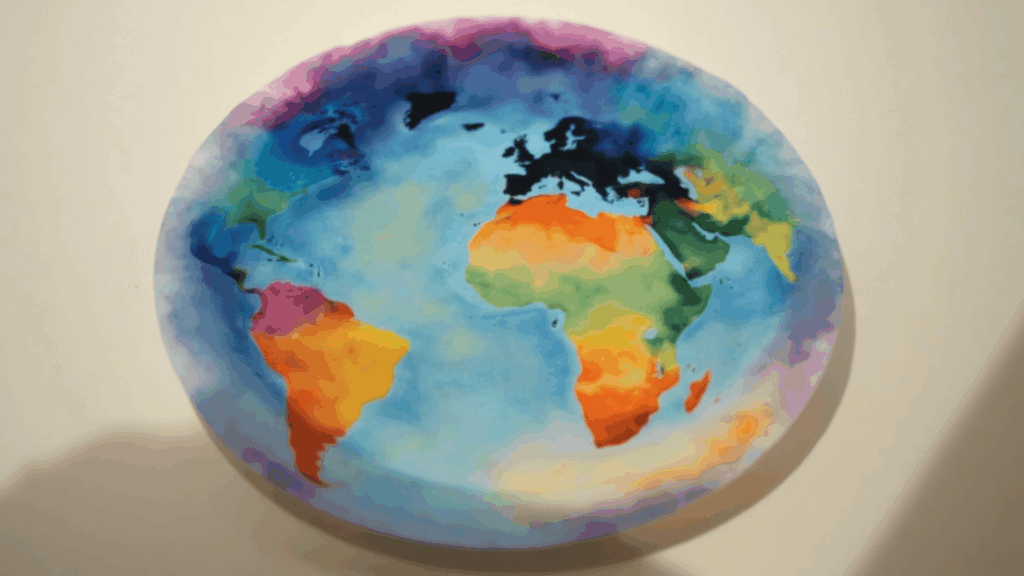
This project is perfect for celebrating Earth Day or learning about the planet. Kids use blue and green markers to create their own version of Earth, complete with swirling oceans and continents.
The finished piece looks beautiful framed against dark paper.
- Materials Needed: Coffee filters, blue and green markers, a spray bottle, and construction paper for a frame.
- Perfect Age Group: Ages 6–12.
- Additional Tip: Use a black background to make the Earth stand out; this also ties in with geography lessons.
4. Coffee Filter Animal Masks
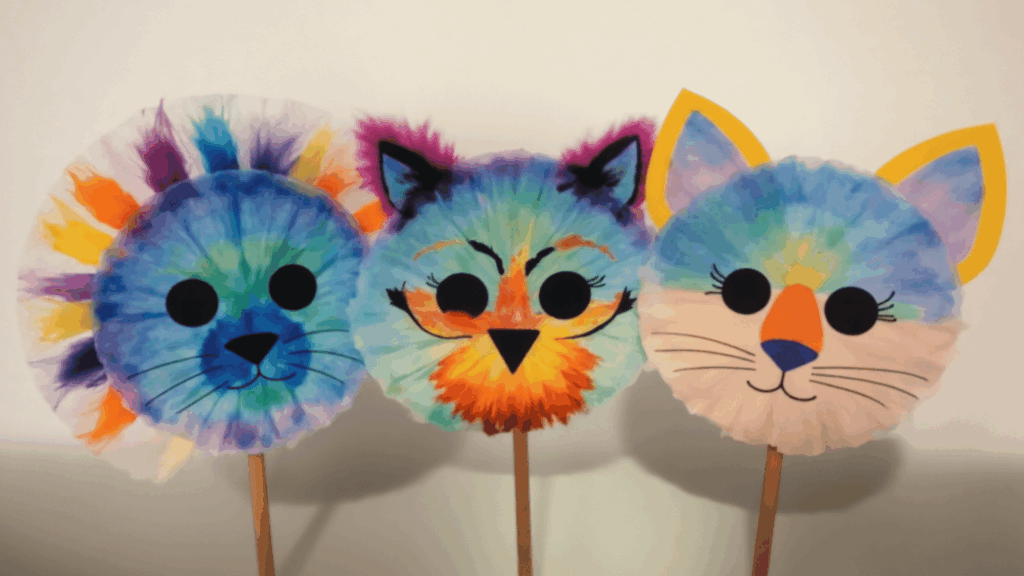
With a few cuts and colors, coffee filters can turn into fun masks of lions, owls, cats, and more. This activity lets kids stretch their imaginations as they design their favorite animal faces.
The finished masks can be worn for pretend play or displayed as art.
- Materials Needed: Large coffee filters, markers/paint, scissors, elastic string, and a hole punch.
- Perfect Age Group: Ages 7–12.
- Additional Tips: Layer two filters for sturdiness; encourage kids to design their own animal features.
5. Coffee Filter Snowflakes
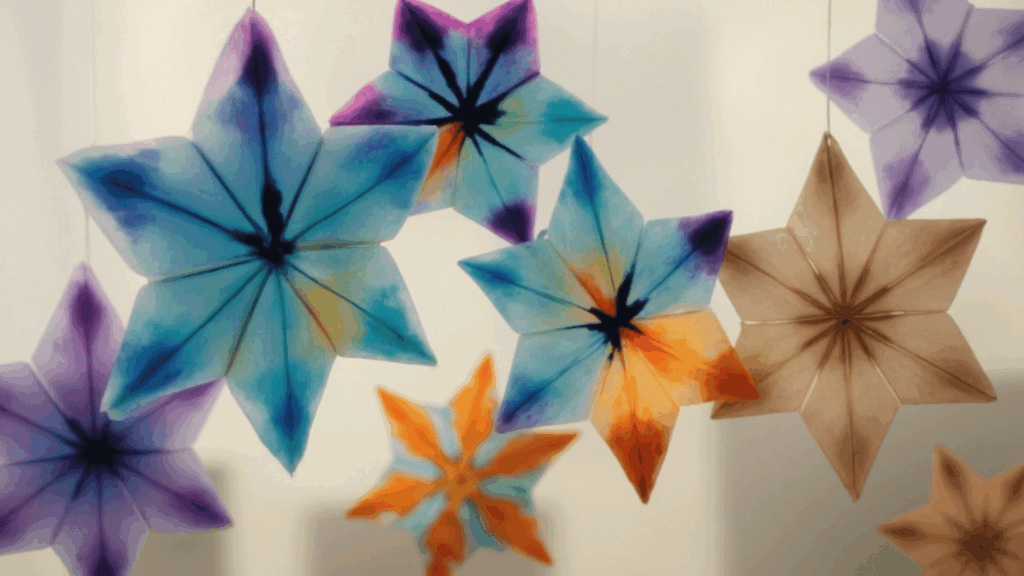
Snowflakes are a classic paper craft, and coffee filters make them even more magical. After folding and cutting patterns, kids can add marker designs and spray with water for icy, blended effects.
Each snowflake turns out different, just like real ones.
- Materials Needed: Coffee filters, scissors, markers, and a spray bottle.
- Perfect Age Group: Ages 5–10.
- Additional Tips: Fold into quarters before cutting for more patterns. Tape finished snowflakes to windows for winter décor.
6. Coffee Filter Jellyfish (Hanging Craft)
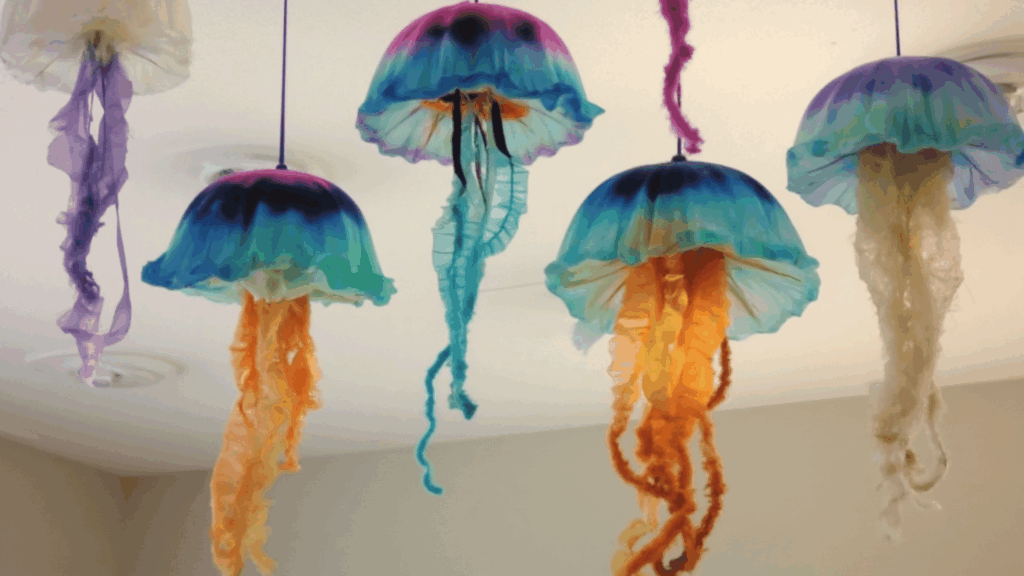
Bring the ocean indoors with floating jellyfish made from coffee filters. Kids can decorate the filters with soft, ocean-colored designs and add yarn or ribbon for wavy tentacles.
Hang them from the ceiling to create a magical underwater scene.
- Materials Needed: Coffee filters, watercolor or markers, yarn or ribbon, glue, and a hole punch.
- Perfect Age Group: Ages 6–10.
- Additional Tips: Use pastel shades for a soft underwater look; hang them from the ceiling for a classroom or bedroom display.
7. Coffee Filter Fireworks Art
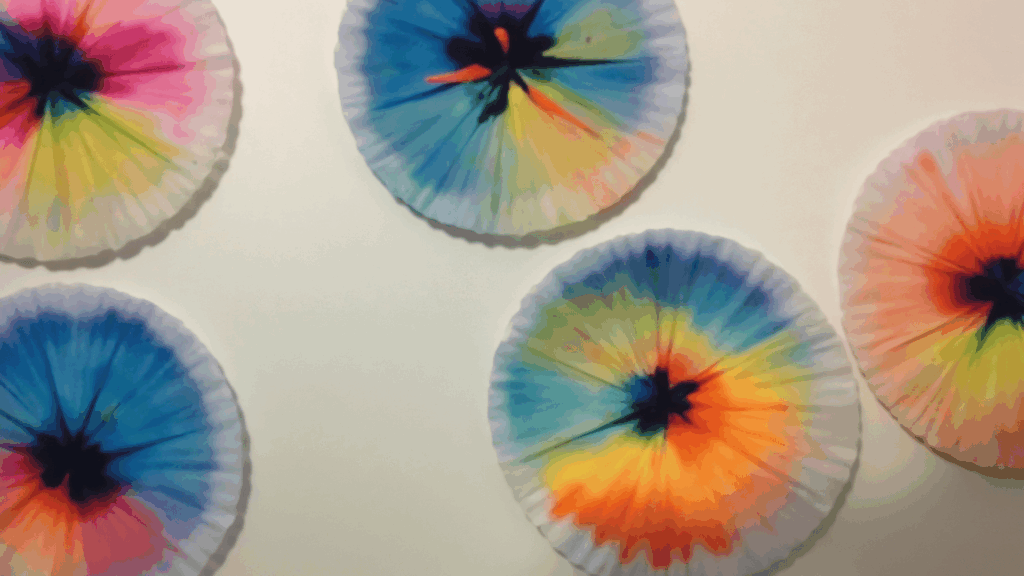
This activity captures the excitement of fireworks in a safe and creative way. Kids can use bright colors on coffee filters, then spray with water to create dazzling bursts of blended light.
The final designs look amazing taped to windows or used in festive displays.
- Materials Needed: Coffee filters, markers in bright colors, a spray bottle, and black construction paper for the background.
- Perfect Age Group: Ages 4–9.
- Additional Tips: Layer several filters together for bigger, brighter “explosions.”
Tips for Making Coffee Filter Art Even More Fun
- Use plenty of marker ink: The more color you add, the brighter and bolder the designs will turn out once water is sprayed.
- Experiment with folding: Folding the filters into halves, quarters, or even smaller sections before coloring can create amazing symmetrical patterns.
- Protect your workspace: Place paper towels or old newspapers underneath to catch extra water and colors.
- Experiment with drying methods: Filters can air dry overnight, or you can speed up the process by placing them outside on a sunny day.
- Mix techniques: Combine cutting (like snowflakes) with coloring for layered designs that really stand out.
- Add finishing touches: Glitter glue, sequins, or stickers can make crafts extra special.
- Display proudly: Tape finished art to windows, hang them as mobiles, or use them as decorations for holidays and parties.
Wrapping It Up
And that is the magic of coffee filter art. Who would have thought something so simple could turn into butterflies, flowers, or even glowing rainbows?
Each project is a little mission waiting to happen, and the best part is that kids get to lead the way with their own imagination. Parents and teachers can also join in, turning craft time into a moment of laughter and creativity.
So why wait? Gather those coffee filters, splash on some colors, and see what amazing creations appear right before your eyes. Every filter holds a surprise, and every child has a story to tell through their art.

