
Many people think drawing a realistic sun is just about making a yellow circle with some rays. However, anyone who has tried knows it’s much trickier than it looks.
Learning proper techniques for realistic sun drawing can transform simple sketches into stunning artwork that truly captures the sun’s brilliant energy and warmth.
This guide breaks down everything needed to create impressive sun drawings, from basic shapes to advanced shading techniques.
You’ll find how to add depth, create realistic light effects, and make your sun artwork stand out from the page.
Whether someone’s a complete beginner or looking to improve their skills, these step-by-step methods make realistic sun drawing achievable.
Understanding the Sun’s Common Visual Characteristics
When drawing a sun, most artists default to the familiar yellow circle with straight spikes, but real suns and artistic suns offer a much greater variety.
Understanding how we perceive the sun helps you make creative choices that bring your drawing to life.
In art, the sun serves as both a source of light and a character. Its visual elements. the circular core, radiating rays, and warm colors instantly communicate brightness and energy.
No matter if you’re creating a realistic landscape scene or a playful cartoon character with sunglasses, these same basic components apply.
The sun’s appearance changes based on your artistic goals. A children’s illustration might feature bold, simple rays and primary colors.
A more sophisticated drawing could include gradient shading and irregular ray patterns.
By recognizing these visual characteristics, you’ll know exactly which elements to emphasize for your intended style and audience.
Step-by-Step Guide: Realistic Sun Drawing
Now that you understand the sun’s visual properties and have your materials ready, let’s begin creating a realistic sun drawing.
Follow these detailed steps carefully, taking your time with each stage to build up layers of light and atmosphere that will bring your sun to life.
What You’ll Need
| Item | Purpose | Options/Details |
|---|---|---|
| Paper | Drawing surface | Standard drawing paper, sketchbook, or mixed media paper |
| Pencil | Initial sketching and shading | HB or 2B recommended for versatility |
| Eraser | Corrections and highlighting | Kneaded or standard white eraser |
| Black Pen/Fineliner | Outlining and defining edges | 0.5mm to 0.8mm tip for clean lines |
| Round Object | Circle template for the sun | Cup, small palette, lid, or compass |
| Coloring Tools | Adding color and depth | Markers, colored pencils, or crayons |
Note: Select coloring tools that align with your preferred style. Markers are ideal for bold colors, colored pencils are best for subtle blending, and crayons are best for creating textured effects.
Step 1: Trace the Sun’s Circle
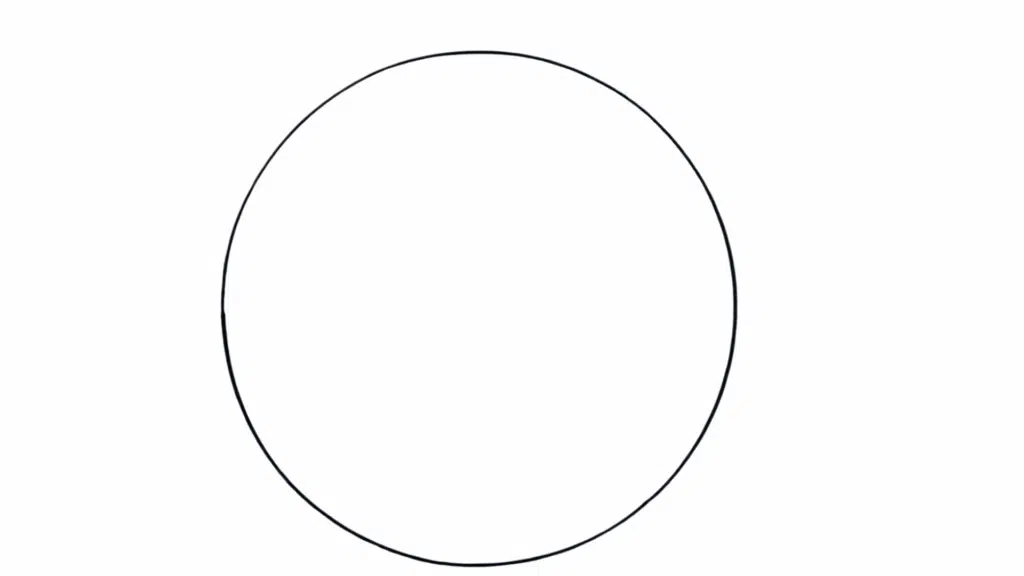
Start with a perfect circle as your foundation. This will be the sun’s core disc, so take your time to get it right. Position your circle thoughtfully on the page, considering where you want light rays and other elements to extend.
Circle setup simplified:
- Place your round object (cup, lid, or compass) where you want the sun and hold firmly
- Use light, confident strokes while tracing, and avoid pressing hard for easy erasing
- Leave ample space around the circle for rays and glow effects
- Apply the rule of thirds by positioning off-center, or place lower for sunrise/sunset scenes
- Keep all initial lines faint for easy adjustments later
Step 2: Plan Your Rays and Mix Up Sizes
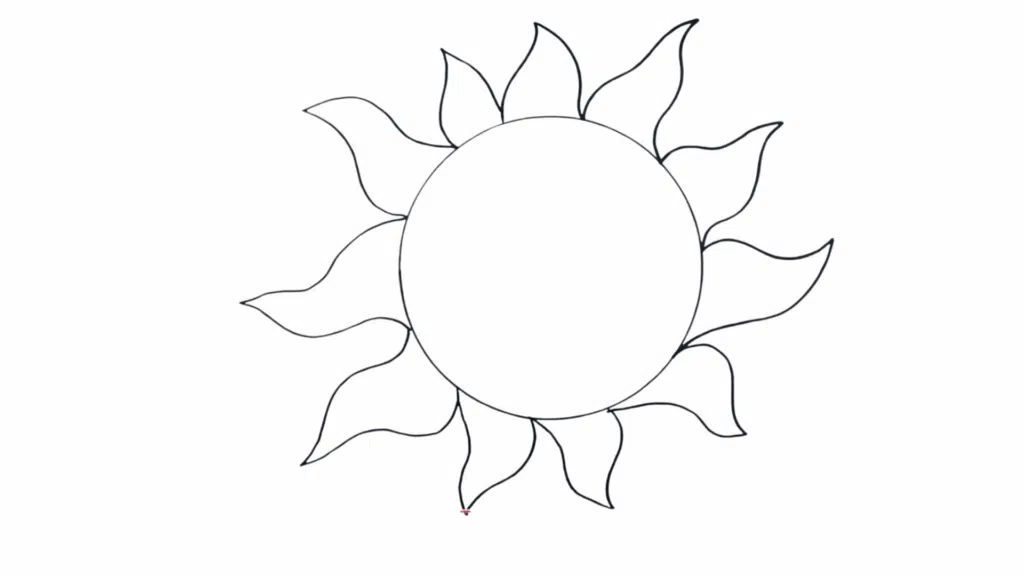
Realistic sun rays aren’t uniform spikes around a circle. Think of them as bursts of energy flowing outward, each with its own character
Natural sunlight creates irregular patterns that feel organic and alive, not mechanical or perfectly spaced.
Creating natural rays simplified:
- Sketch rays like flickering flames, mix curved and straight, alternating short stubby with long ones
- Vary spacing by clustering some rays together while leaving gaps elsewhere
- Start with 4-6 major rays at different angles, then fill in between with medium and small rays
- Make some rays thick at base, tapering to points, others consistently thin throughout
- Avoid perfect symmetry, let rays overlap at bases, and keep sketches light for adjustments
Step 3: Add the Sunglasses Frames
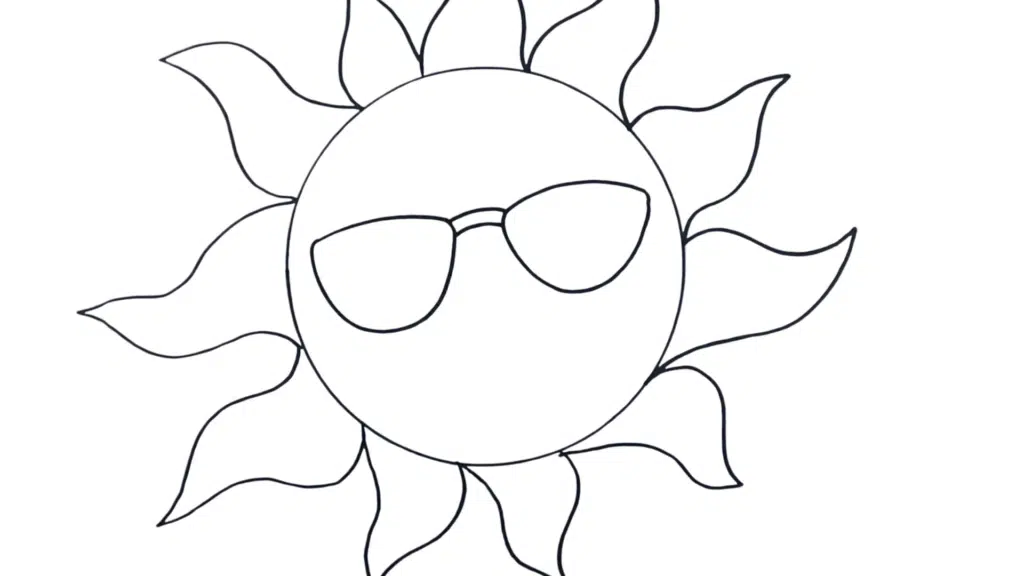
Give your sun some personality by adding cool sunglasses right across the center. This classic touch changes a basic sun into a fun character.
Position the glasses slightly above the circle’s midpoint so your sun appears to be looking straight ahead.
Drawing the Perfect Sunglasses
- Draw the left lens as a curved arc dipping down like a shallow smile
- Keep lenses rounded and slightly wider than tall
- Leave a small center gap for the nose bridge
- Mirror the exact shape of the right lens at the same height
- Connect lenses with a curved bridge line at the top
- Add temple arms extending from the outer lens edges toward the circle
- Make frame lines slightly thicker than the circle outline
Step 4: Draw the Sunshine Smile

Position your sun’s smile below the sunglasses to create a friendly, cheerful expression. The smile should feel natural and proportionate, not too wide or too small.
This simple curve brings your sun character to life and sets the mood for your entire drawing.
- Draw a gentle curved line one-third down from the sunglasses, keeping it shallow and relaxed
- Center the smile aligned with the nose bridge, making it half the circle’s width
- For a bigger grin, add a parallel curve underneath the first line
- Keep smile lines lighter than frame lines for visual hierarchy
- Test different curve depths and slight asymmetry to find the perfect expression
Step 5: Color the sun

Bring your sun to life with warm, lively colors that capture its radiant energy. Start with your base colors and gradually build up layers for depth and realism.
The key is blending different shades to show how light emanates from the sun’s core.
Coloring Your Sun with Chill Vibe
- Fill the main circle with bright yellow, adding orange to the outer edges for dimension
- Deepen ray tips with dark orange or red-orange, blending smoothly where rays meet the circle
- Add light orange touches midway along longer rays for depth
- Fill sunglasses lenses with solid black or dark gray, adding white dots for realistic shine
- Keep all highlights consistent with the same light angle for believability
For a more detailed instructions video, refer to tha YouTube video below:
Other Craetive Realistic Sun Drawing Styles to Try
It’s time to find other creative styles that can add variety to your artwork. From simple cartoon designs perfect for beginners to intricate patterns that challenge your skills.
Each sun style offers unique ways to express light, warmth, and personality through different artistic techniques and cultural inspirations.
Tribal/Aztec Sun

Draw inspiration from ancient Mesoamerican art with this powerful sun design featuring geometric patterns and sacred symbols.
This style changes your sun into a cultural masterpiece, using symmetrical triangular rays combined with intricate dots, lines, and stepped patterns inside the circle that echo traditional Aztec stone carvings and tribal artwork.
Vintage Starburst Sun

Channel the optimistic energy of mid-century modern design with this retro-inspired sun, featuring dramatically alternating ray lengths.
This style, popularized in 1950s advertising and atomic-age artwork, creates a visual rhythm through its distinctive pattern of long, pointed rays paired with shorter ones, giving your sun that classic, vintage poster appeal.
Realistic Sunrise/Sunset

Capture the sun’s most dramatic moments with gradient colors that flow from deep red through warm orange to golden yellow.
This style focuses on how the sun interacts with the atmosphere, creating soft edges, gentle rays that blend into surrounding clouds, and that magical glow that makes sunrise and sunset drawings feel alive and atmospheric.
Mandala Sun
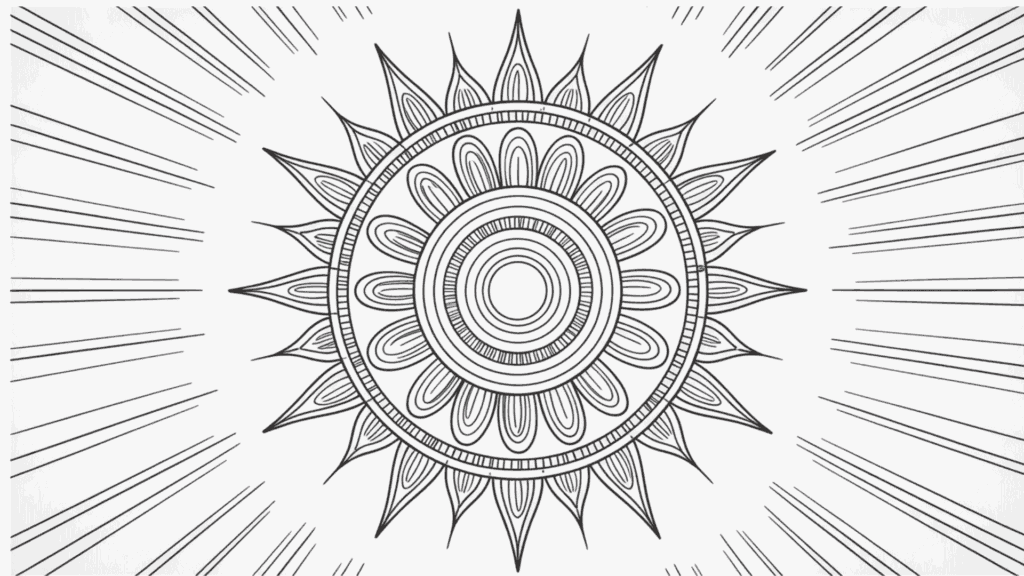
Transform your sun into a meditative work of art by incorporating intricate mandala patterns that radiate from the center.
This style combines the symbolic power of the sun with decorative circular designs, creating a piece that’s both spiritually meaningful and visually stunning through repetitive geometric patterns and careful symmetry.
Digital Swirly Spiral Sun

Add energy and movement to your sun drawings with this playful spiral ray design that brings instant personality to any artwork.
Instead of static straight lines, these curling, flame-like rays twist outward from the center, creating a sense of rotation and warmth that makes your sun appear to dance on the page.
Half Sun/Horizon Sun

This stylish variation features the sun partially visible above a horizon line, making it perfect for capturing those magical moments of dawn or dusk in your artwork.
By drawing only the upper half of the sun with rays extending skyward, you create instant depth and suggest a complete landscape with just a few simple lines.
Celtic Knot Sun

This ancient-inspired design changes simple sun rays into intricate woven patterns that loop endlessly around the circle.
Drawing from traditional Irish and Scottish art feature the Celtic knot sun, blending spiritual symbolism with natural elements. Its rays intertwine like braided rope, symbolizing eternal life and infinity energy.
Minimalist Line Sun

Less is more with this modern approach that captures the sun’s essence using just a handful of simple strokes.
This clean, contemporary style proves that you don’t need complex details to create impactful art; just a circle and a few strategic lines can radiate all the warmth and energy of the sun.
Digital Kawaii/cute Sun

Less is more with this modern approach that captures the sun’s essence using just a handful of simple strokes.
This clean, contemporary style proves that you don’t need complex details to create impactful art; just a circle and a few strategic lines can radiate all the warmth and energy of the sun.
Art Nouveau Sun
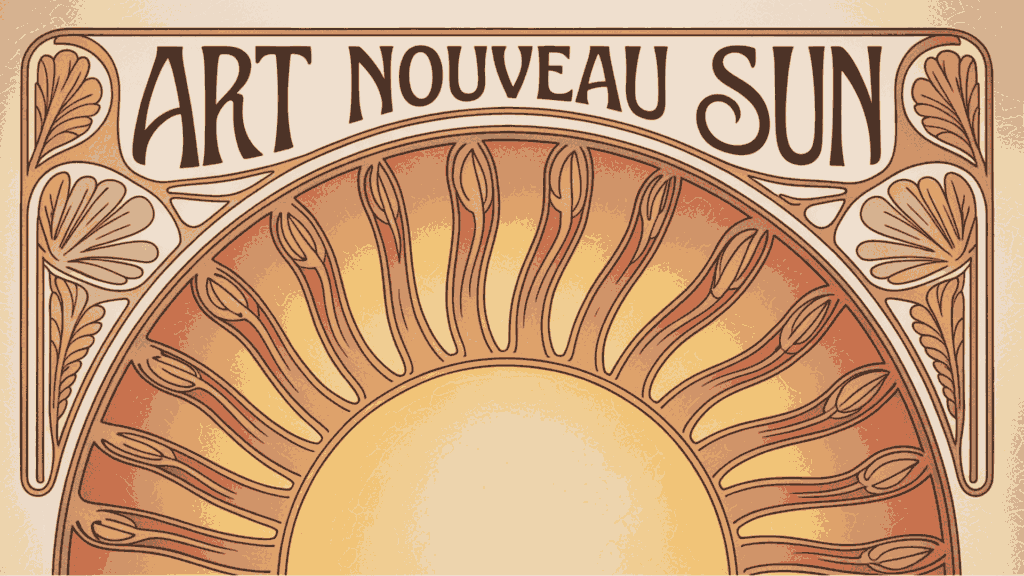
The Art Nouveau sun changes simple rays into flowing, organic shapes that resemble plant tendrils, leaves, and vines. This sophisticated style combines the sun’s radiant energy with the beauty of botanicals.
creating drawings that feel both decorative and alive with graceful, curving lines that echo nature’s own patterns.
Classic Cartoon Sun

The classic cartoon sun is the cheerful icon we all learned to draw as kids. A perfect circle surrounded by straight triangular rays and topped with a happy face.
This evergreen design remains the go-to choice for children’s books, classroom decorations, and any space that needs instant warmth and friendliness in its artwork.
Common Mistakes & Quick Fixes
| Problem | Quick Fix |
|---|---|
| All rays look the same? |
|
| Wobbly circle? |
|
| Crowded sunglasses? |
|
Pro Tip: Address these issues during the sketching phase before adding ink or color. It’s much easier to fix problems with a pencil than to try to correct finished artwork.
The Bottom Line
Now you know the essential steps of realistic sun drawing: making a clean circle, creating varied rays with personality, adding cool shades and a cheerful smile, then bringing it all to life with ink and lively colors
Each element builds on the last to create a sun that radiates warmth and character.
Now experiment with your own ray patterns and expressions. Try spiral rays, zigzag edges, or asymmetrical designs. Give your sun different moods. sleepy eyes, a laughing mouth, or star-shaped sunglasses.
Share your sunny creations and find which variations become your signature style. Remember, the best sun drawings capture energy and joy, not perfection.