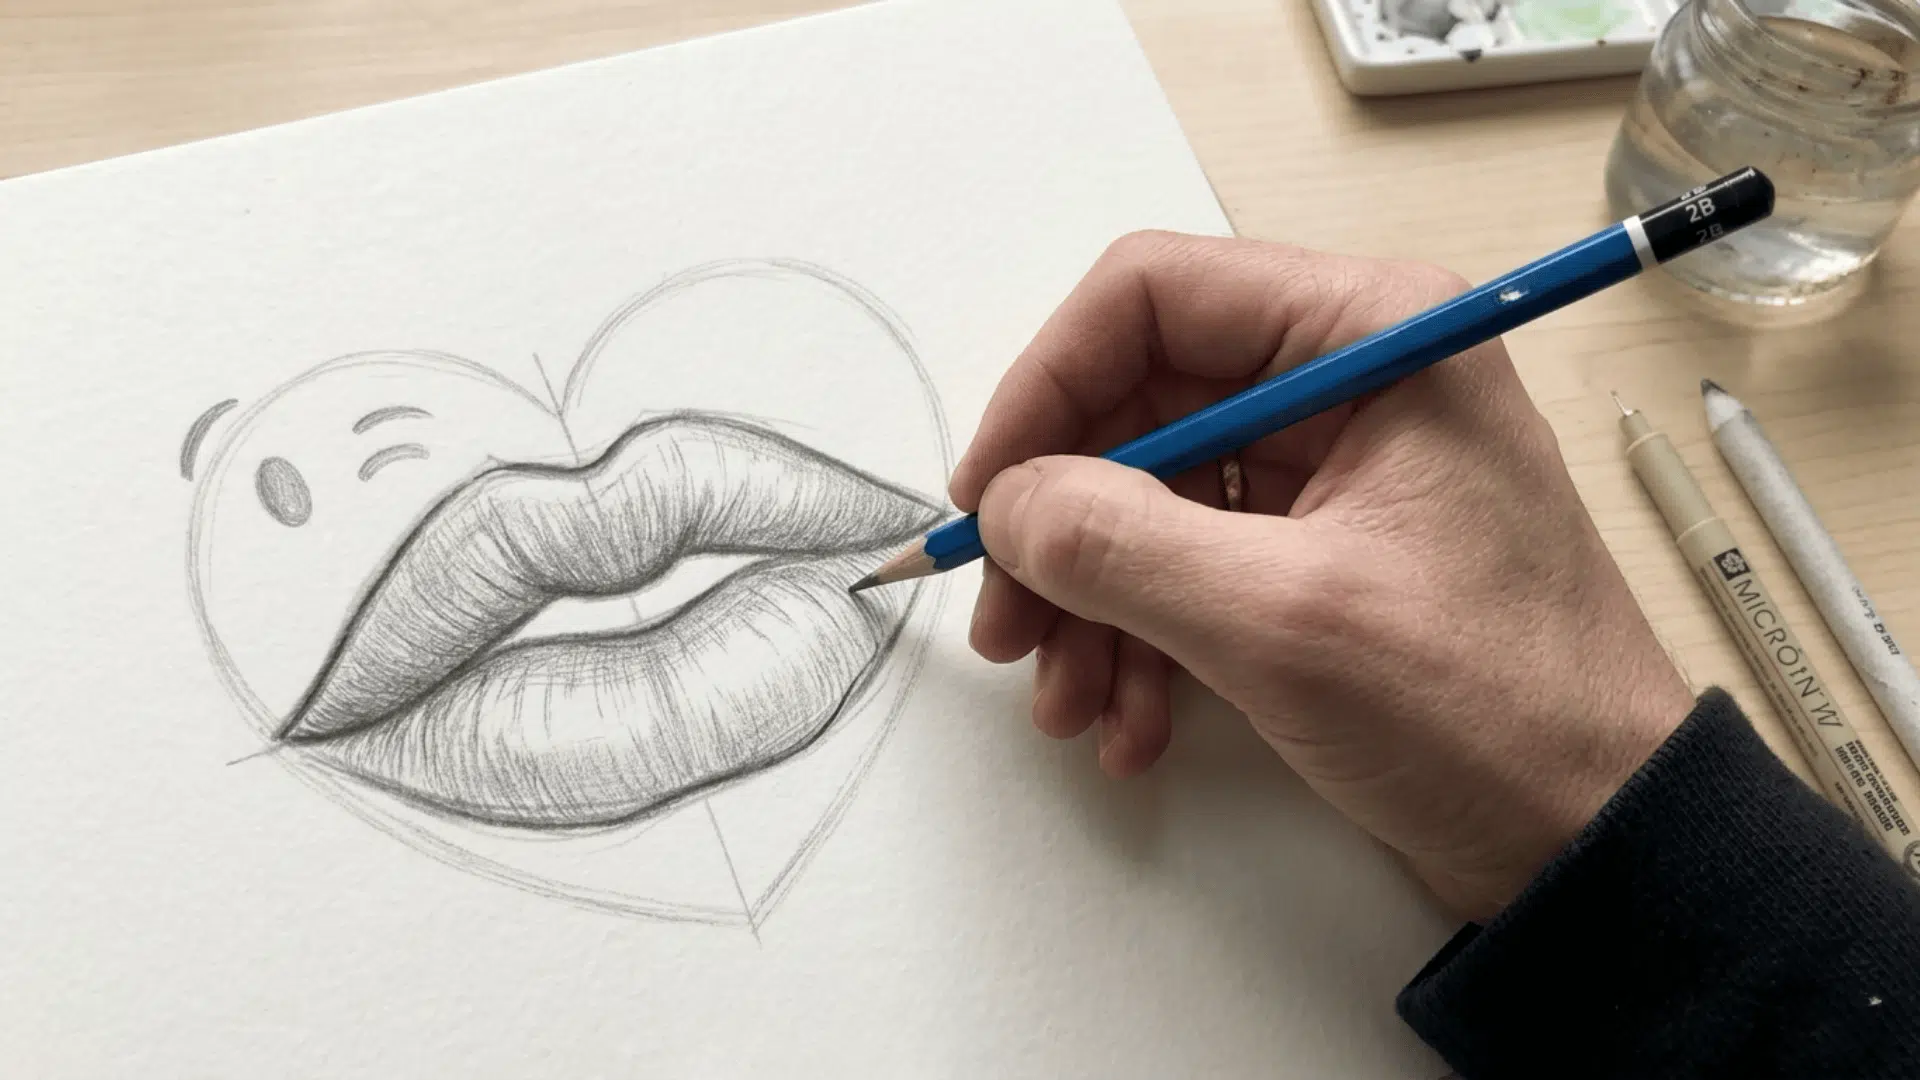
A gentle touch of an emoji kiss can blossom into beautifully detailed, hyper-realistic lips when you use the right layering techniques.
The process starts with structure, then moves into shading and highlight placement.
This transition from flat to dimensional forms becomes easier when understanding the room perspective, where depth is built through controlled structure.
What Is a Pencil Lips Tutorial?
A pencil lips tutorial teaches you to draw or paint realistic lips using pencils, starting from a simple emoji-style kiss and building it into a detailed, lifelike image.
Artists blend lines, shading, and color to create stunning transformations, similar to how light and highlights are carefully built in sun drawing to create realism.
How to Draw Realistic Pencil Lips: Step-by-Step Tutorial
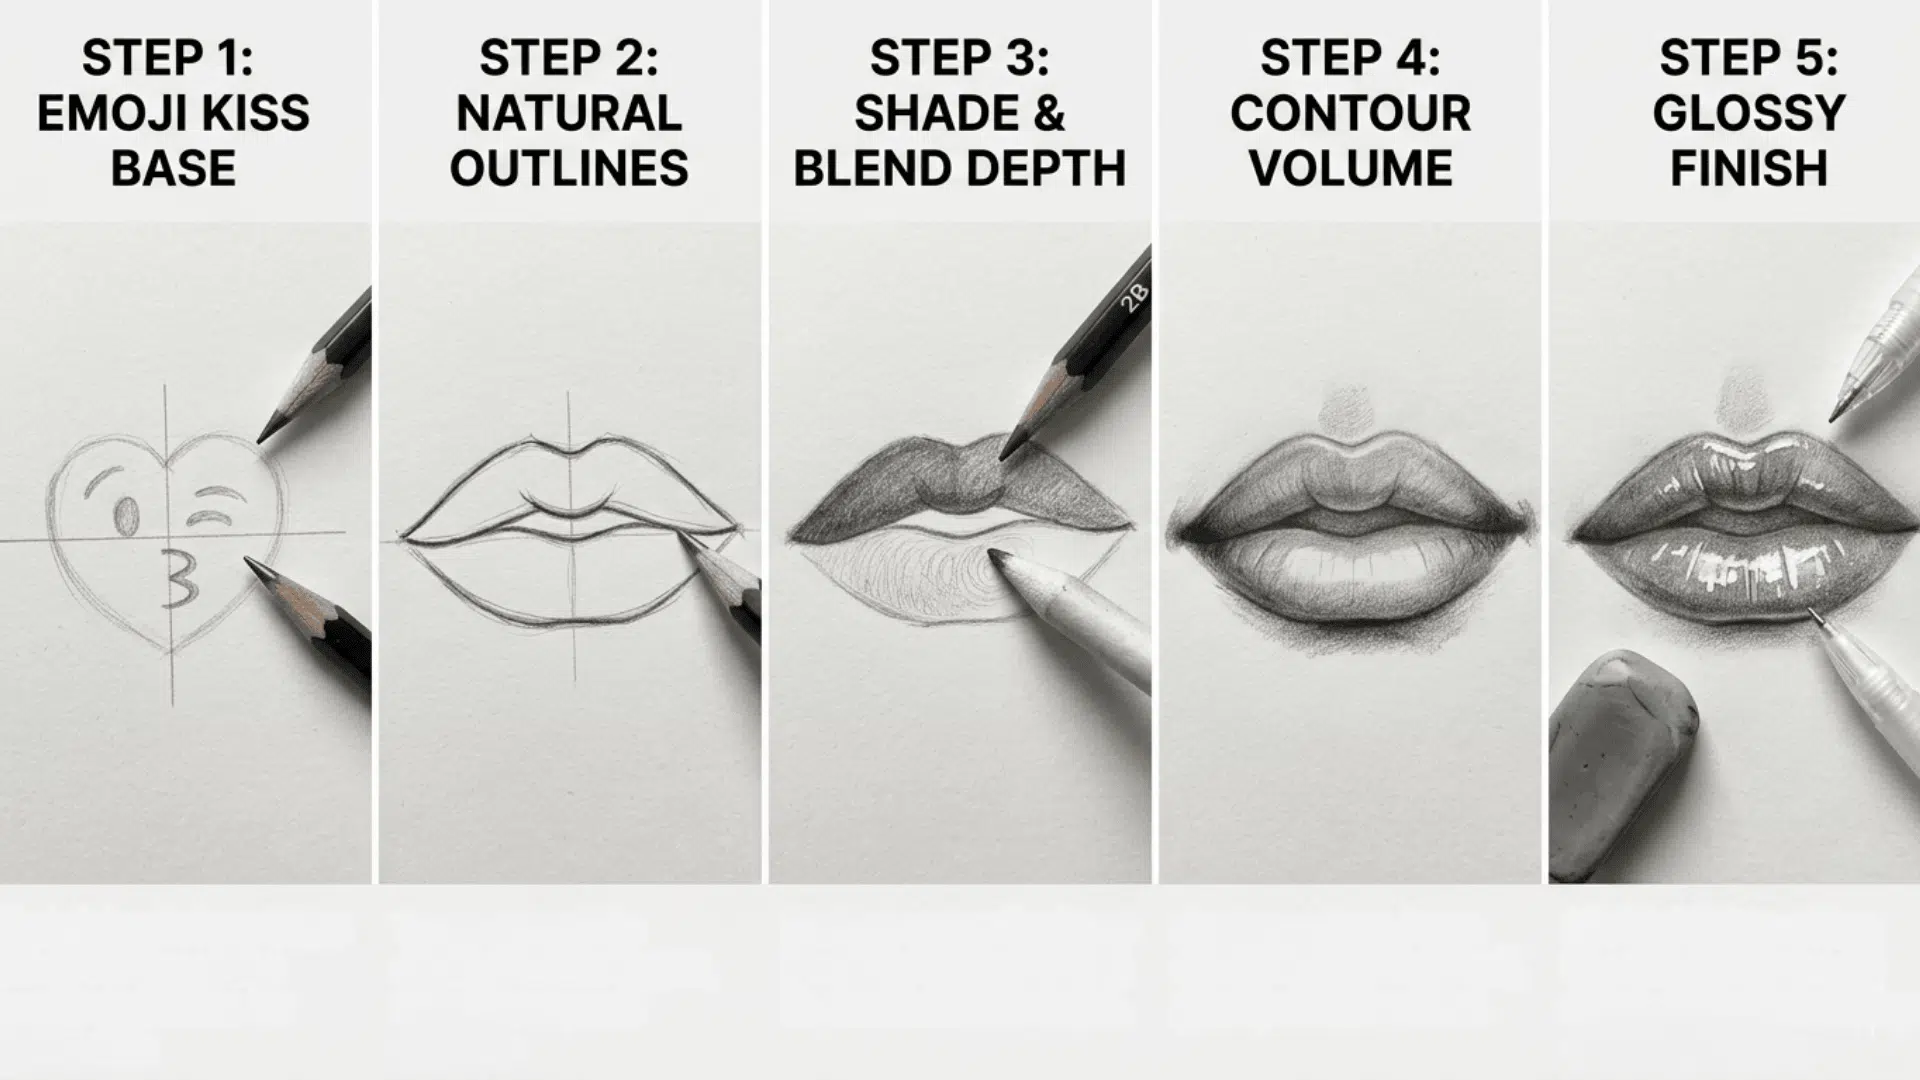
If you’re a beginner or leveling up your art skills, these five steps take you from a basic emoji kiss shape to stunning, glossy, realistic lips.
Step 1: Start With the Emoji Kiss Shape
Sketch a simple heart/kiss emoji as your base, use a center guideline to keep symmetry tight before adding any detail.
This flexible foundation helps prevent proportion mistakes that can be tricky to fix later, making your process smoother and more enjoyable.
Step 2: Outline Natural Lip Structure
Trace over your base to define the cupid’s bow, keep the upper lip thinner, lower lip fuller, and lines soft.
Clean, flowing outlines set the tone for everything that follows. Stiff or heavy lines at this stage make blending and shading much harder to pull off naturally.
Step 3: Shade and Blend for 3D Depth
Darken the upper lip, leave the lower lip lighter, and blend using small circular strokes. Layer graphite gradually for a realistic dimension.
Skipping this step is why most beginner drawings look flat; no amount of detailing later can fix shading that was never properly built from the base.
Step 4: Contour and Add Volume
Keep the edges darker and the center lighter to mimic a makeup ombre effect, making the lips look naturally full and dimensional.
Think of it as contouring with your pencil, not just shading; the same light-and-shadow logic makeup artists use translates perfectly onto paper.
Step 5: Create the Glossy Finish
Lift highlights with a kneaded eraser at the lower lip center and cupid’s bow, then sharpen reflections using a white gel pen.
This final detail is what separates a good drawing from a jaw-dropping one. Most tutorials skip it entirely, which is exactly why yours will stand out.
Pencil Lips Styles You Can Try
Not all pencil lips look the same; each style has its own technique, mood, and level of detail. Try these four to expand your skills and find your signature look.
1. Matte Pencil Lips
Matte lips focus on smooth, even shading with no highlights or shine, perfect for mastering blending before adding complexity.
The flat finish really requires more precise pencil control than any other style, so it’s important to work carefully and steadily.
2. Glossy Realism Lips
Glossy lips combine deep shading with bright eraser-lifted highlights to mimic a wet, dimensional finish.
This style is the most rewarding to master, and the kind of drawing that stops people mid-scroll when you post it online.
3. Ombre Lips Drawing
Ombre lips blend two tones, darker edges fading into a lighter center, to create a dreamy, gradient effect.
It’s one of the easiest styles to pull off as a beginner, and it looks far more advanced than the effort it actually takes.
4. Cartoon / Emoji Lips
Cartoon lips strip everything back to bold outlines, flat color, and exaggerated curves, no shading required.
They’re a fun, low-pressure way to practice shape and symmetry before moving to realistic shapes.
Pro Tips to Make Your Lips Look Hyper-Realistic
The difference between a good drawing and a hyper-realistic one comes down to patience and observation. These five habits separate artists who improve fast from those who stay stuck.
- Build contrast through layering, not by pressing harder; heavy pressure kills blending before it starts.
- Study real lip references before drawing; even a 60-second observation changes how accurately you sketch.
- Layer slowly and lightly, letting each pass add depth rather than rushing to a finished shade.
- Vary your stroke direction across zones, and follow the natural curve of the lips rather than shading in one direction.
- Step back frequently while drawing; small mistakes are invisible up close but obvious from a distance.
Pencil Lips vs Digital Lips: Which Is Better
Choosing between a pencil and a digital depends on your goal and workflow. Both have clear advantages depending on skill level and flexibility needs.
| PENCIL LIPS | DIGITAL LIPS |
|---|---|
| Better for learning fundamentals and hand control | Faster workflow with undo and layers |
| Natural texture and realistic shading | Easy color adjustments and effects |
| Limited correction once drawn | Unlimited edits and flexibility |
| Requires physical tools | Requires device and software |
| Ideal for beginners building skills | Ideal for speed and experimentation |
Wrapping It Up
You now have everything you need to master a pencil lips tutorial: emoji kiss to glossy realism, from your first sketch to that final glossy highlight.
The only step left is to pick up your pencil and start drawing right now.
Save this guide, share it with a friend who loves art, and tag us in your finished drawing. We’d love to see your variation.