Wood sculpting has intrigued artists for centuries, making simple blocks into beautiful and lasting works. It captures attention because it feels both timeless and approachable.
Many beginners seek a creative craft that is calming, hands-on, and rewarding, and carving wood is a perfect fit. With just a small block, a sharp tool, and steady practice, anyone can learn the basics.
This blog offers clear steps, simple patterns, and helpful tips to make the process easier. Readers will also travel through a brief history and look at the various styles that make this art form so rich.
Now is the moment to pick up a tool, choose a pattern, and bring a piece of wood to life.
What Is Wood Sculpting? The Basic Overview
It is the art of shaping wood into three-dimensional works that range from simple decorative pieces to striking artistic statements.
For centuries, cultures around the world have relied on this art form to create masks, statues, architectural details, and symbolic figures.
From African masks to Japanese temple guardians, sculpted wood has carried stories, traditions, and meaning across generations.
Modern wood sculpting combines time-honored techniques with contemporary approaches. Artists may use hand tools, such as chisels and mallets, for detailed shaping or power tools for roughing out larger forms.
For beginners, even small sculptural projects can provide a rewarding introduction to this timeless art form.
Understanding the Different Terms Related to Wood Sculpting
Since it is a broad art form, several related terms often overlap. Knowing these will help beginners choose the right starting point:
| Style | Description | Common Uses |
|---|---|---|
| Whittling | Simplest form of carving using a pocketknife to shape small figures or objects. | Small figures, toys, simple objects |
| Relief Carving | Designs carved into a flat piece of wood; the background is cut away to make the image stand out. | Wall art, panels, decorative plaques |
| Chip Carving | Decorative style where small chips are removed in geometric or floral patterns. | Ornaments, boxes, decorative surfaces |
| Carving in the Round | Fully three-dimensional carving that can be viewed from all angles. | Animal figurines, statues, and lifelike art |
| Wood Turning | Shaping wood on a lathe into symmetrical forms. | Bowls, spindles, furniture details |
Each of these styles falls under the umbrella of wood sculpting, but they differ in tools, techniques, and final results. Beginners may want to start with whittling or relief carving before moving into more advanced methods.
A Glimpse into the History of Wood Carving
Wood carving is one of the oldest art forms in the world. People have been shaping wood for both aesthetic and utilitarian purposes for thousands of years.
- Ancient Times: Egyptians carved wooden figures for tombs, while Asian cultures used wood for temples, statues, and furniture.
- Middle Ages: In Europe, churches were filled with carved altars, doors, and religious symbols.
- Islamic Art: Craftsmen in Persia and Spain created detailed patterns and calligraphy in wood.
- Renaissance & Beyond: Wood carving became more realistic and decorative, showing up in furniture, ships, and even everyday objects.
- Modern Interpretation: Modern artists mix tradition with creativity, while beginners everywhere learn through easy, step-by-step wood carving patterns.
From ancient rituals to today’s DIY projects, sculpting has always been about turning a simple block of wood into something meaningful.
Beginner Step by Step Wood Carving Patterns Tutorial
Starting a project becomes easier when the right tools are ready and the steps are clear.
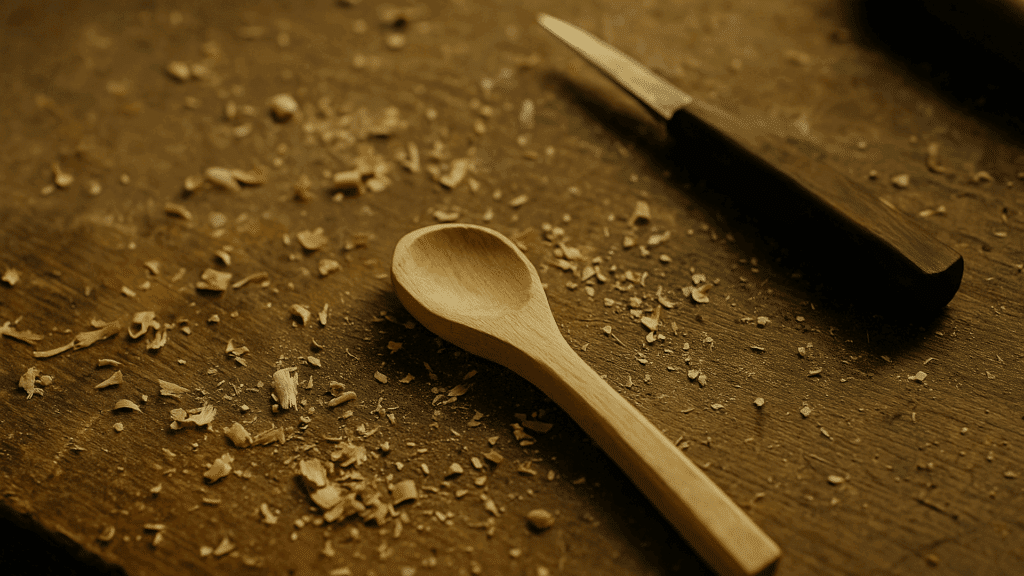
For beginners, a simple spoon is a perfect way to practice shaping wood, learning tool control, and understanding grain direction. With patience and care, even a first attempt can turn into something beautiful and useful.
Tools and Materials Needed
All the materials required for this tutorial are listed in the table attached below.
| Item | Purpose |
|---|---|
| Basswood block | Soft, beginner-friendly wood for carving |
| Carving knives (straight, detail, scoop/gouge) | Main tools for shaping wood and hollowing sections |
| Gloves (leather or carving gloves) | Hand protection against cuts |
| Bandsaw (optional) | For rough shaping and cutting out outlines |
| Pencil | For sketching the spoon design onto wood |
| Strop and sharpening stone | To keep tools razor-sharp for safe, clean cuts |
| Sandpaper (various grits) | For smoothing and finishing surfaces |
These are beginner-friendly, easy-to-follow steps you can follow to make your first wood carving. Go ahead and try it today!
Step 1: Prepare Your Wood and Tools
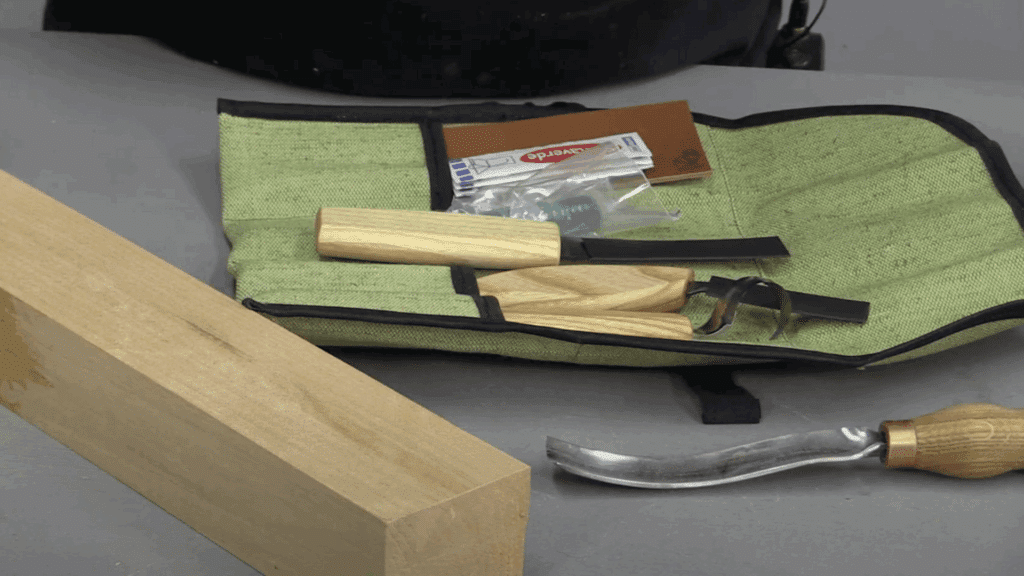
Choose a piece of basswood, which is soft and easy to carve. Gather your carving knives, gloves, and sharpening Tools. Ensure your tools are sharp and wear gloves for safety before starting.
Step 2: Draw the Spoon Pattern
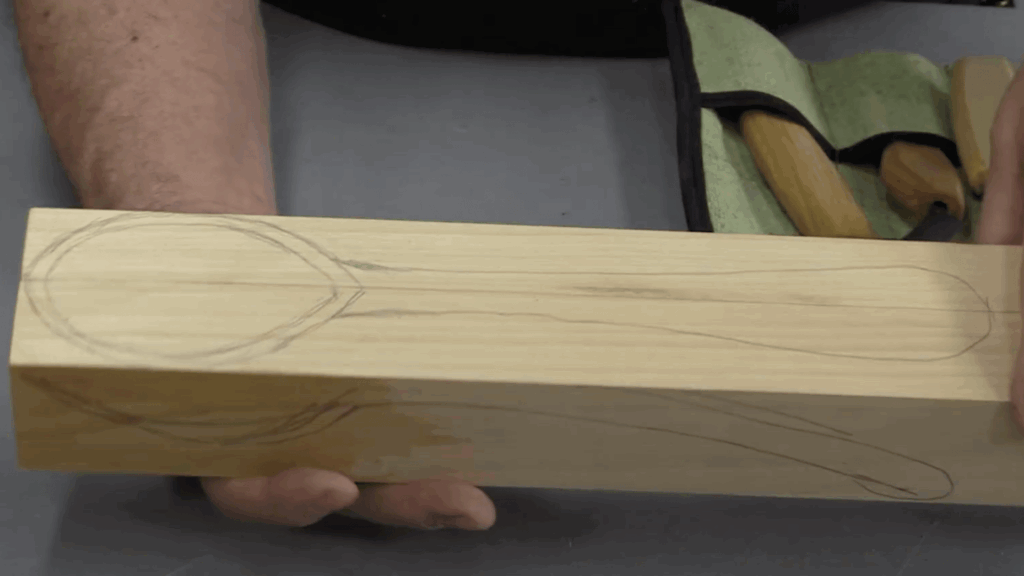
With a pencil, sketch a simple outline of the spoon directly on the wood block. Mark the bowl of the spoon and The handle clearly. A rough side profile helps guide depth and curves.
Step 3: Start Carving the Bowl First
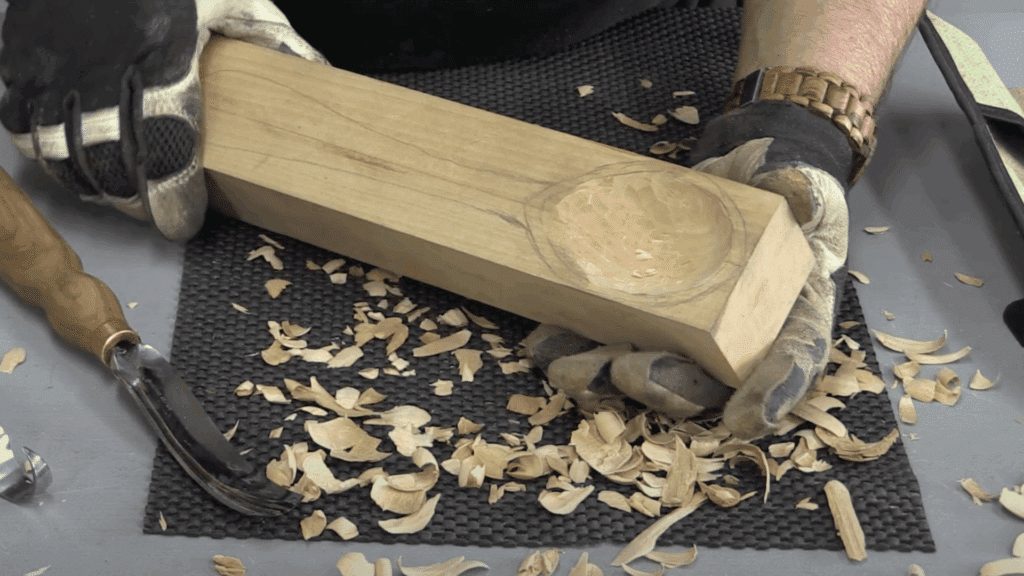
Use a scoop or gouge knife to begin hollowing out the bowl area. Working on this section while the block is still large makes it easier to handle and provides stability. Carve small, controlled cuts, following the grain.
Step 4: Cut out The Spoon Shape
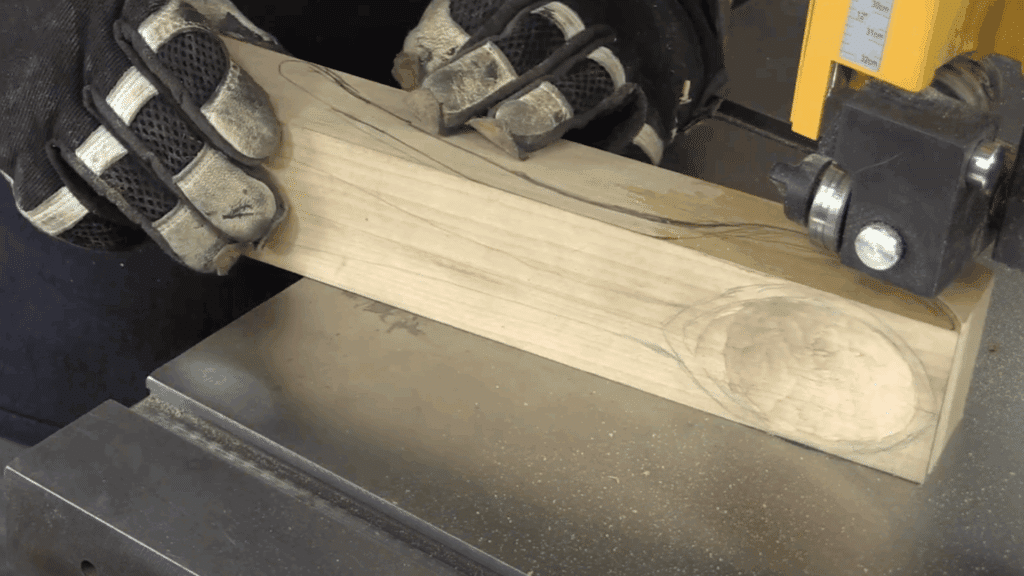
Once the bowl is carved, use a Bandsaw (if Available) to cut along the outline of the handle and the overall spoon shape. If a bandsaw isn’t accessible, continue shaping carefully with carving knives.
Step 5: Shape the Handle and Outer Edges
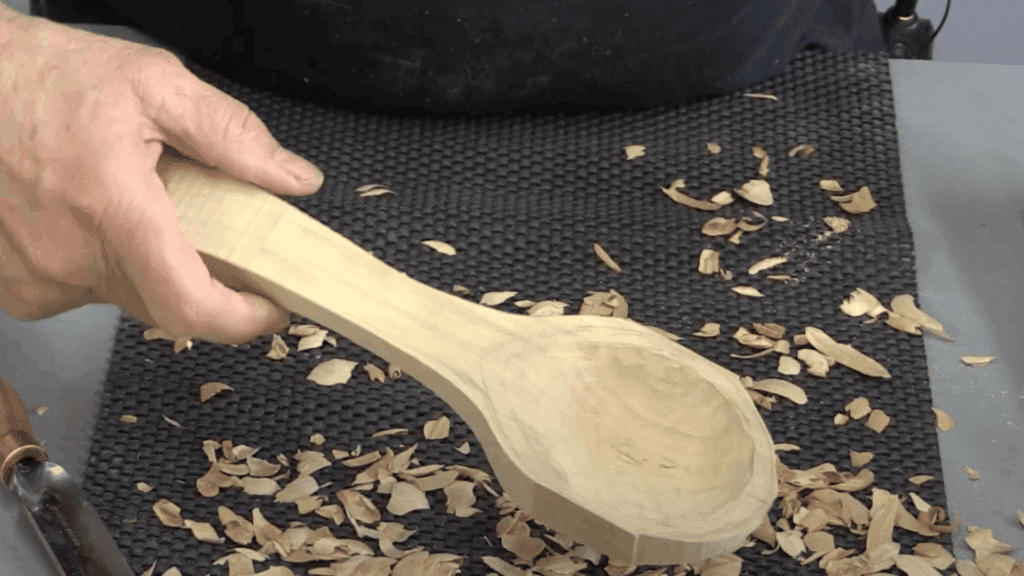
Refine the handle and outer spoon edges with a straight carving knife. Remove larger chunks first, then gradually switch to smaller cuts for better control. Always carve with the grain when possible to avoid chipping.
Step 6: Refine and Smooth the Details
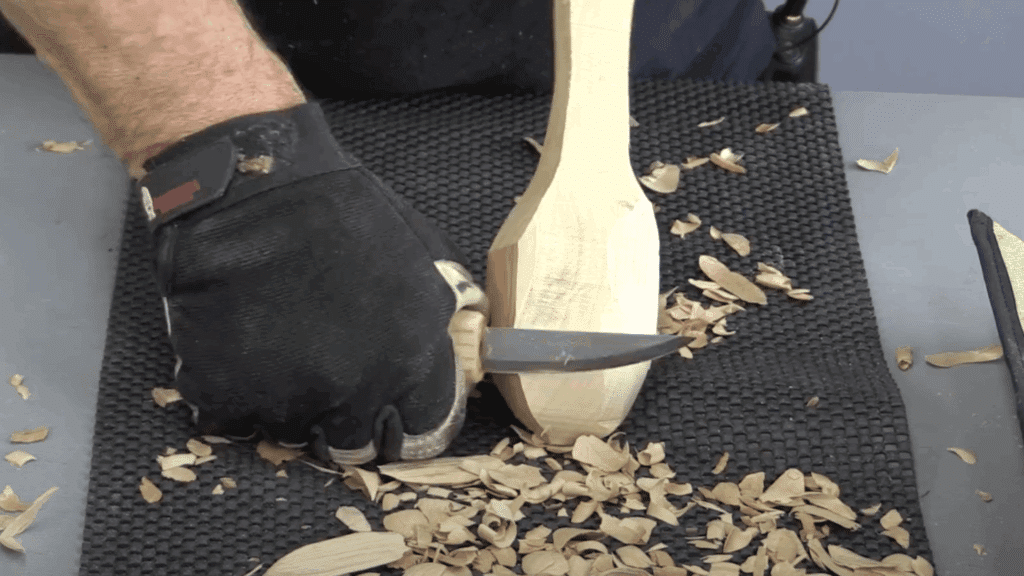
Use smaller knives for Fine Shaping and to even out Rough areas, especially around curves. Pay attention to the natural grain of the wood and adjust your cuts to prevent splitting.
Continue to check for symmetry and comfort in the handle.
Step 7: Finish the Spoon
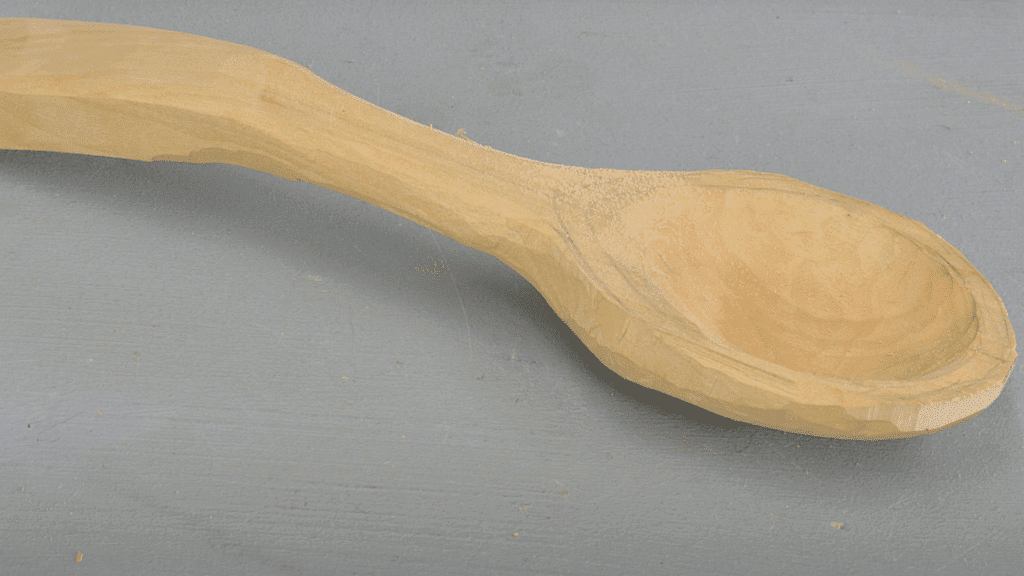
Sand the entire spoon, starting with coarse grit and moving to finer grits for a smooth finish. Optionally, apply a natural oil or beeswax to protect the wood and bring out its natural color.
For a more detailed tutorial, refer to tha YouTube video below
Other Easy Wood Carving Projects Every Beginner Can Try
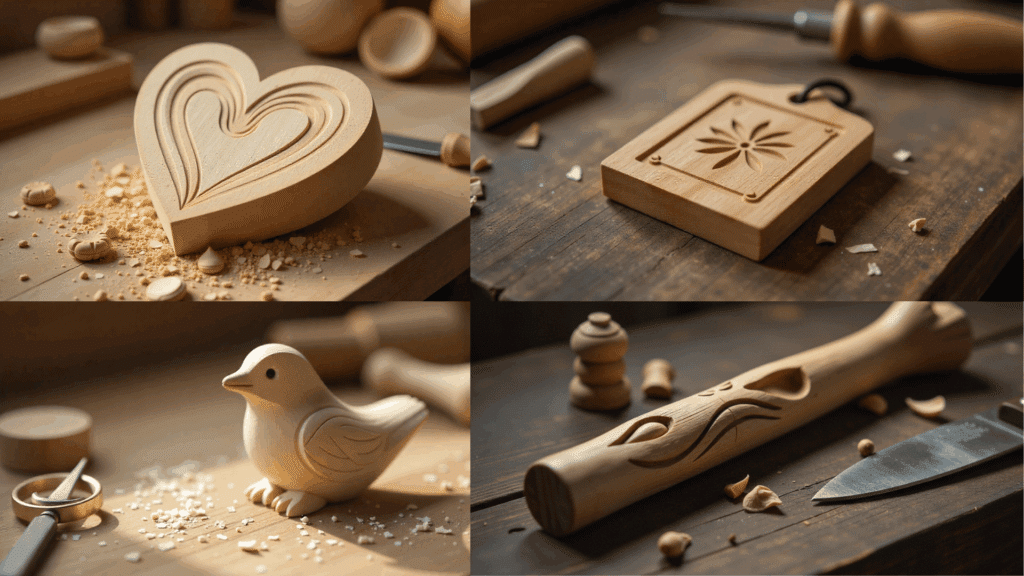
The best way to learn wood sculpting is by starting with simple, enjoyable projects. These give beginners hands-on practice, help develop carving techniques, and can often be completed in just a few hours.
Finishing a project quickly keeps motivation high and builds confidence for more advanced patterns.
1. Simple Animal Figures
Carving small animals, such as birds, cats, or bears, is a fun and creative activity. These projects are carved “in the round,” so all sides are shaped, making them excellent for practicing three-dimensional work.
- Age Group: teens and Adults (with Supervision for Younger Teens)
- Tips: start with Blocky outlines before adding fine details; sand gently to bring out smooth edges.
- Approximate Time: 3–4 Hours
2. Wooden Heart or Star
These simple shapes are quick to carve and make for meaningful keepsakes. They help beginners practice straight cuts and basic shaping without being overwhelming.
- Age Group: kids (with Adult Supervision), Teens, and Adults
- Tips: Draw the shape clearly on the wood before starting; keep edges rounded to avoid splintering.
- Approximate Time: 1–2 Hours
3. Wood Spirit Face
A wood spirit, often carved into a stick or block, features detailed carvings such as eyes, noses, and beards. It’s slightly more advanced but very rewarding for those ready to try faces.
- Age Group: older Teens and Adults
- Tips: Take your time with Facial Features; use a smaller detail knife or Gouge for Precision.
- Approximate Time: 4–5 Hours
4. Keychain or Pendant
Small accessories, such as pendants or keychains, are quick and practical projects to work on. They are great for learning chip carving or relief techniques while creating something personal.
- Age Group: all Ages (with Supervision for Kids)
- Tips: Keep designs simple; drill a Small Hole for The Key Ring or Cord Before Finishing.
- Approximate Time: 1–2 Hours
Start Carving with Confidence
Wood sculpting has grown significantly, from ancient carvings to contemporary creative beginner projects.
In this blog, you learned about its history, key techniques, essential tools, and beginner step-by-step wood carving patterns to get started.
Whether it’s a simple spoon, a wood spirit face, or a keychain, each project helps build skill and confidence.
Now it is your turn to choose a pattern, pick up your tools, and shape wood into something meaningful. Every cut brings progress.
So which beginner project will you try first?

