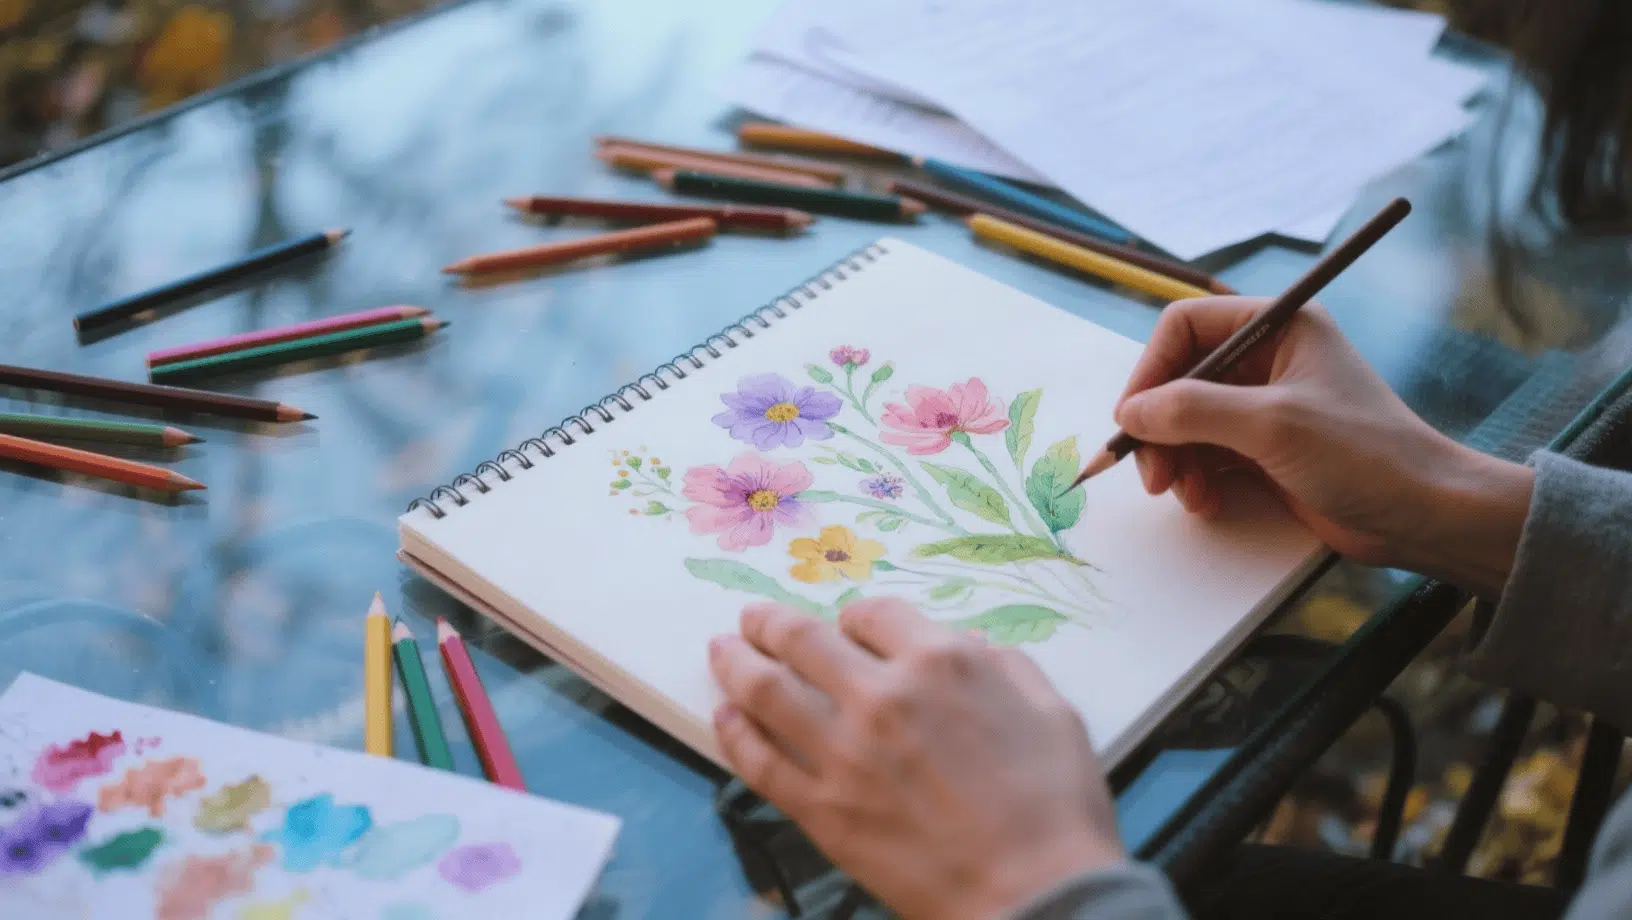
Art is a powerful way for everyone to express themselves, no matter their age or skill level.
People don’t need fancy supplies or years of practice to make something beautiful. All that’s required is a little creativity and a willingness to have fun.
This guide is packed with easy art ideas that prove anyone can be an artist.
These simple projects are designed to help people relax, expand their imagination, and discover the joy of making art without any pressure to be perfect.
Why Art Doesn’t Have to Be Complicated?
Many people believe that to create art, you need to be a talented artist with expensive supplies, but that simply isn’t the case.
Art doesn’t have to be complicated; in fact, the most rewarding projects are often the simplest. The real joy of art comes from the process of making something with your own hands, not from achieving perfection.
It’s about letting go of expectations, relaxing, and seeing what happens when you put a pen to paper or a brush to canvas.
We’ve compiled a list of simple art projects that require minimal materials and even less pressure.
These projects are designed to show you that anyone can be an artist and that creating something beautiful is as simple as having fun.
Simple Drawing & Doodling Art Ideas
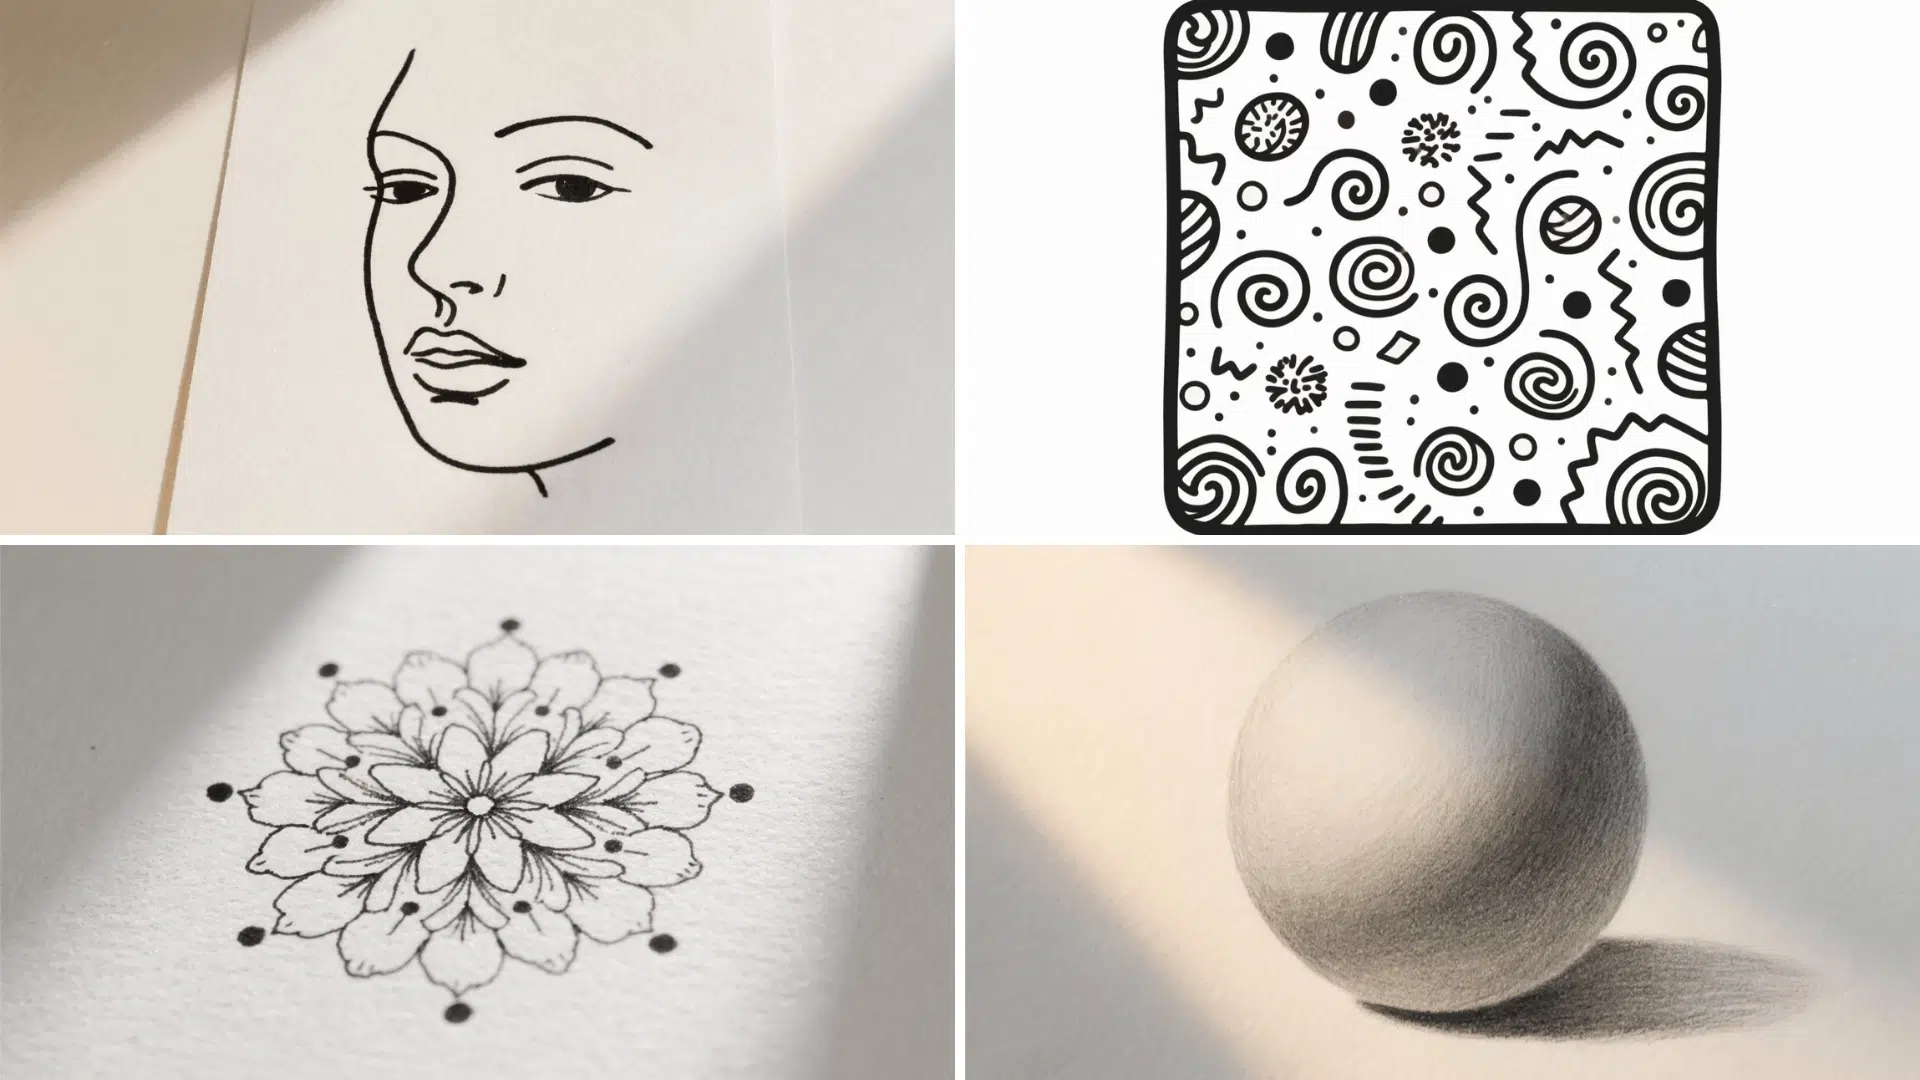
1. One-Line Contour Faces
One-line contour faces encourage expressive creativity by using a single continuous stroke to capture the features of a face.
The artist begins at the forehead and works their way around the eyes, nose, and mouth without lifting the pen.
- Materials Needed: Plain paper, pencil or pen, eraser (optional)
- Skill Developed: Observation, fluid line drawing, creative expression
- Time Required: 10–15 minutes
2. Zentangle Pattern Tiles for Mindful Doodling
Zentangle doodling allows creators to relax while producing intricate-looking art from simple, repetitive patterns. The artist lightly divides the tile and fills each section with swirls, dots, or grids in free-flowing designs.
- Materials Needed: Square paper tiles or cut paper, fine liner or gel pen
- Skill Developed: Mindfulness, pattern creation, focus
- Time Required: 20–30 minutes
3. Negative-Space Leaf Silhouettes
This technique creates striking results by shading around an object instead of inside it. By placing and tracing a leaf, then filling in the outer area, the artist leaves a bold silhouette with a professional touch.
- Materials Needed: Paper, pencil, eraser, real leaf (optional)
- Skill Developed: Negative space awareness, shading control
- Time Required: 15–20 minutes
4. Blind-Contour Sketches of Everyday Objects
Blind-contour sketching asks the artist to focus on the object without looking at the paper. By slowly drawing the outline of mugs, plants, or other objects, the resulting sketches appear quirky, loose, and expressive.
- Materials Needed: Paper, pen, or pencil
- Skill Developed: Hand-eye coordination, observation skills
- Time Required: 5–10 minutes per sketch
5. Compass-Drawn Mandala Rings
Mandalas bring calm through structured symmetry. Using a compass to create concentric circles, the artist divides the design and adds shapes like petals or dots, layering them into balanced, intricate patterns.
- Materials Needed: Compass, ruler, paper, black pen
- Skill Developed: Symmetry, precision, pattern design
- Time Required: 25–35 minutes
6. Minimal City Skyline in 10 Lines
A city skyline can be captured with minimal strokes. The artist begins with a baseline and adds simple rectangles or triangles to suggest rooftops, spires, and towers, producing a frame-worthy, modern doodle.
- Materials Needed: Paper, ruler, fine liner
- Skill Developed: Simplification, minimal design
- Time Required: 15 minutes
7. Continuous-Line Floral Wreath
By drawing a wreath without lifting the pen, the artist combines spontaneity with elegance. Imperfect loops of flowers and leaves create a design that feels polished yet naturally charming.
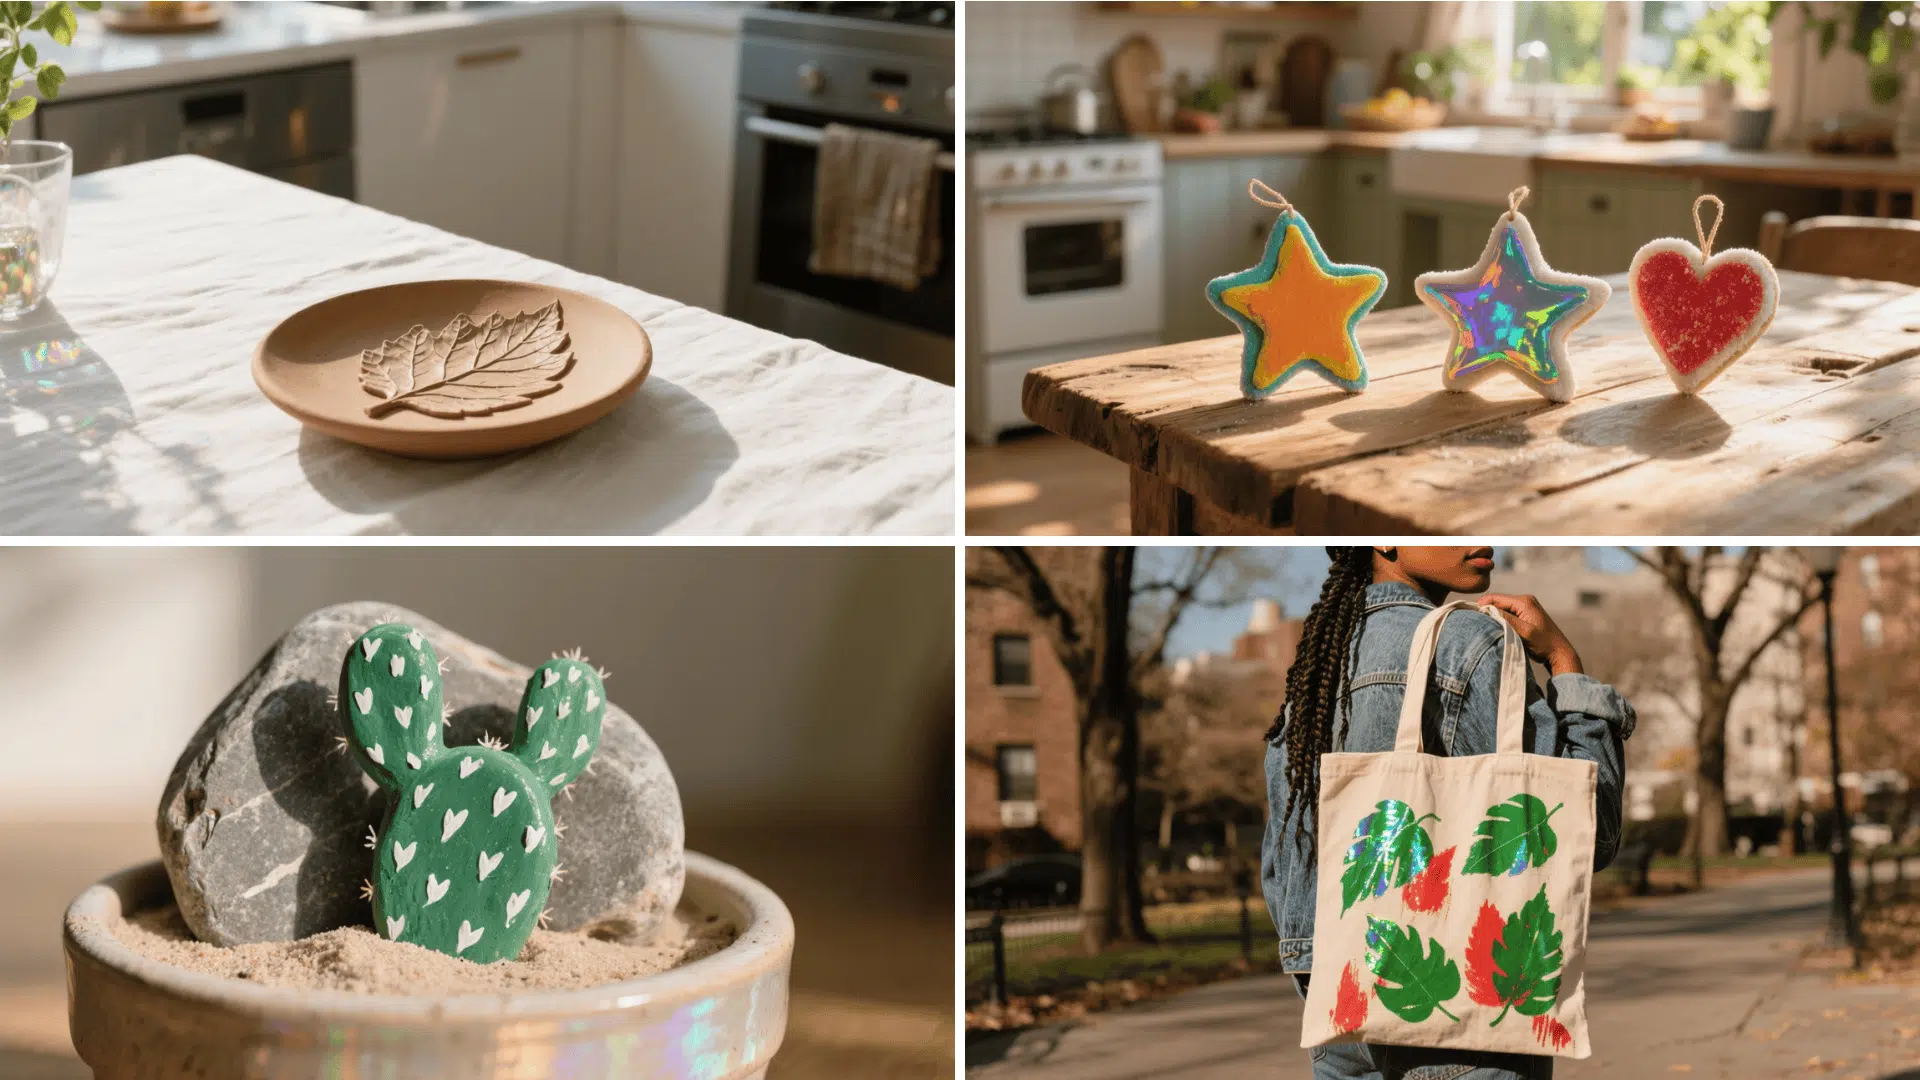
- Materials Needed: Paper, pencil, or pen
- Skill Developed: Flow drawing, creativity, composition
- Time Required: 15–20 minutes
8. Minimal Botanical Line Art from a Phone Photo
Nature-inspired line art changes a plant photo into a clean, simplified design. The artist traces only essential stems and leaf shapes, skipping shading, to produce a stylish piece suited for décor or journaling.
- Materials Needed: Paper, pen
- Skill Developed: Simplification, botanical observation
- Time Required: 10–15 minutes
9. Isometric Cube & Staircase Illusions
Geometric illusions make 2D drawings look 3D. By sketching a hexagon, dividing it into rhombuses, and shading differently, the artist produces a cube or staircase illusion that plays with perspective.
- Materials Needed: Graph paper or ruler, pencil, eraser
- Skill Developed: Perspective drawing, shading, geometry
- Time Required: 20 minutes
10. Light-and-Shadow Sphere Study
This classic shading practice introduces form and depth. The artist draws a circle, then shades from dark to light to mimic light falling across a sphere, finishing with a cast shadow for realism.
- Materials Needed: Paper, pencil, blending tool (tissue works)
- Skill Developed: Shading, realism, light perception
- Time Required: 15–20 minutes
11. 9-Panel Thumbnail Sketch Challenge
In this playful challenge, one object is reinterpreted in nine styles. Artists create a grid, then redraw the same object as a cartoon, abstract, exaggerated, or geometric, encouraging flexibility and imagination.
- Materials Needed: Paper, ruler, pen or pencil
- Skill Developed: Creative versatility, style experimentation
- Time Required: 30–40 minutes
Paint & Color Quick Wins Art Ideas
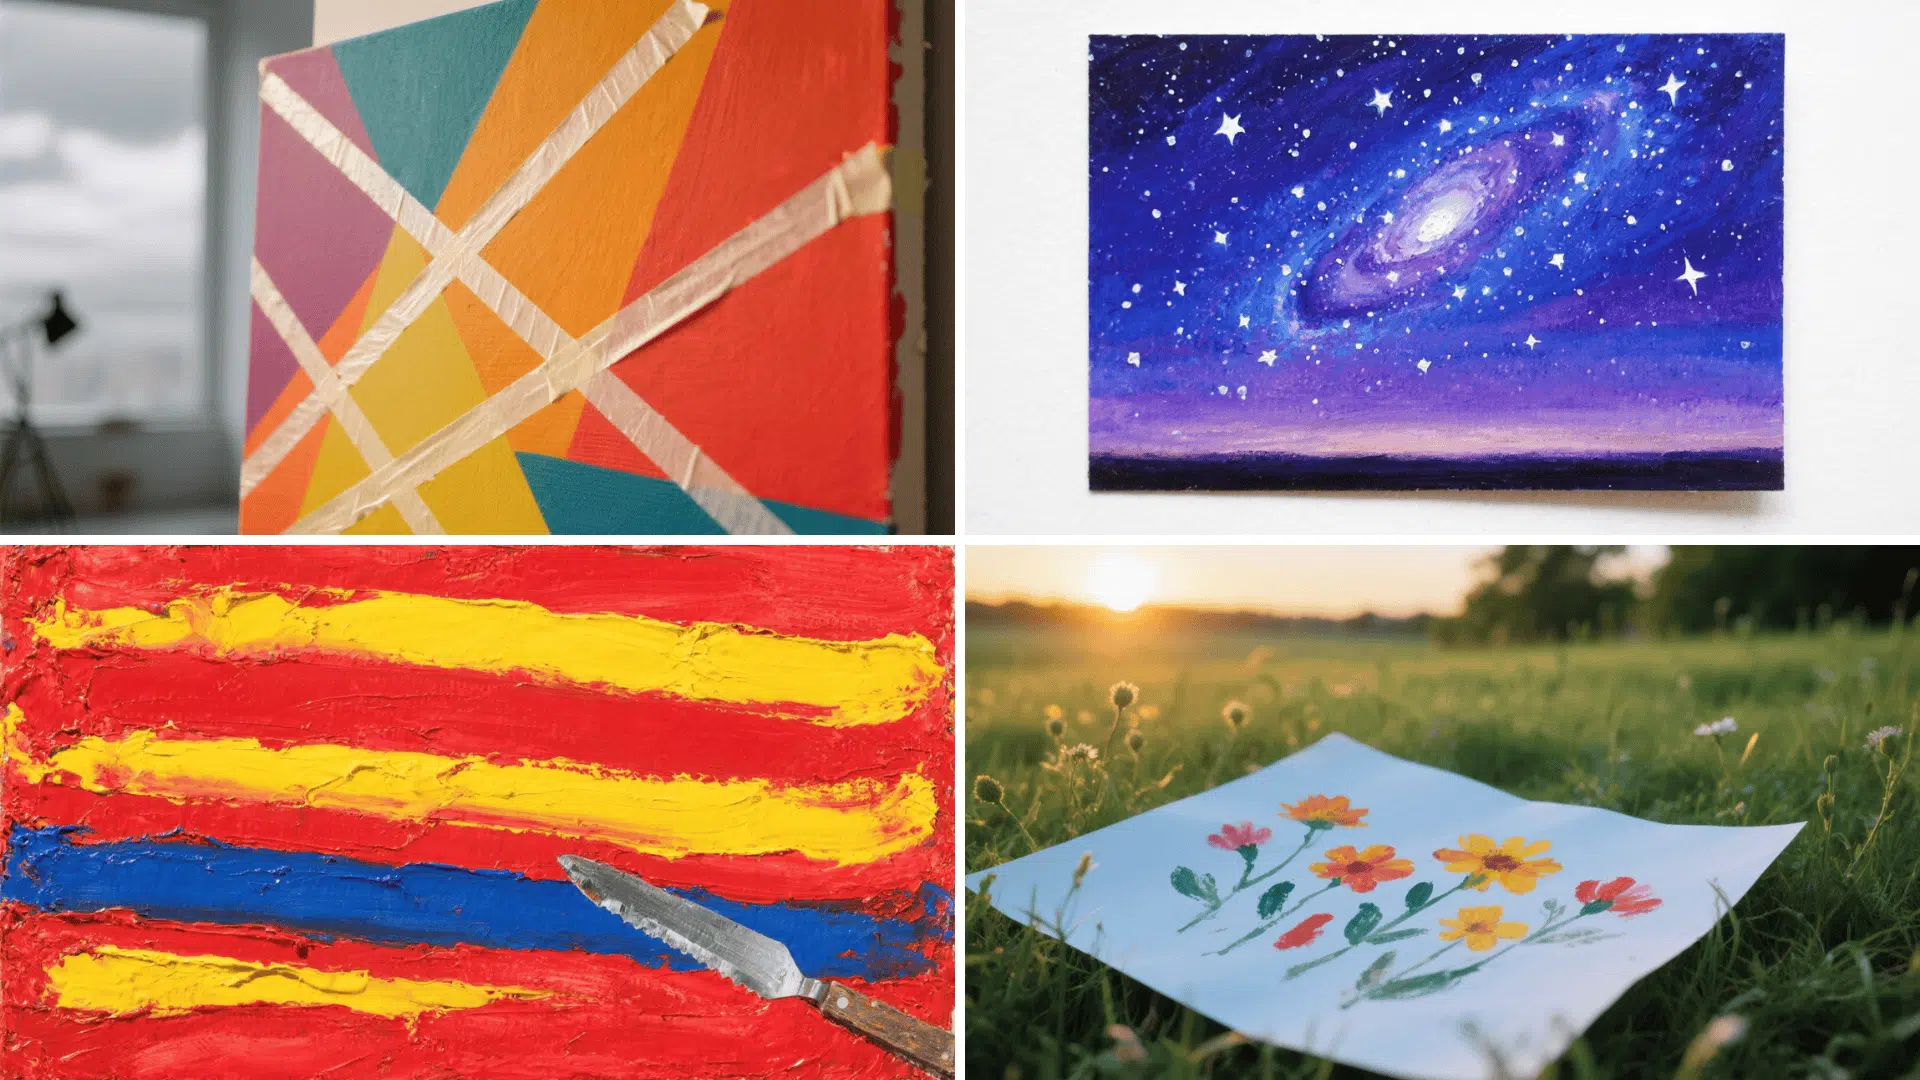
12. Painter’s-Tape Resist Geometric Canvas
The artist places strips of painter’s tape on a canvas in geometric patterns and paints over them with bright or contrasting colors.
After the paint dries, the tape is peeled away to reveal sharp, clean edges.
- Materials Needed: Canvas or thick paper, acrylic paints, brushes, painter’s tape
- Time Required: 20–30 minutes
- Skills Developed: Color contrast, clean edges, design planning
13. Acrylic Swipe Abstract on Cardstock
The painter drops lines of acrylic paint across thick paper or canvas, then uses a palette knife or old card to swipe through the paint.
This blending creates flowing streaks and waves that look bold and abstract.
- Materials Needed: Acrylic paints, thick paper or canvas, palette knife or old card
- Time Required: 20 minutes
- Skills Developed: Color blending, abstract design, tool use
14. Watercolor Galaxy Postcard
The artist blends layers of dark blue, purple, and black watercolor to form a dreamy sky. White paint or a gel pen is used to add star-like splatters. Once dry, the artwork can be trimmed into a postcard size.
- Materials Needed: Watercolor paper, watercolor paints, brushes, white paint, or gel pen
- Time Required: 25–30 minutes
- Skills Developed: Layering, splattering, watercolor blending
15. Gouache Fruit Mini-Studies
The painter chooses simple fruits, such as apples, bananas, or cherries, and paints them with bold blocks of gouache color. Lighter tones are added for highlights, creating cheerful mini-paintings.
- Materials Needed: Gouache paints, small paper squares, brushes
- Time Required: 15–20 minutes each
- Skills Developed: Brush control, color layering, shape observation
16. Monochrome Value Landscape
The artist paints a peaceful landscape using only one color. Different tints and shades are layered to create depth in the sky, mountains, and foreground.
- Materials Needed: Acrylic or watercolor paint in one color, brushes, paper or canvas
- Time Required: 30 minutes
- Skills Developed: Value shading, depth creation, tonal balance
17. Palette-Knife Textured Stripes
The painter spreads thick stripes of acrylic paint across the canvas with a palette knife or old card. By layering colors and scraping gently, they create bold textures with a modern look.
- Materials Needed: Acrylic paints, palette knife or old card, canvas or paper
- Time Required: 15–20 minutes
- Skills Developed: Texture making, layering, abstract design
18. Straw-Blown Drip Art
The artist drops small puddles of paint onto paper and then blows through a straw to spread the paint. This creates playful, branch-like shapes that are fun and unpredictable.
- Materials Needed: Paper, liquid paint (acrylic or watercolor), straw
- Time Required: 10–15 minutes
- Skills Developed: Creativity, spontaneity, playful design
19. Smooth Ombré Gradient Canvas
The painter selects two or three colors and blends them across the canvas with a wide brush. Working while the paint is still wet creates smooth, seamless gradients.
- Materials Needed: Acrylic paints, a wide brush, canvas, or thick paper
- Time Required: 20–25 minutes
- Skills Developed: Blending, color transition, brush technique
20. Splatter Silhouette Animal
The artist places an animal cutout or stencil on paper and splatters paint around it with a brush. When the cutout is removed, the clean animal silhouette stands out against the colorful background.
- Materials Needed: Paper, paintbrush, acrylic or watercolor paints, animal cutout or stencil
- Time Required: 15–20 minutes
- Skills Developed: Splattering, silhouette design, color energy
21. Coffee/Tea Monochrome Painting
The painter dips a brush into cooled coffee or tea and paints a simple subject like a tree, a landscape, or abstract swirls.
Layering creates darker tones and a vintage-style look.
- Materials Needed: Paper, brewed coffee or tea, a brush
- Time Required: 20 minutes
- Skills Developed: Tone control, layering, natural medium use
22. Finger-Painted Wildflower Meadow
The artist dips their fingertips into paint and dabs petals, stems, and leaves onto the surface. By layering different colors, they build up a lively meadow of wildflowers.
- Materials Needed: Acrylic paints, thick paper or canvas, fingers
- Time Required: 15 minutes
- Skills Developed: Finger painting, layering colors, expressive style
Paper, Collage & Printmaking Easy Art Ideas
23. Magazine Collage Mood Board
The artist cuts out images, colors, and words from magazines and arranges them into a theme or design. Once satisfied with the layout, everything is glued down to create an inspiring board that reflects a mood or goal.
- Materials Needed: Magazines, scissors, glue, paper, or cardboard
- Time Required: 30–40 minutes
- Skills Developed: Composition, creativity, visual storytelling
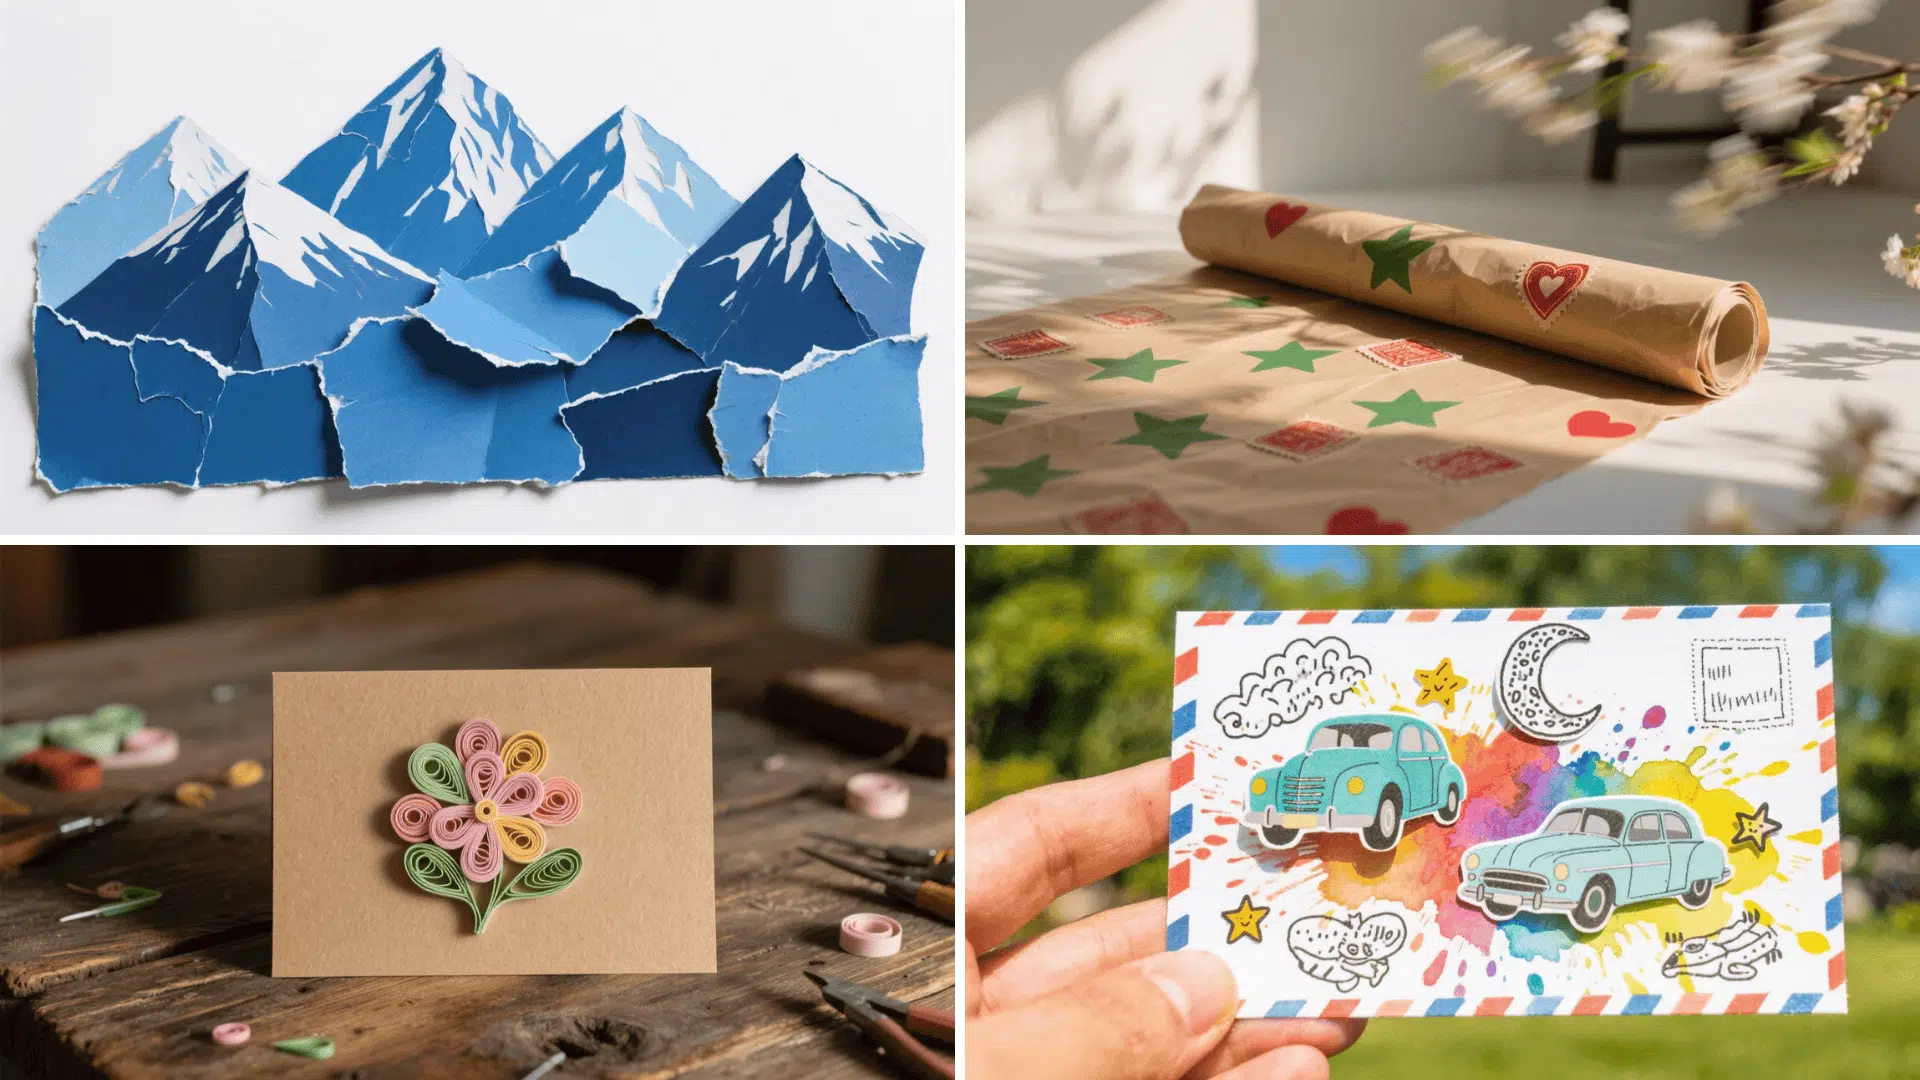
24. Torn-Paper Mountain Landscape
The painter tears colored paper into strips and arranges them in layers to form mountains, hills, or skies. By placing the darkest shades at the bottom and lighter shades at the top, a natural landscape effect is created.
- Materials Needed: Colored paper, glue stick, base paper
- Time Required: 20–25 minutes
- Skills Developed: Layering, texture making, color gradation
25. Washi-Tape Greeting Cards
The artist decorates blank cards with colorful washi tape, arranging strips into patterns such as stripes, triangles, or zigzags. Mixing different tapes results in playful and unique handmade cards.
- Materials Needed: Blank cards, washi tape, scissors
- Time Required: 15 minutes
- Skills Developed: Pattern design, color coordination, craft skills
26. Potato-Stamp Patterned Gift Wrap
The painter cuts a potato in half, carves a simple shape, dips it into paint, and stamps it onto paper. Repeated stamping creates custom patterns, turning plain paper into personal gift wrap.
- Materials Needed: Potatoes, knife, acrylic paint, paper
- Time Required: 20 minutes
- Skills Developed: Printmaking basics, repetition, shape design
27. Leaf Rubbings Turned Wall Prints
The artist places a leaf under a sheet of paper and gently rubs over it with crayons or soft pencils. The leaf’s texture appears on the surface, and multiple leaves can be layered for a collage effect.
- Materials Needed: Paper, leaves, crayons, or soft pencils
- Time Required: 15 minutes
- Skills Developed: Texture observation, layering, natural art techniques
28. DIY Stickers with Packing Tape
The artist covers doodles or printed images with clear packing tape, rubs firmly, and cuts them out. After soaking in water to remove the paper backing, the design becomes a sticker that can be used anywhere.
- Materials Needed: Printed images or doodles, clear packing tape, scissors
- Time Required: 15–20 minutes
- Skills Developed: Craft making, design transfer, and personalization
29. Origami Corner Bookmarks (Starter Folds)
The artist folds a square piece of paper into a triangle, then folds the corners inward to form a pocket. With added doodles or googly eyes, the bookmark becomes a fun way to mark pages.
- Materials Needed: Colored paper squares, scissors, markers
- Time Required: 10–15 minutes
- Skills Developed: Paper folding, simple origami, decoration skills
30. Paper-Quilling Starter Swirls & Coils
The painter rolls thin paper strips into coils using a toothpick or quilling tool. These coils are glued onto paper and shaped into floral or abstract patterns, creating delicate and decorative designs.
- Materials Needed: Quilling paper strips, glue, toothpick, or quilling tool
- Time Required: 25–30 minutes
- Skills Developed: Fine motor control, pattern making,and patience
31. DIY Envelopes from Scrapbook Paper
The artist traces an envelope template onto scrapbook paper, cuts it out, and folds the edges inward. After gluing, the finished envelope becomes a handmade piece perfect for letters or gifts.
- Materials Needed: Scrapbook or patterned paper, scissors, glue
- Time Required: 15 minutes
- Skills Developed: Measuring, folding, functional design
32. “Gel-Plate” Look Prints Using a Plastic Bag
The painter spreads acrylic paint on a plastic bag and presses paper onto it. By peeling the paper away, colorful textures appear, and repeating the process with layers creates striking print effects.
- Materials Needed: Acrylic paints, plastic bag, roller or brush, paper
- Time Required: 20–25 minutes
- Skills Developed: Printmaking, layering, experimental design
33. Mixed-Media Travel Postcard Swap
The artist cuts cardstock into postcard size and decorates it with a mix of paint, collage, and doodles. These postcards can be kept or traded, combining multiple art forms into one creative project.
- Materials Needed: Cardstock, paints, markers, magazine cutouts, glue
- Time Required: 30 minutes
- Skills Developed: Mixed-media layering, composition, creative expression
Home-Decor Upcycles Inspired Art Ideas

34. Painted Terracotta Herb Pots
The artist cleans a terracotta pot, applies a base coat of paint, and then adds stripes, dots, or simple patterns. Once dry, the pot can be sealed for durability, turning plain planters into cheerful and functional decor.
- Materials Needed: Terracotta pots, acrylic paint, brushes, sealer (optional)
- Time Required: 20–30 minutes
- Skills Developed: Pattern design, brush control, upcycling
35. Pressed-Flower Floating Glass Frame
The artist places dried flowers between two pieces of glass and secures them in a frame. The result is a delicate display that preserves nature and looks elegant when hung or placed in sunlight.
- Materials Needed: Pressed flowers, two glass panels, a floating frame
- Time Required: 20–25 minutes
- Skills Developed: Composition, natural art, preservation
36. Tissue-Paper Mason-Jar Lanterns
The crafter tears tissue paper into pieces, glues them onto a mason jar, and lets the jar dry. A candle or LED light inside turns the jar into a glowing lantern, adding warmth to any space.
- Materials Needed: Mason jars, tissue paper, glue, brush, tea lights
- Time Required: 25 minutes
- Skills Developed: Layering, color play, functional craft
37. Scrap-Fabric Tassel or Pom Garland
The artist cuts strips of fabric or rolls yarn into poms, then ties them onto a string to form a garland. This project recycles scraps into handmade decor for parties or home spaces.
- Materials Needed: Fabric scraps or yarn, scissors, string
- Time Required: 30–40 minutes
- Skills Developed: Recycling, knotting, decorative crafting
38. Photo Transfer on Wood (Mod Podge)
The crafter applies Mod Podge to a wood panel, presses a printed photo face-down, and lets it dry overnight. The paper is rubbed away with water, leaving the photo transferred onto the wood with a rustic, vintage look.
- Materials Needed: Wood panel, printed photo (laser print), Mod Podge, sponge
- Time Required: 40 minutes (plus drying time)
- Skills Developed: Image transfer, surface prep, and patience
39. Marker “Alcohol-Ink” Tile Coasters
The artist drops alcohol inks onto white ceramic tiles, adds isopropyl alcohol, and tilts the surface to blend colors. Once sealed, the marbled designs become colorful, functional coasters.
- Materials Needed: White ceramic tiles, alcohol inks, isopropyl alcohol, sealer
- Time Required: 20–30 minutes
- Skills Developed: Color blending, surface art, marbling effect
40. Pebble-Art Family Silhouette in a Shadow Box
The artist arranges pebbles into figures, such as a family, and uses twigs as props. After gluing the design to a backing, the piece is framed in a shadow box for a natural and storytelling artwork.
- Materials Needed: Pebbles, twigs, glue, and a shadow box frame
- Time Required: 25–30 minutes
- Skills Developed: Composition, storytelling, natural art
41. Stenciled Tea Towels (Fabric Paint)
The crafter places a stencil on a plain tea towel, dabs fabric paint over it with a sponge, and carefully lifts the stencil. The towel dries into a personalized, stylish kitchen linen.
- Materials Needed: Plain tea towels, fabric paint, stencils, sponge brush
- Time Required: 20 minutes
- Skills Developed: Stenciling, precision, fabric decoration
42. Abstract Wall Print with Sponge Stamps
The artist cuts sponges into shapes, dips them into paint, and presses them onto paper or canvas. By layering shapes and colors, they create bold, textured abstract wall art.
- Materials Needed: Sponges, acrylic paint, paper, or canvas
- Time Required: 15–20 minutes
- Skills Developed: Shape design, layering, abstract composition
43. Twine-Wrapped Bottle Vase
The crafter applies glue in sections on a glass bottle and wraps twine tightly around it until fully covered. The result is a rustic vase that is both eco-friendly and stylish.
- Materials Needed: Empty glass bottle, twine, glue
- Time Required: 20–25 minutes
- Skills Developed: Wrapping, patience, and recycling craft
Clay, Fiber & Nature Minis Easy Art Ideas
44. Air-Dry Clay Leaf-Imprint Trinket Dish
The artist rolls out air-dry clay, presses a leaf into the surface, and trims the edges into a small dish shape. After drying, the dish can be painted for extra decoration, leaving delicate natural textures.
- Materials Needed: Air-dry clay, rolling pin, leaf, paint (optional)
- Time Required: 30 minutes (plus drying)
- Skills Developed: Clay shaping, texture transfer, decorative finishing
45. Polymer-Clay Bead Necklace or Key Fob
The crafter rolls polymer clay into beads, pierces holes through them, and bakes according to instructions. Once cooled, the beads are strung onto a cord or chain to make jewelry or a key fob.
- Materials Needed: Polymer clay, string or chain, baking tray
- Time Required: 25–30 minutes (plus baking)
- Skills Developed: Bead making, jewelry assembly, and clay handling
46. Salt-Dough Ornaments with Cookie Cutters
The artist mixes flour, salt, and water into dough, rolls it flat, and cuts out shapes with cookie cutters. After baking until hard, the ornaments can be painted and decorated for keepsakes or gifts.
- Materials Needed: Flour, salt, water, cookie cutters, paints
- Time Required: 40 minutes (plus baking)
- Skills Developed: Dough mixing, shape cutting, painting
47. Beginner Macramé Square-Knot Keychain
The crafter ties cords onto a keyring and practices square knots until the desired length is reached. The ends are trimmed and frayed into a tassel, creating a simple macramé keychain.
- Materials Needed: Macramé cord, keyring, scissors
- Time Required: 20–30 minutes
- Skills Developed: Knotting, pattern repetition, hand coordination
48. Yarn Pom-Pom Flowers in a Mini Vase
The artist wraps yarn around their fingers, ties the center, and cuts the loops to form a pom-pom. Each pom-pom is glued onto a stick or straw, creating playful flowers arranged in a vase.
- Materials Needed: Yarn, scissors, sticks or straws, glue
- Time Required: 15–20 minutes
- Skills Developed: Wrapping, cutting, creative assembly
49. Painted Rock “Cactus” Garden
The crafter paints smooth rocks green and adds white lines or dots to mimic cactus patterns. The painted rocks are then arranged in a small pot filled with sand or pebbles, creating a quirky plant-free garden.
- Materials Needed: Smooth rocks, acrylic paint, small pot, sand or pebbles
- Time Required: 25 minutes
- Skills Developed: Painting textures, arranging decor, upcycling
50. Sun-Print-Style Leaf Silhouettes (Construction Paper Hack)
The artist places leaves on dark construction paper and leaves them under sunlight for several hours. When the leaves are removed, pale silhouettes remain, mimicking the look of cyanotype prints.
- Materials Needed: Dark construction paper, leaves, sunlight
- Time Required: 2–3 hours (drying time only)
- Skills Developed: Natural printmaking, patience, observation
51. Backstitch Embroidery Sampler (ABC of Stitches)
The crafter stretches fabric in a hoop, draws a simple design, and uses backstitch to follow the lines. This teaches a foundational embroidery technique that can be used for outlines or lettering.
- Materials Needed: Embroidery hoop, fabric, needle, thread
- Time Required: 30–40 minutes
- Skills Developed: Stitching, pattern following, hand-eye coordination
52. Leaf-Print Tote Bag (Fabric Paint + Roller)
The artist coats a leaf with fabric paint, presses it onto a plain tote bag, and repeats with different leaves and colors. Once dry, the tote becomes a nature-inspired, handmade accessory.
- Materials Needed: Canvas tote bag, fabric paint, leaves, roller or brush
- Time Required: 20–25 minutes
- Skills Developed: Printmaking, fabric painting, and design variety
53. Clay Pinch Pot with a Coil Rim
The crafter forms a clay ball, presses thumbs into it to shape a pot, and adds a coiled rim for decoration. After drying, the pot can be painted, making a rustic and functional mini bowl.
- Materials Needed: Air-dry or kiln clay, water, paint (optional)
- Time Required: 30 minutes (plus drying)
- Skills Developed: Clay forming, coil work, decorative design
Simple and Fun Art Ideas for Beginners
Art is a joyful path of creativity that anyone can start, no fancy supplies or perfect skills needed, just a spark of imagination and a willingness to explore.”
- Start with small projects you can finish in one sitting to build confidence.
- Use materials you already have before buying anything new.
- Keep your designs and color choices simple at first for the best results.
- Focus on enjoying the process, not on perfection or the final product.
- Experiment with different styles and mediums to discover what you like.
- Practice regularly, even for just a few minutes, to improve faster.
- Don’t worry about mistakes, cherish them as part of learning.
- Look for inspiration around you, such as nature, everyday objects, or feelings
The Bottom Line
Art doesn’t have to be complicated or intimidating; it’s something anyone can enjoy with just a little time and creativity.
These easy art ideas show that you don’t need fancy tools or advanced skills to make something beautiful. What matters most is the joy of creating and the relaxation it brings.
No matter if you’re doodling in a notebook, painting with your fingers, or crafting with paper and clay, every project adds to your creativity.
Start with one idea that feels fun, keep it simple, and let yourself enjoy the process. With practice, you’ll not only improve but also discover your own unique style.


