Cross-hatching art is one of the simplest yet most effective ways to add depth and tone to a drawing. With just a pen or pencil, artists can create shadows, texture, and contrast using nothing more than lines.
Hatching relies on strokes in one direction, while cross-hatching layers them at different angles, building a richer range of values.
It’s a technique that feels both accessible and flexible, whether applied in quick sketches or detailed studies.
The appeal lies in its control of the lines, not only defining shade but also suggesting form. For beginners, it opens the door to shading without the need for extra tools.
What is Cross Hatching? The Basic Overview
It is a classic drawing technique that uses simple lines to create the illusion of depth, shadow, and texture.
It builds upon the foundation of hatching, where parallel lines are drawn close together to suggest tone or shading. By layering a second set of lines in a different direction, artists can achieve darker values, richer contrast, and a wider tonal range.
This method gives drawings a stronger sense of realism and form while keeping the process simple and tool-free.
Key Definitions and Purpose:
- Hatching: Parallel lines placed close together to create a light or dark tone.
- Cross hatching: Overlapping sets of hatch lines at different angles to achieve deeper shadows.
- Purpose: Builds contrast, enhances depth, and emphasizes form in a drawing.
- Application: Useful in both quick sketches and complex, detailed illustrations.
Tools and Materials for Cross Hatching Art
Before starting with crosshatching, it’s helpful to have the right tools at hand. Nothing fancy, just a few basics that make the process smoother and the results cleaner.
| Tool/Material | Purpose |
|---|---|
| Sketchbook / Paper | Smooth or slightly textured surface ideal for drawing. |
| Pencils | Soft (B) pencils for darker tones, hard (H) pencils for lighter outlines. |
| Ink Pens | Fineliners or fountain pens for crisp, consistent hatch marks. |
| Eraser | Useful for lightning outlines or refining guide marks. |
| Ruler | Helps maintain straight lines and perspective in structured sketches. |
| Markers (optional) | Adds extra tone or layering alongside hatching. |
| Sharpener | Keeps pencils sharp for precise, clean strokes. |
Cross Hatching Art: Steps to Master Your Sketches
Cross hatch shading takes practice, but breaking it down into steps makes it simple. Follow these clear stages to build tone, depth, and confidence in your sketches.
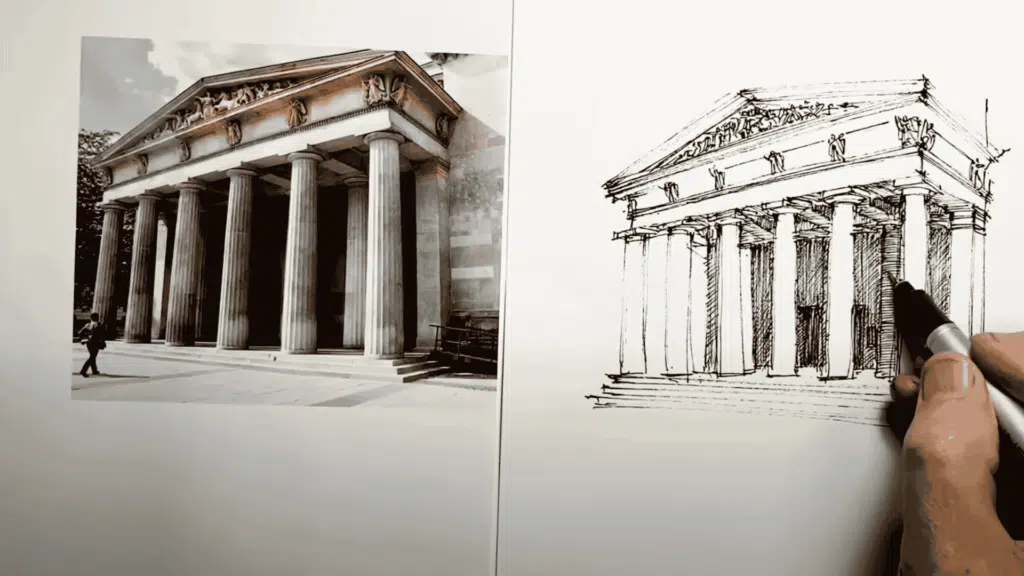
Step 1: Begin with a Clean Outline
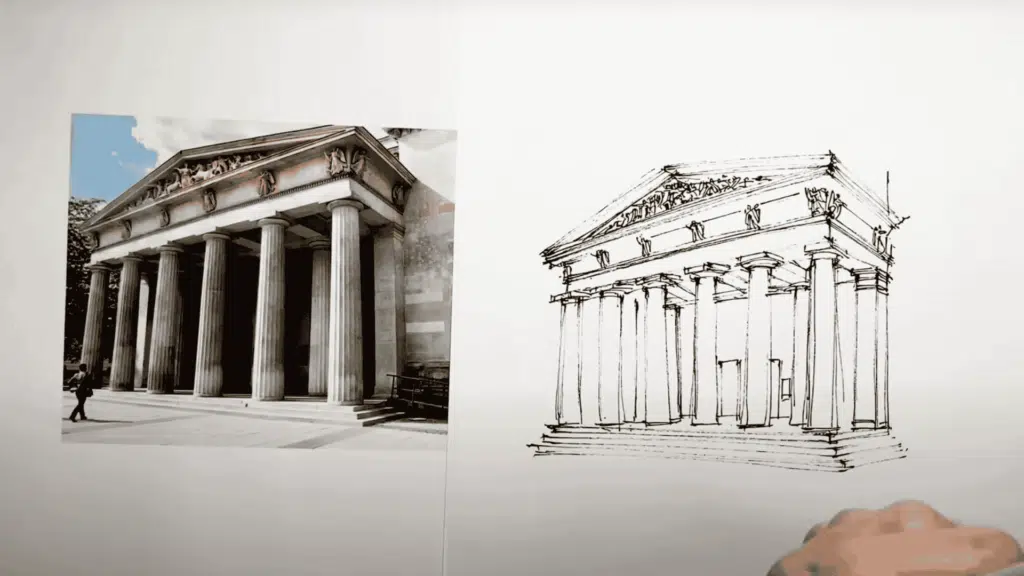
Every good drawing starts with a solid outline. Use a pencil or pen to sketch the subject clearly, keeping the strokes light and confident.
This outline acts as your roadmap, guiding where the hatch lines will sit later. Don’t focus on shading yet, just focus on capturing the main shapes and proportions.
Quick Actions:
- Use light strokes to avoid heavy marks.
- Keep lines confident, not scratchy.
- Focus only on shapes, not shadows.
- Treat the outline as your guide for hatching.
Step 2: Understand Hatching vs. Cross Hatching
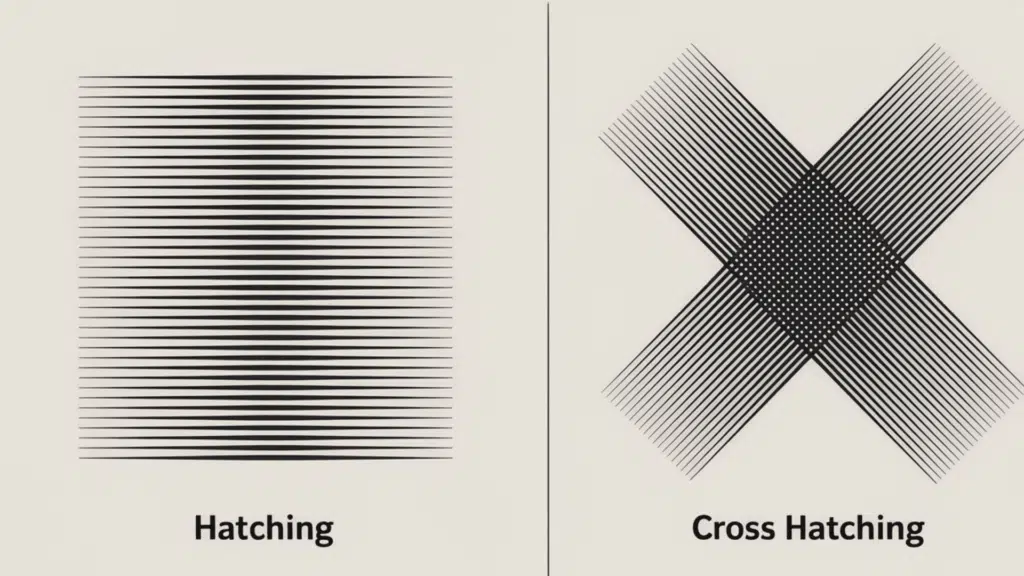
Hatching and cross hatching art may look similar, but they serve different purposes. Hatching is simply drawing parallel lines close together to create light or dark tones.
It takes it further by adding another set of lines in a different direction, making areas look richer and darker.
Quick Actions:
- Hatching: Single-direction lines for light shading.
- Cross hatching: Overlapping lines at different angles for darker tones.
- Use hatching for subtle shadows.
- Use cross-hatching to show strong contrast or depth.
Step 3: Work Out Light and Shadow Areas
Before adding any hatch lines, take a moment to study your subject. Notice where the light falls, which areas sit in gentle shade, and which parts are in deep shadow.
Planning your tones first helps you place lines with purpose, giving your drawing balance and a stronger sense of depth.
Quick Actions:
- Spot the brightest areas to keep line-free.
- Mark gentle shadows with lighter hatching.
- Reserve cross-hatching for darker sections.
- Think of the light direction before starting.
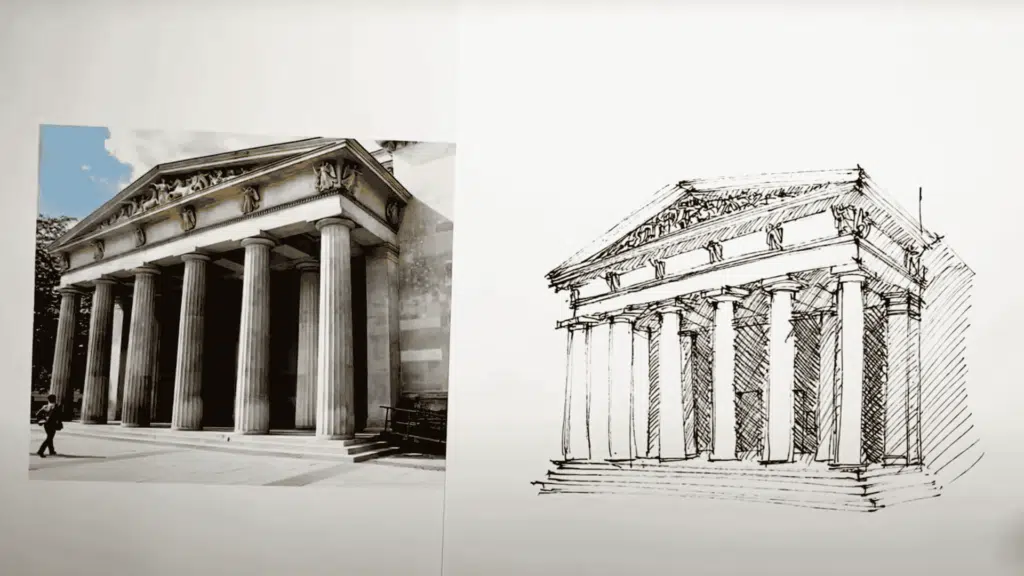
Step 4: Match Lines to Form
Hatch lines should not only add shade but also follow the shape of the object.
When strokes align with the form, they suggest volume and structure, making the drawing feel more three-dimensional. Vertical, curved, or diagonal lines can each emphasize the surface they cover.
Quick Actions:
- Use vertical lines for tall, flat surfaces.
- Curve your strokes to show round shapes.
- Angle lines to match slanted planes.
- Let line direction guide both tone and form.
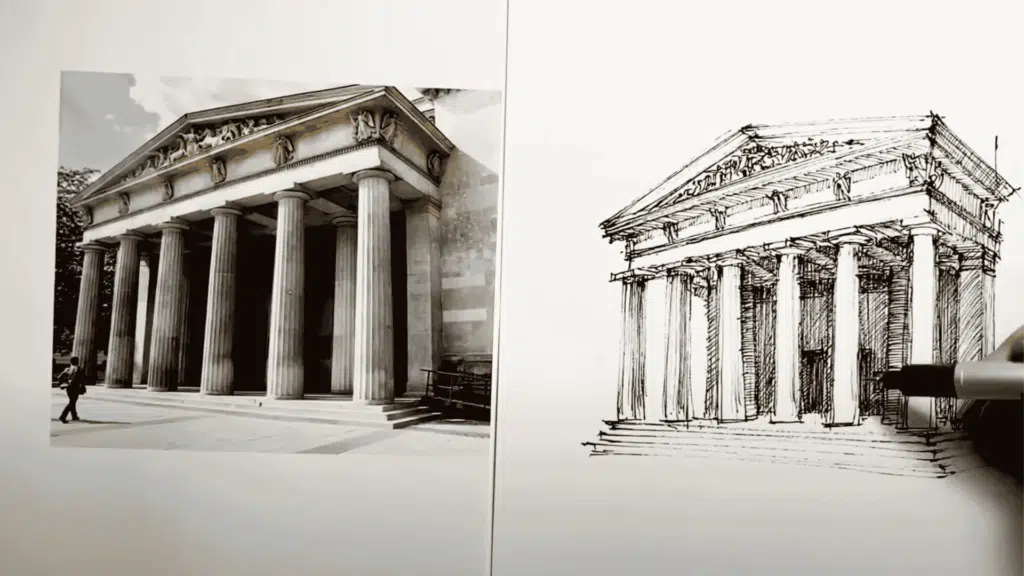
Step 5: Build Tone Gradually
Shading works best when built in layers. Begin with light, evenly spaced lines, then add more layers to deepen shadows.
Quick Actions:
- Start with light, open lines.
- Add layers slowly for darker areas.
- Tilt cross hatching slightly for softer tones.
- Keep tones balanced across the drawing.
Step 6: Refine with Direction, Pressure, and Balance
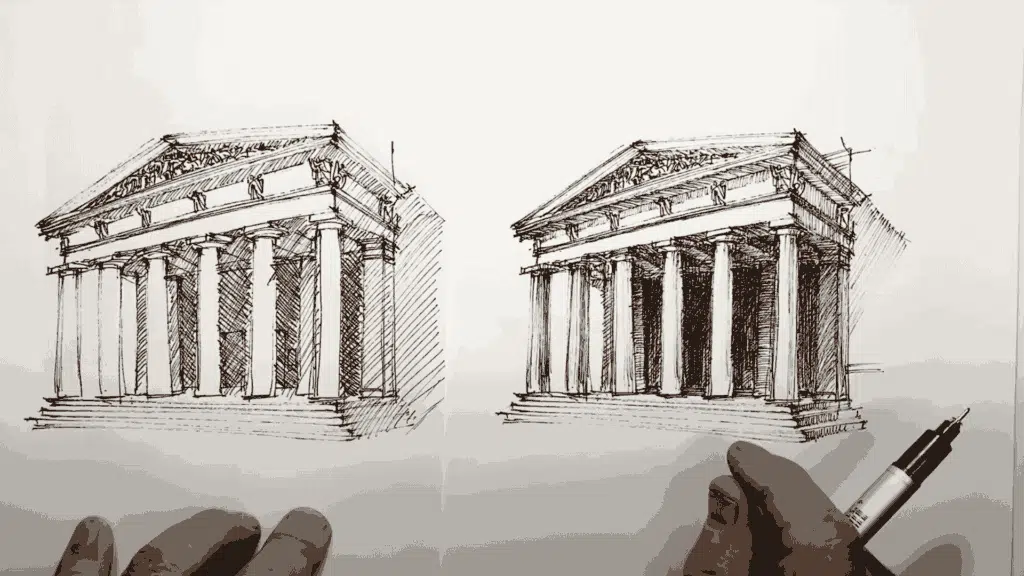
Cross hatching becomes most effective when you vary both the direction and pressure of your lines, then step back to adjust for overall balance.
Changing line direction helps define different surfaces or planes, while altering pressure creates tonal variety. Light strokes suggest soft shading, and firm strokes bring bold, dark shadows.
Quick Actions:
- Shift the line direction to show separate surfaces.
- Use light pressure for soft shading and harder pressure for darker areas.
- Mix directions and line weights to add depth and variety.
- Step back to check the overall balance in your sketch.
- Add loose layers of lines to tie textures together.
- Deepen shadows with extra layers, but leave highlights open for contrast.
For more detailed instructions, refer to the YouTube video below:
Common Mistakes to Avoid
Cross-hatching is a simple technique, but a few common errors can weaken the drawing. Being mindful of how you place lines, build tones, and follow light will keep your sketches clean and realistic.
- Avoid random hatch lines that ignore the object’s form.
- Don’t darken too quickly; build tones gradually.
- Skip uniform cross-hatching; vary spacing and angles.
- Watch the light source to maintain consistent shadows.
- Avoid making all lines the same length; vary them to show texture.
- Don’t crowd every area with lines; leave highlights open for contrast.
- Resist overworking one section; keep balance across the whole drawing.
- Don’t ignore perspective; lines should follow the form of the subject.
The Last Hatching
Cross-hatching isn’t just a shading method; it’s a way to bring light, shadow, and form to life through simple intersecting lines.
Start with clear outlines, plan your tones, and align strokes with the shapes you draw.
Build layers gradually, vary direction and pressure, and step back often to check balance.
Avoid rushing or ignoring the light source. With steady practice, your lines will gain confidence, turning even the simplest sketch into art with depth, clarity, and personality.