Air-dry clay enthusiasts often ask: Can you paint air dry clay to create stunning, professional results? The answer is absolutely yes.
This guide promises to reveal everything about painting air-dry clay successfully. From choosing the right paints to mastering application techniques, you’ll learn professional methods that work every time.
Here’s what you’ll find: step-by-step painting processes for various paint types, creative project ideas like jewelry dishes and ornaments, plus expert tips for sealing and protection your finished pieces.
No matter if you’re crafting personalized gifts or home décor pieces, these proven techniques will help you achieve professional-looking results. Let’s turn your clay creations into colorful masterpieces!
Understanding the Basics of Air Dry Clay
Air-dry clay is exactly what it sounds like: clay that hardens without the need for a kiln or oven. This convenient crafting material cures naturally at room temperature, usually within 24-72 hours, depending on thickness and humidity.
What makes it different from regular clay?
- No firing required, and saves time and equipment costs
- Lighter weight when dry compared to ceramic clay
- More porous texture once cured
- Less durable than kiln-fired ceramics
- Perfect for decorative items rather than functional pottery
Common types include:
- Paper-based clays: lightweight, smooth finish
- Stone-based clays: heavier, more natural texture
- Polymer-style clays: flexible, strong when dry
Can you paint air dry clay? Absolutely yes, the porous nature of air-dry clay makes it highly paintable once fully cured. Unlike wet clay that can crack under paint, dried pieces provide a stable canvas for decoration.
However, this same porosity means that the clay absorbs paint quickly, so proper preparation becomes crucial for achieving the best results.
The Right Time to Paint Your Clay
- Timing is everything when painting air-dry clay: The golden rule? Wait until your piece is completely dry before applying paint to it. This typically takes 24-72 hours, but thicker pieces might need up to a week.
- Knowing it’s ready: The clay should feel room temperature to the touch, neither cool nor damp. It’ll also change color slightly, becoming lighter as moisture evaporates. Tap it gently; fully dried clay produces a hollow sound rather than a dull thud.
- Painting too early leads to disaster: Wet clay will crack, warp, or crumble when subjected to the application of paint. The moisture trapped inside creates bubbles and uneven coverage, ruining your hard work.
- Temperature and humidity also matter: Cold or humid conditions significantly slow down the drying time. If you’re in a rush, place your piece in a warm, dry spot with good air circulation. Avoid direct heat sources that could cause the material to crack.
How to Paint Air Dry Clay? Step-By-Step Painting Techniques
Painting air-dry clay is a creative way to change simple handmade pieces into colorful, polished works of art.
Below are four painting methods: acrylic, chalk, watercolor, and rub ’n buff, explained in detail so readers can decide which finish suits their projects best.
1. Acrylic Paint: Classic and Reliable

Acrylic paint is the most popular choice for air-dry clay. It is affordable, dries quickly, and provides a smooth, clean finish.
- Preparation: Once the clay piece is fully dry, preferably after an overnight wait, any rough spots should be sanded with fine-grit sandpaper. Wiping the piece with a damp cloth ensures a smooth base.
- Application: The primer is optional, although it can improve brightness. Thin, even coats of acrylic applied with a soft brush work best. Acrylic dries very fast, and the process can be sped up using a blow dryer set on low.
- Finish: The result is a solid, even coat of color, making acrylic an excellent base for further decoration or layered designs.
Recommended Paints:
- Apple Barrel Acrylic Craft Paint: Budget-friendly and available in a wide range of colors.
- Liquitex Basics Acrylic: Richer pigmentation, perfect for brighter finishes.
2. Chalk Paint: Soft and Velvety

Chalk paint offers a matte, velvety finish that combines the rustic and elegant. Commonly used on furniture, it also works beautifully on air-dry clay.
- Preparation: As with acrylic, the clay should be fully dried and smoothed before painting.
- Application: The paint is brushed on in smooth strokes. Chalk paint tends to be thicker, requiring fewer coats to achieve a smooth finish. Soft whites create a neutral look, while muted blues or greens offer vintage charm.
- Improvements: A small amount of brown wax can be added as a layer once the paint has dried. Using a lint-free cloth, apply and buff until achieving the desired depth. This technique is ideal for home décor items, like bowls and trays.
Recommended Paints:
- Dixie Belle Chalk Paint: Professional-quality, with a great color selection.
- Annie Sloan Chalk Paint: The original chalk paint, renowned for its velvety finish.
3. Watercolor: Light and Natural

Watercolor paint lends clay pieces a delicate, translucent appearance, making them perfect for nature-inspired designs, such as leaves or flowers.
- Preparation: A smooth, dry surface works well, though lightly dampening the clay beforehand can make blending easier.
- Application: A wet brush is dipped into watercolor paint, then gently brushed across the clay in light strokes. Excess water should be removed from the brush to avoid runny results.
- Finish: The result is organic, with natural gradients in color. For more controlled designs, watercolors can be layered over acrylic or chalk-painted bases.
Recommended Paints:
- Winsor & Newton Cotman Watercolors: Student grade, affordable and reliable.
- Prang Watercolor Set: Kid-friendly and easy for beginners.
4. Rub ’n Buff: A Touch of Metallic Glam

Rub ’n Buff adds shimmer and sophistication with a metallic wax finish. It is best used for accents and highlights.
- Preparation: The clay should already be painted and dry, ideally with an acrylic or chalk base.
- Application: Using a small brush or fingertip, a small amount of Rub ’n Buff is applied to edges or raised details.
- Finish: The product is gently buffed with a soft cloth to reveal a metallic sheen, perfect for rims, patterns, or decorative highlights.
Recommended Products:
- Rub ’n Buff Gold Leaf: Classic warm gold finish.
- Rub ’n Buff Silver Leaf: Bright silver shine for cooler-toned projects.
Sealing and Protecting
Regardless of the paint type, sealing ensures durability. A clear acrylic spray, Mod Podge, or decoupage medium can be applied in thin layers, allowing for a drying time between coats.
This step is especially important for outdoor or functional pieces.
For a hands-on walkthrough, watch the full tutorial below:
Best Painting Methods for Air Dry Clay
| Method | Look & Finish | How It Works on Air-Dry Clay | Best Use Cases | Tips for Success |
|---|---|---|---|---|
| Solid Base Coating | Even, opaque, polished surface | Covers clay fully with uniform color; strong base for detailing | Jewelry, bowls, ornaments, and everyday crafts | Use multiple thin coats instead of one thick layer |
| Dry Brushing | Textured, rustic highlights | Lightly brushes paint only on raised areas, enhancing texture | Sculptures, relief designs, rustic décor | Keep the brush almost dry for subtle effects |
| Sponging/Stippling | Speckled, dappled, faux-stone effect | Adds depth and natural texture using the dabbing technique | Faux stone bowls, abstract art, kids’ crafts | Use a sponge for soft effects; a stiff brush for speckles |
| Layering & Blending | Gradient, multi-tone, shaded finish | Builds depth with overlapping colors and gentle blending | Abstract art, marbled dishes, decorative pieces | Blend while slightly wet for smoother transitions |
| Fine Detailing | Intricate lines and patterns | Painted over a solid base for designs like florals or geometrics | Custom artwork, lettering, and ornaments | Use fine-tip brushes or pens for control |
Creative Project Ideas to Try with Air Dry Clay

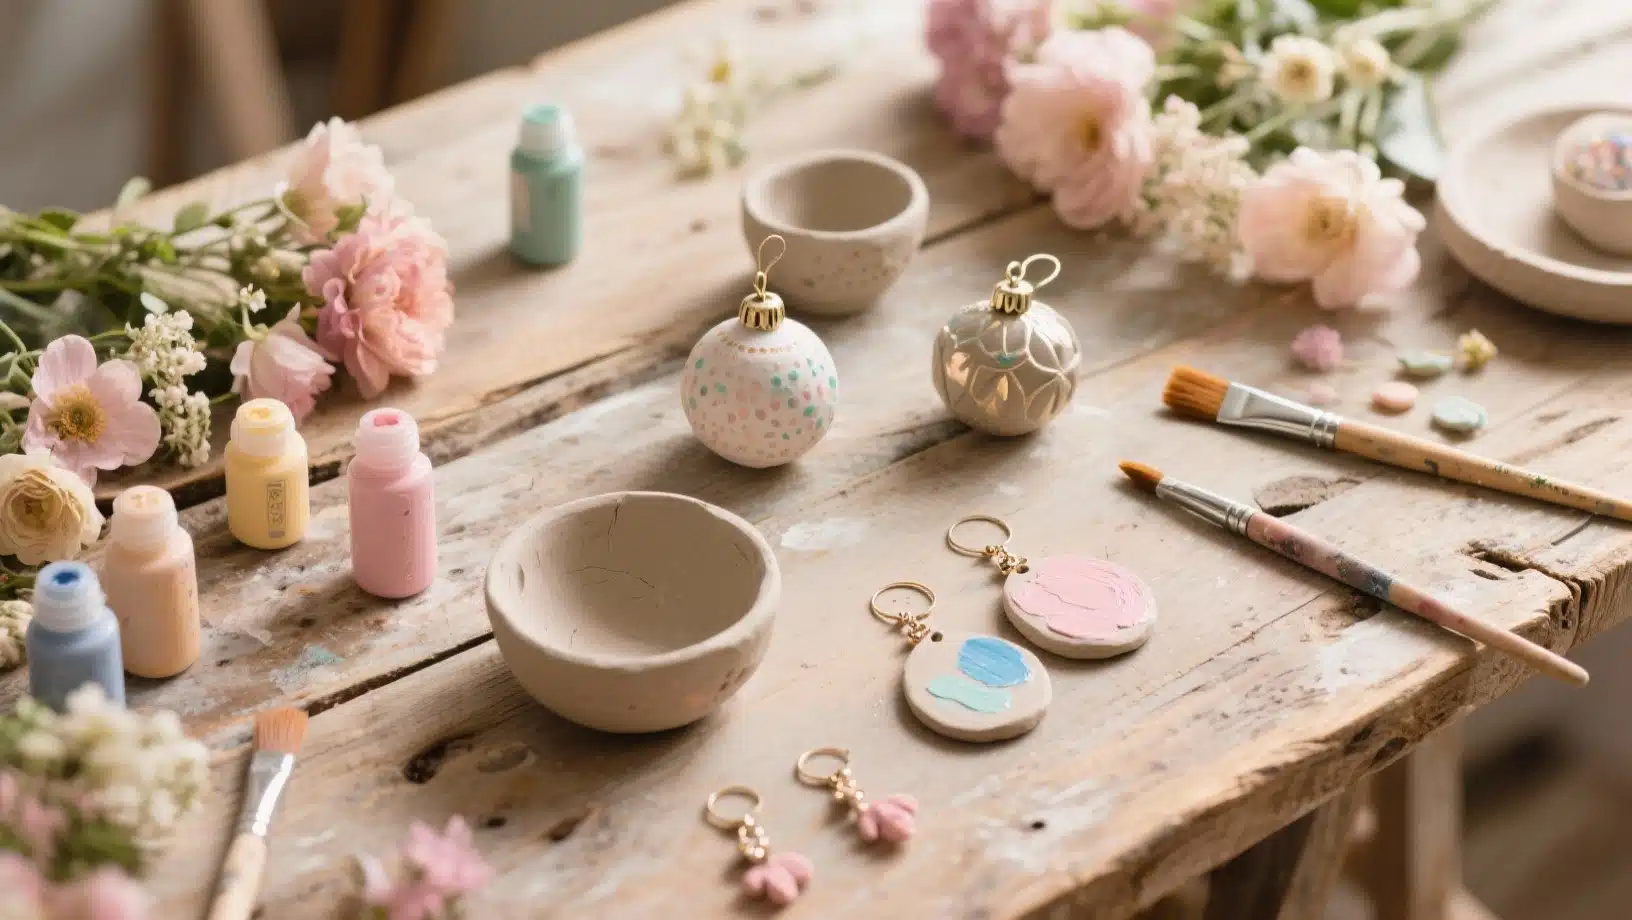
1. Personalized Jewelry Dishes
Jewelry dishes are one of the most popular air-dry clay projects. They’re simple to shape and limitlessly customizable.
Makers can create small trinket bowls to hold rings or earrings, then finish them with acrylic paint or chalk paint for a smooth, finished look.
Adding a metallic accent around the rim gives them a polished, elegant look that makes them gift-worthy.
2. Handmade Earrings
Air-dry clay’s lightweight quality makes it perfect for statement jewelry. Earrings can be shaped with cookie cutters or molded freehand into geometric or organic forms.
Once dry, the pieces can be sanded smooth, painted in bold colors, and sealed for durability. With just a few earring hooks, the project changed into wearable art.
3. Custom Plant Pots
Mini planters made from air-dry clay bring personality to indoor greenery. These can be simple round pots or textured covers for succulents.
Adding carved or stamped designs before drying gives them character, and earthy paint tones add a rustic, handmade charm. They make excellent décor pieces or thoughtful handmade gifts.
4. Decorative Wall Hangings
Flat clay shapes can be strung together with twine to create beautiful wall hangings.
Whether geometric designs or nature-inspired cutouts, these pieces add artistic flair to any space.
Layering different painting techniques, such as sponging, blending, or adding metallic accents, changes simple clay shapes into striking statement art.
5. Clay Coasters
Air-dry clay coasters are practical yet stylish. Makers can roll out flat circles or squares, then press in textures with stamps, lace, or leaves before the clay dries.
Once hardened, the pieces can be painted to match any décor style. A waterproof sealer is essential here, ensuring the coasters withstand everyday use.
6. Festive Ornaments
Seasonal ornaments are an easy and joyful project with air-dry clay. From stars and snowflakes for the holidays to hearts for Valentine’s Day, the possibilities are limitless.
A simple watercolor wash or a touch of glitter gives these ornaments a whimsical finish, making them perfect for decorating trees, gifts, or even walls year-round.
7. Customized Keychains
Tiny clay charms can easily become personalized keychains. Shaping initials, miniature figures, or symbols adds a meaningful touch.
After painting them in lively colors and sealing them for strength, these handmade pieces can be attached to key rings or backpack clips. They’re small projects but make a big impression.
8. Textured Candle Holders
Clay candle holders bring warmth to any room. Makers can press lace, fabric, or even leaves into the clay before drying to create textured designs.
Once painted, a bit of dry brushing highlights the patterns beautifully.
These holders are ideal for tealights, adding a cozy, handmade touch to a space.
9. Decorative Name Tags
Air-dry clay can also be changed into custom name tags for gifts or home organization. Rolled flat and cut into simple rectangles or ovals, the clay can be stamped with names or short words before it dries.
After painting and sealing, these tags make thoughtful gift labels or personalized décor accents.
Ready to Kickstart Your Clay Creations?
Painting air-dry clay opens up endless creative possibilities for your projects. With the right timing, proper preparation, and suitable paints, you can turn simple clay pieces into vibrant works of art that last for years.
Key takeaways: Always wait for complete drying, select suitable paints for porous surfaces, and seal your finished work for added durability.
These simple steps make the difference between amateur attempts and professional-looking results.
What’s your next creative project? Whether it’s decorative bowls, garden sculptures, or kids’ craft projects, you now have the knowledge to paint them successfully. Don’t let plain clay limit your imagination.