Ready to turn simple shapes into amazing art?
Block printing is like having a personal printing press in your hands! This ancient technique lets you create beautiful patterns on paper and fabric using carved blocks and ink.
If you’re creating custom t-shirts, greeting cards, or decorating your room, block printing gives you the power to design and reproduce your own artwork repeatedly.
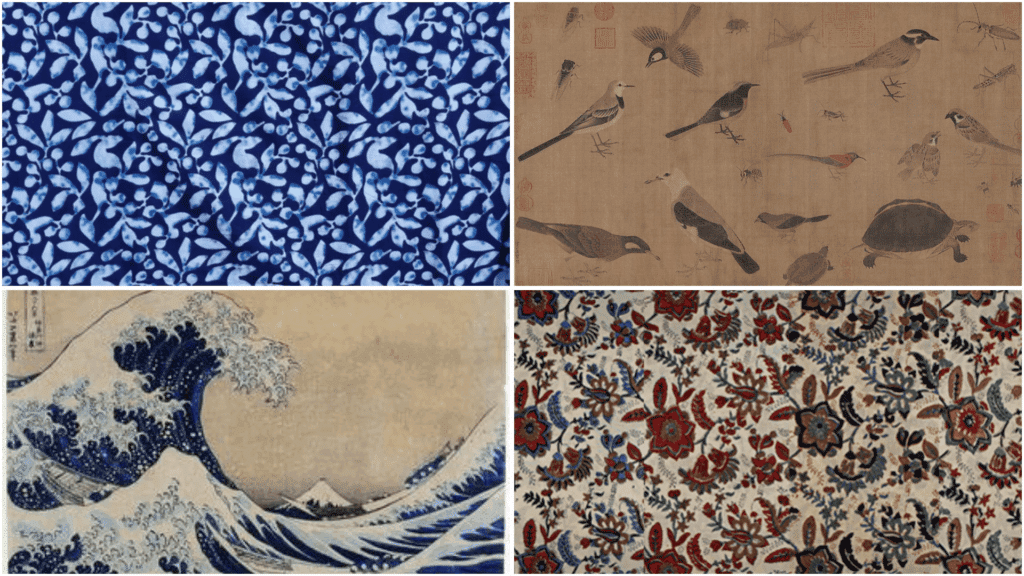
The world’s oldest printed book, the Diamond Sutra, created in 868 AD, was produced using block printing in China over 1,000 years ago.
With modern materials, you can try the same basic techniques ancient artists used—dive into this hands-on art form that can turn anyone into a printer!
What Is Block Printing?
Block printing is a simple art technique where you carve a design into a flat block, then use it like a stamp to make multiple copies. The raised parts of your carved design pick up ink and transfer it to paper or fabric when you press down.
- Woodcut is the oldest type, where artists carve intricate designs into hard wood blocks. Linocut uses softer linoleum material that’s easier to carve, making it perfect for beginners.
- Reduction printing creates colorful images by carving away more of the same block after each color is printed.
Many cultures, particularly in India, have employed carved wooden blocks to print intricate patterns on fabric for centuries. Each technique creates unique textures and bold, striking images.
Historical Snapshot
Block printing has a rich history spanning thousands of years across different cultures. This ancient art form originated in China and has since influenced artistic traditions worldwide.
| REGION/CULTURE | TECHNIQUE | KEY FEATURES |
|---|---|---|
| Ancient China | Woodblock printing | Earliest known block printing, spread to Asia and Europe |
| Japan | Ukiyo-e | Famous floating world prints, influenced Western art movements |
| India – Rajasthan | Dabu technique | Mud-resist printing with natural dyes on cotton fabrics |
| India – Rajasthan | Bagru printing | Traditional hand-block printing using vegetable dyes |
These diverse traditions show how block printing adapted to local materials and cultural needs. Today, artists worldwide continue to draw inspiration from these time-tested techniques.
Essential Supplies & Tools
Essential tools and materials are at the heart of traditional woodblock printing. Each item serves a specific role to ensure precision, color depth, and durability of the finished artwork.
- Paper Preparation: Use moistened printing paper, a mizubake brush, plastic bags, moist newspaper, and a freezer to maintain the right dampness for smooth printing.
- Pigments & Colors: Traditional natural pigments, sumi ink for tonal depth, and pearlescent pigment (paru with mica) for shimmering effects.
- Printing Tools: Cherrywood blocks, a baren with a bamboo sheath, camellia oil with gauze for friction control, and a metal guard tool.
- Alignment & Finishing: Kento registration marks, kento nomi blade for adjustments, and heavy cardstock boards for flat, even drying.
Together, these essentials allow printers to achieve a balance between tradition and innovation. With them, each sheet transforms into a timeless woodblock print.
Step-by-Step Tutorial On How to Block Print
Block printing exists in many forms across cultures, each with unique techniques and purposes as shown in the table below. Here’s a step-by-step tutorial for Ukiyo-e, a traditional Japanese art form.
Step 1: Prepare And Moisten The Paper
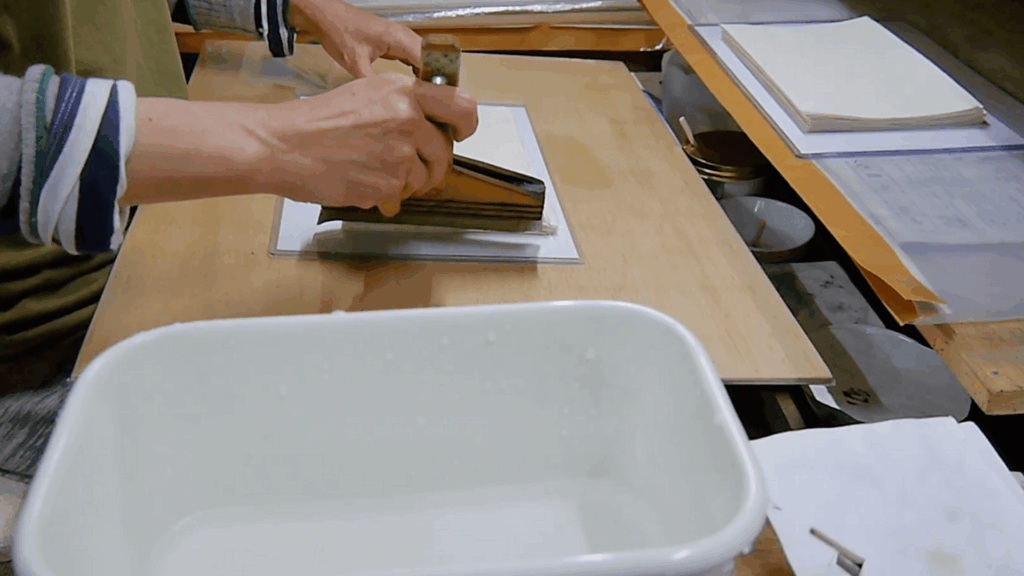
Before printing, paper is brushed with water and stacked with dry sheets overnight for even dampness, preventing distortion and helping pigments sink smoothly into the fibers.
Step 2: Print The Key Block For Registration
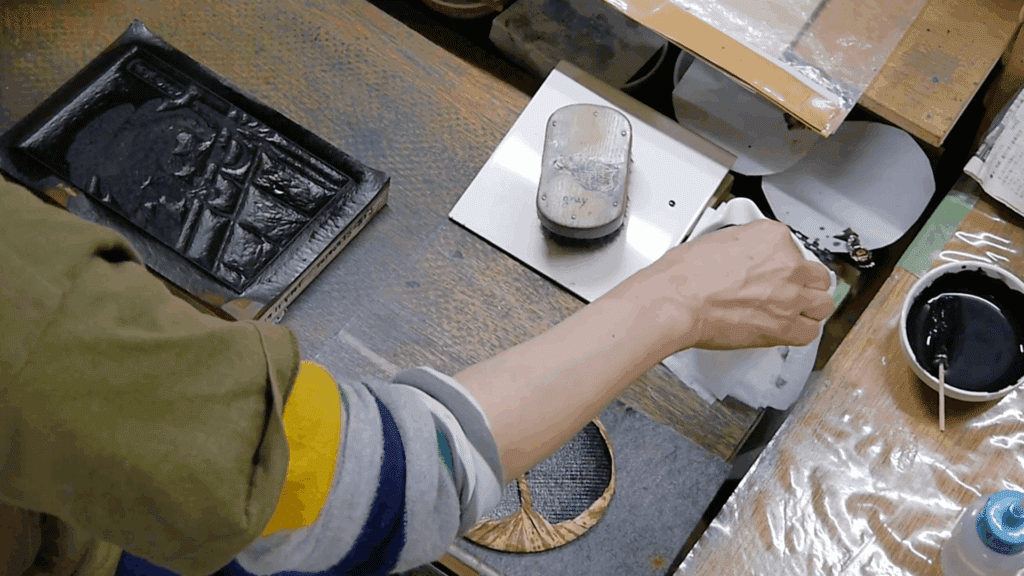
The key block, containing detailed lines, is printed first. This step establishes the foundation for alignment of all subsequent colors. Careful pigment brushing prevents pooling in fine lines, ensuring sharp outlines and accurate registration.
Step 3: Apply Base And Background Colors
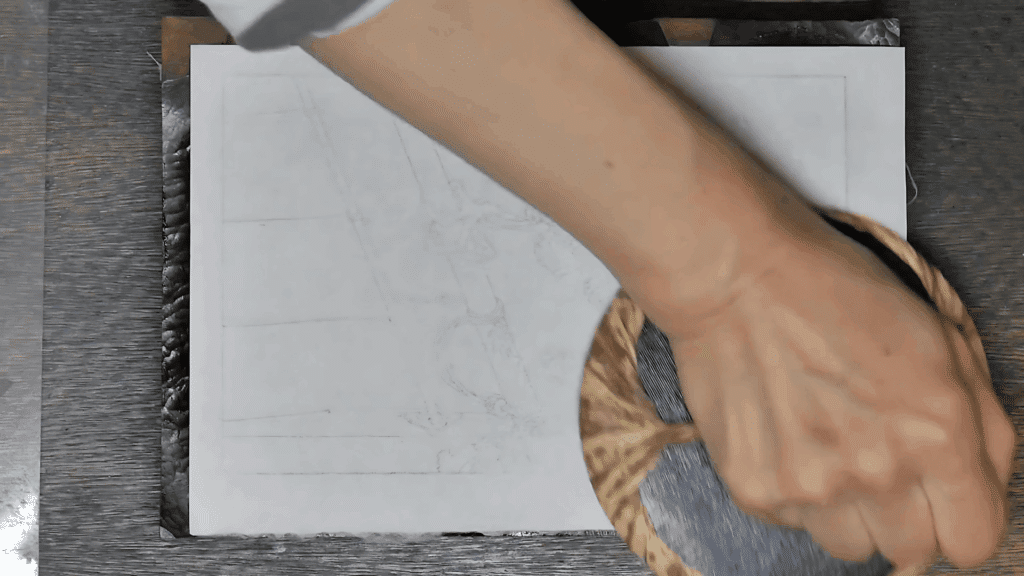
Flat areas like feathers need more pressure and even pigments; printers use camellia oil on the baren to reduce friction and adjust registration marks to correct misalignments for perfect color layering.
Step 4: Mix And Layer Additional Shades
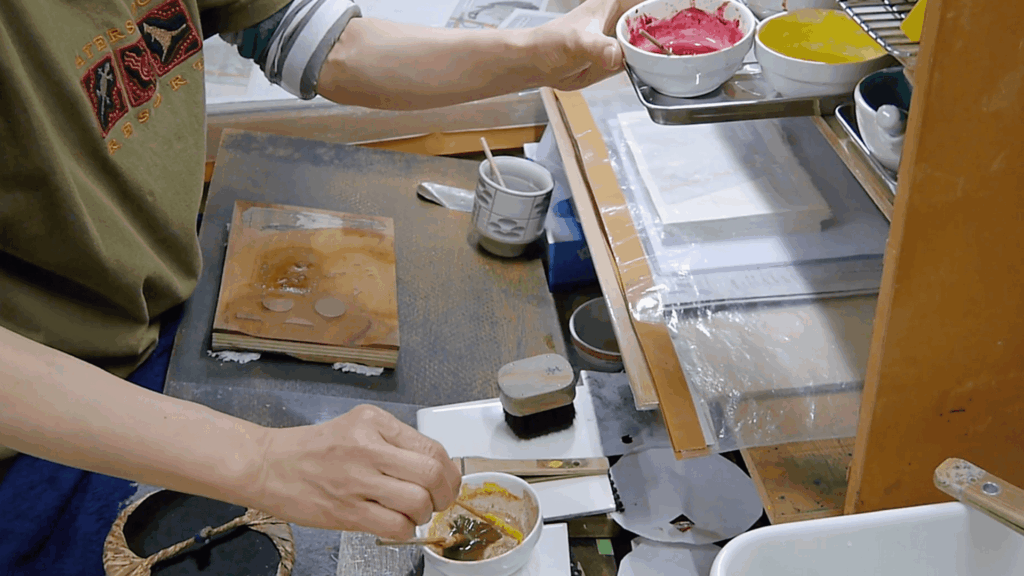
New tones arise by blending pigments, often softened with sumi ink for gray hues; multiple impressions can share one block, while fine details like ornaments or flags are layered to add depth and vibrancy.
Step 5: Finish With Special Effects And Drying
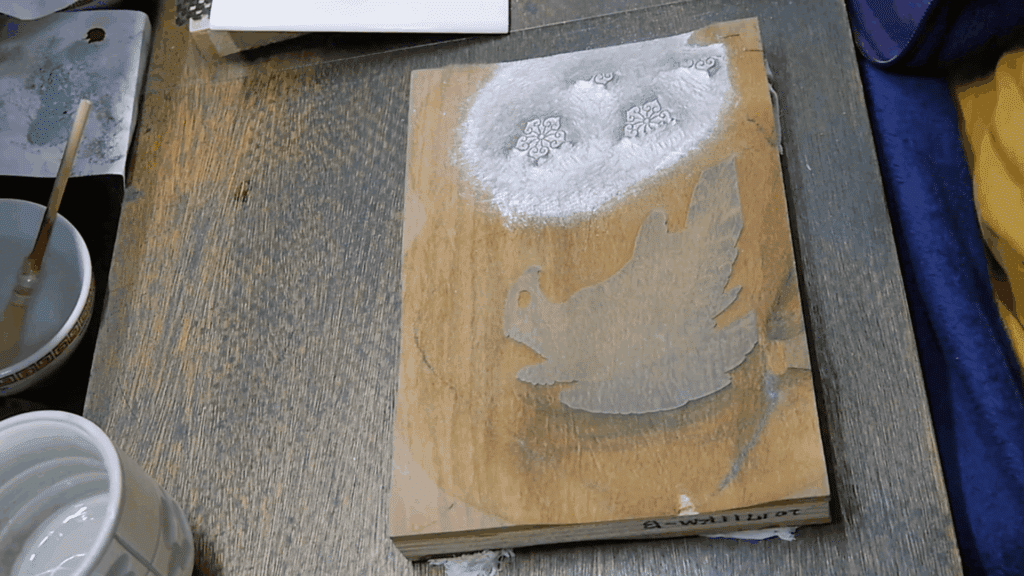
Pearlescent pigment adds shimmer to colors, prints are embossed with maker details, dried flat between boards to prevent warping, then inspected, wrapped, and readied for delivery.
Watch How It’s Done: Video Tutorial
For more information, check out this video tutorial by DavidBull
Fabric vs. Paper Printing: What’s Different?
Block printing works on both fabric and paper using similar techniques. The primary differences stem from the materials used, preparation methods employed, and finishing steps taken.
| ASPECT | FABRIC PRINTING | PAPER PRINTING |
|---|---|---|
| Ink Type | Fabric-specific inks that bond with fibers | Standard printing or acrylic inks |
| Surface Prep | Must be pinned taut to prevent shifting | Can lay flat or be held in place |
| Drying Time | Longer drying, requires heat-setting | Quick air-drying, ready to handle |
| Finishing | Needs washing to remove excess dye | No additional treatment needed |
| Handling | More stable once pinned properly | May shift under printing pressure |
Both methods create beautiful results, but fabric printing requires extra steps for durability. Paper printing offers more immediate gratification and easier experimentation for beginners.
Project Ideas & Inspiration On Different Block Printing Styles
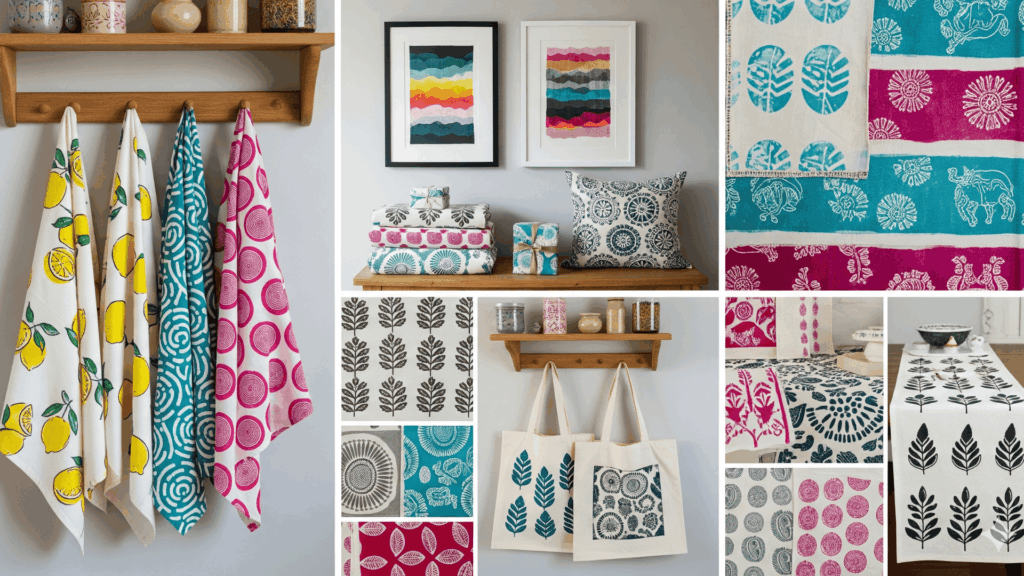
Block printing opens up endless creative possibilities for both beginners and experienced artists. Whether you’re decorating your home or making unique gifts, these projects will inspire your next creation.
- Kitchen Essentials: Create custom tea towels and kitchen towels with simple fruit or geometric patterns that add personality to your cooking space.
- Home Décor: Design matching pillow covers using repeated motifs or create one-of-a-kind gift wrapping paper for special occasions.
- Layered Artwork: Experiment with reduction printing to build complex, multi-colored designs from a single carved block.
- Cultural Fusion: Combine traditional Indian techniques, such as Dabu mud-resist patterns, with contemporary color schemes and modern layouts.
- Fabric Accessories: Print on canvas bags, napkins, or table runners for functional art pieces.
These projects help you practice different techniques while creating beautiful, practical items. Start with simple designs and gradually work toward more complex, multi-layered ones as your skills develop.
Troubleshooting Tips
Even experienced printers encounter problems, but most issues have straightforward solutions. Don’t worry if your first prints aren’t perfect, that’s how you learn!
- Crooked Prints: Use registration marks or tape to line up your block in the same spot every time, or create a simple cardboard guide
- Patchy Ink Coverage: Roll your ink evenly on a smooth surface first, then apply it to your block with steady, even pressure
- Too Much Ink: If your print looks blotchy, use less ink and roll it thinner; a little goes a long way
- Smudged Details: Clean your carved lines regularly with a small brush to remove built-up ink that fills in fine details
- Uneven Pressure: Press firmly and evenly across the entire block, or use a wooden spoon to rub the back
Remember, handmade charm comes from slight variations, perfect imperfection is what makes block printing special and unique!
Final Print
Congrats! You’re ready to create your first block print! Begin with simple shapes, such as leaves or geometric patterns, and then progress to more complex designs as your confidence grows.
Block printing connects you to thousands of years of artistic tradition, while allowing you to create something completely unique.
If you’re decorating fabric, making greeting cards, or just having fun with colors and patterns, you’re joining a global community of artists who love this hands-on craft.
What will you create first? Drop a comment below and share your block printing ideas. We’d love to see what inspires you to pick up that carving tool!

