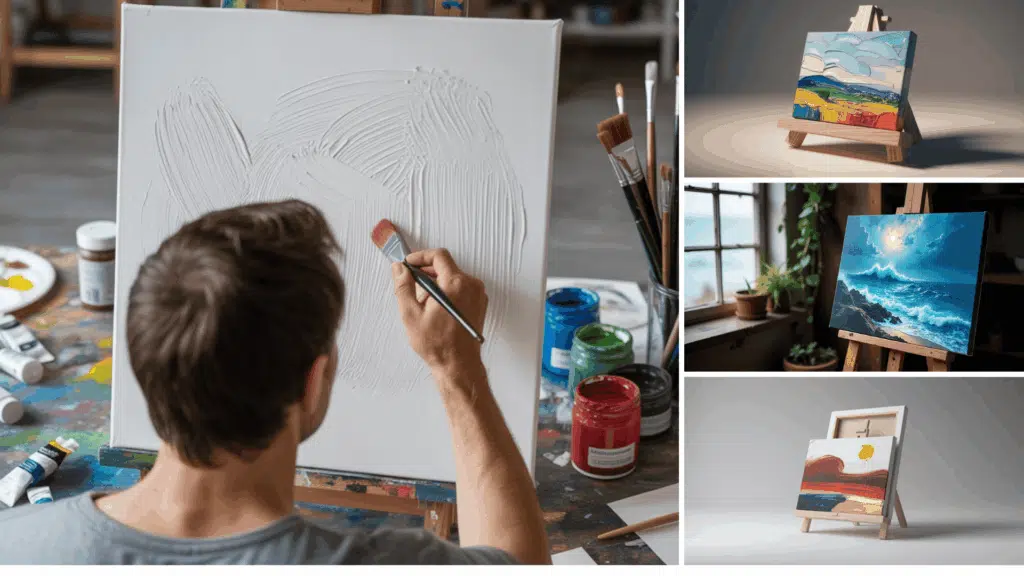
Have you ever looked at a beautiful acrylic painting and thought, “I could never create something like that”? Well, think again!
Acrylic painting is actually one of the most beginner-friendly art forms out there, and canvas is your perfect playground to start experimenting.
Unlike oils that take forever to dry or watercolors that can be tricky to control, acrylics are forgiving.
Looking for a fresh creative outlet or simply want to find your artistic side? This tutorial will cover all the basics you need. Ready to get those hands a little messy?
Why Choose Acrylic on Canvas?
If you’re just starting out, acrylic on canvas is honestly your best friend. It’s like the reliable car of the art world, dependable, practical, and gets you where you want to go without drama.
Quick drying time and layering potential:
Acrylics dry in approximately 30 minutes, allowing you to build layers without waiting. Made a mistake? Just paint right over it once it’s dry.
Bold, bright colors that pop on canvas:
Canvas has a lovely texture that beautifully grabs onto paint. Your colors will look vibrant and rich, and the canvas adds natural interest to your brushstrokes.
Affordable and widely available supplies:
You can get started for under $30 at most craft stores. No need to break the bank or hunt down specialty art shops.
Acrylic on Canvas vs Other Color Types
| Feature | Acrylic on Canvas | Oil on Canvas | Watercolor on Canvas | Gouache on Canvas |
|---|---|---|---|---|
| Drying Time | Fast-drying (minutes to hours) | Very slow (days to weeks) | Very fast (seconds to minutes, needs special prep) | Moderate (faster than oils, slower than watercolor) |
| Finish/Look | Matte to glossy, depending on the medium used | Rich, glossy, and luminous | Transparent but less vibrant on canvas | Matte, opaque finish |
| Ease of Use | Beginner-friendly, easy cleanup with water | Requires solvents, more technical | Harder to control; canvas must be primed | More forgiving than watercolor |
| Layering | Easy to layer and correct mistakes | Excellent blending, but harder to fix once dry | Limited layering, colors may lift | Can rework layers but may crack if too thick |
| Durability | Long-lasting, flexible once dry | Extremely durable and museum-quality longevity | Less durable on canvas vs paper | Moderately durable, less stable than acrylic |
| Ideal For | Beginners to professionals; diverse in many styles | Professional fine art, realistic and detailed work | Loose, fluid, expressive painting | Illustrations, posters, flat-color artwork |
Essential Tools and Materials for Acrylic on Canvas
Now that you’re sold on acrylics, let’s talk about what you actually need to get started. The good news? You don’t need to buy out the entire art store.
| Category | Items Required |
|---|---|
| Canvas | 16×20 inch canvas (recommended) or 8×10 inch canvas |
| Brushes | 1 large flat brush (background & grass) 1 medium round brush (flowers) 1 small detail brush (jar & stems) |
| Paints | White, Brown, Green, Blue, Yellow, Orange |
| Other Supplies | Cup of water, Paper towels, Palette for mixing, Easel or flat painting surface |
Step-by-Step Acrylic Painting on Canvas
Ready to get in? Let’s create your first acrylic masterpiece with a simple project that’ll build your confidence and teach you the basics.
Step 1: Prepare Your Workspace
Set up your canvas on an easel or a flat surface. Have a cup of clean water, a few paper towels, and all your brushes ready.
Choose either a 16×20-inch canvas (recommended for clarity) or an 8×10-inch canvas. Place your paints on a palette where they’re easy to reach.
Step 2: Paint the Background
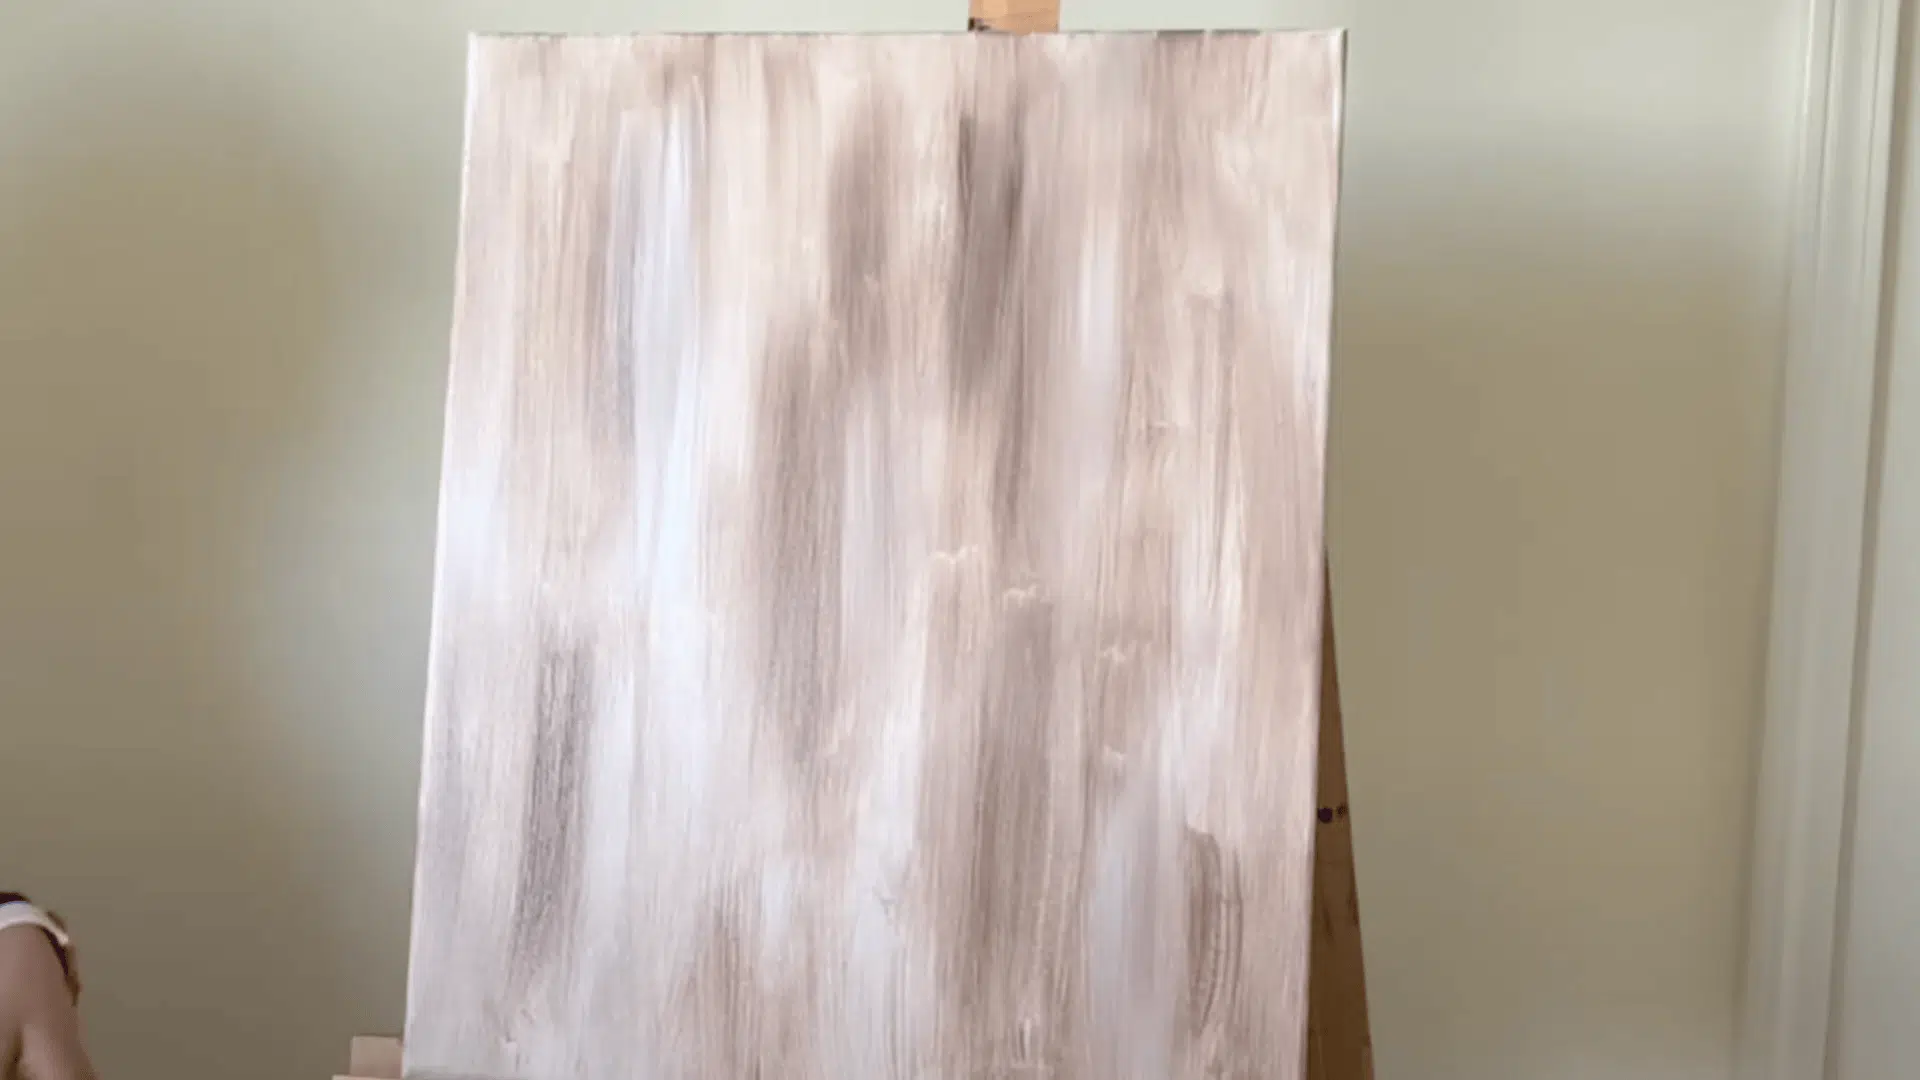
Dip your largest flat brush in water, wipe off excess, and load a small amount of brown paint on the tip. Apply vertical strokes across the canvas, keeping the motion loose and random.
Add water as needed to thin the paint and avoid harsh lines. Once the surface is mostly covered, blend in tiny touches of white paint to create soft variations and a textured, wood-like feel.
Don’t worry about perfection; slight differences add depth.
Step 3: Add Vertical Plank Lines & Knots
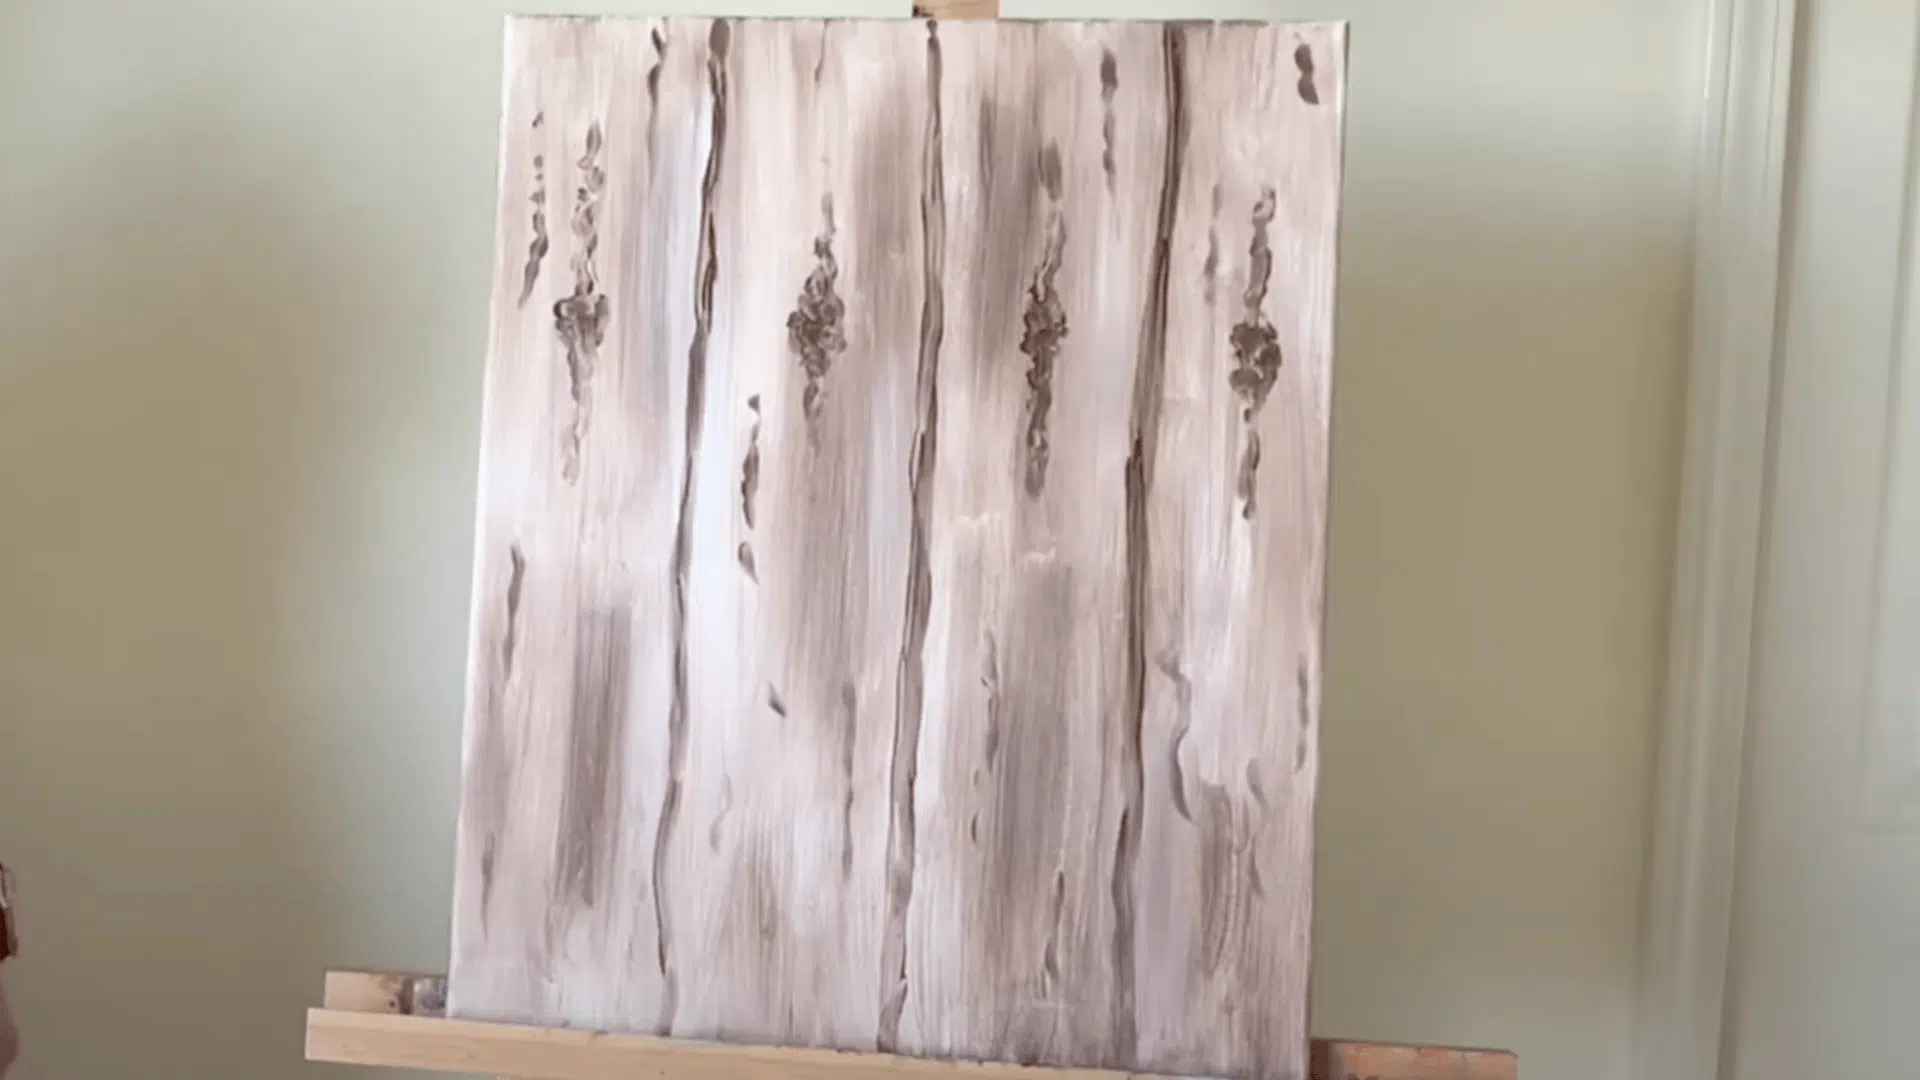
Switch to your small round brush. Mix a little brown paint with a few drops of water for smoother strokes. Add three vertical lines spaced across the canvas to resemble wood planks.
Next, paint irregular, wiggly “knots” on the planks by dabbing paint and drawing uneven circular lines.
Keep these shapes; organic wood is never perfectly straight. Let the background dry before moving forward.
Step 4: Paint the Grass
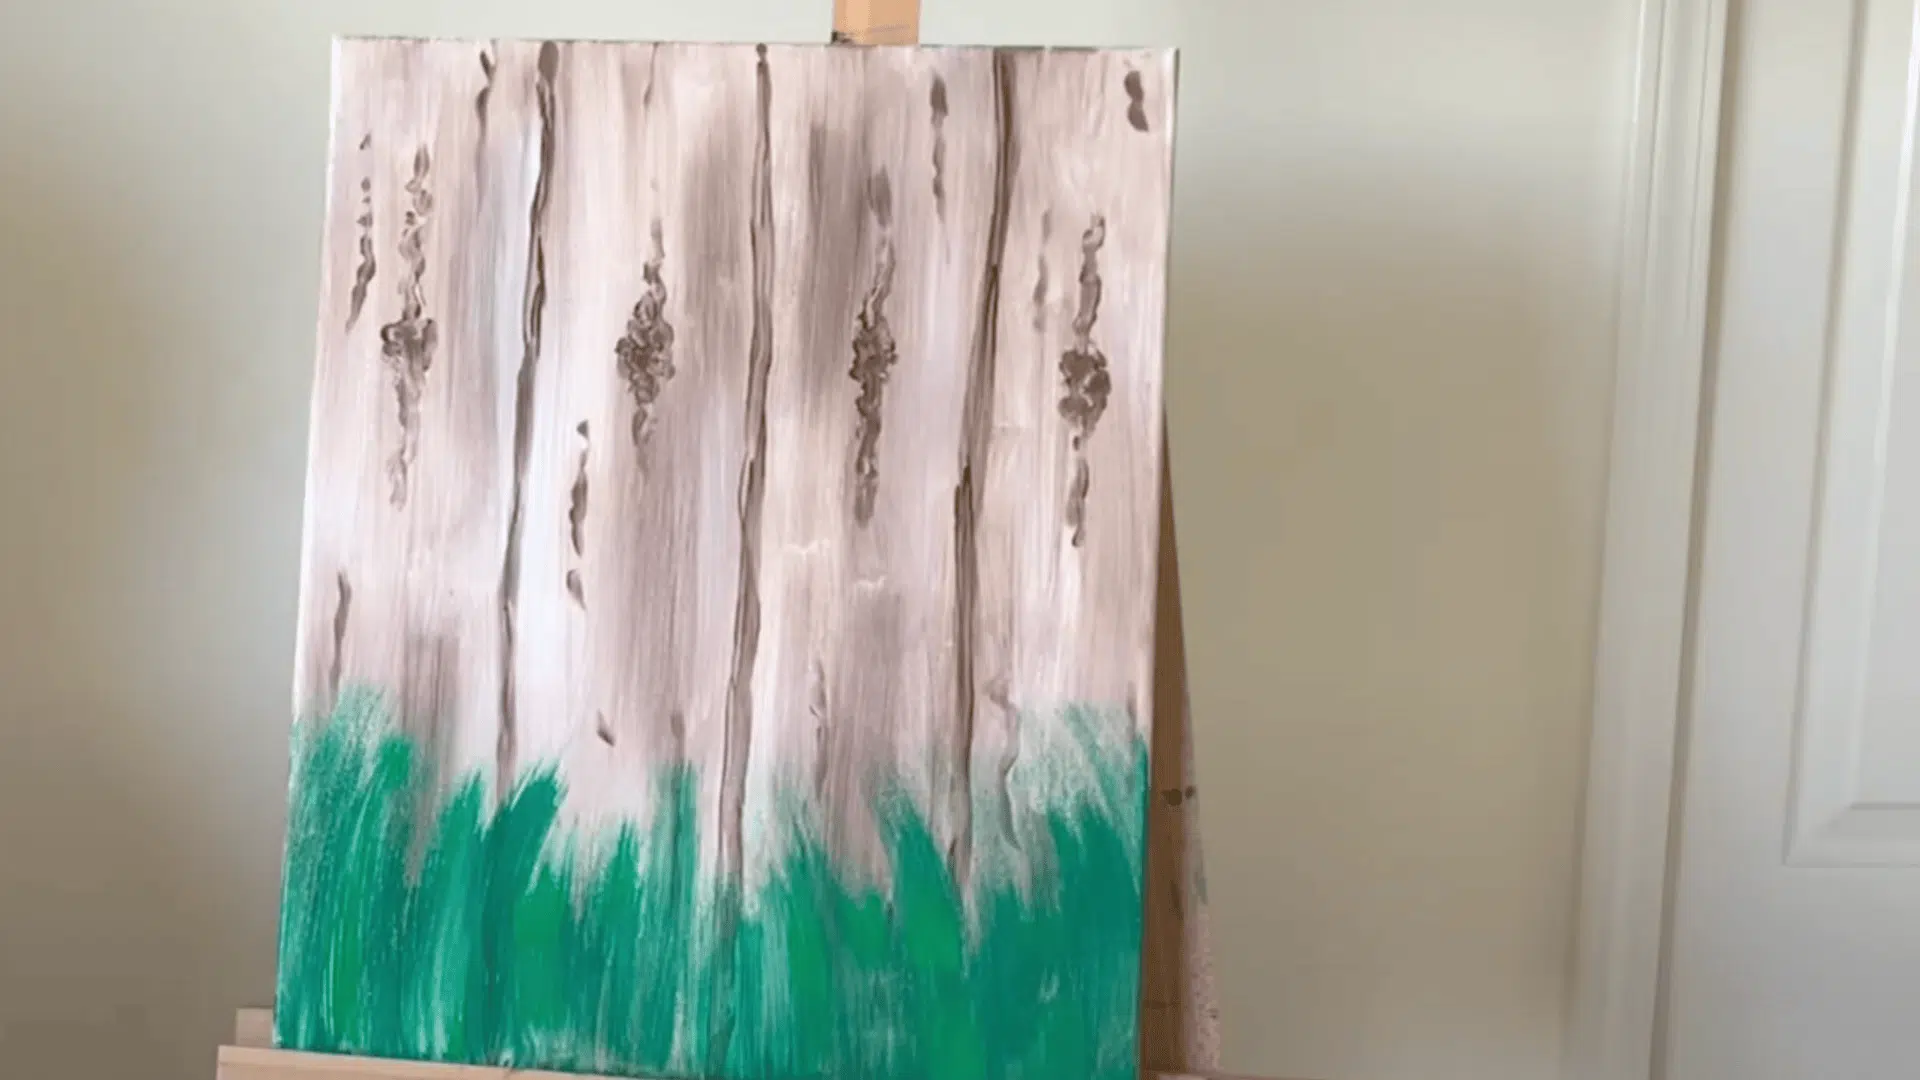
Using your largest brush, mix green with a little blue to create a dark green. Starting from the bottom edge of the canvas, pull upward strokes to form grass blades.
Add a few drops of water for longer, flowing strokes. Layer on lighter green (without cleaning your brush) to create natural variation.
Keep the darkest tones at the base and scatter the lighter ones for depth.
Step 5: Sketch and Fill the Jar
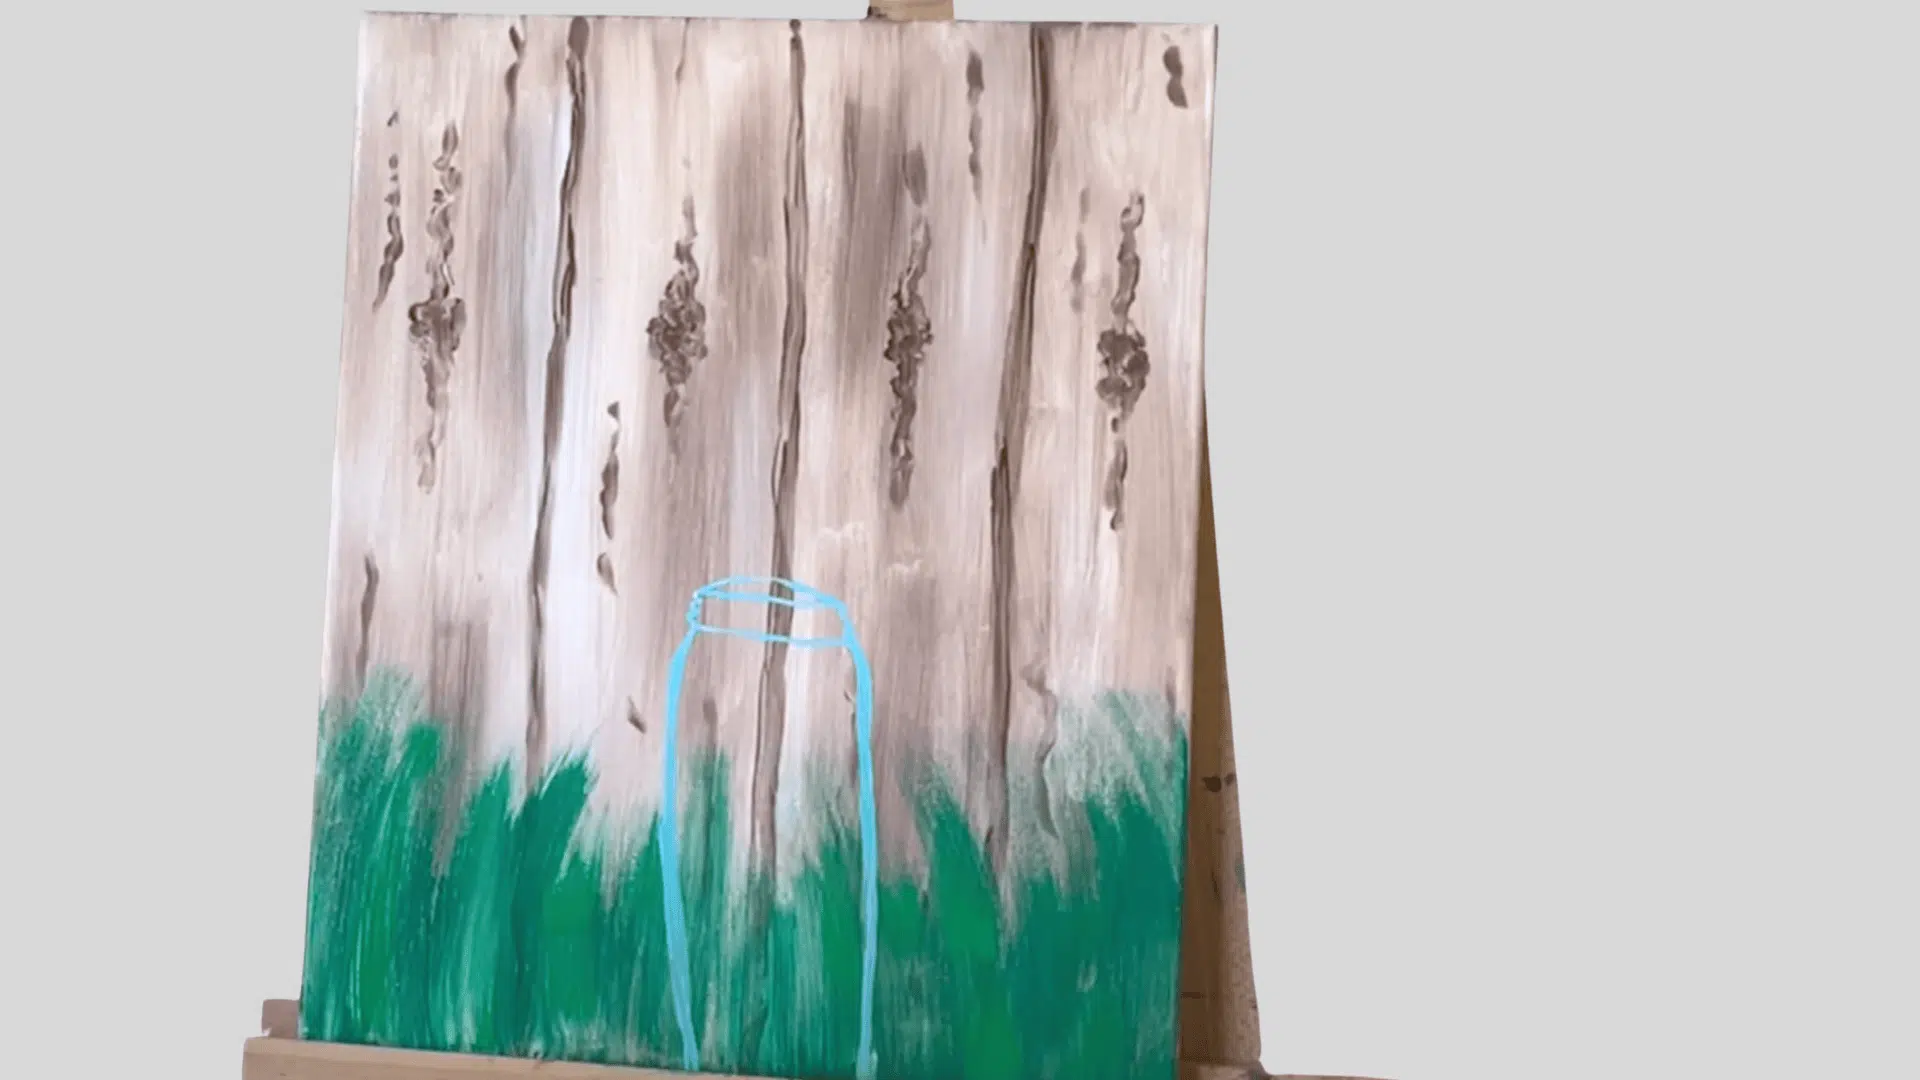
Take your small detail brush. Mix a light blue by combining mostly white with a touch of blue, thinned with a few drops of water.
Lightly sketch the outline of a mason jar with two vertical sides, a rounded bottom, and a simple lid shape at the top. Don’t worry if the lines cross into the grass area; you’ll refine it later.
Add a few curved lines for the jar lid to suggest dimension.
Step 6: Add Flower Stems and Blooms
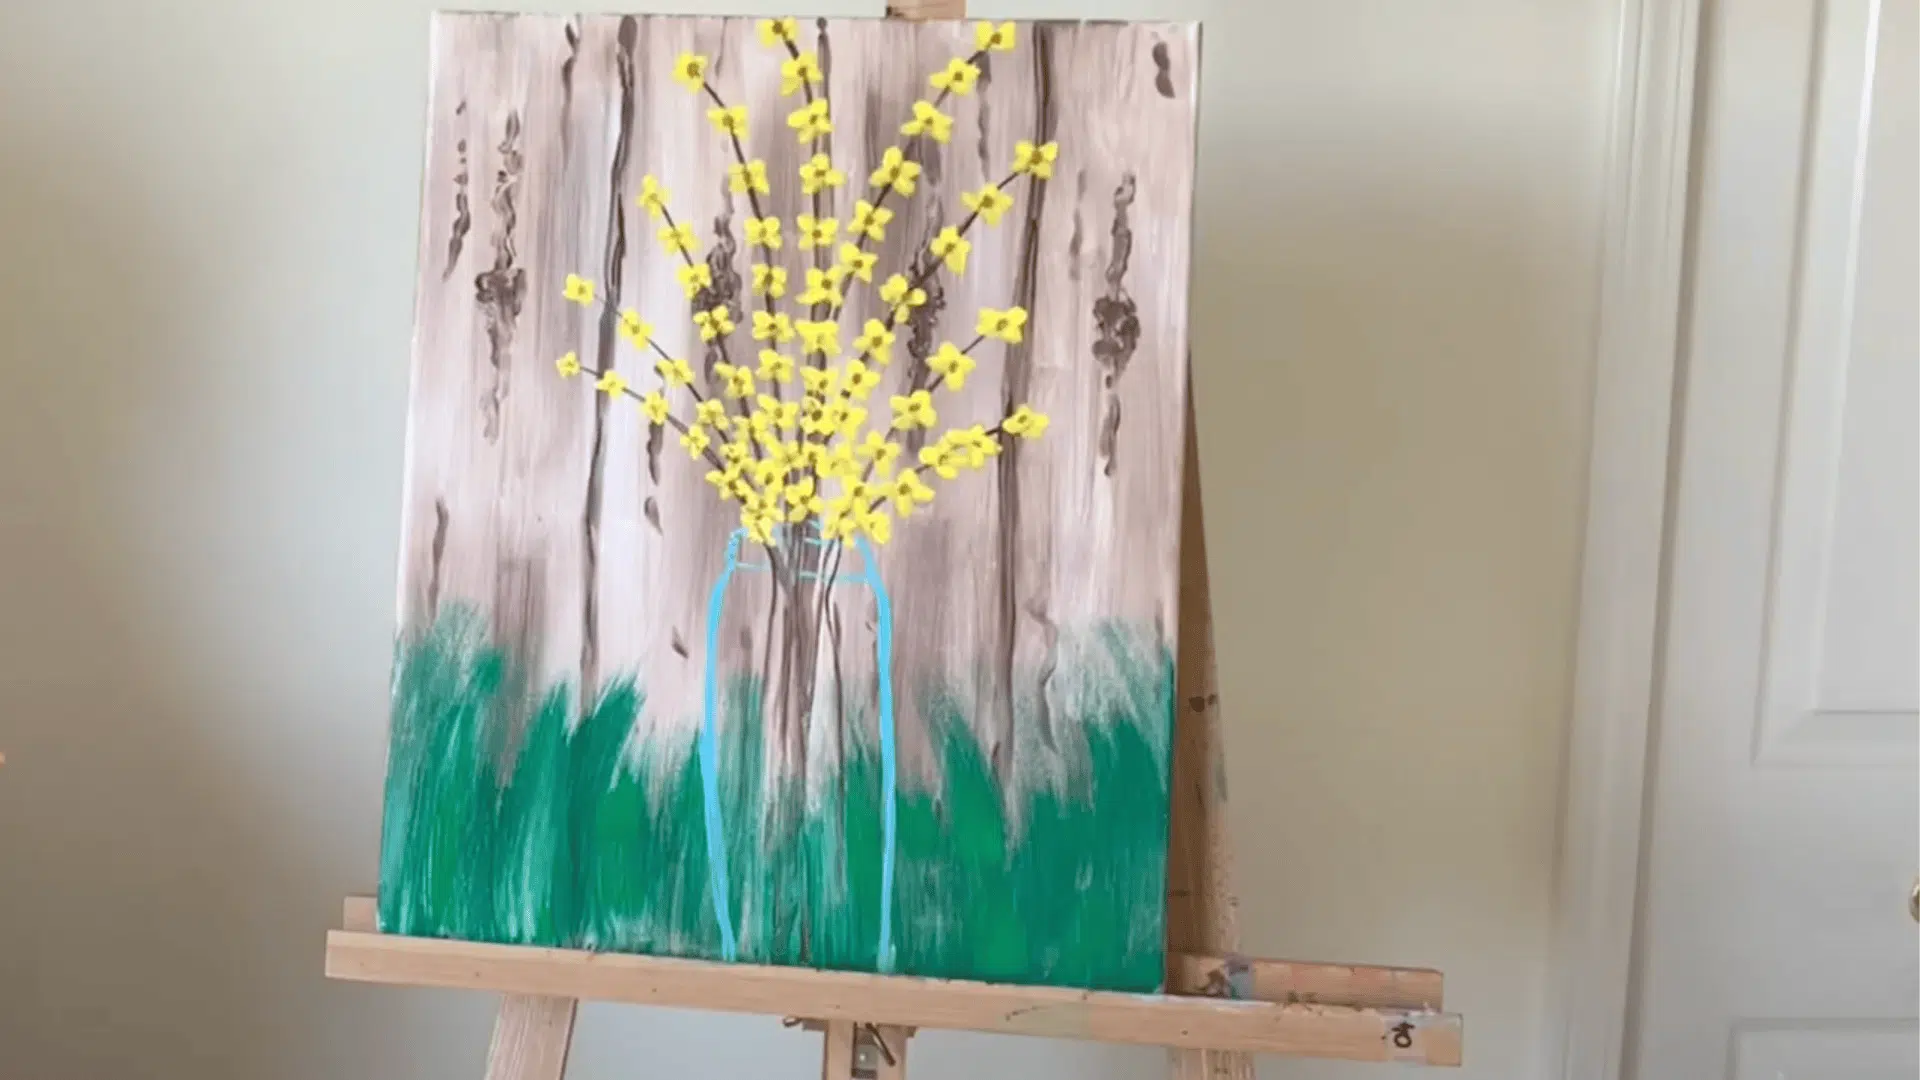
Still using the small brush, paint thin brown lines inside the jar for stems, varying their length and angle. Switch to your medium round brush and paint flowers using yellow paint.
Create simple four-petal blossoms by stamping the brush gently around a center point.
Once dry, add a small orange dot at the center of each flower for contrast.
Step 7: Add Jar Highlights and Finishing Touches

To complete the glass effect, return to your light blue mix and lightly brush along the inner edges of the jar with soft, vertical strokes.
Add touches of white for highlights and a few faint yellow strokes at the bottom of the jar to suggest reflected flower color. Step back, check the balance of dark and light areas, and make small adjustments as needed.
Finally, clean all brushes thoroughly with soap and water, and admire your finished painting!
For more detailed instructions, refer to the YouTube Tutorial below:
Ideas for Your Next Acrylic on Canvas Project
Feeling confident after your first painting? Here are some fun projects that’ll help you practice different techniques without overwhelming you.
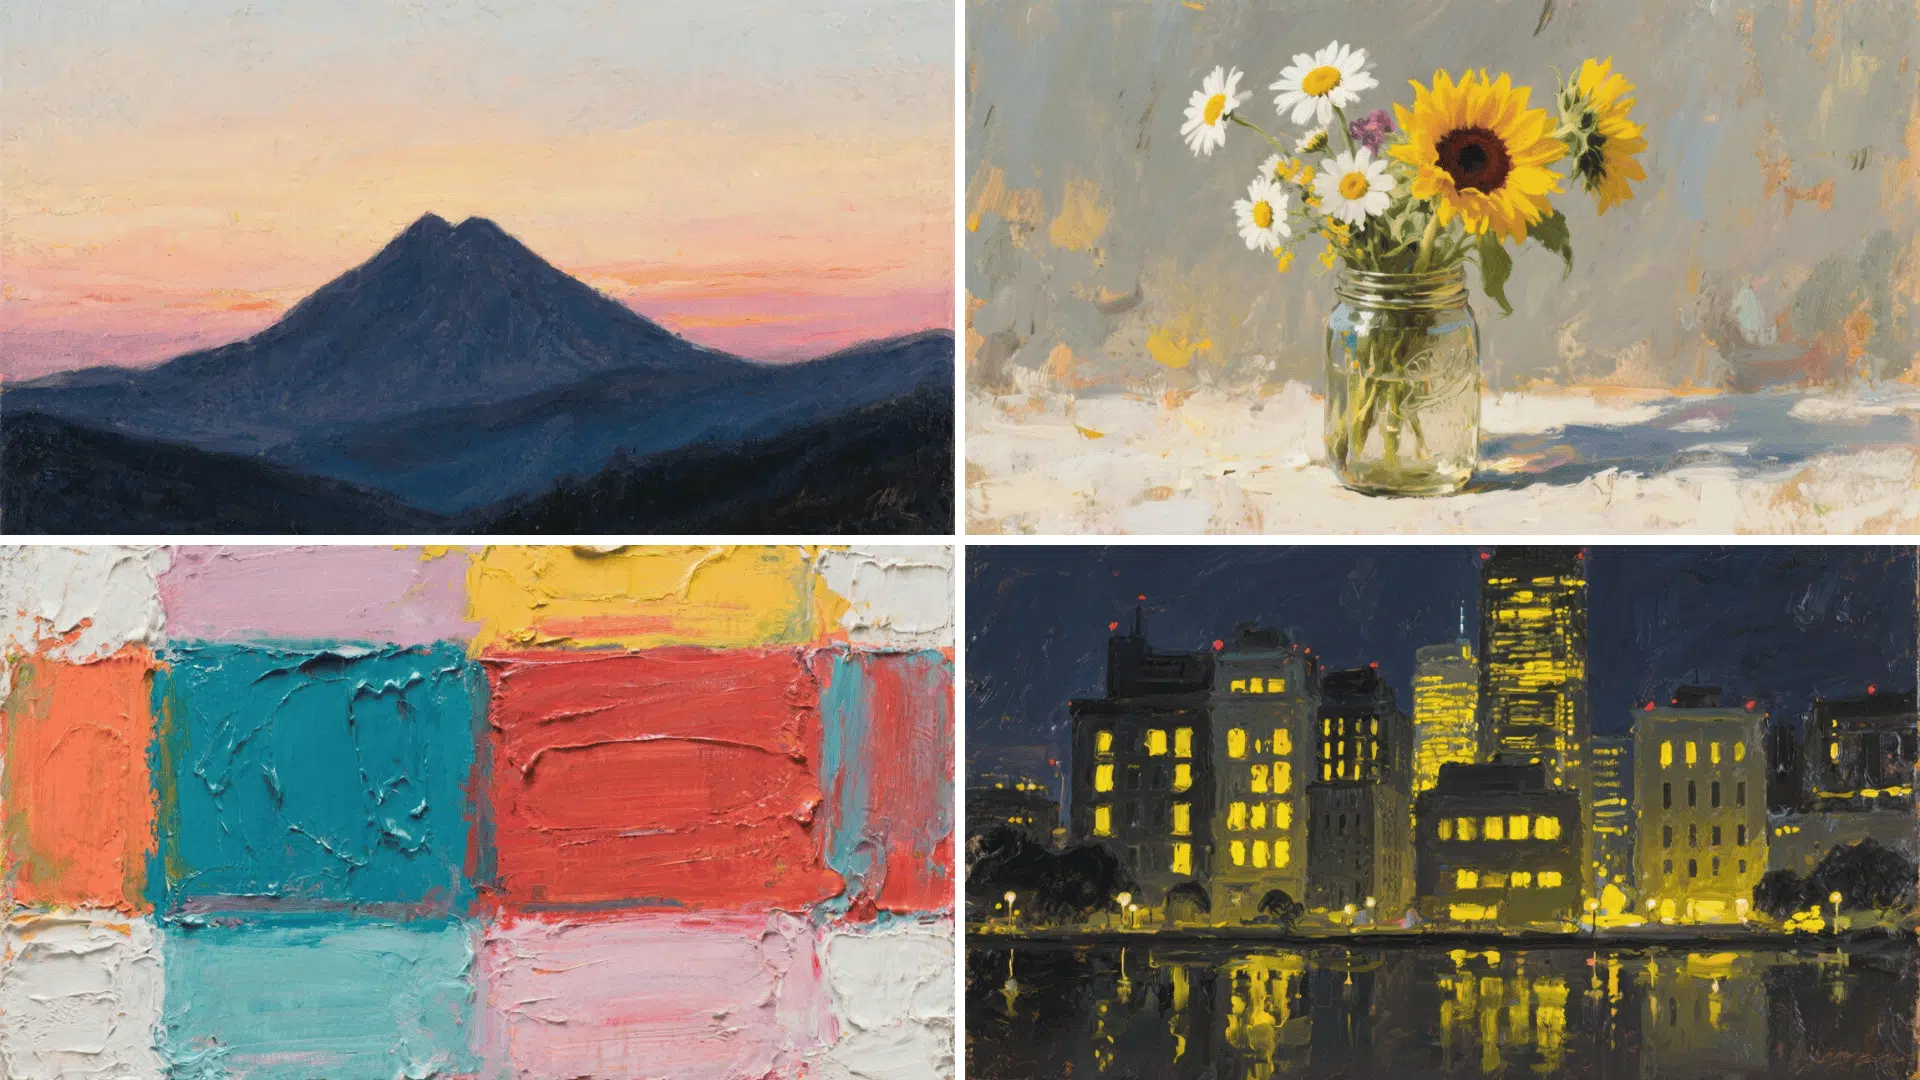
Landscapes with Simple Skies
- Try painting a sunset with just three colors, blending into each other
- Create a simple mountain silhouette against an evening sky
- Focus on color transitions rather than perfect details
- Keep horizons low or high for more interesting compositions
Floral Still Life in A Jar
- Use a mason jar or simple vase as your container
- Stick to 2-3 types of flowers. Daisies and sunflowers are great starters
- Paint the background first, then the jar, then add flowers on top
- Don’t stress about perfect petals; loose, expressive strokes often look better anyway
Abstract Color Blocking for Practice
- Pick 3-4 colors that look good together
- Paint geometric shapes or random blocks of color
- Try different brush techniques, palette knives work great here too
- Layer colors once they’re dry to see how they interact
Cityscape at Night
- Paint buildings with dark silhouettes and glowing yellow windows
- Add reflections in water by dragging horizontal strokes
- Keep details loose; focus on light contrast instead of precision
- Try mixing ultramarine and black for a moody night sky
Tips for Success with Acrylic Painting on Canvas
Here are some game-changing tips that’ll save you from common beginner mistakes and help you enjoy the process more:
- Be patient with drying times: Give each layer 20-30 minutes to fully set before adding the next one.
- Don’t overload the brush with paint: Less is more. Dip lightly and build up gradually.
- Step back often to view the whole picture: Take breaks and look at your work from across the room.
- Practice on smaller canvases before big ones: Start with 8×10 or 9×12-inch canvases to build confidence.
- Keep your brushes damp while painting: Rinse frequently to prevent acrylics from ruining your brushes.
- Mix colors on your palette, not on the canvas: Get the shade right before applying it.
- Start with light colors and work toward dark: It’s easier to darken a color than to lighten it.
- Clean up spills immediately: Once acrylic dries, it’s permanent and tough to remove.
- Work in good lighting: Paint near a Window or Use Daylight Bulbs for Accurate Colors
Conclusion
You’ve got everything you need now: the techniques, the tips, and most importantly, the confidence to start creating. Acrylic painting isn’t about perfection.
Don’t be afraid to experiment. Mix unexpected colors, try different brush strokes, or use unconventional tools like sponges or palette knives. Some of the best paintings are made when you’re just playing around.
Your first painting might not look exactly like you imagined, and that’s perfectly okay.
So grab those brushes, squeeze out some paint, and let your creativity flow. Your artistic side starts with that very first brushstroke, and it’s going to be amazing.


