Looking for a way to make your art more exciting? Mixed media art involves blending various materials, such as paint, paper, fabric, photographs, and even everyday objects, to create a unique piece.
The best part is that there are no strict rules. You might splash watercolor over old book pages, glue buttons onto a canvas, or layer fabrics with bold acrylics.
Beginners can start with simple projects using scraps at home, and experienced creators can push boundaries with bold combinations. Mixed media invites everyone to experiment freely.
Get ready to cut, paint, glue, and more, because these ideas will spark your creativity and help you see ordinary materials in a whole new light.
What Is Mixed Media Art?
It is all about combining different materials to create something unique and full of personality.
Instead of using just paint or paper, you can layer fabrics, photos, textures, or even found objects like buttons and twigs.
Each layer adds depth and tells part of the story. The best part is that there are no rules. These ideas can be simple and playful or bold and textured, creating a creative space where imagination leads the way.
The beauty of this art lies in its lack of a single formula. You can keep it simple with paints and collage, or go bold with 3D textures and assemblage. It is art without limits, where creativity truly takes the lead.
Easy Instructions for Creating a Mixed Media Lady’s Portrait
Painting a panther with melted crayons is both bold and exciting. This step-by-step project demonstrates how heat and wax can combine to create a striking, textured masterpiece.
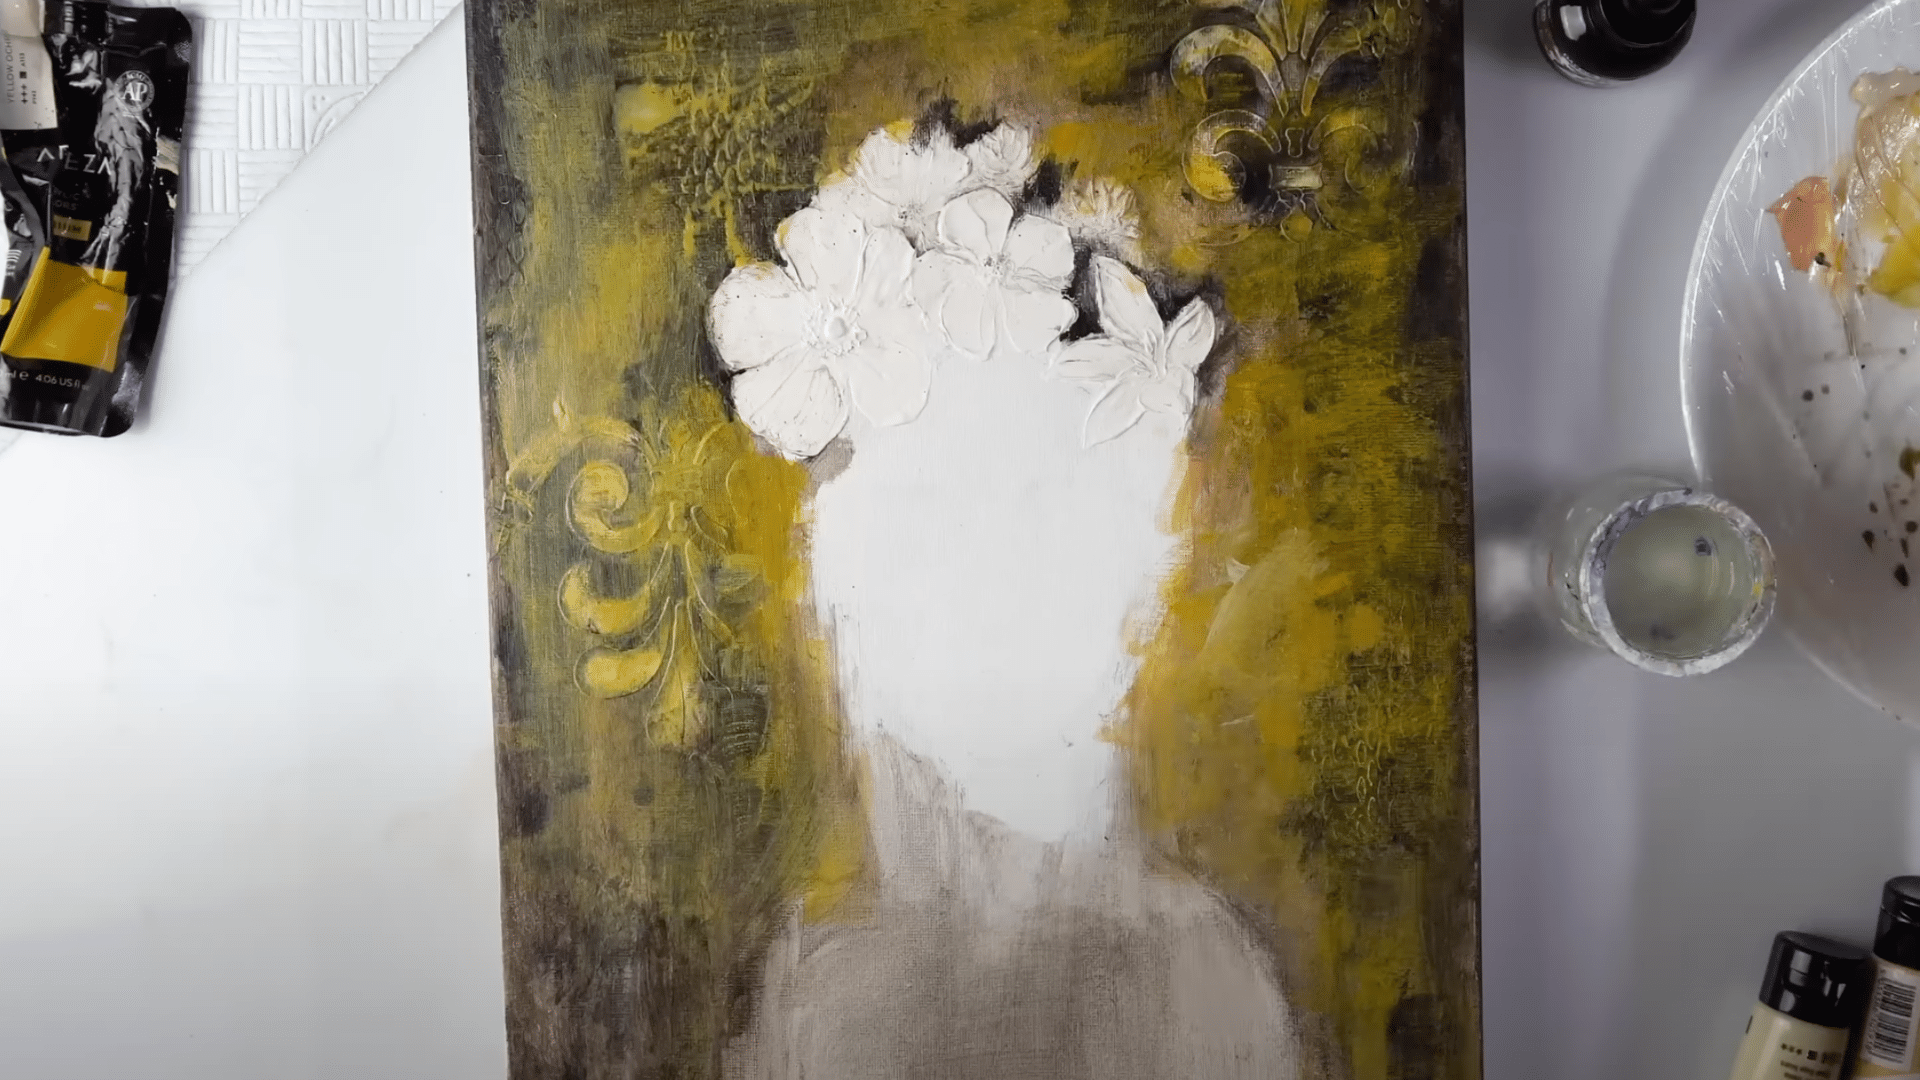
Step 1: Prepare Your Canvas

Choose a sturdy surface such as a deep-edge canvas (for example, 40 x 30 cm). Apply a layer of gesso or white acrylic paint as a base. This primes the canvas, smooths the surface, and ensures your colors will stand out.
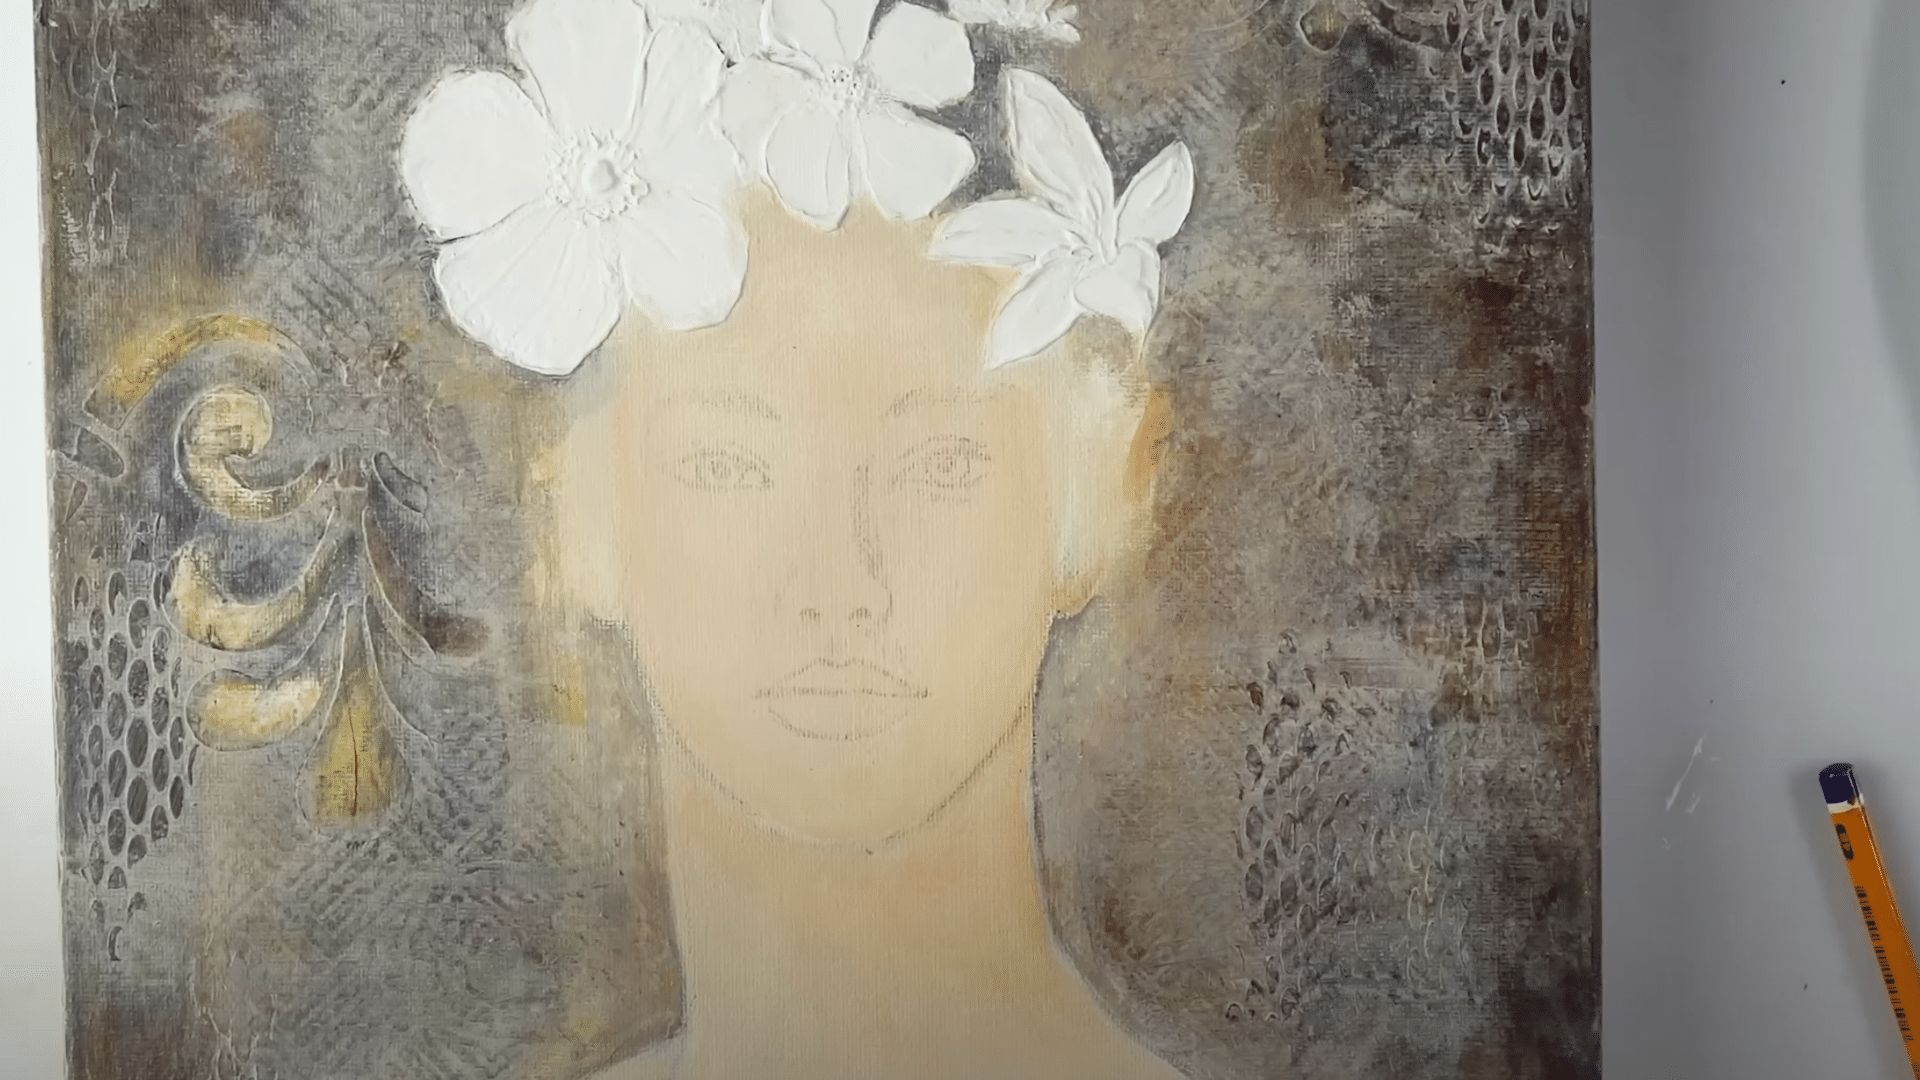
Step 2: Sketch and Transfer the Portrait
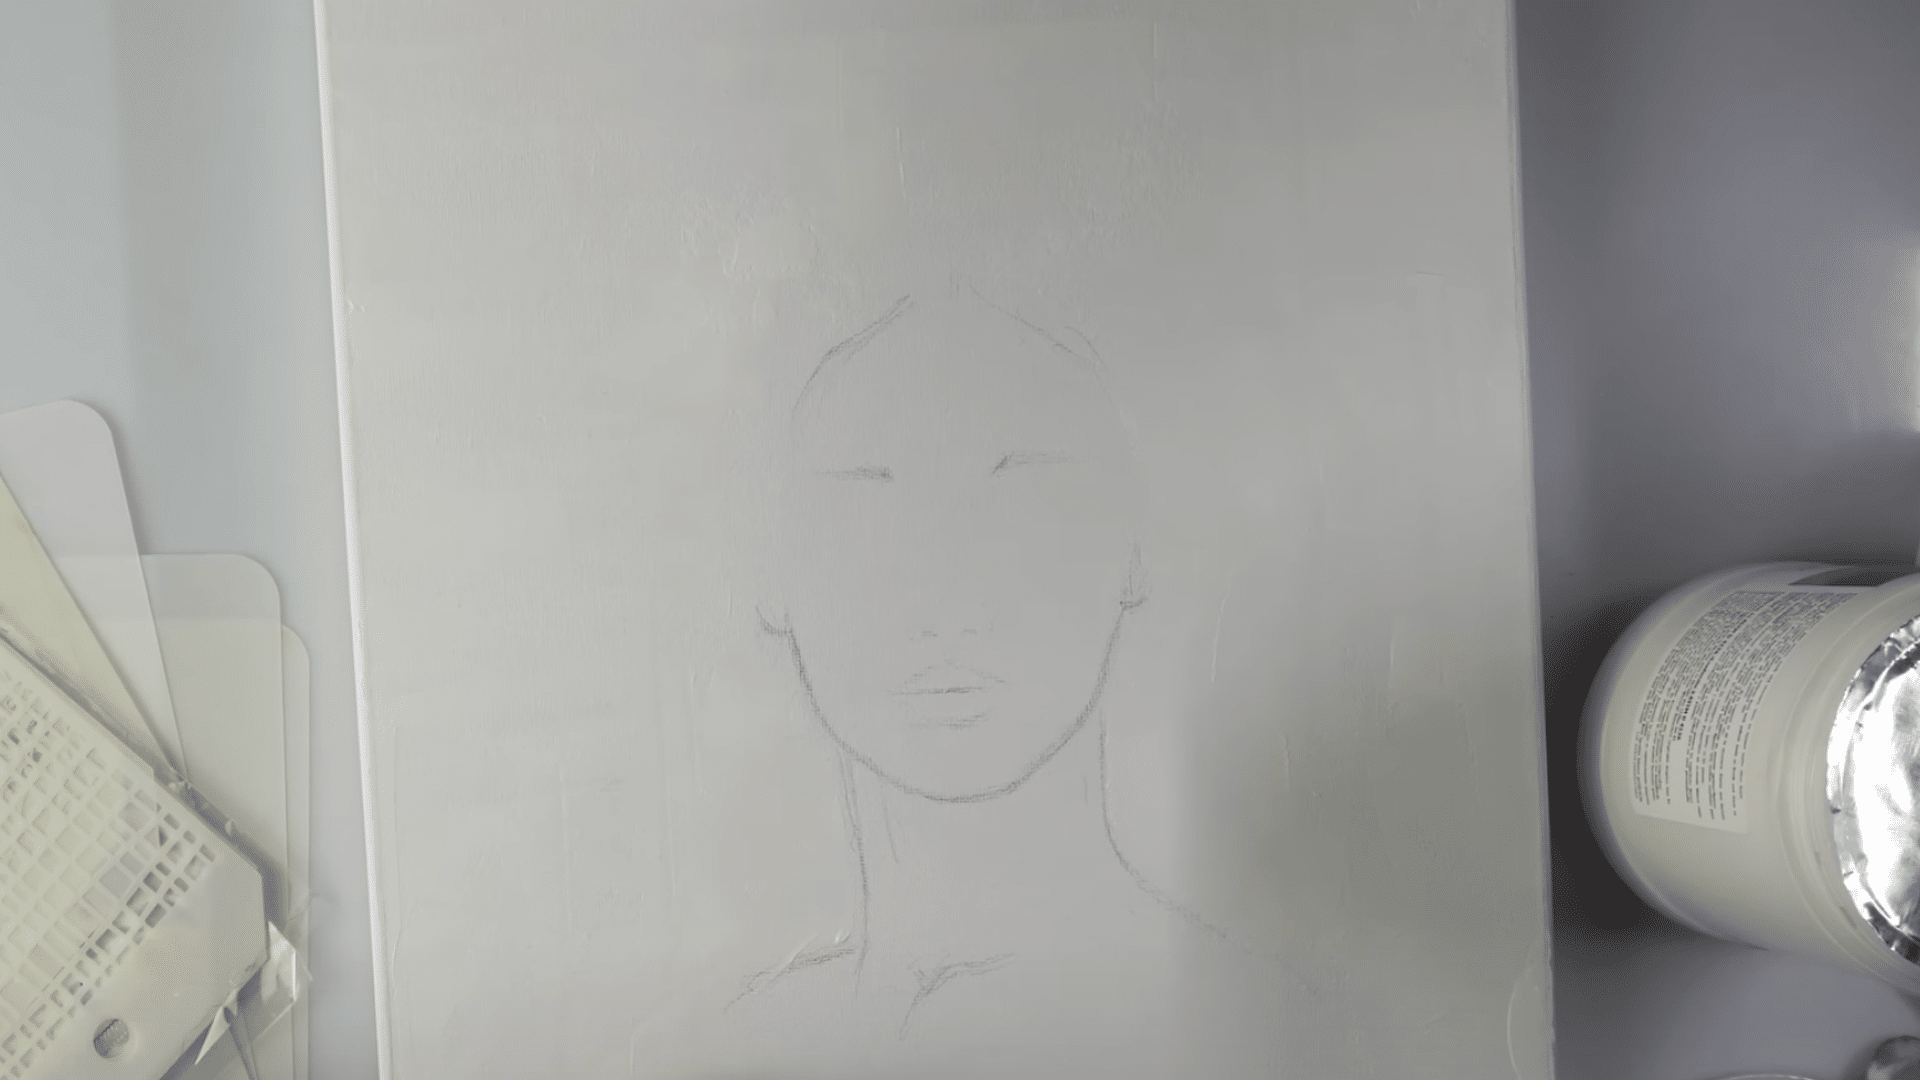
On a sheet of paper, lightly sketch the outline of your lady’s face and neck. Once satisfied, transfer the drawing onto the canvas by pressing firmly with a pencil or charcoal.
This method keeps the canvas clean and gives you confidence in your proportions.
Step 3: Block in the Skin Tones
Mix warm shades like yellow ochre, portrait pink, and a touch of burnt sienna. Start by covering large areas with a mid-tone, then gradually add shadows under the chin and around the features.
Use your fingers or a soft brush to blend smoothly. Highlights can be built up later with lighter mixes of titanium white.
Step 4: Add Facial Details
Paint the eyes, nose, lips, and eyebrows with care. Use a fine brush for delicate strokes, such as those on eyelashes and eyebrow hairs.
Experiment with eye color (greens, browns, hazels) to bring life and emotion. Keep the lips soft at first, then deepen the tones to harmonize with the flowers you’ll add later.
Step 5: Create Hair and 3D Flowers
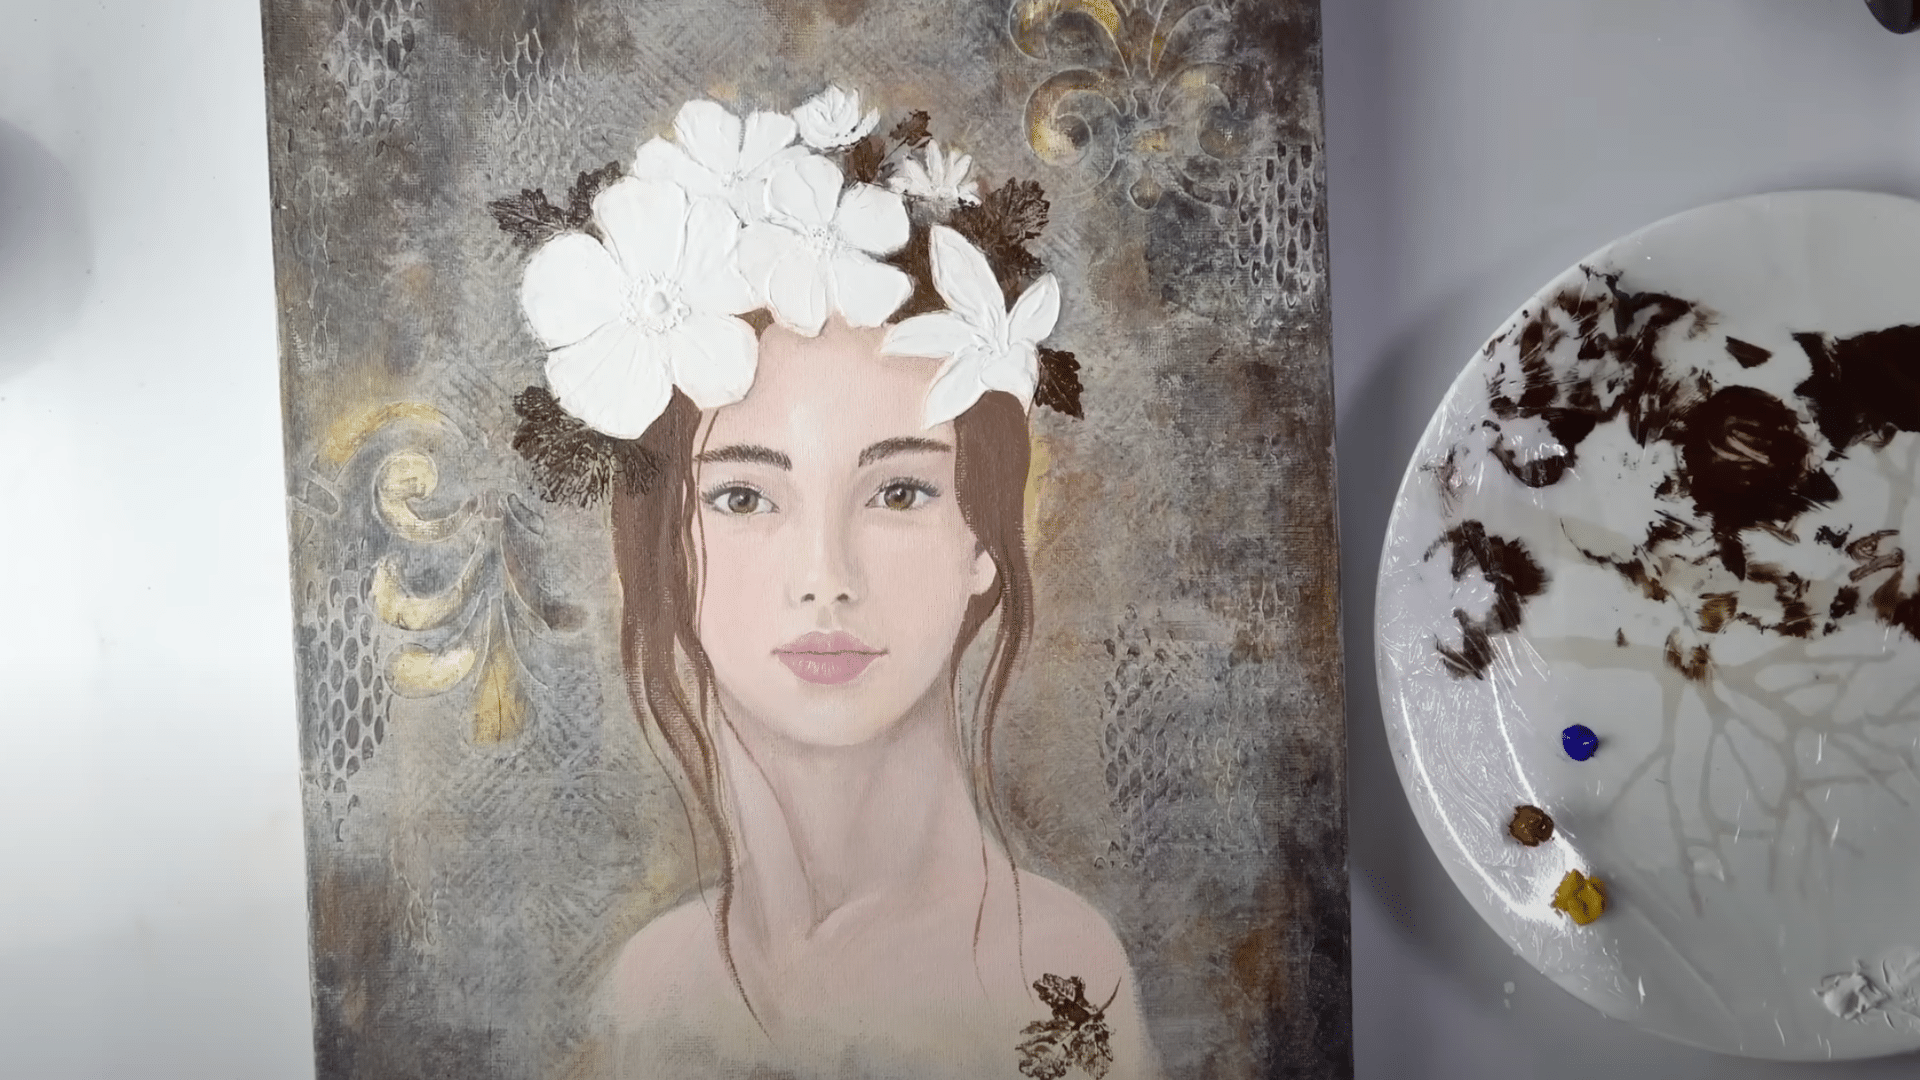
Mix several shades (burnt umber, sienna, ultramarine, ochre) for a natural hair look, layering lighter and darker strands for depth.
For flowers, use modeling paste and a palette knife to shape petals directly on the canvas. Paint them with coral, peach, pink, or yellow blends to complement your portrait.
Step 6: Add Finishing Touches
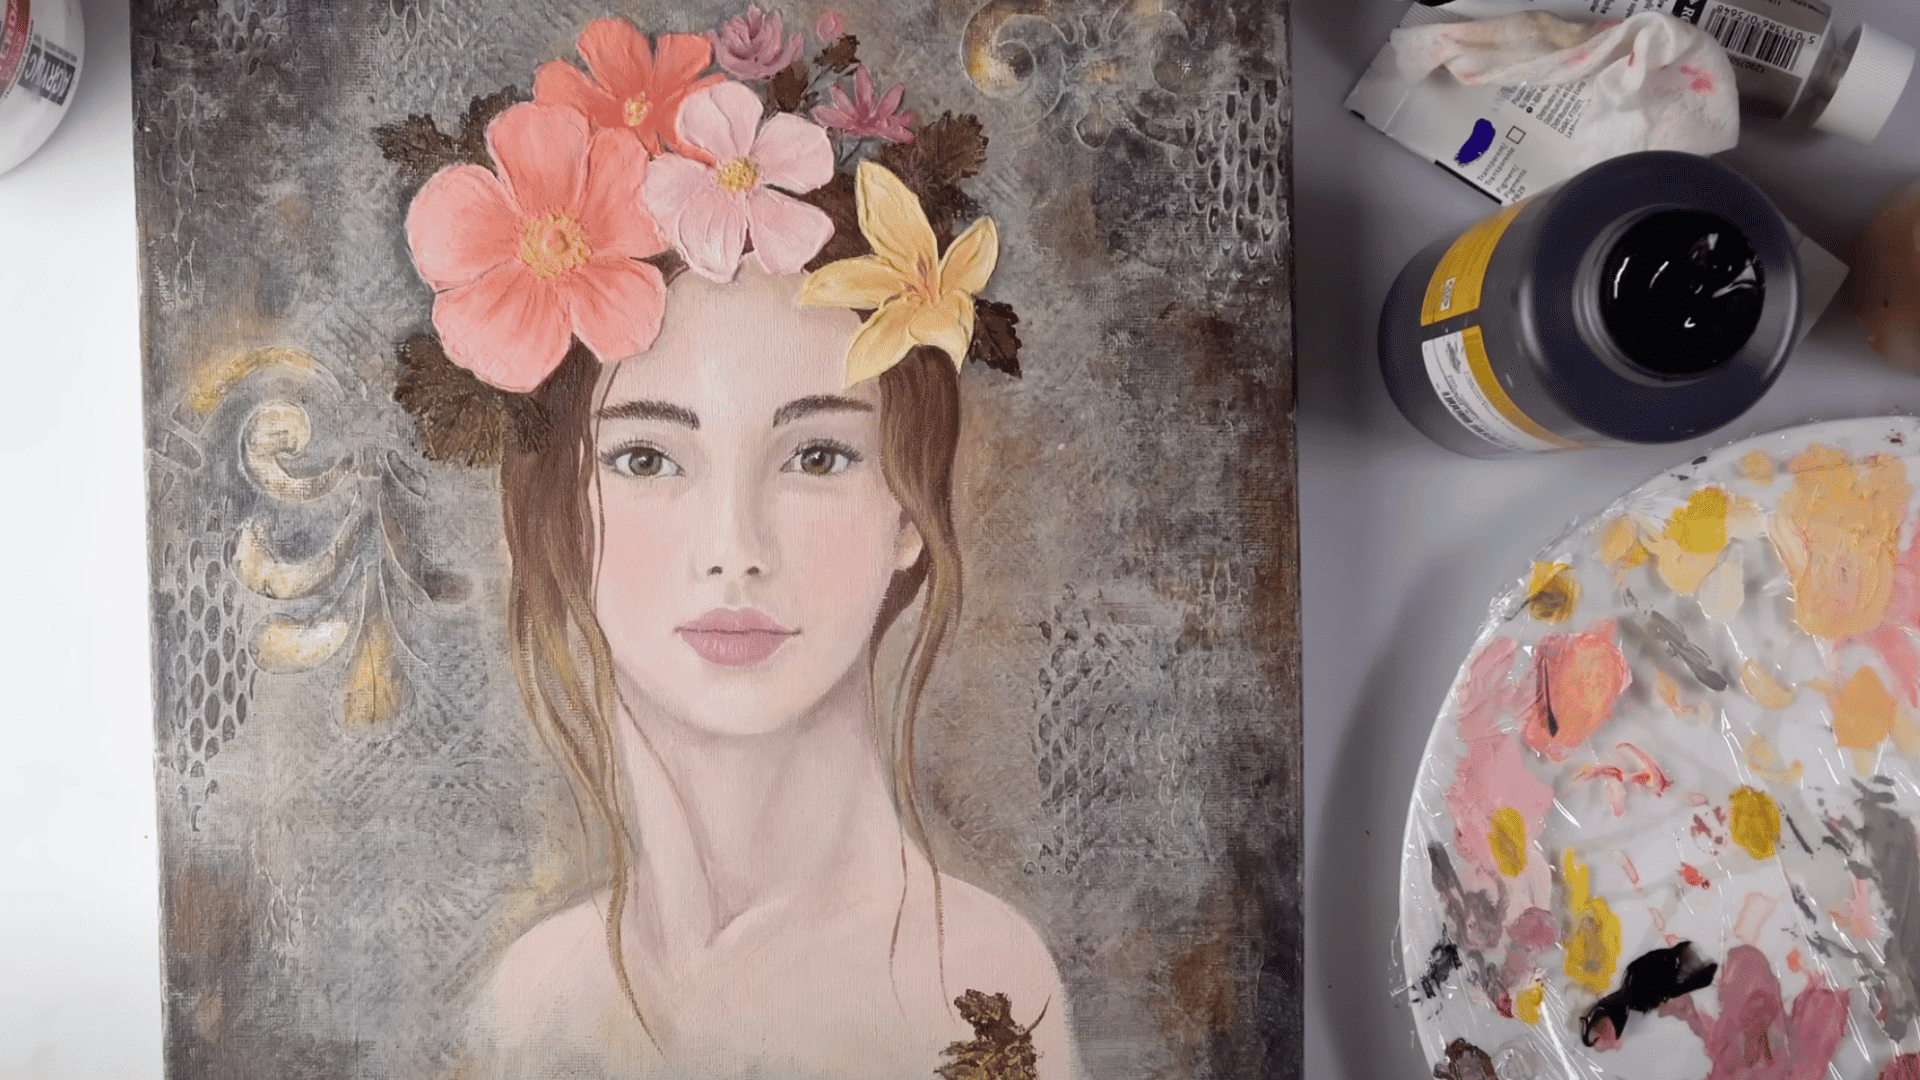
Balance the composition with subtle patterns or extra foliage in the background. Use metallic inks or light washes for highlights and drips to create a sense of movement.
Step back often to view the portrait as a whole, and when it feels complete, seal the artwork with a protective varnish.
For more detailed instructions, refer to the YouTube video below:
<
Creative Mixed Media Art Ideas to Try
1. Found Object Assemblage
This technique involves creating a three-dimensional work by gathering various discarded items and arranging them on a solid base.
The process is like telling a story with objects, where each piece, from a rusty key to a broken toy, adds a new layer of meaning and history to the final piece.
- Materials Required: A wooden board or thick cardboard, strong adhesive like E6000 or hot glue, and a variety of found objects.
- Time Needed: 2-4 hours, plus drying time.
- Skill Level: Beginner
2. Watercolor & Pen Illustration
Start with a light sketch and apply a lively watercolor wash as your base layer. Once the paint is completely dry, use a fine-tip permanent ink pen to add intricate details, outlines, and cross-hatching to bring your subject to life.
- Materials Required: Watercolor paper, watercolor paints, brushes, and a waterproof fine-tip ink pen.
- Time Needed: 1-3 hours.
- Skill Level: Beginner to Intermediate
3. Fabric & Fiber Art Collage
Blend the softness of textiles with the rigidity of paper and paint. Start with a painted canvas or paper, then glue down various fabric scraps, threads, ribbons, and other fibers to create a richly textured, tactile surface.
- Materials Required: Canvas or heavy paper, acrylic paints, fabric scraps, various threads and fibers, and fabric glue.
- Time Needed: 2-4 hours.
- Skill Level: Intermediate
4. Gesso & Sand Textured Canvas
Create a unique, grainy texture on your canvas by mixing a small amount of sand directly into gesso or thick acrylic paint.
This is perfect for abstract pieces, allowing you to build up a tactile landscape that can be further enhanced with other media once dry.
- Materials Required: Canvas, gesso, clean sand (from a craft store), and acrylic paints.
- Time Needed: 1-2 hours for preparation, plus significant drying time.
- Skill Level: Beginner
5. Altered Book Art
Revamp an old book into a work of art by using its pages as your canvas.
You can tear, fold, and glue pages to create new structures, or simply paint, draw, and collage directly onto the existing text, giving a new purpose to a forgotten story.
- Materials Required: An old hardcover book, gesso, acrylics, pens, paper scraps, and glue.
- Time Needed: 3-5 hours, depending on complexity.
- Skill Level: Intermediate
6. Photo Transfer on Wood
Transfer a printed image onto a wooden surface to achieve a rustic, vintage look.
Apply a gel medium to the wood, press your image face down, let it dry completely, and then carefully rub away the paper to reveal the transferred photo. You can then add paint or other mediums to embellish the surface.
- Materials Required: Laser-printed image, wooden block or board, gel medium, sponge or cloth, and sealant.
- Time Needed: 1-2 hours, with an overnight drying period.
- Skill Level: Beginner
7. Digital & Traditional Hybrid
Combine a digital print with physical elements, such as brushstrokes with acrylic paint, layers of ink, or small collage pieces, to create a unique piece.
Merge the virtual with the physical to create a tangible mixed-media piece.
- Materials Required: Computer with drawing software, printer, high-quality paper, and various traditional art supplies.
- Time Needed: Varies greatly.
- Skill Level: Intermediate
8. Wire Sculpture with Painted Elements
Create a three-dimensional piece by bending and shaping wire into a form. Once the wire sculpture is stable, you can wrap it with different painted fabrics or papers, or use a palette knife to add thick, sculptural paint to certain sections.
- Materials Required: Wire (various gauges), wire cutters, pliers, acrylic paints, and brushes.
- Time Needed: 2-5 hours.
- Skill Level: Advanced
9. Stenciled & Layered Artwork
Use stencils to create layered patterns: start with a base paint, add texture paste with a stencil, then spray contrasting colors, building layers for a complex, visually interesting effect piece.
- Materials Required: Stencils, canvas or paper, acrylic paint, texture paste, and a palette knife.
- Time Needed: 1-3 hours, with drying time between layers.
- Skill Level: Beginner
10. Mixed Media Journaling
Dedicate a sketchbook to mixed media, creating daily or weekly entries that blend sketches with collages, stamps, and written thoughts.
This is a low-pressure way to experiment with different techniques and document your creative journey.
- Materials Required: Sketchbook or art journal, a variety of pens, markers, glue, old book pages, and magazines.
- Time Needed: 30 minutes to 1 hour per entry.
- Skill Level: Beginner
11. Oil Pastel & Ink Resist
Start with a lively sketch using oil pastels, pressing firmly to create a thick layer of wax. Then, apply a thin wash of ink or watered-down acrylic over the top.
The oil pastel will resist the liquid, allowing your original drawing to shine through with a soft, blended background.
- Materials Required: Heavy paper, oil pastels, and ink or watered-down acrylic paint.
- Time Needed: 1-2 hours.
- Skill Level: Beginner
12. Paper Mâché & Paint Sculpture
Use strips of newspaper and a simple flour-and-water paste to build a three-dimensional form.
Once the papier-mâché is completely dry and rigid, you can paint it with acrylics and add details using other materials, such as sequins or glitter.
- Materials Required: Newspaper, flour, water, a balloon or cardboard base, and acrylic paints.
- Time Needed: Several hours for creation, with a full day or two for drying.
- Skill Level: Beginner
13. Mixed Media on Canvas with Impasto
Begin with a canvas and build up texture using molding paste, gesso, or even household materials like fabric scraps and small beads.
Once the base is dry, apply thick layers of acrylic or oil paint with a palette knife to create a highly textured, three-dimensional painting.
- Materials Required: Canvas, molding paste, gesso, acrylic/oil paints, and a palette knife.
- Time Needed: 3-6 hours, plus drying time.
- Skill Level: Intermediate
14. Yarn & Embroidery on Paper
Start with a simple illustration or abstract design drawn on thick paper. Use a needle and yarn to stitch directly into the paper, adding lines and textures that contrast with your drawing.
This technique adds a beautiful, tactile element to a 2D piece.
- Materials Required: Heavy paper, embroidery needle, and various colors of yarn or embroidery floss.
- Time Needed: 1-2 hours for a small piece.
- Skill Level: Intermediate
15. Collage with Painted Newspaper
Instead of just using newspaper scraps, paint a large sheet of newspaper with various colors and patterns. Let it dry, then tear it into shapes and use the pieces to create a collage.
The pre-painted newspaper adds a unique, chaotic element to the final composition.
- Materials Required: Newspaper, acrylic paints, and a paper-based adhesive.
- Time Needed: 1-3 hours.
- Skill Level: Beginner.
Essential Tips for Better Results
Here are a few simple tips that can make your creative process smoother and more enjoyable:
- Start with a Strong Base: Use canvas, heavy watercolor paper, or a mixed-media journal that can handle layers of paint and glue.
- Work in Layers: Begin with broad backgrounds, then add textures, and finish with details. Allow each layer to dry before proceeding to the next.
- Mix Textures Freely: Combine smooth textures (such as paint, ink) with rough textures (like fabric, sand, or paste) for added depth.
- Limit Your Colors: Stick to 2–3 main colors so your artwork looks cohesive, even with a variety of materials.
- Use What You Have: Old magazines, fabric scraps, buttons, or packaging can all be repurposed as creative elements.
- Balance Planning and Play: Have a vision, but leave room for happy accidents and spontaneous ideas.
- Seal Your Work: Finish with a clear varnish or spray to protect the layers and preserve the textures.
The Bottom Line
Creating with Mixed Media Is Like Opening a Door to infinite Possibilities.
With just a Few Supplies and Some Imagination, You Can Layer Textures, Colors, and Materials to Make Art that Feels Completely Your Own.
The Joy of Mixed Media Art Lies in The Fact that There Are No Strict Rules, Only Opportunities to Play and Let Creativity Flow.
Start simple, experiment often, and watch how everyday objects revamp into something magical. Most importantly, enjoy the process, because every layer tells a story and every piece becomes a little thrill in art!