Draw a Face | "Learn to Draw" Lesson
from the Learn to Draw Index
We look at faces everyday and know what they are supposed to look like. This is part of the challenge of drawing a face, and part of the reason you may be somewhat picky about how it turns out. If you understand a few rules about drawing a face, however, your drawing will be much more successful. Be fearless. Put your pencil to the paper and don't look back. Your first try is your first step toward greatness!
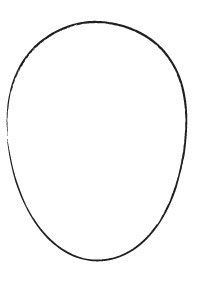
Step 1
Let's begin by drawing an oval in the center of your paper.
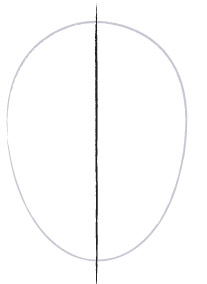
Step 2
Next, divide the face in half with a vertical line. This is the central axis.
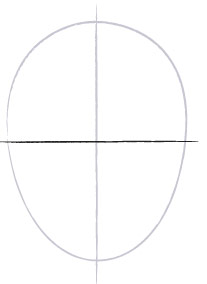
Step 3
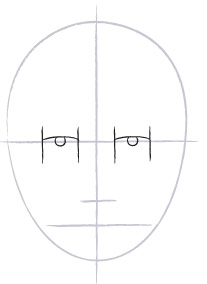
Using your pencil, measure the distance from the inside corner of your eye to the bottom of your chin. Now measure the distance from the inside corner of your eye to the top of your head. It's about the same distance. Draw a horizontal line at the halfway point to represent eye level.
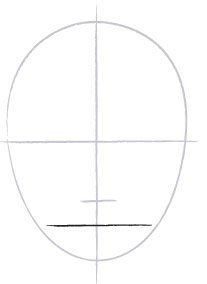
Step 4
Draw another horizontal line to represent the end of the nose. This line is about one half of the way between eye level and the bottom of your chin.

Step 5
Draw another horizontal line that will represent the middle of the lips. This line is about one third of the way between eye level and the bottom of your chin.
Step 6
What about the distance between one eye and the other, and the distance of each eye from the side of your head. Standing in front of a mirror, using your pencil, measure the distance from one side of your eye to the other. After marking that distance with your thumb, compare that distance to the distance between your eyes, and from the side of your head to the outside corner of your eye. Believe it or not, it's the same distance.
Divide the vertical line for the eyes into 5 equal sections. Mark the center of each eye.
Step 7
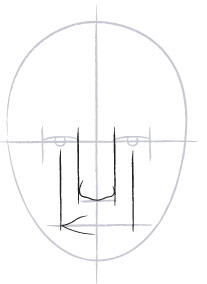
Back to the mirror. Hold your pencil horizontally, placing it directly in front of the pupil of your eye. If you look down, you should see that the pupil of your eye lines up perfectly with the corner of your mouth. While you're there, check how the outside of the inside corner of the eyes, and the outside of the nose lines up.
Draw two vertical lines extending down from the pupil of the eyes to represent the corners of your mouth, and two vertical lines extending down from the inside corners of the eyes to represent the outside of the nose.
Step 8
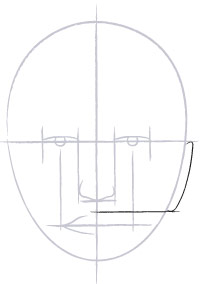
Follow the vertical line for eye level out to its end, and you will find the perfect spot to draw the tops of your ears. The bottom of each ear ends somewhere in the middle of the nose and the mouth. Lightly draw each ear.
Step 9
One last trip to the mirror. Take a look at the width of your neck. It's almost as wide as your jaw. Lightly draw a neck.
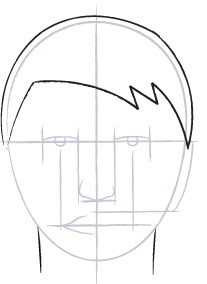
That's it!
Let's try another lesson: Lesson 10: Draw Johann Sebastian Bach
For Teachers
This series of exercises was created to help the young artist discover and develop the special abilities of the right brain. The side of the brain that is 'right for drawing.' Lessons in this "Learn to Draw" series are based on ideas from Drawing on the Right Side of the Brain by Betty Edwards.

|